
Related Manuals for Elo TouchSystems E796783


Summary of Contents for Elo TouchSystems E796783
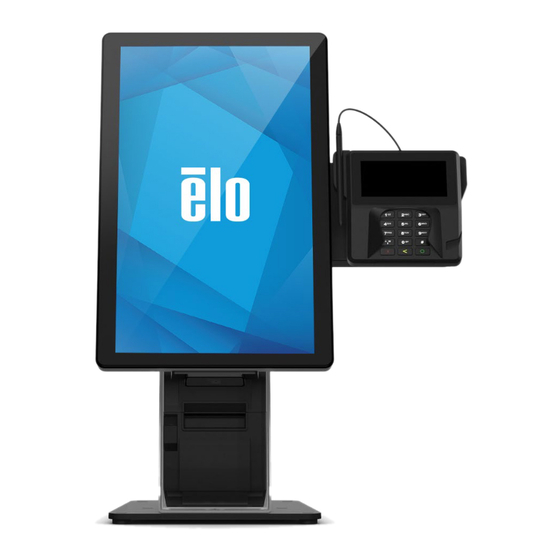
- Page 1 ASSEMBLY INSTRUCTIONS, ELO SELF SERVICE STAND E796783 ELO-STAND-SELF-SERVICE-15-22-COUNTERTOP © Copyright 2021 Elo Touch Solutions, Inc.
- Page 2 Contents for Kit: E796783, ELO-STAND-SELF-SERVICE-15-22-COUNTERTOP Hardware SCREW, M4X8, PAN-HEAD, Qty.10 Countertop Base CROSS-RECESS Qty. 1 SCREW, M4X8, FLAT-HEAD, CROSS- Qty.4 RECESS SCREW, M3X8, PAN-HEAD, Qty.3 CROSS-RECESS, SCREW, 3mm X8L, Qty.4 THREAD-FORMING, PAN-HEAD SCREW, M4X6, PAN-HEAD, Qty.4 CROSS-RECESS Head Assembly SCREW, M4X18, PAN-HEAD, CROSS- Display Bracket, Qty.4...
- Page 3 Add (2) screws from bag “A”; leave ~3mm (1/8”) gap for Head. • Align slots on bottom rear of Head with (2) screws on base and slide Remove and save (2) screws on rear of Head, pull out printer tray. on stand.
- Page 4 Choose Android or Windows Display Bracket For 15” or 22” monitor, use Android Display Bracket Android Display Bracket shown above Add (2) screws from bag “A”; leave ~3mm (1/8”) gap (for Display Remove and save (2) screws, open cover of Display Bracket; Bracket).
- Page 5 • Assemble USB Hub. • Assemble Display Bracket onto Head. • Add (2) screws from bag “S”; leave ~3mm (1/8”) • Position “A” for 15”, 22” in landscape. • Position “B” for 15” in portrait gap for USB bracket to slide on; tighten screws. •...
- Page 6 Android Slate: Landscape (For Portrait, skip to step 10) Note: EMV Cradles are not compatible with Android Slate in landscape orientation. Top Landscape Add tie-wrap • Route Add (2) screws from bag “L” to top 75mm VESA positions. Slate Hub through display bracket and head.
- Page 7 Android Slate: Portrait If using an EMV Cradle, follow those instructions before proceeding. Top Portrait Add tie-wrap • Route Add (2) screws from bag “L” to top 75mm VESA positions. Slate Hub through display bracket and head. • Mount Slate, add (2) screws from bag “L” to bottom 75mm VESA positions. Leave ~3mm (1/8”) gap for mounting to display bracket.
- Page 8 Apply double-sided foam tape from bag “U” to back of Slate Hub and attach to back of head approximately where shown. Route LAN cable through base. Connect LAN and power supply to Slate Hub. Skip to step © Copyright 2021 Elo Touch Solutions, Inc.
- Page 9 Android: Landscape (For Portrait, skip to step 15) If using an EMV Cradle, follow those instructions before proceeding. Top Landscape Add tie-wrap Cable direction • Mount I-Series, add (2) screws from bag “L” to bottom 100mm VESA Add (2) screws from bag “L” to top 100mm VESA positions. Leave ~3mm (1/8”) gap for mounting to display bracket.
- Page 10 Android: Portrait If using an EMV Cradle, follow those instructions before proceeding. Top Portrait Cable direction Add tie-wrap • Mount i-Series, add (2) screws from bag “L” to bottom VESA positions. Add (2) screws from bag “L” to top VESA positions. Leave •...
- Page 11 Windows: Landscape (For Portrait, skip to step 19) If using an EMV Cradle, follow those instructions before proceeding. 15” Landscape 22” Landscape 15”: add (2) screws from bag “M” to top 75mm VESA positions. Route power cable from I-Series through bottom of stand, 22”: add (2) screws from bag “N”...
- Page 12 Mount I-Series, then add bottom VESA screws: Add (2) screws from bag “M” (15”) or bag “N” (22”) to bottom 75mm VESA positions. Add tie-wrap Place I-Series on surface near stand head, within reach of Route, LAN cable through bottom of stand head. Route cable.
- Page 13 Windows Portrait If using an EMV Cradle, follow those instructions before proceeding. 15” Portrait 22” Portrait 15”: add (2) screws from bag “M” to top 75mm VESA positions. Route power cable from I-series through bottom of 22”: add (2) screws from bag “N” to top 100mm VESA positions. stand, through openings in the mount bracket as shown.
- Page 14 Mount I-Series, then add bottom VESA screws: 15”: add (2) screws from bag “M” to bottom 75mm VESA positions. 22”: add (2) screws from bag “N” to bottom 100mm VESA positions. Add tie-wrap Route, LAN cable through bottom of stand Place I-Series on surface near stand head, within reach of head.
- Page 15 If no printer, skip to step If using printer, remove cover to add printer. Add (2) screws from bag “C” to printer tray; use Star printer Star Continue to step printers. bracket to set depth of screws than remove Star bracket. Epson TM-T88, skip to step ©...
- Page 16 Add Star printer bracket to printer; refer to Star instructions. Epson TM-T88 Add Star printer with bracket to printer tray. Secure printer to printer tray using third screw from bag “C”. Add (4) screws from bag “D” to attach printer to the tray. Skip to step ©...
- Page 17 • Close Display Bracket and add (2) screws saved from step 7. Route cables from/to printer as needed, slide in printer tray assembly (or printer tray with cover if no printer). • Secure printer assembly with (2) screws saved from step 3. ©...
- Page 18 If installing an EMV Cradle with display in landscape orientation, finish by adding (1) screw from bag “S”. • EMV-SELF-SERV-15-22-ING-IPP320/350/315 • EMV-SELF-SERV-15-22-VF-MX915-ING-ISC250 • EMV-SELF-SERV-ING-LANE3000 • EMV-SELF-SERV-VF-MX925 • EMV-SELF-SERV-VF-P400 EMV-SELF-SERV-ING-RP757 © Copyright 2021 Elo Touch Solutions, Inc.
- Page 19 Learn more about Elo at EloTouch.com. Americas Europe (EMEA) Asia Pacific Tel +1 408 597 8000 Tel +32 16 930 136 Tel +86 (21) 3329 1385 EloSales.NA@elotouch.com EMEA.sales@elotouch.com EloAsia@elotouch.com The information in this document is subject to change without notice. Elo Touch Solutions, Inc. and its Affiliates (collectively “Elo”) makes no representations or warranties with respect to the contents herein, and specifically disclaims any implied warranties of merchantability or fitness for a particular purpose.
- Page 20 ASSEMBLY INSTRUCTIONS, ELO SELF SERVICE STAND E796965 ELO-STAND-SELF-SERVICE-15-22-FLOOR-TOP E797162 ELO-STAND-SELF-SERVICE-15-22-FLOOR-BASE © Copyright 2021 Elo Touch Solutions, Inc.
- Page 21 Contents for Kit: E796965 ELO-STAND-SELF-SERVICE-15-22-FLOOR-TOP Hardware SCREW, M4X8, PAN-HEAD, Qty.10 CROSS-RECESS SCREW, M4X8, FLAT-HEAD, Qty.4 CROSS-RECESS SCREW, M3X8, PAN-HEAD, Straps Qty.3 CROSS-RECESS Qty. 3 SCREW, 3mm X8L, Qty.4 THREAD-FORMING, PAN-HEAD SCREW, M5X10, FLAT-HEAD, Qty.6 CROSS-RECESS Display Bracket, Android Qty. 1 SCREW, M4X6, PAN-HEAD, Qty.4 CROSS-RECESS...
- Page 22 Contents for Kit: E797162 ELO-STAND-SELF-SERVICE-15-22-FLOOR-BASE Floor Base Qty. 1 © Copyright 2021 Elo Touch Solutions, Inc.
- Page 23 Assemble tower to base plate using (4) screws from bag “K”. • Remove and save the (4) screws on the left and right of the stand front cover. • Pull off the silver cover and set aside. • Add (2) remaining screws from bag “K” to bottom front of stand. ©...
- Page 24 Remove and save (2) screws on rear of Head, pull out printer tray. © Copyright 2021 Elo Touch Solutions, Inc.
- Page 25 (Power strip shown available from McMaster-Carr, item Add power bricks into tower using provided straps. #7361K43) • Add power strip brackets (supplied with power strip) using (2) screws from bag “L”. • Hook one side of power strip onto brackets then push to snap down. ©...
- Page 26 Choose Android or Windows Display Bracket For 15” or 22” monitor, use Android Display Bracket Android Display Bracket shown above Add (2) screws from bag “A”; leave ~3mm (1/8”) gap Remove and save (2) screws, open cover of Display Bracket; (for Display Bracket).
- Page 27 • Assemble Display Bracket onto Head. • Assemble USB Hub. • Position “A” for 15”, 22” in landscape. • Add (2) screws from bag “S”; leave ~3mm (1/8”) gap for USB bracket to slide on; tighten screws. • Position “B” for 15” in portrait •...
- Page 28 Android Slate: Landscape (For Portrait, skip to step 12) Note: EMV Cradles are not compatible with Android Slate in landscape orientation. Top Landscape Add tie-wrap • Add (2) screws from bag “L” to top 75mm VESA Route Slate Hub through display bracket and head. Mount Slate, add (2) positions.
- Page 29 Android Slate: Portrait If using an EMV Cradle, follow those instructions before proceeding. Top Portrait Add tie-wrap • Route • Add (2) screws from bag “L” to top 75mm VESA Slate Hub through display bracket and head. positions. Leave ~3mm (1/8”) gap for mounting to •...
- Page 30 Apply double-sided foam tape from bag “U” to back of Slate Hub and attach to back of tower approximately where shown. Route LAN cable through tower base. Connect LAN and power supply to Slate Hub. Skip to step © Copyright 2021 Elo Touch Solutions, Inc.
- Page 31 Android or 15”/22” Monitor: Landscape (For Portrait, skip to step 17) If using an EMV Cradle, follow those instructions before proceeding. Note: EMV Cradles are not compatible with monitors in landscape orientation. Top Landscape Add tie-wrap Cable direction • Add (2) screws from bag “L” to top 100mm VESA •...
- Page 32 Android or 15”/22” Monitor: Portrait If using an EMV Cradle, follow those instructions before proceeding. Top Portrait Cable direction Add tie-wrap For 22” Monitor, it is recommended to use centering plate Mount i-Series, add (2) screws from bag “L” to bottom VESA positions. (P/N E698263) to center monitor on stand.
- Page 33 Optional: Mount Backpack 4.0 to tower bracket as shown using (4) screws from bag “T”. To improve Wi-Fi signal use antenna extension cables (Amphenol RF P/N 095-902-538-024, available from Digikey or Mouser). Remove antennas from Backpack, attach (2) extension cables to Backpack antenna connectors.
- Page 34 Windows Landscape (For Portrait, skip to step 24) If using an EMV Cradle, follow those instructions before proceeding. 15” Landscape 22” Landscape 15”: add (2) screws from bag “M” to top 75mm VESA positions. Route power cable from I-Series through bottom of stand, 22”: add (2) screws from bag “N”...
- Page 35 Mount I-Series, then add bottom VESA screws: Add (2) screws from bag “M” (15”) or bag “N” (22”) to bottom 75mm VESA positions. Add tie-wrap Place I-Series on surface near stand head, within reach of Route, LAN cable through bottom of stand head. Route cable.
- Page 36 Windows Portrait If using an EMV Cradle, follow those instructions before proceeding. 15” Portrait 22” Portrait 15”: add (2) screws from bag “M” to top 75mm VESA positions. Route power cable from I-series through bottom of 22”: add (2) screws from bag “N” to top 100mm VESA positions. stand, through openings in the mount bracket as shown.
- Page 37 Mount I-Series, then add bottom VESA screws: 15”: add (2) screws from bag “M” to bottom 75mm VESA positions. 22”: add (2) screws from bag “N” to bottom 100mm VESA positions. Add tie-wrap Route, LAN cable through bottom of stand Place I-Series on surface near stand head, within reach of head.
- Page 38 If no printer, skip to step If using printer, remove cover to add printer. Add (2) screws from bag “C” to printer tray; use Star printer Star Continue to step printers. bracket to set depth of screws than remove Star bracket. Epson TM-T88, skip to step ©...
- Page 39 Add Star printer bracket to printer; refer to Star instructions. Epson TM-T88 Add Star printer with bracket to printer tray. Secure printer to printer tray using third screw from bag “C”. Add (4) screws from bag “D” to attach printer to the tray. Skip to step ©...
- Page 40 • Close Display Bracket and add (2) screws saved from step 7. Route cables from/to printer as needed, slide in printer tray assembly (or printer tray with cover if no printer). • Secure printer assembly with (2) screws saved from step 3. ©...
- Page 41 Replace floor stand cover and secure using (4) screws saved (2) bolt holes available on top of base to secure stand to floor. Feet can from step 2. be adjusted in case of uneven surfaces. © Copyright 2021 Elo Touch Solutions, Inc.
- Page 42 If installing an EMV Cradle with display in landscape orientation, finish by adding (1) screw from bag “S”. • EMV-SELF-SERV-15-22-ING-IPP320/350/315 • EMV-SELF-SERV-15-22-VF-MX915-ING-ISC250 • EMV-SELF-SERV-ING-LANE3000 • EMV-SELF-SERV-VF-MX925 • EMV-SELF-SERV-VF-P400 EMV-SELF-SERV-ING-RP757 © Copyright 2021 Elo Touch Solutions, Inc.
- Page 43 Learn more about Elo at EloTouch.com. Americas Europe (EMEA) Asia Pacific Tel +1 408 597 8000 Tel +32 16 930 136 Tel +86 (21) 3329 1385 EloSales.NA@elotouch.com EMEA.sales@elotouch.com EloAsia@elotouch.com The information in this document is subject to change without notice. Elo Touch Solutions, Inc. and its Affiliates (collectively “Elo”) makes no representations or warranties with respect to the contents herein, and specifically disclaims any implied warranties of merchantability or fitness for a particular purpose.
Need help?
Do you have a question about the E796783 and is the answer not in the manual?
Questions and answers