Table of Contents
Advertisement
Advertisement
Table of Contents

Related Manuals for Datacolor 200


Summary of Contents for Datacolor 200
- Page 1 Datacolor 200...
- Page 2 To obtain information on local agents, contact either of the offices listed below, or visit our website at www.datacolor.com. Support Questions? If you need help with a Datacolor product, please contact one of our top-rated technical support teams listed in the appendix for the Datacolor office in your area. Below is contact information for local Datacolor offices:...
-
Page 3: Table Of Contents
Datacolor 200 Setup and Calibration ......................... 8 Instrument Setup for Datacolor PAINT ........................8 Datacolor PAINT Instrument Calibration ........................9 Setup and Calibration for Other Datacolor Programs ....................9 Sample Presentation and Measurement ....................13 Sample Viewing Port .............................. 14 Maintenance ............................. - Page 4 This page intentionally left blank Datacolor 200 User Guide...
-
Page 5: Datacolor 200
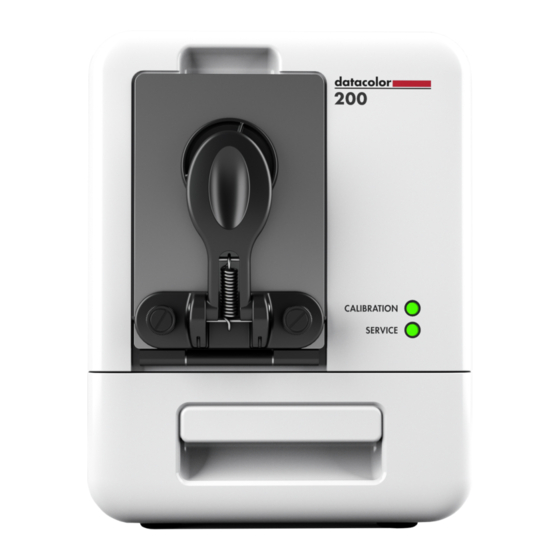
Datacolor® 200 About Datacolor 200 Datacolor 200 is a member of the newest generation of Datacolor bench top color measuring instruments. Incorporating state-of-the-art CMOS integrated circuit technology in the instrument design, it is intended for use as a device for measuring, specifying and evaluating color in both laboratory and retail settings. -
Page 6: Feature Summary
Feature Summary Datacolor® 200 employs state-of-the-art features including the spectrometer, integrating sphere, light source, and optics. Below is a summary of those features: FEATURE DESCRIPTION Integrating sphere Barium coated sphere Measurement D/8º geometry, specular Geometry component included (SCI) or excluded (SCE). -
Page 7: About This User's Guide
Aperture Plates Datacolor® 200 is a single aperture instrument. However, a variety of aperture sizes are available to accommodate different applications. Consult with a Datacolor representative to determine the correct aperture size for your application. -
Page 8: Cable Installation
Cable Installation Cables WARNING Turn off power BEFORE working with any cables. Datacolor® 200 requires the use of two cables, a power cable and an instrument cable that connects the instrument to the computer. Power Cable Instrument Cable (USB) WARNING... -
Page 9: Cable Installation
Connect the instrument cable to a communications port on the back of the computer. Tighten each connection securely to ensure proper signal. NOTE When the connection is made and the program is launched, the instrument will be detected automatically 5 Datacolor 200 User Guide... -
Page 10: Controls And Indicators
When power is applied, all mechanisms are automatically reset. NOTE If the instrument is not turned on before you launch a Datacolor program, you may receive an error message. When the front panel Calibration LED remains lighted, your instrument is ready to be calibrated. -
Page 11: Instrument Calibration
Instrument Calibration General Calibration Information Datacolor® 200 must be calibrated regularly to ensure that the measurements are accurate. This section provides instructions for installing the calibration data and performing the calibration. Below are instructions for performing the calibration using Datacolor PAINT other Datacolor programs. -
Page 12: Datacolor 200 Setup And Calibration
Datacolor® 200 Setup and Calibration The first time you launch a Datacolor program, you must add the instrument to the system. When running Datacolor PAINT, the program automatically detects and configures the instrument for use with the program. If you are using Datacolor TOOLS, Datacolor MATCH and other Datacolor programs, you must provide inputs for the program to configure the program to recognize the Datacolor 200. -
Page 13: Datacolor Paint Instrument Calibration
Setup and Calibration for Other Datacolor Programs When using programs other than Datacolor PAINT, you must add Datacolor 200 to the instrument list. Below is the procedure for Datacolor TOOLS. This procedure is used for all Datacolor programs except Datacolor PAINT. - Page 14 The main program window will display. Select the Instrument Calibration option. Select Calibration. The measurement main window displays: Click Add. The Add Instrument window displays. Display the drop down menu in the Model field, and scroll to Datacolor 200. 10 Datacolor 200 User Guide...
- Page 15 Click Add. The program will search for the device and display the com port assignment: Click Add. Datacolor 200 will display as the current instrument. At the bottom of the window, the program will display information about the instrument selected: Instrument information Click Close.
- Page 16 When the green tile measurement is completed, the program displays information about the green tile measurement. Click OK. The program stores this as the master measurement for the green tile. You can now measure samples. 12 Datacolor 200 User Guide...
-
Page 17: Sample Presentation And Measurement
Sample Presentation and Measurement When measuring samples using Datacolor® 200, you must pay close attention to the positioning of the sample to insure an accurate measurement. When positioned correctly, the sample rests between the sample holder and the front panel door. The sample must completely cover the aperture opening. -
Page 18: Sample Viewing Port
If necessary, adjust the placement of the sample to properly position the sample area to be measured. The sample must completely cover the port opening. Push the door back to its normal position, and start the measurement. 14 Datacolor 200 User Guide... -
Page 19: Maintenance
This inspection should be performed frequently, especially if you measure loose materials. NOTE If you discover loose materials in the sphere, contact Datacolor Service for instructions to remove the loose material. Tile Handling and Cleaning Handling Tiles ... - Page 20 Cleaning the Black Trap The black trap should be kept dust-free. Dust accumulating in the black trap should be blown out with compressed air. The compressed air must be free of moisture. 16 Datacolor 200 User Guide...
-
Page 21: Appendix
Appendix Datacolor® 200 Instrument Specifications Specifications are subject to change without notice. ITEM DESCRIPTION Instrument Type Dual beam integrating sphere with xenon flash lamp. Measuring Geometry Diffuse illumination, 8º viewing in conformance with CIE publication No. 15.2 Colorimetry. Illumination Source Pulsed xenon, filtered to approximate D65. -
Page 22: Miscellaneous Technical Information
Miscellaneous Technical Information Datacolor® 200 RS-232C Connector Pin Assignments Pin # Purpose Direction Transmit data Out (to host) Receive data In (from host) Signal ground WARNING (1) DO NOT WIRE to pins other than 2, 3, and 7. (2)For all unused inputs, the default is active high.
Need help?
Do you have a question about the 200 and is the answer not in the manual?
Questions and answers