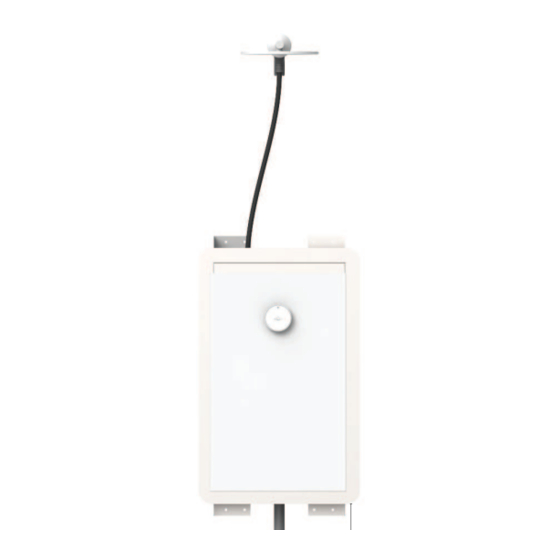
Orbital Systems R3 Technology Installation
Shower panel
Hide thumbs
Also See for R3:
- User manual (11 pages) ,
- Installation manual (33 pages) ,
- Manual (59 pages)

Related Manuals for Orbital Systems R3


Summary of Contents for Orbital Systems R3
- Page 1 Technology Installation Orbital Shower Panel R3 5-06-0012 Publication date 2021-08-27...
- Page 2 All rights reserved. No part of this document may be reproduced or copied in any form or by any means without written permission from Orbital Systems. The English language version of this document contains the original instructions. All other language versions are translations of the original instructions.
-
Page 3: Table Of Contents
Table of Contents Prerequisites and Approvals ......................5 Warranty ........................... 6 Service ..........................6 Install Orbital Shower Unit ....................... 7 Install Sensor Hose, Flush Hose and Recirculation Hose ..............7 Install Sensor Tank Dock ......................8 Install Sensor Tank and Sensor Tank Lock ..................8 Install Funnel ........................ - Page 4 This page is intentionally left blank. Page 4 of 33...
-
Page 5: Prerequisites And Approvals
Institutes of Sweden AB) with Type Approval Certificate C900373 & C900374. Orbital Shower is CE-marked based on test reports from third party labs. If industry regulations and instructions in this manual are followed, Orbital Systems guarantees a functional shower system. Page 5 of 33... -
Page 6: Warranty
For showers outside of the warranty period spare parts are available for purchase directly from Orbital Systems. Service Orbital Systems and our team of expert staff are available to assist you if you require product advice, experience any problems, need to purchase spare parts or to set up a service appointment. -
Page 7: Install Orbital Shower Unit
Install Orbital Shower Unit Component Overview Install Sensor Cable, Flush Hose and Recirculation Hose. Make sure the Sensor Cable goes first. 1. Hose Connection (RSK 188 24 82) 2. Orbital Shower Core 3. Panel Pull the Sensor Cable out to where the contact almost reaches the end of the Sensor Tank. -
Page 8: Install Sensor Tank Dock
Install Sensor Tank Dock Insert Sensor Tank Dock into Connection Pipe. Push it all the way in. NOTICE Apply lubricant according to local regulations or best practice. Make sure that the o-rings are lubricated. Connect Hoses to Sensor Tank Dock. Lock Sensor Tank Dock in place with the Spring Lock. - Page 9 Connect the Sensor Cable to the Sensor Tank. Lock the Sensor Tank in position with the Sensor Tank Lock by turning it 90 degrees. CAUTION CAUTION Make sure to have correct alignment between key and slot in connectors by Make sure Sensor Tank is inserted aligning the two white lines.
-
Page 10: Install Funnel
Install Funnel Remove Transport Plugs before installation. NOTICE Place the Funnel with the hole oriented to the left! Placing the hole oriented to the right will disable recirculation. Install Orbital Shower Core Page 10 of 33... - Page 11 Insert Orbital Shower Core into the Wallbox and attach WARNING Safety Wire. Keep tilted to enable electrical installation. Electrical installation should be performed according to local regulations CAUTION by a licensed electrician. Heavy equipment. The Orbital Shower Core weighs approx. 25 kg. CAUTION Make sure to attach the Safety Wire before tilting the Orbital Shower Core.
- Page 12 CAUTION Make sure to have correct alignment between key and slot in connectors. Make sure locking ring snaps and connector is locked. M8 socket head Page 12 of 33...
-
Page 13: Install Hose Connections
Install Hose Connections CAUTION Install Hose Connections according to local regulations and adaptations. RSK 188 24 82 Provided by Customer: • Hose Connections, x2 Page 13 of 33... -
Page 14: Install Panel
M3 (5.5mm driver) Install Panel Install Control Dial Page 14 of 33... - Page 15 Position the Control Dial according to the “up marking” CAUTION before assembly. Risk of damage to Panel if overtightening. Plastite screw (12 mm) Page 15 of 33...
- Page 16 CAUTION Make sure to have correct alignment between key and slot in connectors. Make sure locking ring snaps and connector is locked. Adjust Panel angle. Page 16 of 33...
-
Page 17: Install Panel Lock
Install Panel Lock Adjust NOTICE Clean surface before attaching Bracket. M3 (5.5 mm driver) Secure Page 17 of 33... - Page 18 Adjust until edge aligned to edge. Adjust until edge aligned with magnet. Page 18 of 33...
- Page 19 Adjust Panel depth. Page 19 of 33...
-
Page 20: Next Step
Set into locked position. Next Step CAUTION The Orbital Shower will not function without executing following steps. Filter Capsule has to be installed before starting the Orbital Shower. See User Guide for details. Page 20 of 33... - Page 21 Orbital Shower Core installation completed. Next step depends on Shower variant. Follow steps valid for Orbital Follow steps valid Systems Shower Head for 3rd Party (Installing the Shower Head Shower Head [22]) (Installing the 3rd Party Shower Head [24]) Follow steps valid for Orbital Systems Hand Shower (Installing the Diverter and Hand Shower...
-
Page 22: Installing The Shower Head
Installing the Shower Head Component Overview 2 mm 1. Shower Head Wall Mount 2. Shower Head Arm 3. Shower Head It is recommended to cut the Wallbox UNI Push with the LK Wall Box Cutter UNI. NOTICE Cover the end of the Shower Water Connector with thread sealant to avoid leakage. - Page 23 CAUTION Make sure not to cross thread and not to overtighten. Shower Head installation completed. Page 23 of 33...
-
Page 24: Installing The 3Rd Party Shower Head
Installing the 3rd Party Shower Head Install 3rd Party Shower Head. Go to www.orbital- systems.com for more information about installation of 3rd Party Shower Heads in combination with Orbital Shower. Page 24 of 33... -
Page 25: Installing The Hand Shower
Installing the Hand Shower Installing the Diverter and Hand Shower Component Overview 1. Diverter Valve House 2. Diverter Wall Plate 3. Diverter Knob 4. MC6S M4 x 8H A2 hexagon screw, x3 5. Diverter Housing Cover 6. T25 screw 50 mm (5.5 mm), x2 7. - Page 26 Cut Conduit flush to tile surface. Drill 4 holes (6 mm) in marked locations. CAUTION Only drill through the tile itself, no deeper. CAUTION Seal drill holes according to local regulations or best practice. • A: Wood / Concrete • B: Waterproofing membrane 31mm •...
- Page 27 CAUTION It’s important that the PEX Conduits are pushed in all the way to ‘stop’ before cutting to the correct length of 18 mm. 18 mm CAUTION Do not run water through the Diverter before Diverter Housing Cover is 31mm mounted.
-
Page 28: Installing The Hand Shower Holder
NOTICE Use Torx T8 L key tool in kit T8 2.5 x 8 mm screw Installing the Hand Shower Holder Component Overview MC6S M4 x 8H A2 hexagon screw 1. Hand Shower Cover 2. T25 stainless steel screw 50 mm (5.5 mm), x2 3. - Page 29 Push Hand Shower Cover into position and use the Set Screw to lock it. NOTICE Use Torx T8 L key tool in kit T25 stainless steel screw 50 mm (5.5mm) Page 29 of 33...
- Page 30 Hand Shower installation completed. Page 30 of 33...
-
Page 31: Shower Activation, Wi-Fi Setup And Installation Test
Shower Activation, Wi-Fi Setup and Installation test To setup Wi-Fi and do an Installation test on your Orbital Shower, please download app My Water by Orbital Systems from App Store or Google Play and follow the instructions provided in the app. Internet Connection is required Either password protected 2,4 GHz / 5 GHz Wi-Fi network or Ethernet is required. - Page 32 This page is intentionally left blank. Page 32 of 33...
- Page 33 C E R T I F I E D S P A C E T E C H N O L O G Y...
Need help?
Do you have a question about the R3 and is the answer not in the manual?
Questions and answers