Table of Contents
Advertisement
Quick Links
Advertisement
Table of Contents

Related Manuals for Full Spectrum Laser MUSE TITAM


Summary of Contents for Full Spectrum Laser MUSE TITAM
-
Page 2: Table Of Contents
Table of Contents Full Spectrum Laser Muse Titan Setting Vector Properties Symbols and Definition Adding Text Section I. Safety Creating Shapes Setup Precautions Creating, Manipulating Compound Shapes & Objects Safety During Operation Creating & Converting Vector Paths Fire Safety Mouse Controls Woodshop Dust Fire Safety Section VII. -
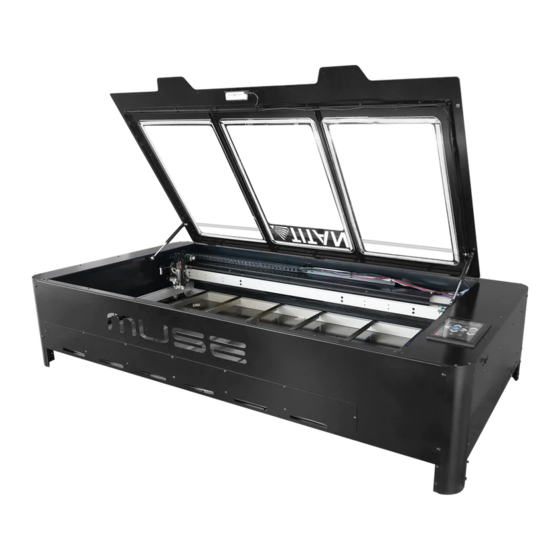
Page 3: Full Spectrum Laser Muse Titan
For more information and product selection, please visit www.fslaser.com Compliance Statement: The Full Spectrum Laser Muse Titan is a class 3R laser product, as defined in International Standard IEC 608251. The Full Spectrum Muse Titan complies with 21 CFR 1040.10 and 1040.11, the Federal Performance Standards for Light Emitting Products, except for deviations pursuant to... -
Page 4: Symbols And Definition
Symbols and Definitions... -
Page 5: Section I. Safety
Section I. Safety Setup Precautions Follow all safety protocols and procedures before operating any machinery. It is the responsibility of the operator to ensure all safety precautions are correctly followed, and the machine is properly assembled and in working order. Always inspect the laser cutter for damage or breakage before each use. -
Page 6: Safety During Operation
Safety During Operation The output of the CO2 engraving laser is fully contained in a Class 1 enclosure during normal operation. The laser cabinet has a safety interlock switch that deactivates the laser if the door is opened during operation, and no special precautions are necessary to operate the high power laser safely. -
Page 7: Fire Safety
Always keep a properly maintained and inspected 5lbs. or larger fire extinguisher on hand. Full Spectrum Laser recommends a Halogen fire extinguisher or a multipurpose dry chemical fire extinguisher. Halogen extinguishers are more expensive than a dry chemical, but offer certain advantages should you ever need to use an extinguisher. -
Page 8: Woodshop Dust Fire Safety
Woodshop Dust Fire Safety Considerations Before processing materials, the user must verify whether harmful fumes will be generated and whether the filter equipment of the exhaust system is suitable for the harmful materials. We emphasize that it is the responsibility of the user to consider the national and regional threshold values for dust, fogs, and gases when selecting the filters and the exhaust system. -
Page 9: Electrical Safety
The power supply is capable of outputting DC 20,000V at up to 20mA. This power is also provided to the discharge terminals on the laser tube itself. Your laser shipped with silicone terminal covers that prevent access to bare wiring—notify Full Spectrum Laser support and immediately cease operations if these covers ever slip and expose bare wire. -
Page 10: Section Ii. Unboxing Your Muse Titan
Section II. Unboxing Your Muse Titan Unboxing Steps Your Muse will require careful unboxing and examination of parts. You will need two able-bodied adults to lift and place the machine at the desired workstation. Follow these instructions for best results: Prepare Work Space: You will need an open, level workspace to place your laser cutter. -
Page 11: Unpacking List
Unpacking List Your laser shipped with the following included major components and their associated accessories: Major components Muse Titan, Air compressor, Exhaust fan, Chiller Minor components Minor components will consist of all the wiring, tubing, and ducting to set up your laser. Additional Required Items In addition, you will need the following tools and accessories (not included with your machine purchase): Never use unapproved ducting in the exhaust system. -
Page 12: Section Iii. Installation & Assembly
Section III. Installation & Assembly With your laser cutter unboxed and placed in its permanent work space we can now prepare it for use. This is a simple process that should take less than half an hour to complete. Assembly Stage 1: Remove Zip Ties To secure the machine during shipping, zip ties are used to hold the laser head assembly and the x-gantry. -
Page 13: Connect The Exhaust System
HEPA Filter. Fume extractors do not require outside ventilation. This is a great choice for workshops that do not have the option to ventilate outside Both the extractors and the filters are available on the Full Spectrum Laser website at: http://fslaser.com/laser-accessories/... - Page 14 Fume Extractor filters require routine cleaning and replacement, dependent on use and materials cut. Generally, fume extractor suction will diminish and odors will be detected as filters clog. Never use a fume extractor without all filters in place. Maintenance guidelines: Pre-Filters: Clean often.
-
Page 15: Assemble The Water System
Assembly Stage 3: Assemble the Water System Muse Titan uses a water-cooled continuous beam CO2 laser tube. The tube requires a flow of room temperature water to regulate the temperature of the laser tube. Your purchase includes a water chiller for cooling the laser tube. - Page 16 Attach Water Tubing to Titan: Push the silicone tube that is coming from the OUTLET of the chiller to the INLET of the Muse Titan. Then Push on the silicone tubing from the INLET of the Chiller to the OUTLET of the Muse Tian. Important to remember In to out, out to in; Your laser will not fire if this is installed backwards.
-
Page 17: Connect The Air Compressor
Assembly Stage 4: Connect the Air Compressor Air is used as a pressurized gas to assist in cutting and engraving operations. Pressurized air is essential to safe and efficient cutting operations. This not only helps cut through material more quickly but also helps prevent the formation of flames. -
Page 18: Connect Electrical Power
Assembly Stage 5: Connect Electrical Power The Muse Laser System, and available accessories, are configured to accept 110VAC at 60Hz. 220VAC units connect to power through an included converter (single-phase 220VAC). Prepare Power Cord: Remove the electrical cord from its packaging. Plug in Power Cord To Laser Cutter: The power cord plugs into a “C14”... -
Page 19: Connect To The Machine
Assembly Stage 6: Connect to the Machine The Muse Titan utilizes RetinaEngrave v3.0, browser-based software that doesn’t require any downloads. Only two items are required to access RetinaEngrave v3.0: a computer with access to an internet browser (Google Chrome recommended) and a connection between the Muse Titan and the internet or said computer. Watch this video to learn more: https://www.youtube.com/watch?v=zYR90f6jXq0&t=1s Connect Via Router (Recommended): Connecting to the Muse Titan via the router is the most reliable way to establish a link to RE3. - Page 20 Assembly Stage 7: Connect to the Software RetinaEngrave v3.0 is a combination of a print driver and control software that communicates with, downloads jobs to, and controls the laser system. There is no download required for RetinaEngrave v3.0. With a local connection (achievable with Wi-Fi or the included Ethernet cable) your Muse Titan will link with the software’s IP address.
- Page 21 Type IP Into Browser: On the Network Screen, you will see a “Wired IP” number. Using your computer, type this IP number into your favorite browser (Google Chrome is recommended). This will link you to the RetinaEngrave v3.0 interface. You now have full access to the software. There is no need to install or download anything.
-
Page 22: Section Iv. Tests & Adjustments
Section IV. Tests & Adjustments Before you start your first job, it is important that your laser is aligned; Luckily you have the Titan which is the easiest laser to align. 1. Alignment Test 2. Mirror Alignment Procedure Alignment Test The laser tube that came pre-installed in your Muse Titan was carefully aligned in our facilities in Nevada. -
Page 23: Mirror Alignment Procedure
Mirror Alignment Procedure (Please note that if your initial test looked good, do not attempt this step) The mirror alignment procedure goal is to first align the visible red beam with the invisible CO2 laser beam then use the red beam as the primary indicator for mirror alignment. The idea is that when the laser is not aligned, you will have two black dots from the test fires in the top and bottom positions. - Page 24 Stage 1: Prep Prepare your tools and workspace. Before starting any project, be sure you are aware of all safety issues. Be sure you read and understand all safety warnings presented in Section I. Power on Laser Cutter: Turn on the machine by hitting the power switch. Allow the machine time to boot up the touch screen operating system.
- Page 25 Stage 2: Mirror #3 Align the invisible cutting beam with the visible red beam diode and make sure they hit each mirror precisely. Remember to check your mirror alignment before starting this procedure; it is probably unnecessary if the laser tube was pre-installed in your Muse Titan. Open the Safety Lid: You will need to access the interior of the machine.
-
Page 26: Focus Lens
Focus Lens The focal lens does not require manual focusing; it physically detects surface distance via the autofocus. The focal lens is located towards the bottom of the laser head assembly. The focal lens is considered a consumable; cleaning and maintaining the lens is essential for long use. Always use the special optic cloth or wipes to clean your lens. -
Page 27: Autofocus Properties
Autofocus Properties Auto focus can be run via the touchscreen or will function automatically at the beginning of each job. The auto focus will also retract to get out of the way of anything in your workspace when doing a camera capture of your work area. -
Page 28: Section V. Touch Screen Interface
Section V. Touch Screen Interface Muse’s touch panel allows you to control the basic functions of your laser without needing to connect to a computer. This is very convenient during alignment and testing procedures. To run jobs, you will need to access the RetinaEngrave v3.0 software (see Installations and Assembly Section). -
Page 29: Safety Override Lid Failsafe
Safety Override Lid Failsafe As a safety feature, the lid has a magnetic failsafe that disconnects the laser when the lid is open. this will be indicated by your touch screen display like so. Be sure your lid is closed when you try to fire the laser. If the lid is closed and the laser still does not fire, check that the lid magnet is touching the proper base magnet and that wires are connected. -
Page 30: Safety Override Waterflow Failsafe
Safety Override Waterflow Failsafe The laser will not fire unless water is flowing through the laser tube. The following indicator informs Muse Titan operators if water is not flowing. If your touch screen indicates water is not flowing through the laser tube, check your water tube connections and make sure your tubes and water chiller are assembled correctly. -
Page 31: Job History Screen
Job History Screen Search: Opens History Options. Delete: Delete Project from History. Run Perimeter: Laser automatically JOGS the extent of the current project’s border. Start: Run selected Project. - Page 32 Main Tools Screen Search: Opens History Options. Delete: Delete Project from History. Run Perimeter: Laser automatically JOGS the extent of the current project’s border. Start: Run selected Project. About Sub-Screen Model: Indicates Laser Model. Firmware Version: Current Version of Touchscreen Wireless MAC: MAC wireless Information.
- Page 33 Lock / Unlock Indicator Locked Icon: Indicates the gantry is locked. When locked, the user must move the gantry using JOG controls. Unlocked Icon: Indicates the gantry is unlocked. When unlocked, the user must manually move the gantry.
-
Page 34: Section Vi. Retinaengrave V3.0 Software
Section VI. RetinaEngrave v3.0 Software In this section, you will be introduced to the major interface features of RetinaEngrave v3.0. Main Menu FILE → New Project (Alt+N): Start a new project. → New From Clipboard (Shift+Ctrl+Alt+N): Start a new project from the clipboard. →... - Page 35 MODIFY ARRANGE → Send to Front (Shift+Ctrl+Up): Send an object to the front layer. → Bring Forward (Ctrl+Up): Send an object one layer forward. → Send Backward (Ctrl+Down): Send an object one layer backward. → Send to Back (Shift+Ctrl+Down): Send an object to the back layer. ALIGN →...
- Page 36 PATH → Join Paths (Ctrl+J): Combine 2 or more selected paths into one compound path. → Split Paths (Shift+Ctrl+J): Split a compound path into its original separate paths. → Convert to Path (Shift+Ctrl+P): Convert a non-path to a layer path. →...
- Page 37 MUSE TITAN CAMERA → Capture Workspace: Initiates camera functions. → Clear Last Workspace Capture: Remove last camera image. Trace Background: Used with camera functions to apply vectors to selected area of image. Estimate Job Time: Give approximate time for the job to complete. Run Job: Run your project.
- Page 38 Settings Info: Information regarding your machine. Laser: Information regarding device options...
- Page 39 Rotary: Shows information on rotary. Defaults: Set image defaults with dither options.
- Page 40 Editor: Editing menu for RE3. Network: Network settings for RE3.
- Page 41 Settings Save: Save project. Undo: Reverse your last action. Redo: Reverse your last undo. Muse Control Capture Workspace: Takes images of workspace Clear Last Workspace Capture: Clears previous workspace image. Estimate Job Time: Amount of time the job will take. Preview Contour of All Objects: Shows laser tracing of job.
- Page 42 Draw Menu Select (Pointer): Pointer (V): Initiates mouse pointer. Subselect (D): Initiates “subselect” mouse pointer. Lasso (O): Initiates “lasso” mouse pointer. Layer (M): Initiates “layer” mouse pointer. Shape Line (L): Create a line with the drawing tool. Rectangle(R): Create a rectangle with the drawing tool. Ellipse (E): Create an ellipse with the drawing tool.
- Page 43 Projects Menu Displays information about projects. Reduce Window: Reduce or expand projects window. Delete: Delete selected project. Create New Project: Begin a new project. Project Name: Displays project’s name. Toggle Lock:Lock or unlock project in current order. Toggle Visibility: Turn visibility of project on or off. Layers &...
- Page 44 Project Info This window displays information regarding the active project. Active Project Name: Displays name of active project. Modified: Displays last date project was modified. Job Time Estimate: Displays estimated time until job is complete. Unit: Choose unit of measurement from the following Pixels: Sets unit of measurement to pixels.
- Page 45 Raster Properties Window Halftone Dither: Apply Halftone Dither. Blur: Adjust blur filter radius from 0 to 30. Edge: Adjust edge enhancement threshold from 0 to 30. Intensity: Adjust intensity from -255 to 255. Threshold: Apply Threshold; adjust from 0 to 255. Invert: Reverse Black and White elements.
- Page 46 Vector Fill & Rasterize Use this Window to set an infill for shapes and designs. Color: Set the color of the layer. Infill: Set the pattern of your fill. Spacing: Spacing between infill lines. Generation: Generates raster lines based on all objects or for each object. Rasterize: Clicking icon opens raster menu.
- Page 47 Indicators (Bottom Row) Position Indicator: Displays current position of the laser on the grid. Time Remaining Indicator: Displays the time remaining to complete the current job. Status Indicator: Displays whether laser is ready to initiate a job or is currently executing a job. Sync Indicator: Notifies you of the last workspace update operation results.
-
Page 48: Engraving Rastering
Engraving / Rastering Engraving, also called Rastering, is the process of creating a surface image on material without cutting through the material entirely. Setting Engraving Properties Clicking an object (design image) in the workspace will allow you to access that object properties tab. The Raster Properties will automatically open. - Page 49 Engraving/Rastering Power Settings...
-
Page 50: Setting Vector Properties
Setting Vector Properties When a PDF file is imported into RetinaEngrave v3.0, the program automatically detects it as both a vector file and a raster file. When a vector object (basic shapes) is selected the Vector Fill & Rasterize property tab will open on the right side. - Page 51 Passes This allows the operator to assign how many times the laser will complete a full cycle. Adding passes creates deeper cuts. Setting passes to “0” will disable the respective color layer. Setting Vector Current Vector current is a control unique to vector files. As always, settings will vary with your tube wattage and type of material.
- Page 52 Vector Mark Example We can outline (as opposed to fill) parts of the pattern for a second design option. Again, we will instruct the laser using our vector properties In this design, the blue lines will not be cut through on our material, but instead will be marked, as the red outline still cuts.
-
Page 53: Adding Text
Adding Text Click the “T” icon and then click anywhere in the view window. You can now write your text. To customize your text, click on the text object you created and a new window will appear with options to adjust the positioning, size and font of your text. - Page 54 Text Transform Options Transform options allow the operator to alter the shape and skew of text. Move: Set X/Y coordinates. Scale: Manipulate the scale of text, separately, in width and height. Rotate: Rotate text a set number of degrees, up or down. Skew: Skew the angle of text by a set number of degrees on the X and Y axis.
- Page 55 Text Path Options Attach Text to Path: This function allows the user to attach text to a shape and contour the text to that shape. As an example, a user creates an ellipse design and a text element separately. With the mouse, drag a square over both.
-
Page 56: Creating Shapes
Creating Shapes Click the Square Icon and then click and hold anywhere in the view window. By moving the mouse, you can expand and manipulate the square you want to create. By clicking the drop-down arrow next to the Square Icon, you can choose other base shapes and expand them just like with a square. - Page 57 Star Points: Slide bar to create polygons with multiple points (3 to 25). Size: The size of the inside of the star. Corner: Slide bar to curve corners. Advanced Settings Round: Create rounded corners. Round2: Create inverted rounded corners. Bevel: Create inset corners. Inset: Create inset corners.
-
Page 58: Creating, Manipulating Compound Shapes & Objects
Creating, Manipulating Compound Shapes & Objects Compound Shapes & Objects Operators can combine and modify shapes and objects to create unique compound shapes and objects with these functions (see also Modify): Split Selection (Shift+Ctrl+G): Split up a previously created compound shape or object that has been Unioned with other shapes. -
Page 59: Creating & Converting Vector Paths
Creating & Converting Vector Paths A vector path indicates the line the laser moves along while cutting. For a simple line, the path is a clear route from Point A to Point B. More complicated paths, and shapes, can be created using the following options in the Modify drop-down window: Vectorize Border: Use to create a vector path of the border of an object. -
Page 60: Mouse Controls
Mouse Controls Drag ‘n Drop: Click and hold a design file and then drag it into the workspace. You will be invited to “Drop anywhere!”. Once uploaded, click and hold the left mouse button and drag the mouse to move the object in the workspace. -
Page 61: Section Vii. Operations
Section VII. Operations This section will guide you through using your Muse Titan laser cutter. To get started, it is important to understand the meanings of “Vector Cutting” and “Raster Engraving” and their associated file types. General Functions Vector Cutting The most common feature of a laser cutter. - Page 62 Engraving Engraving is the process by which complex designs are etched into a workpiece. Engraving can range from a simple surface mark all the way through deep material removal. Engraving is differentiated from cutting in that cutting is the process of burning a closed contour completely through a workpiece. Engraving is also known as “Raster Engraving”...
-
Page 63: From Concept To Design
From Concept to Design The RetinaEngrave v3.0 software works with your Muse Titan to create a simple and intuitive set of operations that is easy to learn and use. With experience, you will find your Muse Titan achieving amazing results following this procedure. - Page 64 Create Design Typically, projects are created in design software and then imported to RetinaEngrave 3.0. Generally, a PDF file is optimal for most vector cuts, as PDF files are easy to convert to and most design software has “convert to PDF” as a standard feature. For rastering (engraving), a JPEG file is best as these are bitmap files perfect for pixel-based images.
- Page 65 Place Material At this stage you will place your material into the laser bed workspace. The material can be placed anywhere within the work bed; however, we recommend placing material close to center. Once the material is placed, close the lid. Your material is what you will be cutting or engraving. Typical materials include wood, acrylic, cardboard, fabric, etc.
-
Page 66: Positioning The Laser Head (Jog)
Positioning the Laser Head (Jog) Operators will want to become accustomed to moving the laser head, in order to position the laser. This can be done in one of two methods: manual and jog control. Manually moving the laser head requires that the laser head be in the “Unlocked”... -
Page 67: Stopping The Laser
Stopping the Laser Once a project has begun, the laser will continue until the project is complete. If for any reason an operator needs to stop the laser immediately, choose one of these options: Open the Lid: The large workbed access lid is installed with a device that automatically (and instantly) cuts off the laser if it is opened even slightly. -
Page 68: Camera
Camera Inside your Muse Titan you will find a Intel RealSense 3D camera. This camera uses multiple cameras simultaneously to create a 3D map of your workspace to get the most accurate data for your laser projects. Saving time and money on materials with the 3D camera system is a major benefit. Also the 3D camera allows you to do cool things like our trace feature in RE3. -
Page 69: Camera: Capture Workspace
Camera: Capture Workspace Use the Intel Realsense 3D camera to capture your workspace to align your designs. Place material in the laser bed. Lift the Lid of the laser in it’s upper position. Initiate Camera - Press the Camera Icon on your RE3 software, or on the LCD touch screen (for touch screen controls, see user manual) - Note that you 1) use the camera button, 2) position the head, and 3) press the camera button again (this initiates sequence with no indication on software). -
Page 70: Camera: Vector Trace
Camera: Vector Trace Use the onboard camera to capture your workspace to align your design. Choose and prepare your material. Flat objects work best, and we suggest you place masking tape (paper tape) on the surface before marking with a pen (sharpie). Don’t allow the masking tape to overlay on the material when applying more than one strip. -
Page 71: Camera: Maintaining Your Camera & Calibration
Maintaining Your Camera Follow these simple tips to keep your camera clean and functioning at peak performance: Just like with mirrors, you will need to clean the camera lens periodically. Use lens wipes to gently clean the camera lens as needed. - Page 72 6. Simply Click: In this menu simply scroll down to “Run Camera Calibration” and click it. The rest of this process is automated. 7. Close The Lid: Once the automated process is complete you can simply close the lid and prepare your project.
-
Page 73: Materials Testing
Instead of giving inaccurate data, operators should become accustomed to material testing. Full Spectrum Laser provides a free materials test template with suggested starting points in power and speed settings. From there, you can experiment with your own materials testing. Once the perfect settings are determined, we recommend recording those results in a Materials Log. -
Page 74: Section Viii. Hardware & Maintenance
Section VIII. Hardware & Maintenance With a little care and maintenance, you Muse Titan Laser Cutter will remain clean and continue to run at top efficiency for years to come. Be aware of all safety and maintenance issues with your machine by following all the safety instructions in this manual. -
Page 75: Installing The Co2 Laser Tube
Installing the CO2 Laser Tube If replacing the tube, unplug the machine and let rest for one hour for capacitors to discharge to avoid electrocution. Handle CO2 tube with care, glass is fragile and can cause lacerations if mishandled. CO2 Laser Tube Replacement 1. -
Page 76: Belt Installation
The belts on your laser system are a consumable item and will eventually stretch beyond a usable length or break. You can contact Full Spectrum Laser support for replacements. The capacitors in the power supply retain power even after turning the laser off. -
Page 77: Focus Lens Replacement Instructions
Focus Lens Replacement Instructions Parts: Air Assist Cone (A) - Fitting O-Ring (B) - Air Assist Fitting (C) -Focus Lens w/ Case (E) (These instructions are for replacing different sized lenses; If you are simply replacing a lens that has become damaged or broken you will simply slide the new lens in where the old one was) 1. -
Page 78: General Maintenance
General Maintenance Maintenance on the Muse Titan is extremely important to maintain optimal output. Please follow the directions below to keep a clean machine for best results. Before starting a job: Make sure the lens and optics are all clean and clear of debris; Microfiber cloth or lens wipes are the only recommended options for cleaning lenses as any other option can cause micro scratches in your optics. -
Page 79: Appendix A: Chiller
Appendix A. Chiller Unboxing Carefully remove the items from the box as directed. Remove From Package: You will see the chiller and all needed accessories. Remove Right Packaging Box: Remove the chiller and check that all the following parts are included: silicone tubing (2) and AC Power Cable (1). -
Page 80: Chiller Installation Steps
Chiller Installation Steps 1. Safety First: Before starting this procedure, turn off your Muse Titan and unplug it from all power sources. We recommend to wait at least 20 minutes to ensure no residual electricity remains. 2. SIlicone tubing (Chiller): Connect both silicone tubes provided to your chiller. 3. -
Page 81: Using Your Chiller
Using Your Chiller 1. Add Distilled Water: Unscrew water cap. Fill the tank with distilled water (approx. 2.1 gallons). Put cap back on and tighten. 2. Power On chiller: Water will continuously run through the tube when powered on. -
Page 82: Appendix B: Rotary Attachment
Appendix B. Rotary Attachment The Full Spectrum Laser Hobby Advanced Rotary Attachment is an accessory to the Muse Titan and is not included with the base purchase. The rotary attachment is capable of engraving on objects from 0.25in diameter. You can order the rotary attachment from the Full Spectrum Laser website at: https://fslaser.com/laser-accessories/... -
Page 83: Aligning Your Rotary Attachment
Once you have connected your rotary attachment, you can activate your laser and move the rotary attachment and laser head into a position to engrave on your workpiece. The red dot should be in the same vertical (X-Z) plane as the center axis of the workpiece. The rotary attachment is designed to be used within the laser case, however its maximum engraving diameter can be increased by modifying your laser system’s bottom panel. -
Page 84: Appendix C: Focus Lenses
2.5” Focus Lens Full Spectrum Laser’s Pro-Series comes standard with a 2.5” lens which is good for cutting up to 1/2 of material and engraving detail to around 8pt fonts with a 90w tube, yet can be beneficial for desktop lasers if you want to cut up to half inch material. -
Page 85: Appendix D: Warranty
Appendix D. Warranty Within the first 30 days, Full Spectrum Laser will replace or repair any defective parts free of charge and pay for ground shipping of parts. Overnight shipping is available at extra charge. Outside the first 30 days, Full Spectrum Laser will replace or repair any defective part within the warranty period free of charge but shipping charges are the responsibility of the customer. -
Page 86: Appendix E: Customer Support
Appendix E. Customer Support Full Spectrum Laser provides the best customer support in the industry. Contact us if you have any questions or issues with your Muse Titan Laser Cutter. We can also offer convenient purchasing of accessory upgrades and replacement of consumable items. Refer to this sheet for all your customer support and reordering needs. - Page 87 Join the Full Spectrum Laser Community Full Spectrum Laser invites you to join our community of hobby makers and professional manufacturers through our social media channels (Facebook, Instagram, Twitter, YouTube). We love being part of the hobby maker culture and the industry we work in. You can follow us to see what is new at FSL, and learn about the latest updates, projects, and more.
Need help?
Do you have a question about the MUSE TITAM and is the answer not in the manual?
Questions and answers