Table of Contents

Subscribe to Our Youtube Channel
Related Manuals for Chore-Time Valego RDE-58


Summary of Contents for Chore-Time Valego RDE-58
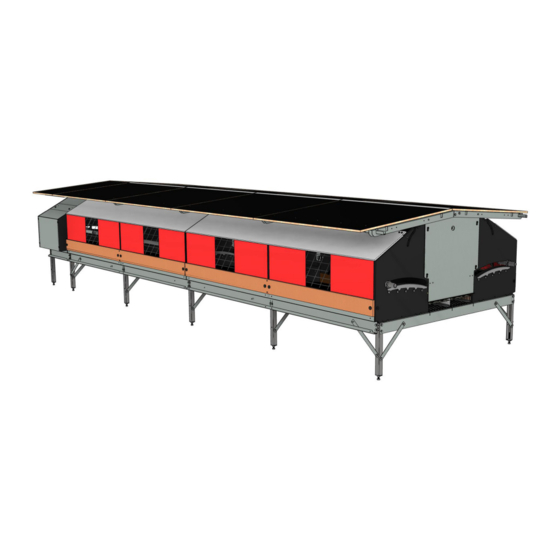
- Page 1 Valego RDE-58 with Flat Roof ® Instruction Manual For additional parts and information, contact your nearest Chore-Time distributor or representative. Find your nearest distributor at: www.choretime.com/contacts March 2021 ME2489A...
-
Page 2: Table Of Contents
Contents Topic Page Safety and General Information ........... . 4 Follow Safety Instructions . - Page 3 Contents - continued Topic Page Full Section Walkover ............. .34 Expeller Installation .
-
Page 4: Safety And General Information
Safety and General Information Valego® RDE-58 with Flat Roof Instruction Manual Safety and General Information Caution, Warning and Danger Decals have been placed on the equipment to warn of potentially dangerous situations. Care should be taken to keep this information intact and easy to read at all times. Replace missing or damaged safety decals immediately. -
Page 5: Planning The System
Valego® RDE-58 with Flat Roof Instruction Manual Planning the System Planning the System Section Dimensions and Expulsion Unit Location Dimensions for each Section and for Expulsion Units shown below. Systems 50 Sections or less If the number of sections in the house are 50 Sections or less; only one Expulsion Unit is required and is centered as shown in Figure 1. -
Page 6: Installation
Installation Valego® RDE-58 with Flat Roof Instruction Manual Installation Adjustable Leg Assembly 1.Assemble the Legs as shown. Item Description Part No. Valego SS Leg 390 mm 600103 Valego SS Leg 440 mm 600104 Valego SS Leg 490 mm 600105 Valego SS Leg 540 mm 600106 Valego SS Leg 590 mm 600107... -
Page 7: Framework
Valego® RDE-58 with Flat Roof Instruction Manual Installation Framework Undercarriage (Full Sections) 1.At the end of the Framework, Fasten Leg Assemblies (Item 4) to a Cross Carriage (Item 2) and Side Car- riages (Item 1) with two Strut Strips (Item 3) using M8 Taptites (Item 6) as shown. 2.Install Leg Assemblies (Item 4) with one Strut Strip (Item 3) where Side Carriages (Item 1) fasten together. -
Page 8: Undercarriage (Half Sections)
Installation Valego® RDE-58 with Flat Roof Instruction Manual Undercarriage (Half Sections) 1.At the end of Rows, Fasten Leg Assemblies (Item 4) to a Cross Carriage (Item 2) and Side Carriages (Item 1) using two Strut Strips (Item 3) as shown. 2.Install Leg Assemblies (Item 4) and one Strut Strip (Item 3) where Side Carriages (Item 1) fasten together. -
Page 9: Undercarriage (Expulsion Unit)
Valego® RDE-58 with Flat Roof Instruction Manual Installation Undercarriage (Expulsion Unit) 1. Fasten Leg Assemblies (Item 4) to Side Carriages (Item 2) with M8 Taptites as shown. 2.Fasten Cross Carriages (Item 2) to the Legs (Item 4) with M8 Taptites (Item 5). 3.Install two Strut Strips (Item 3) per Leg Assembly as shown. -
Page 10: Egg Belt Supports
Installation Valego® RDE-58 with Flat Roof Instruction Manual Egg Belt Supports Full Section Half Section Item Description Part No. Full Section Side Separation (2400mm) 600266 Full Section Middle Separation (2400mm) 600268 Half Section Side Separation (1200mm) 600267 Half Section Middle Separation (1200mm) 600269 Figure 8.Egg Belt Supports Egg Belt Supports (at Expulsion Units) -
Page 11: Egg Belt Installation
Valego® RDE-58 with Flat Roof Instruction Manual Installation Egg Belt Installation Return Egg Belt 1.Install the Egg Belt Drive Unit and Egg Belt Return Unit. 2.Start with the Egg Belt Rolls (Item 1) at the Belt Drive end and lay them on the Cross Carriages (Item 2). Item Description Part No. -
Page 12: Egg Belt (Back To Drive Unit)
Installation Valego® RDE-58 with Flat Roof Instruction Manual Egg Belt (Back to Drive Unit) 1.Feed the Egg Belt through the Return Unit (Not Shown) and pull the Belt back to the Drive Unit end laying it on top of the Egg Belt Supports. Lay Egg Belt on top of Egg Belt Supports and route back to Drive Unit. -
Page 13: Rack Plate Assembly
Valego® RDE-58 with Flat Roof Instruction Manual Installation Rack Plate Assembly Pin Locations Pins at End of System 1.Install 15mm End Pins (Item 1) and 15mm Connecting Pins (Item 2) in the Side Panels (Item 3) at the Ends of the Nest System. Item Description Part No. - Page 14 Pins at Walkover Sections 1.Install 15mm End Pins (Item 1) and 15mm Connecting Pins (Item 2) in Side Panels (Item 3) at Walkovers as shown. Item Description Part No. 15mm End Pin 600737 15mm Connecting Pin 600732 Side Panel 600334 Figure 16.Pins at Walkovers...
- Page 15 Valego® RDE-58 with Flat Roof Instruction Manual Installation Pins at Expulsion Units 1.Install 15mm End Pins (Item 1) in Expeller Side Panels (Item 2) as shown. Item Description Part No. 15mm End Pin 600737 Expeller Side Panel 600337 Figure 17.Pins at Expulsion Unit ME2489A...
-
Page 16: Rack Plate/Side Panel Installation
Rack Plate/Side Panel Installation 1.Attach Toothed Rack Plates (Item 1) to the Side Panels (Items 2 and 3) as shown. See orientation of Toothed Rack Plates (Inside) at Expulsion Unit. 2.Important! Install Side Panels with Racks at every Leg location "A". No Rack Plates at Middle of Sections "B". 3.At Expulsion Units install Toothed Rack Plates facing inside the Unit as shown. -
Page 17: Back Panel Assembly
Valego® RDE-58 with Flat Roof Instruction Manual Installation Back Panel Assembly Back Panel for Full Section Assembly 1.Attach Corner Plastic Connectors (Item 2) to Back Panels (Item 3) with 9mm End Pins (Item 1) as shown. Item Description Part No. Corner Plastic Connector 600730 Back Panel Assembly (Full Section) -
Page 18: Back Panel For Half Section Assembly
Installation Valego® RDE-58 with Flat Roof Instruction Manual Back Panel for Half Section Assembly 1.Attach Corner Plastic Connectors (Item 1) to Back Panels (Item 2) with 9mm End Pins (Item 3) as shown. Item Description Part No. Corner Plastic Connector 600730 Back Panel (Half Section) 600918... -
Page 19: Rear Panel Installation
Valego® RDE-58 with Flat Roof Instruction Manual Installation Rear Panel Installation Install the Rear Panel Assemblies as shown below. Item Description Part No. Back Panel (Full Section) 600907 Back Panel (Half Section) 600918 Figure 21.Rear Panel Installation ME2489A... -
Page 20: Entrance Boards
Entrance Boards 1.Attach Corner Plastic Connectors (Item 2) to the Entrance Boards (Item 3 and 4) with 9mm End Pins (Item 1) as shown. 2.Fasten Entrance Board to the Back Panels by sliding the Corner Connectors onto the 15 mm Connecting Pins installed in Figure 18. on page 16. 3.Fasten only Full Section Entrance Boards (Item 3) to the Side Panels with two M4.2 x 32 Screws (Item 4). -
Page 21: Draft Board (Optional)
Valego® RDE-58 with Flat Roof Instruction Manual Installation Draft Board (Optional) Not all installations require Draft Board. 1.Install Draft Boards (Item 1) as shown. Item Description Part No. Draft Board 600677 Figure 23.Draft Board Installation Wire Mesh Nest Floor 1.Install Wire Mesh Nest Floor (Item 1) (4 per section) as shown. Item Description Part No. -
Page 22: Nest Pad Installation
Installation Valego® RDE-58 with Flat Roof Instruction Manual Nest Pad Installation 1.Install Nest Pad (Item 1) as shown with the Nest Pad Slat between the Entrance Board (Item 2) and the Wire Mesh Nest Floor (Item 3). Item Description Part No. Side View Nest Pad with Slat 600373... -
Page 23: Expulsion Unit Installation
Valego® RDE-58 with Flat Roof Instruction Manual Installation Expulsion Unit Installation Connection Plate & Cross Frame Plate 1.Fasten Two Expulsion Connection Plates (Item 1) to the Expeller Side Panels (Item 2) as shown. 2.Fasten two Expulsion Cross Frame Plates (Item 3) to the Expeller Side Panels with M8 Hardware (Items 4 &... -
Page 24: Motor Mounts
Motor Mounts 1.Install four Flanged Bearing Sleeves (Item 4), two Expeller Pipes (Item 3), and 8 Set Collars (Item 5) between the Cross Frame Plates (Item 2) as shown. Note: Do Not tighten down the four Set Collars on each side of the Expeller Mounting Profiles at this time. Do Not tighten these Set Collars at this time. -
Page 25: Motor Installation
Valego® RDE-58 with Flat Roof Instruction Manual Installation Motor Installation 1.Fasten the Motors (Item 1) to the Motor Plates (Item 2) with M8 Hex Bolts (Item 4), M8 Washers (Item 6), and M8 Nuts (Item 5) as shown. 2.Slide Motor assembly assemblies onto Expeller Mounting Profiles (Item 3). See Motor Orientation. Item Description Part No. -
Page 26: Expulsion Shaft Couplings
Expulsion Shaft Couplings 1.Move the Motors/Expulsion Shafts into the forward position as shown. 2.Slide Single Sided Tooth Wheels (Item 3) onto four Expulsion Shaft Couplings (Item 2) oriented as shown. 3.Attach the Expulsion Shaft Couplings to the Motor Shaft Couplings using Chain and Shackle Duplex’s (Item 1). 4.Orient the Toothed Wheels with the Set Screws toward the front of Nest and up as shown. -
Page 27: Expulsion Shafts
Valego® RDE-58 with Flat Roof Instruction Manual Installation Expulsion Shafts Connection at Expulsion Unit There is a Single Sided Toothed Wheel at every Side Panel that has a Toothed Rack Plate. Installing Expulsion Tubes until you get to a Walkover, Expulsion Unit, or in some cases the end of the System. 1.Make Sure that the Expulsion Shafts are in the forward position. -
Page 28: Expulsion Shafts/Caps
Installation Valego® RDE-58 with Flat Roof Instruction Manual Expulsion Shafts/Caps 1.Continue Connecting Expulsion Shafts (Item 1) together (See Figure) until you reach a Walkover, Expul- sion Unit, or the end of the system. See Figure 40 (on page 33) for an example of a Walkover. 2.Cut Shafts off at Walkovers and the End of the System and Install Expulsion Shaft Caps (Item 4) as shown. -
Page 29: Tightening Down Toothed Wheels On Expulsion Shafts
Valego® RDE-58 with Flat Roof Instruction Manual Installation Tightening down Toothed Wheels on Expulsion Shafts 1.Make sure the Tubes toward the front of the nest as shown. 2.Important! Rotate the Toothed Wheels so the Set Screws are toward the front and top of the nest and tighten all of the Set Screws. -
Page 30: Expulsion Unit Closure
Installation Valego® RDE-58 with Flat Roof Instruction Manual Expulsion Unit Closure 1.Attach Expulsion Unit Closures (Item 1) to both sides of each Expulsion Unit by locking into place with 15mm End Pins (Item 2). Item Description Part No. Expulsion Unit Closure 600925 15mm End Pin 600737... -
Page 31: End Of The Row (Drive Unit End)
Valego® RDE-58 with Flat Roof Instruction Manual Installation End of the Row (Drive Unit End) 1.At the Drive Unit End Fasten a Nest Closure (Item 1) using 15mm Connecting Pins (Item 2). Item Description Part No. Nest Closure 600923 15mm Connecting Pin 600732 Figure 37.Expulsion Unit Closure (Drive Unit End) Flange Bent outward... -
Page 32: Extra Leg Assembly At Walkover
Installation Valego® RDE-58 with Flat Roof Instruction Manual Extra Leg Assembly at Walkover Important! An extra Leg Assembly is required for support at Walkover Sections. 1.Install Extra Leg Assemblies and Strut Strips in the Center of the Walkover Section as shown. Item Description Part No. -
Page 33: Half Section Walkover
Valego® RDE-58 with Flat Roof Instruction Manual Installation Half Section Walkover Walkover Frame Cover/Expulsion Shafts 1.Expulsion Shafts should be 3" past Side Panels. (See Figure 40.) 2.Install Walkover Frame Covers (Item 1) as shown. 3.Add Expulsion Shaft Caps (Item 2). 3"... -
Page 34: Full Section Walkover
Installation Valego® RDE-58 with Flat Roof Instruction Manual Full Section Walkover 1.Expulsion Shafts should be 3" past Side Panels. (See Figure 42.) Note: Walkover Frame Covers, Egg Belt Covers, and Closures are installed the same for Full or Half Section Walkovers See Figure 40 (on page 33) through Figure 41. -
Page 35: Expeller Panel Installation
Valego® RDE-58 with Flat Roof Instruction Manual Installation Expeller Panel Installation 1.Insert the Panel Lock Bushings (Item 1) of the Expeller Panel Assembly into the Slots of the Side Panel, and snap the Panel Clamps (Item 2) onto the Expulsion Shafts as shown. Position Expulsion Shaft all the way toward the front of the Nest as shown for easier assembly. -
Page 36: Multiple Roof Panel Installation
Installation Valego® RDE-58 with Flat Roof Instruction Manual Multiple Roof Panel Installation 1.Install Roof Hinges (Item 6) on Roof Panel Assemblies (Items 1, and 2) with M8 x 16 Taptites (Item 5) 2.Install Roof Panels (Items 1, and 2) using M6 x 35 Hex Bolts (Item 3) and M6 Hex Nuts (Item 4). Half Section Item Description... -
Page 37: Roof Supports
Valego® RDE-58 with Flat Roof Instruction Manual Installation Roof Supports 1.Fasten U-Profile Roof Supports (Item 1) together with M8 x 16 Taptites (Item 3) as shown. 2.Install a Roof Support Assembly at each and every Leg location using M6 x 50 Hex Bolts (Item 4) and M6 Lock Nuts (Item 5). -
Page 38: Roof Panels And Top Caps
Installation Valego® RDE-58 with Flat Roof Instruction Manual Roof Panels and Top Caps 1.Install Roof Covers (Item 1, and 2) as shown. 2.Fasten Top Caps (Item 3) as shown. Cut to length where needed at Expulsion Units. Item Description Part No. Roof Cover 600810 Roof Cover (Expulsion Unit) -
Page 39: Valego® Rde 58 Nest Control (601150)
Valego® RDE-58 with Flat Roof Instruction Manual Installation ® Valego RDE 58 Nest Control (601150) 1.See the installation manual included with the 601150 Control for Installation and operation instructions. ME2489A... -
Page 40: Parts Numbers
Parts Numbers Standard Nest Section Parts... -
Page 41: Part Numbers
Part Numbers Item Description Part Number Item Description Part Number Item Description Part Number M8 DIN985 Lock Nut 201003 Expeller Panel 600424 Half Section Roof Panel Assembly 600950 M6 DIN985 Lock Nut 201037 Entrance Board (2400mm) 600559 M4.2 x 32 Screw 201143 Expulsion Shaft Cap 201038... -
Page 42: Expulsion Unit
Parts Numbers Valego® RDE-58 with Flat Roof Instruction Manual Expulsion Unit Included Motor Coupling ME2489A... -
Page 43: Part Numbers
Valego® RDE-58 with Flat Roof Instruction Manual Parts Numbers Part Numbers Item Description Part Number Item Description Part Number M8 DIN985 Lock Nut 201003 Expulsion Connection Plate 600637 M8 x 30 DIN933 Bolt 201007 Mounting Profile Expeller Pipe 600638 M8 DIN125A Washer 201013 Roof Cover (Expulsion Unit) 600843... -
Page 44: Walkover (Full And Half Section)
Parts Numbers Valego® RDE-58 with Flat Roof Instruction Manual Walkover (Full and Half Section) Full Section Half Section Item Description Part Number M8 x 16 Taptite 201047 201047 M12 x 90 SS DIN933 Bolt 201054 201054 M12 SS DIN934 Nut 201055 201055 RDE-58 Cross Carriage... - Page 45 Valego® RDE-58 with Flat Roof Instruction Manual Parts Numbers This page left blank intentionally..ME2489A...
- Page 46 Revisions to this Manual Page No. Description of Change New Manual 35466 For additional parts and information, contact your nearest Chore-Time distributor or representative. Find your nearest distributor at: www.choretime.com/contacts CTB, Inc. PO Box 2000 Milford, Indiana 46542-2000 USA Phone (574) 658-4101 Fax (877) 730-8825 Email: choretime@choretime.com...
Need help?
Do you have a question about the Valego RDE-58 and is the answer not in the manual?
Questions and answers