
Related Manuals for Haier HDV70E1


Summary of Contents for Haier HDV70E1
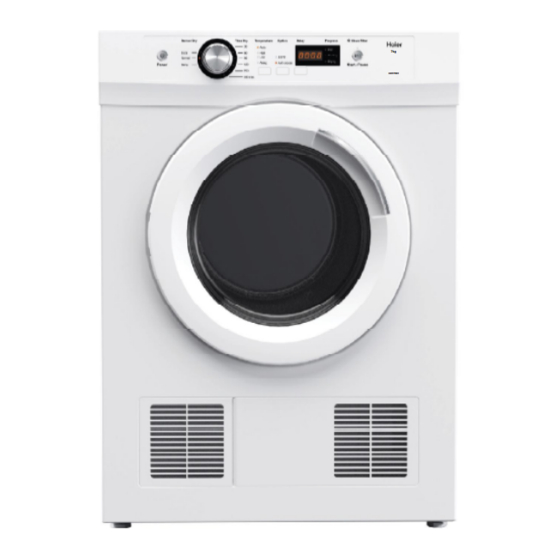
- Page 1 INSTALLATION INSTRUCTIONS USER GUIDE HDV70E1 Vented clothes dryer Model: HDV70E1...
-
Page 2: Table Of Contents
CONTENTS SAFETY AND WARNINGS INSTALLATION INSTRUCTIONS CONTROL PANEL DRYING CYCLES USING YOUR DRYER CLEANING YOUR DRYER BEFORE YOU CALL FOR SERVICE TROUBLESHOOTING IMPORTANT! SAVE THESE INSTRUCTIONS Please read these instructions carefully before using your tumble dryer. The instructions contain important information which will help you get the best out of the device and ensure safe and proper installation, use and maintenance. -
Page 3: Safety And Warnings
SAFETY AND WARNINGS Meaning of symbols on the dryer Warning: Risk of fire/Flammable materials Read the instructions ! WARNING! Fire Hazard ■ Only dry fabrics that have been washed with water. ■ Do not use heat to dry articles containing foam rubber or similarly textured rubber–like materials, dry on ‘Airing’. - Page 4 ■ At regular intervals have the interior of the dryer cleaned of any accumulated lint. This must be done by a Haier trained and supported service technician. This must be done when the dryer installation is changed from free standing or inverted, or vice versa.
- Page 5 These materials can, when heated, produce fire by spontaneous combustion. ■ The maximum mass of dry textiles depends on your model, The HDV70E1 model is rated at 7kg. Do not overload your dryer.
-
Page 6: Installation Instructions
■ Please help protect the environment and dispose of the packaging from around the dryer in an environmentally friendly manner. Accessories Please check your dryer model and the following accessories inside the drum: HDV70E1 ■ 1 x Installation instructions and user guide ■ 1 x Wall mounting kit ■... - Page 7 INSTALLATION INSTRUCTIONS Venting Correct installation is very important for all dryers to ensure maximum efficiency and safety. IMPORTANT! Never run the dryer unless the airflow system is free from obstruction. There must be adequate ventilation to avoid the back flow of gases into the room from appliances burning fuels, including open fires, when operating the dryer.
- Page 8 INSTALLATION INSTRUCTIONS Free standing The dryer stands on the floor and can easily be moved into position. 1 Move the dryer into the desired position. Do not lift the dryer by the top panel. 2 Have a minimum clearance on all sides of at least 20mm.
- Page 9 INSTALLATION INSTRUCTIONS Mounting dryer on wall 1 Determine the position of the dryer on the wall and mark the bracket position. A minimum of 50mm is needed between the top of the dryer and the ceiling for ease of installation. If mounting above a washing machine, allow sufficient room to open the lid of the washer.
- Page 10 INSTALLATION INSTRUCTIONS Stacking installation Your dryer has been designed to be able to be stacked on the top of a Haier front load washing machine, ensure the washing machine is the same width as your dryer. Stacking bracket includes: Tools and parts required: ■...
- Page 11 INSTALLATION INSTRUCTIONS Before a rear venting option is installed the dryer must be changed from the front venting factory setup. Remove the outlet grille from the front left-hand side and replace with the outlet cover from the rear left-hand side. These covers should be gently pried at the sides to prevent damage.
- Page 12 ■ Do not touch or operate the dryer with wet hands or with bare feet. ■ A damaged power cord must be replaced by a Haier trained and supported service technician. The appliance must not be operated until it is repaired, as there is risk of electric shock.
-
Page 13: Control Panel
CONTROL PANEL Iron HDV70E1 Press ‘Power’ button to activate your dryer. Press it again to switch the dryer off. ‘Key Lock’ can be used to lock the buttons on your dryer.This will avoid accidental button presses. There are two drying settings with your dryer, Sensor Dry and Time Dry. The default cycle is “Normal Dry –... -
Page 14: Drying Cycles
‘Extra Dry ’, ‘High’ dry temperature is the recommended cycle of HDV70E1 model for everyday cotton items. Time dry It is suitable for some fabrics that you wish to dry for a specific time period. You can select 30, 60, 90, 120, 150 and 180 minute drying times. -
Page 15: Using Your Dryer
USING YOUR DRYER IMPORTANT! ■ Check the lint filter is clean before every load. Ensure it is replaced correctly before using your dryer. ■ The lint filter indicator light will flash at the beginning of every cycle when the machine is switched on, as a reminder to check the lint filter. - Page 16 USING YOUR DRYER Switch on the power supply Press the ‘Power’ button to power on your dryer. Selecting program Select your desired drying cycle by turning the control dial. As you rotate the dial, the drying cycle selected will illuminate, along with the default settings for that cycle on the right side of the control panel.
-
Page 17: Cleaning Your Dryer
CLEANING YOUR DRYER IMPORTANT! ■ If you wish to stop the dryer before the cycle has finished you MUST remove the clothes IMMEDIATELY and spread them out to cool. DO NOT leave the clothes in the dryer or bunched up in a clothes basket. Take extreme care as the drum and the load items may be extremely hot. -
Page 18: Before You Call For Service
Record the fault code and call your Haier trained and supported service technician to arrange service. If a fault code is being displayed, you can still turn your dryer off by pressing ‘Power’... -
Page 19: Troubleshooting
TROUBLESHOOTING The following is a list of problems you may encounter when using this appliance and some suggestions that may help to correct the problem. If you still have problems, please contact your Haier Repairer. PROBLEM POSSIBLE CAUSES WHAT TO DO Pressing ‘Power’... - Page 20 TROUBLESHOOTING PROBLEM POSSIBLE CAUSES WHAT TO DO Fault code warning Dryer has a fault. Refer to page 17. Noises. Dryer is overloaded. Remove some items from the dryer. Dryer has a fault. Continuous beeping or a musical series of beeps with a message displayed on digital display.
- Page 21 TROUBLESHOOTING PROBLEM POSSIBLE CAUSES WHAT TO DO Linting. Lint filter not cleaned or replaced. Ensure the lint filter is cleaned after every cycle and replaced correctly. Refer to pages 16 and 17. Loads not sorted correctly. Dry lint givers separately from lint receivers. Dry similar colours together eg light coloured items with light coloured items, dark items with dark items.
- Page 22 0180500*** 2017.09.A...
- Page 23 ค� ำ แนะน� ำ ในกำรติ ด ตั ้ ง คู ่ ม ื อ กำรใช้ ง ำน เครื ่ อ งอบผ้ ำ ระบบ Vented รุ ่ น : HDV70E1...
- Page 24 สำรบั ญ ข้ อ มู ล ด้ า นความปลอดภั ย และค� า เตื อ น ค� า แนะน� า ในการติ ด ตั ้ ง แผงควบคุ ม การท� า งาน โปรแกรมการอบผ้ า การใช้ ง านเครื ่ อ งอบผ้ า ของท่ า น การท�...
- Page 25 ข้ อ มู ล ด้ ำ นควำมปลอดภั ย และค� ำ เตื อ น ควำมหมำยของสั ญ ลั ก ษณ์ บ นเครื ่ อ งอบผ้ ำ ค� ำ เตื อ น: ควำมเสี ่ ย งต่ อ กำรเกิ ด เพลิ ง ไหม้ / วั ต ถุ ท ี ่ ส ำมำรถติ ด ไฟได้ โปรดอ่...
- Page 26 ควรท� า ความสะอาดฝุ ่ น ที ่ ส ะสมอยู ่ บ ริ เ วณด้ า นในของเครื ่ อ งอบผ้ า ตามระยะเวลาที ่ ก � า หนด ซึ ่ ง จะต้ อ งด� า เนิ น การ โดยช่ า งเทคนิ ค ที ่ ผ ่ า นการอบรมและสนั บ สนุ น จาก Haier และจะต้ อ งท� า ความสะอาดในส่ ว นนี ้ เ มื ่ อ มี ก ารเปลี ่ ย น...
- Page 27 ข้ อ มู ล ด้ ำ นควำมปลอดภั ย และค� ำ เตื อ น กำรเผำไหม้ ท ี ่ เ กิ ด เอง ข้ อ ส� ำ คั ญ ! เพื ่ อ ลดความเสี ่ ย งจากการเกิ ด เพลิ ง ไหม้ ใ นเครื ่ อ งอบผ้ า ควรปฏิ บ ั ต ิ ต ามค� า แนะน� า ดั ง ต่ อ ไปนี ้ : เสื...
- Page 28 โปรดตรวจสอบชื ่ อ รุ ่ น ของเครื ่ อ งอบผ้ า ของท่ า น และตรวจสอบว่ า ได้ ร ั บ อุ ป กรณ์ ด ั ง ต่ อ ไปนี ้ พ ร้ อ มกั บ เครื ่ อ งอบผ้ า อย่ า งครบถ้ ว นหรื อ ไม่ : รุ ่ น HDV70E1 ค� า แนะน� า การติ ด ตั ้ ง และคู ่ ม ื อ การใช้ ง าน 1 เล่ ม...
- Page 29 ค� ำ แนะน� ำ ในกำรติ ด ตั ้ ง กำรระบำยอำกำศ การติ ด ตั ้ ง เครื ่ อ งอย่ า งถู ก วิ ธ ี เ ป็ น สิ ่ ง ที ่ ส � า คั ญ อย่ า งยิ ่ ง ส� า หรั บ เครื ่ อ งอบผ้ า ทุ ก เครื ่ อ ง เพื ่ อ ให้ ม ั ่ น ใจได้ ถ ึ ง ประสิ ท ธิ ภ าพและ ความปลอดภั...
- Page 30 ค� ำ แนะน� ำ ในกำรติ ด ตั ้ ง กำรติ ด ตั ้ ง แบบตั ้ ง เดี ่ ย ว เครื ่ อ งอบผ้ า จะต้ อ งติ ด ตั ้ ง ไว้ บ นพื ้ น และสามารถเคลื ่ อ นย้ า ยได้ อ ย่ า งง่ า ยดาย 1 เคลื...
- Page 31 ค� ำ แนะน� ำ ในกำรติ ด ตั ้ ง กำรติ ด ตั ้ ง เครื ่ อ งอบผ้ ำ บนผนั ง 1 ก� า หนดต� า แหน่ ง ที ่ จ ะติ ด ตั ้ ง เครื ่ อ งอบผ้ า บนผนั ง และขี ด สั ญ ลั ก ษณ์ ท � า เครื ่ อ งหมายตรงต� า แหน่ ง ของแผงยึ ด เพื ่ อ ให้...
- Page 32 เครื ่ อ งซั ก ผ้ า ฝาหน้ า ของ Haier ที ่ ส ามารถรองรั บ การติ ด ตั ้ ง เครื ่ อ งอบผ้ า แบบซ้ อ นชั ้ น มี ร ุ ่ น ดั ง ต่ อ ไปนี ้...
- Page 33 ค� ำ แนะน� ำ ในกำรติ ด ตั ้ ง ก่ อ นที ่ จ ะติ ด ตั ้ ง เครื ่ อ งอบผ้ า โดยใช้ ร ะบบระบายลมร้ อ นออกทางด้ า นหลั ง จะต้ อ งเปลี ่ ย นการตั ้ ง ค่ า จากการระบาย ลมร้...
- Page 34 ใช้ ง านเครื ่ อ งจนกว่ า จะได้ ร ั บ การซ่ อ มแซมเป็ น ที ่ เ รี ย บร้ อ ย เพราะอาจเกิ ด ไฟฟ้ า ช็ อ ตได้ ห้ า มใช้ ง านเครื ่ อ งอบผ้ า หากเกิ ด ความเสี ย หายระหว่ า งการขนส่ ง ในกรณี น ี ้ โปรดติ ด ต่ อ ศู น ย์ บ ริ ก ารของ Haier ข้...
- Page 35 Iron Dry HDV70E1 A กดปุ ่ ม ‘Power’ (เปิ ด /ปิ ด เครื ่ อ ง) เพื ่ อ เปิ ด ใช้ ง านเครื ่ อ งอบผ้ า ของท่ า น กดปุ ่ ม นี ้ อ ี ก ครั ้ ง เพื ่ อ ปิ ด สวิ ต ช์ เ ครื ่ อ ง...
- Page 36 สั ง เคราะห์ , ผ้ า ขนสั ต ว์ , ผ้ า ไหม เป็ น ต้ น * อุ ณ หภู ม ิ ร ะดั บ ‘Extra’ (สู ง เป็ น พิ เ ศษ), ‘High’ (สู ง ) เป็ น อุ ณ หภู ม ิ ท ี ่ แ นะน� า ของเครื ่ อ งอบผ้ า รุ ่ น HDV70E1 ส�...
- Page 37 กำรใช้ ง ำนเครื ่ อ งอบผ้ ำ ของท่ ำ น ข้ อ ส� ำ คั ญ ! ตรวจสอบให้ แ น่ ใ จว่ า ได้ ท � า ความสะอาดที ่ ก รองฝุ ่ น แล้ ว หรื อ ไม่ ก่ อ นที ่ จ ะเริ ่ ม การอบผ้ า ทุ ก รอบ และต้ อ งแน่ ใ จว่ า ท่...
- Page 38 กำรใช้ ง ำนเครื ่ อ งอบผ้ ำ ของท่ ำ น กำรเปิ ด ใช้ ง ำนเครื ่ อ งอบผ้ ำ กดปุ ่ ม ‘Power’ (เปิ ด /ปิ ด เครื ่ อ ง) เพื ่ อ เปิ ด สวิ ต ช์ เ ครื ่ อ งอบผ้ า ของท่ า น กำรเลื...
- Page 39 กำรท� ำ ควำมสะอำดเครื ่ อ งอบผ้ ำ ของท่ ำ น ข้ อ ส� ำ คั ญ ! หำกท่ ำ นต้ อ งกำรหยุ ด กำรท� ำ งำนของเครื ่ อ งอบผ้ ำ ก่ อ นที ่ จ ะสิ ้ น สุ ด โปรแกรม ท่ ำ นจะต้ อ งหยิ บ ผ้ ำ ออกมำจำก เครื...
- Page 40 ความผิ ด พลาดบางอย่ า งเกิ ด ขึ ้ น รหั ส แสดงความผิ ด พลาดจะแสดงขึ ้ น ด้ ว ยตั ว อั ก ษร Err และตามด้ ว ยหมายเลขบน หน้ า จอแสดงผล ให้ ท ่ า นจดบั น ทึ ก รหั ส แสดงความผิ ด พลาด และติ ด ต่ อ ไปที ่ ศ ู น ย์ บ ริ ก ารของ Haier เพื ่ อ ขอรั บ บริ ก าร...
- Page 41 ข้ อ มู ล ต่ อ ไปนี ้ เ ป็ น รายการของปั ญ หาที ่ ท ่ า นอาจพบเมื ่ อ ใช้ ง านเครื ่ อ งอบผ้ า และมี ข ้ อ แนะน� า บางอย่ า งที ่ อ าจช่ ว ยแก้ ไ ข ปั ญ หา หากท่ า นยั ง ไม่ ส ามารถแก้ ไ ขปั ญ หาได้ โปรดติ ด ต่ อ ศู น ย์ บ ริ ก ารของ Haier ปั...
- Page 42 กำรแก้ ไ ขปั ญ หำ ปั ญ หา สาเหตุ ท ี ่ เ ป็ น ไปได้ วิ ธ ี แ ก้ ป ั ญ หา การเตื อ นด้ ว ยรหั ส เครื ่ อ งอบผ้ า ท� า งานบกพร่ อ ง โปรดดู...
- Page 43 กำรแก้ ไ ขปั ญ หำ ปั ญ หา สาเหตุ ท ี ่ เ ป็ น ไปได้ วิ ธ ี แ ก้ ป ั ญ หา มี ฝ ุ ่ น จากขุ ย ผ้ า ยั ง ไม่ ไ ด้ ท � า ความสะอาดหรื อ ใส่ ท ี ่ ต้...
Need help?
Do you have a question about the HDV70E1 and is the answer not in the manual?
Questions and answers