Advertisement
Quick Links
Advertisement

Related Manuals for Haier HDV70AWW1


Summary of Contents for Haier HDV70AWW1
- Page 1 VENTED CLOTHES DRYER HDV60AWW1 HDV70AWW1...
- Page 4 Safety information...........................4 Intended use............................8 Product description.........................9 Control panel...........................10 Dry cycles............................13 Dry Preparation..........................14 Getting started quickly.........................16 Care and clean..........................18 Before you call for sevice......................19 Fault codes............................20 Troubleshooting..........................21 Installation............................24 Customer care..........................30...
-
Page 5: Fire Hazard
Before First Use - Do not operate this machine if it has been damaged during transport. Contact your dealer or Haier service technician. - Ensure all transport bolts are removed before running the appliance. Failure to do so might end in damage to the apppliance. - Page 6 Capacity - Do not overload the appliance beyond its rated capacity: MAXIMUM DRY CAPACITY HDV60AWW1: 6 Kg MAXIMUM DRY CAPACITY HDV70AWW1: 7 Kg - Capacity refers to the maximum dry weight of items the appliance can dry at any one time Dryer Information - Ensure all lint lters are cleaned before every load.
- Page 7 - If the lint lter is damaged, contact your Haier service technician to arrange getting a new lter. Do not operate your appliance with a damaged lint lter or without the lter in place, as this will cause damage to your appliance.
-
Page 8: Maintenance, Cleaning And Disposal
- Do not use water spray or steam to clean the appliance. - A damaged electrical cable must be replaced by a Haier service technician or similarly quali ed person. Do not use the appliance until it has been repaired to avoid a risk of electric shock. - Page 9 - This appliance is intended for drying garments that can be tumbled. - Follow the manufacturer instructions found in the garment label. - Do not make any changes or modi cations to this appliance, they might cause personal injury and damages to property. - Do not install the appliance behind a lockable door, sliding door, or behind a door where the hinge is on the opposite side to that of the dryer in such a way that the full opening of the door is inhibited.
- Page 10 HDV60AWW1 HDV70AWW1 ■ 1 x Installation instructions ■ 1 x Installation instructions and user guide and user guide ■ 1 x Wall mounting kit ■ 1 x Wall mounting kit ■ 2 x Stacking bracket ■ 2 x Stacking bracket ■...
-
Page 11: Anti-Crease Button
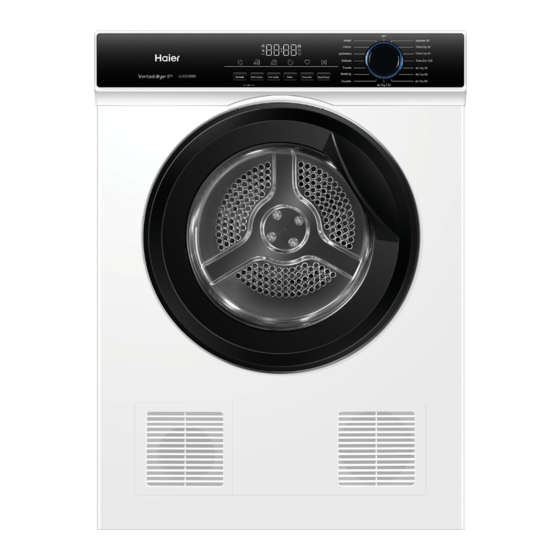
11 12 13 14 15 16 Key lock button Dry level button Anti-increase indicator Anti-crease button Power Iron ready indicator Iron ready button Cycle selector knob 15 Delay indicator Delay button Display 16 Favourite indicator Favourite button Key lock indicator Start/Pause button Clean lter indicator 4.1 Dry level... - Page 12 4.3 Iron ready Use “Iron ready” to set a noti cation when the garments are at a moisture level most suitable for ironing. When ready, the Iron ready Icon LED will start ashing and the machine 5 beeps every 5 minutes. Pause the cycle and remove the desired garments.
- Page 13 Cycle Selector Turn the knob to select a program.When a cycle is selected, it will lit up and default setting will be displayed. 4.10 Display The display(Fig.4-10)will shows important information 4 10 about cycle: Options and modi ers,remaining time,error codes and service information,warnings and noti cations.
- Page 14 Timed cycle that uses cold air to freshen — — Air Dry garments *DEFAULT DRY LEVEL : Extra-Dry-H-3 ; Dry-H-2 ; Damp-H-1 Registration Cycle HDV60AWW1 Cotton,H-2 is the recommended energy saving cycle for everyday drying. HDV70AWW1 Cotton,H-3 is the recommended energy saving cycle for everyday drying.
- Page 15 Sort items into loads of similar items,and loads that will likely take similar times to dry.This prevents the possibiliity of some items be coming over-dried whilst others are still damp. Separate coloured items from white/light items where possible,especially when new.Colour run may be an issue,especially if you intend to delay the start of the drying cycle.
- Page 16 Delicate or easily damaged items (eg nylon stocking, ne fabrics, delicate embroidered fabrics) should be dried separately, using the DELICATE cycle.
- Page 17 Connect the appliance to a power supply(220V to 240V~/50Hz) Make sure: the lint lter is clean and properly installed.(Fig.7-2). Sort clothes according to fabric (cotton, synthetics, wool etc.). Empty pockets of sharp or ammable objects such as keys and matches. Follow the instructions in the laundry label and dry loads that can be dried.
- Page 18 If you wish to change a cycle or select a di erent option once a drying cycle has started, you should power o and restart the dryer.
- Page 19 Clean the lint lter after each dry cycle. 1. Remove the lint lter from the drum(Fig.8-1). 2. Open up the lint lter(Fig.8-2). 3. Clean the lint lter from any lint residuals(Fig.8-3). Wipe the outside of the tumble dryer and the control panel with a damp cloth.Do not use any organic solvent or corrosive agent to avoid damage to the device.
- Page 20 Press the ‘Start / Pause’ to resume the cycle. paused Once you have addressed the issue the user prompt was alerting you to, try using your dryer as per usual. If the issue persists, call your Haier trained and supported service technician.
- Page 21 When a continuous series of beeps sound, all the lights turn o on the control panel and a string of codes appears on the display ’a fault has occurred’ . Please call your trained and supported Haier service technician.
- Page 22 PROBLEM POSSIBLE CAUSES WHAT TO DO Turning the knob Fault with household power Try plugging in and turning on another does not turn supply. electrical appliance. on the dryer. Dryer could be displaying a user Refer to Section 10. Pressing warning or fault code.
- Page 23 PROBLEM POSSIBLE CAUSES WHAT TO DO Dryer is beeping, Dryer has a fault. Refer to Section 10 . displaying unfamiliar light patterns and/or a message on the digital display. Noises. Dryer is overloaded. Remove some items from the dryer. Dryer has a fault. Continuous beeping or a musical series of beeps with a message displayed on digital display.
- Page 24 PROBLEM POSSIBLE CAUSES WHAT TO DO Linting. Lint filter not cleaned or replaced. Ensure the lint filter is cleaned after every cycle and replaced correctly. Loads not sorted correctly. Dry lint givers separately from lint receivers. Dry similar colours together eg light coloured items with light coloured items, dark items with dark items.
- Page 25 Freestanding, Stacking and Wall mounted Your dryer can be installed freestanding, stacked on top of a Haier front load washing machine, or inverted and mounted on the wall. Your dryer can also be con gured for front venting or rear venting.
- Page 26 Product dimensions ○ PRODUCT DIMENSIONS Overall height* 830mm ○ Overall width 600mm ○ ○ Overall depth 565mm ○ Depth of open door 970mm ○ ○ ○ *Including dial and door (when closed) PLAN FRONT Cavity and clearance dimensions *Front panel of the product ○...
-
Page 27: Clearance Dimensions
*Ensure you use the supplied stacking kit for this product and Haier front load washing machine. *Ensure the washing machine is the same width as your dryer. - Page 28 Remove 4 screws at two sides of bottom panel, then install the stacking bracket. 4 Screws Stacking bracket Install your dryer with stacking bracket on the top of the front load washing machine. Drill two holes on both sides of top panel of washing machine with 2.9mm diameter drill. Detailed drill position as shown on the stacking bracket.
- Page 29 Mounting dryer on wall 1 Determine the position of the dryer on the wall and mark the bracket position. A minimum of 50mm is needed between the top of the dryer and the ceiling for ease of installation. If mounting above a washing machine, allow sufficient room to open the lid of the washer.
- Page 30 Venting- Never run the dryer unless the air ow system is free from obstruction. - Venting must comply with local by-laws and regulations Front Venting Your dryer comes already set up for front venting. If front venting is used there must be adequate ventilation to avoid the buildup of moisture in the room, which can a ect the performance of the dryer.
- Page 31 If you cannot nd a solution there please contact. - Your local dealer, or - The Service and Support area at www.haier.com where you can nd telephone numbers, FAQs and where you can activate a service claim. Before contacting our service team, ensure that you have the following information available.
- Page 32 0180500689C...
Need help?
Do you have a question about the HDV70AWW1 and is the answer not in the manual?
Questions and answers