Table of Contents
Advertisement
Quick Links
SW5500, FLOORTEC R 985
Service Manual
Advance Model Numbers:
9084416010 SW5500 B
9084417010 SW5500 LP
Nilfisk Model Numbers:
9084410010 SW5500 B
9084413010 FLOORTEC R 985 B
9084412010 SW5500 D
9084411010 SW5500 LPG
9084414010 FLOORTEC R 985 LPG
05/2016 revised 05/2018 (D) Form No. 1467281000
English
Advertisement
Table of Contents
Troubleshooting

Related Manuals for Nilfisk-Advance SW5500 B


Summary of Contents for Nilfisk-Advance SW5500 B
- Page 1 SW5500, FLOORTEC R 985 Service Manual Nilfisk Model Numbers: Advance Model Numbers: 9084410010 SW5500 B 9084416010 SW5500 B 9084413010 FLOORTEC R 985 B 9084417010 SW5500 LP 9084412010 SW5500 D 9084411010 SW5500 LPG 9084414010 FLOORTEC R 985 LPG English 05/2016 revised 05/2018 (D) Form No. 1467281000...
-
Page 2: Table Of Contents
Service Manual – Machine Model Name™ Contents Contents 03 - General Information . . . . . . . . . . . . . . . . . . . . . . . . . . . . . . . . . . . 7 Machine General Description Service Manual Purpose and Field of Application Other Reference Manuals... - Page 3 Service Manual – Machine Model Name™ Contents Maintenance and Adjustments Check and Adjusting Operation Drum Brake Cable Troubleshooting Removal and Installation Drum Brake Braking Shoes Specifications 20 - Wheel System, Traction . . . . . . . . . . . . . . . . . . . . . . . . . . . . . . . . 91 Functional Description Wiring Diagram Component Locations...
- Page 4 Service Manual – Machine Model Name™ Contents 28 - Engine System, Diesel . . . . . . . . . . . . . . . . . . . . . . . . . . . . . . . . . 149 Functional Description Wiring Diagram Component Locations...
- Page 5 Service Manual – Machine Model Name™ Contents 42 - Sweep System, Main Broom . . . . . . . . . . . . . . . . . . . . . . . . . . . . . 202 Functional Description Wiring diagram Component Locations...
- Page 6 Service Manual – Machine Model Name™ Contents 52 - Hopper System . . . . . . . . . . . . . . . . . . . . . . . . . . . . . . . . . . . . . 267 Functional Description Wiring Diagram Hopper System Hydraulic Diagrams...
-
Page 7: 03 - General Information
Please read this manual carefully before performing any maintenance and repair procedure on the machine Other Reference Manuals Brand Model Product Code Instructions for Use Spare Parts List SW5500 B 9084416010 1467287000 ADVANCE 1464285000 SW5500 LP 9084417010 1467284000... - Page 8 1466900000 Side broom guard kit 1466901000 Battery charger kit 1466904000 SW5500 B, FLOORTEC R 985 B 1466903000 SW5500 D, SW5500 LPG, FLOORTEC R 985 Hybrid kit These manuals and spare parts list are available at: • Local Advance or Nilfisk Retailer •...
-
Page 9: Conventions
Service Manual – SW5500, FLOORTEC R 985 03 - General Information Conventions Forward, backward, front, rear, left or right are intended with reference to the operator’s position when driving. Serial Number Label Reference to Figure 1 The machine serial number and model name are marked on the plate (see the example to the side). -
Page 10: Safety
Service Manual – SW5500, FLOORTEC R 985 03 - General Information Safety The following symbols indicate potentially dangerous situations Always read this information carefully and take all necessary precautions to safeguard people and property Visible Symbols On The Machine WARNING! WARNING! Carefully read all the instructions Hot parts, danger of burns. -
Page 11: General Instructions
Service Manual – SW5500, FLOORTEC R 985 03 - General Information General Instructions Specific warnings and cautions to inform about potential damages to people and machine are shown below. DANGER: (for SW5500, FLOORTEC R 985 Battery/Diesel/LPG) − Before performing any maintenance, repair, cleaning or replacement procedure disconnect the battery connector, remove the ignition key and engage the parking brake. - Page 12 Service Manual – SW5500, FLOORTEC R 985 03 - General Information − Refuel outdoors or in a well-ventilated area, with the engine off. − Leave at least a space of 4 cm in the filler to allow the fuel to expand. −...
- Page 13 Service Manual – SW5500, FLOORTEC R 985 03 - General Information use manual. Using other brooms could reduce safety. − This is a class A product. In a domestic environment this product may cause radio interference in which case the user may be required to take adequate measures. −...
- Page 14 Service Manual – SW5500, FLOORTEC R 985 03 - General Information batteries, etc.), the speed must not exceed 4 km/h. − In case of machine malfunctions, ensure that these are not due to lack of maintenance. If necessary, request assistance from the authorized personnel or from an authorized Service Center.
-
Page 15: Machine Lifting
Service Manual – SW5500, FLOORTEC R 985 03 - General Information Guide lines to bacteria control and other dangers coming from the presence of microbes in the DustGuard™ system. To prevent the operators and other people from developing infections caused by microbes and Legionella that may flourish in the dust guard system, take the following precautions: •... -
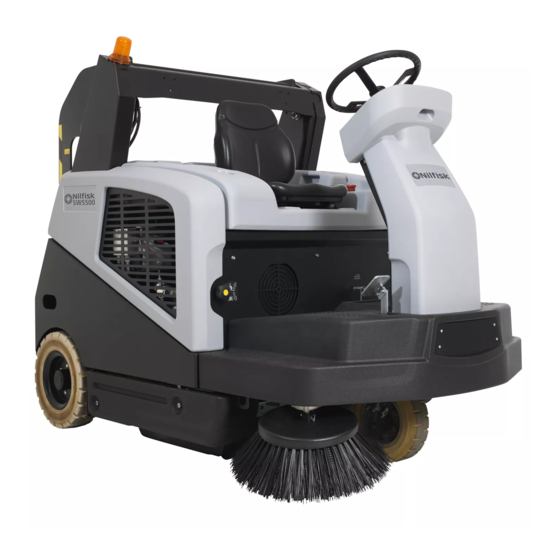
Page 16: Machine Nomenclature (Know Your Machine)
Service Manual – SW5500, FLOORTEC R 985 03 - General Information Machine Nomenclature (know your machine) Driver’s seat with Can holder Flashing light microswitch Seat position adjusting lever Battery Steering wheel compartment hood Main broom height Removable left side adjusting knob panel Front column Accelerator pedal... - Page 17 Service Manual – SW5500, FLOORTEC R 985 03 - General Information Machine Nomenclature (Continues) (Hybrid version) Battery charger LPG cylinder LPG tank fastening band Main control panel Serial number plate (Hybrid version) Engine off button Vacuum system rear hood Accelerator pedal Panel filter Right panel Dust filter container...
- Page 18 Service Manual – SW5500, FLOORTEC R 985 03 - General Information Machine Nomenclature (Battery version) (Continues) Open hood safety Hydraulic unit Battery charger Battery connector complete with tank Battery compartment hood Batteries (open) Battery connection diagram BATTERY BATTERY PLUG PLUG Figure 4:...
- Page 19 Service Manual – SW5500, FLOORTEC R 985 03 - General Information Machine Nomenclature (Diesel version) (Continues) Open hood safety Hydraulic unit Fuel tank cap Fuel tank complete with tank Battery compartment hood Diesel engine (open) Batteries Cooling fan Alternator Figure 5:...
- Page 20 Service Manual – SW5500, FLOORTEC R 985 03 - General Information Machine Nomenclature (LPG version) (Continues) Hydraulic unit Alternator Batteries complete with tank LPG engine Cooling fan Figure 6:...
-
Page 21: Control Panel
Service Manual – SW5500, FLOORTEC R 985 03 - General Information Control panel Multifunction Hopper lifting Ignition key Horn button display button Filter shaker button Hopper reset button Hopper dumping Vacuum button button Side broom rotation Hopper lowering speed adjustment button buttons Increase maximum... -
Page 22: Multifunction Display - Items Displayed
Service Manual – SW5500, FLOORTEC R 985 03 - General Information Multifunction display - Items displayed Working hours Battery type Maximum running speed setting Side brooms Work screen activation Main broom Vacuum activation activation Reverse gear activation Side brooms speed setting Auto-shut off timer Hopper opening... -
Page 23: Service And Diagnostic Equipment
Service Manual – SW5500, FLOORTEC R 985 03 - General Information Service and Diagnostic Equipment Besides a complete set of standard meters, the following instruments are necessary to perform fast checks and repairs on Nilfisk machines: Laptop computer charged with the current version of EzParts, Adobe Reader and (if possible) Internet connection •... -
Page 24: Technical Data
Service Manual – SW5500, FLOORTEC R 985 03 - General Information Technical Data Model SW5500 B SW5500 D SW5500 LPG FLOORTEC R 985 B FLOORTEC R 985 LPG Cleaning width With one side broom 46.3 in (1,175 mm) With two side brooms... -
Page 25: Hydraulic Oil Technical Data
Service Manual – SW5500, FLOORTEC R 985 03 - General Information Technical Data (Continues) Model SW5500 B SW5500 D SW5500 LPG FLOORTEC R 985 B FLOORTEC R 985 LPG Weight Curb weight (without 1,402 lb (636 Kg) 1,669 lb (757 Kg) -
Page 26: Machine Material Composition And Recyclability
Service Manual – SW5500, FLOORTEC R 985 03 - General Information Technical Data (Continues) Machine Material Composition and Recyclability Type Recyclable SW5500 B SW5500 D SW4000 LPG percentage FLOORTEC R 985 LPG FLOORTEC R 985 B weight percentage Weight percentage... -
Page 27: Dimensions
Service Manual – SW5500, FLOORTEC R 985 03 - General Information Dimensions 1.874 mm (73.8 in) 1.300 mm (51.2 in) Figure 9:... -
Page 28: Maintenance
Service Manual – SW5500, FLOORTEC R 985 03 - General Information Maintenance The lifespan of the machine and its maximum operating safety are ensured by correct and regular maintenance WARNING: Read carefully the instructions in the Safety chapter before performing any maintenance procedure. -
Page 29: Scheduled Maintenance Table (Diesel/Lpg Version)
Service Manual – SW5500, FLOORTEC R 985 03 - General Information Scheduled Maintenance Table (Diesel/LPG version) Procedure Upon Every Every Every Every Every delivery year hours hours hours hours Engine oil level check Battery fluid level check Side and main broom height check Engine air filter check Service brake cable adjustment Hopper dust filter check and cleaning (“A”... -
Page 30: 05 - Control System
Service Manual – SW5500, FLOORTEC R 985 05 - Control System Functional Description The machine is started by the ignition key (KEY), The digital forwards/backwards signal is managed located on the main control panel When the key is by the Main Machine Controller (EB1) which turned to I, the Display Controller (EB3) is powered which in turn powers the control section of the Main receives the control from the reverse button... - Page 31 Service Manual – SW5500, FLOORTEC R 985 05 - Control System Display Controller (EB3) Main Control Board (EB4) Main Machine Controller contactor (ES1) Main Machine Controller (EB1) Side Main Control Board (EB5) Figure 1:...
-
Page 32: Functional Block Diagram
Service Manual – SW5500, FLOORTEC R 985 05 - Control System Functional Block Diagram BATTERIES (BAT) DISPLAY CONTROLLER (EB3) MAIN CONTROL BOARD (EB4) EMERGENCY KEY (KEY) PUSH-BUTTON (SW0) SIDE CONTROL MAIN MACHINE BOARD (EB5) CONTROLLER CONTACTOR (ES1) Main Broom Sensors (S4) Hopper Sensors (S1, S2, S3) Power Main Broom Motor (M4) -
Page 33: Wiring Diagram
Service Manual – SW5500, FLOORTEC R 985 05 - Control System Wiring Diagram BATTERY + MAIN MACHINE CONTROLLER FUSE (F1) MAIN MACHINE KEY CIRCUIT FUSE (F2) CONTROLLER CONTACTOR (ES1) HORN FUSE (F8) EMERGENCY HORN RELAY (ES9) HORN (HN) PUSH-BUTTON (SW0) MAIN MACHINE MAIN MACHINE CONTROLLER... -
Page 34: Component Locations
Service Manual – SW5500, FLOORTEC R 985 05 - Control System Component Locations • Main Machine Controller (EB1) • Display Controller (EB3) • Main Control Board (EB4) • Side Main Control Board (EB5) • Flat cables from (EB3) to (EB4) •... -
Page 35: Troubleshooting
Service Manual – SW5500, FLOORTEC R 985 05 - Control System Troubleshooting Main Machine Controller Alarm Codes The Main Machine Controller indicates a series of alarms in case of malfunction of one or more systems, and in case of abnormal conditions detected in the input signals The alarms are grouped into 3 categories: •... - Page 36 Service Manual – SW5500, FLOORTEC R 985 05 - Control System Main Machine Controller Alarm Codes (Continues) General alarms Alarm code Effect ------------------- Meaning Condition Service Suggestions Description EEPROM error EEPROM error All functions Shut down and restart the machine, if the alarm blocked + continues, change the Main Machine Controller reset to default...
- Page 37 Service Manual – SW5500, FLOORTEC R 985 05 - Control System Main Machine Controller Alarm Codes (Continues) Main Machine Controller alarms Alarm code Effect -------------------------- Meaning Condition Service Suggestions Description MAIN BROOM I > ISC (parameter) for a Main broom Check for debris blocking the main broom motor amperometric time inversely proportional...
- Page 38 Service Manual – SW5500, FLOORTEC R 985 05 - Control System Main Machine Controller Alarm Codes (Continues) Drive system alarms CODE - Description Effect Condition Service Suggestions (shown on multifunction display) Switch off and on the machine TR AL.8 WATCHDOG Issue internal to the drive Drive operation blocked board.
- Page 39 Service Manual – SW5500, FLOORTEC R 985 05 - Control System CODE - Description Effect Condition Service Suggestions (shown on multifunction display) Switch off and on the machine TR AL.75 CONTACTOR DRIVER Issue internal to the drive Drive operation blocked board.
- Page 40 Service Manual – SW5500, FLOORTEC R 985 05 - Control System CODE - Description Effect Condition Service Suggestions (shown on multifunction display) KEY OFF SHORTED TR AL.220 Short circuit on key circuit Drive operation blocked Check the key switch circuit wires from B+ to EB2.JC.1 (SW0, KEY, ES8 (only for LPG/D versions)).
-
Page 41: Service Screens
Service Manual – SW5500, FLOORTEC R 985 05 - Control System Service Screens The alarms activated during normal machine operation are stored and can be read in the corresponding log (Alarm Log Screen) Main Screen Turn the ignition key to the starting position “I” while holding down the One-Touch and right side broom buttons simultaneously to access the main screen... -
Page 42: Machine Settings Screen
Service Manual – SW5500, FLOORTEC R 985 05 - Control System Machine Settings Screen The machine settings screen functions allow you to customize some parameters described in the following table of modifiable parameters. Figure 8: To increase the value of the current parameter, press the increase running speed button To decrease the value of the current parameter, press the decrease running speed button To move to the next parameter, press the hopper lifting button To return to the main screen, press and hold the hopper lowering button... - Page 43 Service Manual – SW5500, FLOORTEC R 985 05 - Control System Machine Settings Screen (Continues) The following parameters are displayed only when, on reaching the last RESET parameter, the hopper lifting button is pressed together with the One-Touch button and the right side broom button Otherwise, pressing only the hopper lifting button returns to the first VSL parameter.
-
Page 44: Alarm Log Screen
Service Manual – SW5500, FLOORTEC R 985 05 - Control System Alarm Log Screen This function allows you to check any alarms stored by the machine Figure 9: Use this function only with the support of the Nilfisk Service Centre to solve problems with machine operation To return to the main screen, press the hopper lifting button repeatedly... -
Page 45: Operating Time Counter Screen
Service Manual – SW5500, FLOORTEC R 985 05 - Control System Operating Time Counter Screen The operating time counter screen function allows you to check the total accumulated hours of work for each machine subsystem: Figure 10: • (A) TOTAL hour counter (machine on time) •... -
Page 46: Main Machine Controller Outputs Verification Screen
Service Manual – SW5500, FLOORTEC R 985 05 - Control System Main Machine Controller Outputs Verification Screen This function allows you to individually activate one of the Main Machine Controller outputs, press the relevant button as following table Figure 11: In this way, the output will be independently activated from any condition present on the inputs and only for the time while the button is pressed Where indicated in the table, the display shows in real time the current consumption detected by the card on... - Page 47 Service Manual – SW5500, FLOORTEC R 985 05 - Control System Main Machine Controller Outputs Verification Screen (continues) Current Button Action Text shown on the display value diplayed MAIN BROOM motor output activation MAIN BROOM ON RIGHT SIDE BROOM motor output activation RIGHT BROOM ON (100% PWM) LEFT SIDE BROOM motor output activation...
-
Page 48: Removal And Installation
Service Manual – SW5500, FLOORTEC R 985 05 - Control System Removal and Installation Main Machine Controller (EB1) Removal Drive the machine on a level floor. Turn the ignition key to “0”, then engage the parking brake Open the battery/engine compartment hood with the handle and fasten it with the support rod Disconnect the battery connector (Battery Version) - Disconnect the batteries (Diesel and LPG Version) Unscrew the four screws (A) fastening the fairing (B) Unscrew the nut (C) on the front... - Page 49 Service Manual – SW5500, FLOORTEC R 985 05 - Control System Main Machine Controller (EB1) (Continues) 12 Remove the steering wheel with steering shafts assembly (L), gripping it as shown in the figure, and disengaging it from the shaft with key (M) 13 Disconnect all the electrical connections from the Main Machine Controller (N) after marking their various positions 14 Unscrew the four nuts (P) and remove the Main Machine Controller (N)
-
Page 50: Drive Wheel Controller (Eb2)
Service Manual – SW5500, FLOORTEC R 985 05 - Control System Drive Wheel Controller (EB2) Removal Drive the machine on a level floor. Turn the ignition key to “0”, then engage the parking brake Open the battery/engine compartment hood with the handle and fasten it with the support rod Disconnect the battery connector (Battery Version) - Disconnect the batteries (Diesel and LPG Version) Unscrew the four screws (A) fastening the fairing (B) Unscrew the nut (C) on the front... - Page 51 Service Manual – SW5500, FLOORTEC R 985 05 - Control System Drive Wheel Controller (EB2) (Continues) 12 Remove the steering wheel with steering shafts assembly (L), gripping it as shown in the figure, and disengaging it from the shaft with key (M) 13 Disconnect all the electrical connections from the Drive Wheel Controller (N) after marking their various positions 14 Unscrew the four nuts (P) and remove the Drive Wheel Controller (N)
-
Page 52: Display Controller (Eb3)
Service Manual – SW5500, FLOORTEC R 985 05 - Control System Display Controller (EB3) Removal Drive the machine on a level floor. Turn the ignition key to “0”, then engage the parking brake Open the battery/engine compartment hood with the handle and fasten it with the support rod Disconnect the battery connector (Battery Version) - Disconnect the batteries (Diesel and LPG Version) Unscrew the four screws (A) fastening the fairing (B) Unscrew the nut (C) on the front... -
Page 53: Main Control Board (Eb4)
Service Manual – SW5500, FLOORTEC R 985 05 - Control System Main Control Board (EB4) Removal Drive the machine on a level floor. Turn the ignition key to “0”, then engage the parking brake Open the battery/engine compartment hood with the handle and fasten it with the support rod Disconnect the battery connector (Battery Version) - Disconnect the batteries (Diesel and LPG Version) Unscrew the four screws (A) fastening the fairing (B) Unscrew the nut (C) on the front... - Page 54 Service Manual – SW5500, FLOORTEC R 985 05 - Control System Main Control Board (EB4) (continues) 11 Lower the ignition assembly (I) If necessary, disconnect the electrical connections (J) and remove (I) 12 Remove the steering wheel (see procedure in the Steering System chapter) 13 Remove the sleeve (K) 14 Disconnect the electrical connection (L) of the Main Control Board on the Display Controller (M) 15 Remove the screws (N) and lower the Display Controller (M)
- Page 55 Service Manual – SW5500, FLOORTEC R 985 05 - Control System Main Control Board (EB4) (continues) Installation 17 Clean the seat of the Main Control Board (P) with solvent and remove any adhesive residue 18 Install the new Main Control Board, centering it in its seat 19 Assemble the components in the reverse order of removal Figure 20:...
-
Page 56: Side Main Control Board (Eb5)
Service Manual – SW5500, FLOORTEC R 985 05 - Control System Side Main Control Board (EB5) Removal Drive the machine on a level floor. Turn the ignition key to “0”, then engage the parking brake Open the battery/engine compartment hood with the handle and fasten it with the support rod Disconnect the battery connector (Battery Version) - Disconnect the batteries (Diesel and LPG Version) Working on the inner left side of the battery/engine compartment, unscrew the screws (A) and remove the guard (B) - Page 57 Service Manual – SW5500, FLOORTEC R 985 05 - Control System Side Main Control Board (EB5) (continues) Unscrew the ring nut (H) and remove the emergency button (I), disengaging its reference (J) from its seat (K) 10 Use a spatula to detach the side Main Control Board (L), starting in a corner Installation 11 Clean the seat of the side Main Control Board (L) with solvent and remove any adhesive residue 12 Install the new side Main Control Board (L), centering it in its seat...
-
Page 58: Specifications
Service Manual – SW5500, FLOORTEC R 985 05 - Control System Specifications Main Machine Controller (EB1) Connectors Battery Connection (M6 screw terminals) Ref. Description Controller in/out V ref. I max. Connected to Main Machine Controller power supply + 150A BAT+ Main Machine Controller power supply - 150A BAT-... - Page 59 Service Manual – SW5500, FLOORTEC R 985 05 - Control System Main Machine Controller (EB1) Connectors (Continues) Power Connections (M5 screw terminals) Ref. Description Controller in/out V ref. I max. Connected to RSB+ Right side broom motor + 10A (PWM) RSB- Right side broom motor - 10A (PWM)
- Page 60 Service Manual – SW5500, FLOORTEC R 985 05 - Control System Main Machine Controller (EB1) Connectors (Continues) A1: Actuator 1 connection (main broom) (MOLEX MINIFIT type, 6-way vertical) Description Controller in/out V ref. I max. Connected to Main broom actuator supply +/- () 0/24V ENGINE VERS.
- Page 61 Service Manual – SW5500, FLOORTEC R 985 05 - Control System Main Machine Controller (EB1) Connectors (Continues) A3: Actuator 3 connection (LH side broom) (MOLEX MINIFIT type, 6-way vertical) Description Controller in/out V ref. I max. Connected to Left side broom actuator supply +/- (1) 0/24V (Not used) (Not used)
- Page 62 Service Manual – SW5500, FLOORTEC R 985 05 - Control System Main Machine Controller (EB1) Connectors (Continues) J1: Signal inputs connections (MOLEX MINIFIT type, 20-way vertical) Description Controller in/out V ref. I max. Connected to Return from KEY circuit <1A EB3.5 HOPPER ENABLING button input <1A...
- Page 63 Service Manual – SW5500, FLOORTEC R 985 05 - Control System Main Machine Controller (EB1) Connectors (Continues) J2: Signal outputs connections (MOLEX MINIFIT type, 16-way vertical) Description Controller in/out V ref. I max. Connected to Hopper lifting pump valve output Hopper lowering pump valve output Hopper dumping valve output Horn output...
- Page 64 Service Manual – SW5500, FLOORTEC R 985 05 - Control System Main Machine Controller (EB1) Connectors (Continues) J3: Signal inputs / outputs connections (MOLEX MINIFIT type, 4-way vertical) Description Controller in/out V ref. I max. Connected to Main Control board serial connection in/out 0-5V <1A...
- Page 65 Service Manual – SW5500, FLOORTEC R 985 05 - Control System Main Machine Controller (EB1) Connectors (Continues) J5: Auxiliary power supplies connections (MOLEX MINIFIT type, 8-way vertical) Description Controller in/out V ref. I max. Connected to (Not used) (Not used) (Not used) (Not used) (Not used)
- Page 66 Service Manual – SW5500, FLOORTEC R 985 05 - Control System Main Machine Controller (EB1) Connectors (Continues) J6: TYCO MODU II type, 6-ways vertical Description Controller in/out V ref. I max. Connected to MACHINE ON signal <1A TRK.BN Power supply +24V <1A TRK.RD iButton input...
-
Page 67: Display Controller (Eb3) Connectors
Service Manual – SW5500, FLOORTEC R 985 05 - Control System Display Controller (EB3) Connectors J1: MOLEX MINIFIT type, 6-ways vertical Ref. Description Controller in/out V ref. I max. Connected to Power + <1A KEY.15/54 Main Control board serial connection + in/out 0-5V <1A... - Page 68 Service Manual – SW5500, FLOORTEC R 985 05 - Control System Display Controller (EB3) Connectors (Continues) J2: FCI DUFLEX (2.54 pitch) 16-way, male pins Ref. Description Controller in/out V ref. I max. Connected to Power supply - common <1A EB4.J1.1 HOPPER UP button (P10) <1A EB4.J1.2...
-
Page 69: Shop Measurements - Battery Powered Model
Service Manual – SW5500, FLOORTEC R 985 05 - Control System Shop Measurements - Battery Powered Model The following tables contain some “real world” shop voltage measurements to help you recognize what “normal” looks like. All voltage values were measured with the black (Negative) voltmeter lead connected to the main battery negative unless otherwise specified. - Page 70 Service Manual – SW5500, FLOORTEC R 985 05 - Control System Shop Measurements - Main Machine Controller (EB1) (continues) Power Connections Figure 40: Color Description Measured/Condition Main broom motor + 23.8V Main broom on Black 0.4v Main broom on Main broom motor - 24.8V main broom off Hopper lifting pump motor + 24.3V pump running...
- Page 71 Service Manual – SW5500, FLOORTEC R 985 05 - Control System Shop Measurements - Main Machine Controller (EB1) (continues) Power Connections LSB+ LSB- RSB+ RSB- Figure 41: Color Description Measured/Condition RSB+ Right side broom motor + 24.3v on 0.3V on RSB- Black Right side broom motor -...
- Page 72 Service Manual – SW5500, FLOORTEC R 985 05 - Control System Shop Measurements - Main Machine Controller (EB1) (continues) A1: Actuator 1 connection Figure 42: Color Description Measured/Condition Main broom actuator supply +/- () Up 0.01V Down 25.1V Off 0.0V Configuration - Battery or Engine Red/Black 0.004V when loop is present...
- Page 73 Service Manual – SW5500, FLOORTEC R 985 05 - Control System Shop Measurements - Main Machine Controller (EB1) (continues) A3: Actuator 3 connection Figure 44: Color Description Measured/Condition Left side broom actuator supply +/- (1) Up 0.18V Down 25.2V Off 0.0V Black Left side broom actuator supply -/+ (1) Up 25.1V...
- Page 74 Service Manual – SW5500, FLOORTEC R 985 05 - Control System Shop Measurements - Main Machine Controller (EB1) (continues) J1: Signal inputs connections Figure 46: Color Description Measured/Condition Key Off - 0.02V Oange Return from KEY circuit Key On -23.9V Red/White HOPPER ENABLING button input Pressed - 24.8V...
- Page 75 Service Manual – SW5500, FLOORTEC R 985 05 - Control System Shop Measurements - Main Machine Controller (EB1) (continues) J2: Signal outputs connections Figure 47: Color Description Measured/Condition Off - 25.2V Blue/Black Hopper lifting pump valve output On - 0.33V Off - 25.2V Brown/Black Hopper lowering pump valve output...
- Page 76 Service Manual – SW5500, FLOORTEC R 985 05 - Control System Shop Measurements - Main Machine Controller (EB1) (continues) J3: Signal inputs / outputs connections Figure 48: Color Description Measured/Condition Blue Main Control board serial connection 4.09V Yellow Main Control board serial connection 2.4 - 2.7V Main Control board power supply - 0.004V...
- Page 77 Service Manual – SW5500, FLOORTEC R 985 05 - Control System Shop Measurements - Main Machine Controller (EB1) (continues) J5: Auxiliary power supplies connections Figure 50: Color Description Measured/Condition...
- Page 78 Service Manual – SW5500, FLOORTEC R 985 05 - Control System Shop Measurements - Main Machine Controller (EB1) (continues) J6: TYCO MODU II type Figure 51: Color Description Measured/Condition MACHINE ON signal TRK.BN Power supply +24V TRK.RD iButton input TRK.YE BROOM ACTIVE FUNC.
-
Page 79: Shop Measurements - Display Controller (Eb3)
Service Manual – SW5500, FLOORTEC R 985 05 - Control System Shop Measurements - Display Controller (EB3) J1: MOLEX MINIFIT type Figure 53: Color Description Measured/Condition Key Off - 0.4V Orange Power + Key On - 24.7V Blue Main Control board serial connection + 4.09V Yellow Main Control board serial connection -... - Page 80 Service Manual – SW5500, FLOORTEC R 985 05 - Control System Shop Measurements - Display Controller (EB3) (continues) J2: FCI DUFLEX type Figure 54: Color Description Measured/Condition Ribbon Power supply - common 0.007V Ribbon HOPPER UP button (P10) Not Pressed - 3.1V Presssed - 0.009V Ribbon HOPPER DOWN button (P11)
-
Page 81: 10 - Chassis System
Service Manual – SW5500, FLOORTEC R 985 10 - Chassis System Chassis (main parts) • Front section supporting the steering assembly, drive wheel and side brooms (A) • Central section supporting batteries/engine with alternator (B) • Lower compartment for central broom (C) •... -
Page 82: 14 - Wheel System, Non Traction
Service Manual – SW5500, FLOORTEC R 985 14 - Wheel System, Non Traction Functional Description The rear wheels turns freely without any drive or stop system These are hold in place by means of a pin on eccentric flange, fastened to the chassis by means of screws. On the Battery version, the standard wheels are super elastic non-marking (optionally black) On Diesel and LPG versions, the standard wheels are foam (optionally super elastic non-marking or black) -
Page 83: Component Locations
Service Manual – SW5500, FLOORTEC R 985 14 - Wheel System, Non Traction Component Locations • Rear wheels • Hub • Hexagon castle nut • Drum brake • Service brake pedal • Parking brake lever Service brake pedal Rear wheels Service brake pedal Rear wheels Drum brake... -
Page 84: Maintenance And Adjustments
Service Manual – SW5500, FLOORTEC R 985 14 - Wheel System, Non Traction Maintenance and Adjustments Check and Adjusting Operation Drum Brake Cable Drive the machine on a level floor. Check that the parking brake is not engaged Ensure that the machine cannot move by placing opposing chocks (A) on the wheel opposite to the one to be checked Lift the hopper to the end-of-stroke WARNING: Place a safety rod under the lifted hopper. - Page 85 Service Manual – SW5500, FLOORTEC R 985 14 - Wheel System, Non Traction Check and Adjusting Operation Drum Brake Cable (continues) Lower the dust seal (J) 10 The parking brake is correctly regulated when: ◦ With the parking brake disengaged, the wheel (D) turns freely, without touching the braking drums ◦...
-
Page 86: Troubleshooting
Service Manual – SW5500, FLOORTEC R 985 14 - Wheel System, Non Traction Troubleshooting Trouble Possible causes Remedy Braking is unbalanced / the machine does Drum brake cables incorrectly regulated Regulate not brake The braking shoes are worn Replace Wheel tread worn Replace the wheels Brakes squeal Brake pedal in park position... -
Page 87: Removal And Installation
Service Manual – SW5500, FLOORTEC R 985 14 - Wheel System, Non Traction Removal and Installation Drum Brake Braking Shoes WARNING: It is advisable to replace the braking shoes on both rear wheels at the same time in order to achieve correct braking effectiveness of the parking brake. Removal Drive the machine on a level floor. - Page 88 Service Manual – SW5500, FLOORTEC R 985 14 - Wheel System, Non Traction Drum Brake Braking Shoes (continues) Turn the fasteners and remove the left door Remove the right door after removing the relevant mounting screws Apply a suitable jack (B) underneath the chassis zone (C) and raise the machine a few cm so that the wheel to be checked (D) can turn freely For safety, place a suitable spacer (E) underneath the chassis zone (F) to prevent the machine from dropping accidentally...
- Page 89 Service Manual – SW5500, FLOORTEC R 985 14 - Wheel System, Non Traction Drum Brake Braking Shoes (continues) 10 Disengage the plastic cover and unscrew the screw (K) on the rear wheel (D) 11 Remove the rear wheel (D) 12 Disconnect the springs (L) from the braking shoes (M) 13 Remove the braking shoes (M) Installation 14 Assemble the components in the reverse order of removal, and note the following:...
-
Page 90: Specifications
Service Manual – SW5500, FLOORTEC R 985 14 - Wheel System, Non Traction Specifications Model SW5500 B SW5500 D SW5500 LPG FLOORTEC R 985 B FLOORTEC R 985 LPG Rear wheels diameter 16 in (406 mm) Drum brake diameter 6.3 in (160 mm) -
Page 91: 20 - Wheel System, Traction
Service Manual – SW5500, FLOORTEC R 985 20 - Wheel System, Traction Functional Description The main drive components are the steered driving When the machine is started with the key switch wheel assembly, the accelerator pedal (R1) and the (KEY), the system is always placed in forward mode Drive Wheel Controller (EB2) Pressing the reverse button changes to reverse mode until the button is pressed again When reverse is... - Page 92 Service Manual – SW5500, FLOORTEC R 985 20 - Wheel System, Traction Functional Description (continues) The information on the assets and the movement of the car alarms are the only ones that use the CAN-BUS The drive system is fitted with an anti-overturning system based on the lateral acceleration signal from an accelerometer on the Main Machine Controller (EB1) In the event this lateral acceleration value is excessively high, the analogue maximum speed signal supplied by the Main Machine Controller to the drive system board is reduced in proportion to the measured acceleration (the voltage value of the speed signal...
-
Page 93: Wiring Diagram
Service Manual – SW5500, FLOORTEC R 985 20 - Wheel System, Traction Wiring Diagram DRIVE WHEEL CONTROLLER CONTACTOR (ES2) B+ Main machine controller power supply + WIRE ENGINE VERSION WIRE BATTERY VERSION JB.2 JC.9 A4.4 Traction inhibition A4.3 MAX SPEED REF. JC.9 JB.8 A4.1 REVERSE GEAR enabling... -
Page 94: Component Locations
Service Manual – SW5500, FLOORTEC R 985 20 - Wheel System, Traction Component Locations • Increase maximum running speed button • Decrease maximum running speed button • Reverse gear/forward gear reset button • Accelerator pedal (R1) • Driver’s seat safety microswitch (SW1) •... - Page 95 Service Manual – SW5500, FLOORTEC R 985 20 - Wheel System, Traction Component Locations (Continues) • Driving wheel (M0) • Drive Wheel Controller (EB2) • Main fuse (160A) (F3) • Drive Wheel Controller contactor (ES2) Drive Wheel Controller (EB2) Main fuse (160A) (F3) Drive system contactor (ES2) Driving wheel (M0) Figure 4:...
-
Page 96: Troubleshooting
Service Manual – SW5500, FLOORTEC R 985 20 - Wheel System, Traction Troubleshooting Trouble Possible causes Remedy The machine does not move The batteries (BAT) are discharged or its Charge the batteries or clean/repair the connections are not efficient connections The accelerator pedal (R1) is broken or badly Recalibrate / replace adjusted... -
Page 97: Drive Board Error Codes Table
Service Manual – SW5500, FLOORTEC R 985 20 - Wheel System, Traction Drive Board Error Codes Table Drive Board Error Codes CODE - Description Meaning First procedure If the problem persists (shown on multifunction display) Switch off and on the TR AL.8 WATCHDOG Issue internal to the drive... - Page 98 Service Manual – SW5500, FLOORTEC R 985 20 - Wheel System, Traction Drive Board Error Codes CODE - Description Meaning First procedure If the problem persists (shown on multifunction display) TR AL.65 MOTOR TEMPERAT. Motor thermal sensor over Check the current drawn into Substitute the temperature 150°...
- Page 99 Service Manual – SW5500, FLOORTEC R 985 20 - Wheel System, Traction Drive Board Error Codes CODE - Description Meaning First procedure If the problem persists (shown on multifunction display) TR AL.223 COIL SHOR. MC-EB Contactor coil short circuit. Check the wires between the Substitute the Drive Wheel Drive Wheel Controller and Controller contactor (ES2).
-
Page 100: Driving Wheel Motor Current Draw Check
Service Manual – SW5500, FLOORTEC R 985 20 - Wheel System, Traction Driving Wheel Motor Current Draw Check WARNING: This procedure must be performed by qualified personnel only. Drive the machine on a level floor. Turn the ignition key to “0”, then engage the parking brake Unscrew the four screws (A) fastening the fairing (B) Unscrew the nut (C) on the front Slide the sleeve (D) until it is flush on the steering wheel. - Page 101 Service Manual – SW5500, FLOORTEC R 985 20 - Wheel System, Traction Driving Wheel Motor Current Draw Check (continues) For safety purposes, to prevent accidental lowering of the machine, apply two suitable spacers under the right (I) and left (J) side brackets Working on the drive board (M), apply the ammeter clamp (K) to the drive motor electrical cable (L) 10 Start the machine with the ignition key 11 With the help of an assistant, carefully seat on the driver’s seat to activate the microswitch, then turn...
-
Page 102: Drive Board Connectors
Service Manual – SW5500, FLOORTEC R 985 20 - Wheel System, Traction Drive Board Connectors Power Connections (male screw terminals M 6) Ref. Description Drive board V ref. I max. Connected to in/out Drive board power supply + 24Vdc 250A Board power supply + (downline of fuse F3) 24Vdc 250A... - Page 103 Service Manual – SW5500, FLOORTEC R 985 20 - Wheel System, Traction Shop Measurements - Drive Wheel Controller (EB2) (continues) JC Connector: Figure 8: Color Description Measured/Condition “Key on” input from Main Machine Controller Key Off - 0V Orange/ Black Key On - 23.9? Violet Smart Key Communication (Optional)
- Page 104 Service Manual – SW5500, FLOORTEC R 985 20 - Wheel System, Traction Shop Measurements - Drive Wheel Controller (EB2) (continues) JD Connector: Figure 9: Color Description Measured/Condition Blue Encoder Phase A 13.5V or 0.135V depending on location. You can move the wheel slightly by hand to confirm that it switches.
-
Page 105: Removal And Installation
Service Manual – SW5500, FLOORTEC R 985 20 - Wheel System, Traction Removal and Installation Driving Wheel Removal Drive the machine on a level floor. Turn the ignition key to “0”, then engage the parking brake Position a suitable lifting device (A) at the centre of the front section of the machine, on the chassis bracket (H), then raise the front of the machine by a few centimeters until the driving wheel can be removed For safety purposes, to prevent accidental lowering of the machine, apply two suitable spacers under the... -
Page 106: Driving Wheel Assembly - Spare Parts
Service Manual – SW5500, FLOORTEC R 985 20 - Wheel System, Traction Driving Wheel Assembly - Spare parts Motorwheel (A) Chain stretcher (B) Non marking wheel (C) Motor (D) Steering plate (E) Gear box for motorwheel (F) Speed kit (G) Figure 11:... -
Page 107: Driving Wheel Assembly
Service Manual – SW5500, FLOORTEC R 985 20 - Wheel System, Traction Driving Wheel Assembly Removal Drive the machine on a level floor. Turn the ignition key to “0”, then engage the parking brake Open the battery/engine compartment hood with the handle and fasten it with the support rod Disconnect the battery connector (Battery Version) - Disconnect the batteries (Diesel and LPG Version) Unscrew the four screws (A) fastening the fairing (B) Unscrew the nut (C) on the front... - Page 108 Service Manual – SW5500, FLOORTEC R 985 20 - Wheel System, Traction Driving Wheel Assembly (continues) 12 Remove the steering wheel with steering shafts assembly (L), gripping it as shown in the figure, and disengaging it from the shaft with key (M) 13 Remove the screws (N) and remove the accelerator (P) and brake (Q) pedals 14 Unscrew the handwheels (R) on the left-hand side of the machine and remove the left door (S) Figure 13:...
- Page 109 Service Manual – SW5500, FLOORTEC R 985 20 - Wheel System, Traction Driving Wheel Assembly (continues) 15 Unscrew the screws (T) on the right-hand side of the machine and remove the right door (U) 16 Unscrew the two screws (V) and remove the cover (W) at the base of the steering column 17 Working below the footboard (X), unscrew the screws in the fastening positions (Y) of the footboard itself 18 Remove the footboard (X), freeing it from the steering column (Z)
- Page 110 Service Manual – SW5500, FLOORTEC R 985 20 - Wheel System, Traction Driving Wheel Assembly (continues) 19 Remove the steering chain (see procedure in the Steering System chapter) 20 Free the three caps (AA) and disconnect the three electrical connections (AB) of the driving wheel (AC), after unscrewing the corresponding nuts 21 Disconnect the driving wheel temperature electrical connection (AD) 22 Disconnect the encoder electrical connection (AE)
- Page 111 Service Manual – SW5500, FLOORTEC R 985 20 - Wheel System, Traction Driving Wheel Assembly (continues) 24 Unscrew the six screws (AG) fastening the driving wheel (AC); lift the wiring (AH) slightly for the two left screws 25 Position a suitable lifting device (AI) at the centre of the front section of the machine, on the chassis bracket (AL), then carefully raise the front of the machine by a few centimeters until the driving wheel (AM) can be removed;...
-
Page 112: Accelerator Pedal
Service Manual – SW5500, FLOORTEC R 985 20 - Wheel System, Traction Accelerator Pedal Removal Drive the machine on a level floor. Turn the ignition key to “0”, then engage the parking brake Open the battery/engine compartment hood with the handle and fasten it with the support rod Disconnect the battery connector (Battery Version) - Disconnect the batteries (Diesel and LPG Version) Unscrew the four screws (A) fastening the fairing (B) Unscrew the nut (C) on the front... - Page 113 Service Manual – SW5500, FLOORTEC R 985 20 - Wheel System, Traction Accelerator Pedal (continues) 12 Remove the steering wheel with steering shafts assembly (L), gripping it as shown in the figure, and disengaging it from the shaft with key (M) 13 Remove the side brooms (see procedure in the Side Broom System)
- Page 114 Service Manual – SW5500, FLOORTEC R 985 20 - Wheel System, Traction Accelerator Pedal (continues) 16 Unscrew the screws (T) on the right-hand side of the machine and remove the right door (U) 17 Unscrew the two screws (V) and remove the cover (W) at the base of the steering column 18 Working below the footboard (X), unscrew the screws in the fastening positions (Y) of the footboard itself 19 Remove the footboard (X), freeing it from the steering column (Z)
- Page 115 Service Manual – SW5500, FLOORTEC R 985 20 - Wheel System, Traction Accelerator Pedal (continues) 20 Disconnect the two electrical connections (AA) of the accelerator pedal; if necessary, cut any clamps in the way 21 Unscrew the screws (AB) and remove the accelerator pedal (AC) 22 If necessary, go to the workbench to unscrew the screw (AD) and remove the lever (AE) from the accelerator pedal (AC), freeing it from the shaft (AF) with seat Assembly...
-
Page 116: Driver's Seat Microswitch
Service Manual – SW5500, FLOORTEC R 985 20 - Wheel System, Traction Driver’s Seat Microswitch Removal Drive the machine on a level floor. Turn the ignition key to “0”, then engage the parking brake Open the battery/engine compartment hood Disconnect the battery connector (Battery Version) - Disconnect the batteries (Diesel and LPG Version) Working from the inside of the battery/engine compartment, disconnect the electrical connection (A) of the seat microswitch If necessary, also remove the seat rails by unscrewing the nuts (B) - Page 117 Service Manual – SW5500, FLOORTEC R 985 20 - Wheel System, Traction Driver’s Seat Microswitch (continues) Installation 11 Assemble the components in the reverse order of removal, and note the following: ◦ Before tightening the screws (G) check that the seat rails (H) are aligned ◦...
-
Page 118: Specifications
Service Manual – SW5500, FLOORTEC R 985 20 - Wheel System, Traction Specifications Model SW5500 B SW5500 D SW5500 LPG FLOORTEC R 985 B FLOORTEC R 985 LPG Drive Type Electrical on the front wheel Gearmotor power 1.6 hp (1,200 W) -
Page 119: 22 - Steering System
Service Manual – SW5500, FLOORTEC R 985 22 - Steering System Functional Description The steering wheel is fastened to the steering column and connected to a shaft with a universal joint The movement is transmitted with pinion and chain to the ring gear, which determines the steering The ring gear is fastened to the driving wheel... -
Page 120: Component Locations
Service Manual – SW5500, FLOORTEC R 985 22 - Steering System Component Locations • Steering wheel • Steering column • Universal joint • Steering shaft • Steering assembly • Steering chain Steering shaft Steering wheel Steering column Steering shaft Universal joint Steering chain Steering assembly Figure 1:... -
Page 121: Removal And Installation
Service Manual – SW5500, FLOORTEC R 985 22 - Steering System Removal and Installation Steering Wheel Removal Installation Drive the machine on a level floor. Assemble the components in the reverse order of removal, and note the following: Turn the ignition key to “0”, then engage the parking brake ◦... -
Page 122: Steering Chain
Service Manual – SW5500, FLOORTEC R 985 22 - Steering System Steering Chain Removal If possible, place the machine on a hoisting system Turn the ignition key to “0”, then engage the parking brake Steer the front wheel until the linkage (A) of the steering chain (B) becomes visible Loosen the locknut (C) and the nut (D) If there is no footboard on the machine, the operations on the locknut (C) and the nut (D) can be performed from the upper section of the chassis, through the slot (E) -
Page 123: 24 - Electrical System
Service Manual – SW5500, FLOORTEC R 985 24 - Electrical System Functional Description - Battery Version The electrical system is basically a 24Vdc nominal system of electronically managed motors The battery is connected to the system by means of the connector (C1) Downline of the connector a safety fuse is installed, (F1) before the power section of the Main Machine Controller (EB1), and (F3) before the power system of the Drive Wheel Controller (EB2) These fuses are sized to blow only if the power section of the boards becomes seriously damaged... - Page 124 Service Manual – SW5500, FLOORTEC R 985 24 - Electrical System Functional Description - Battery Version (continues) On-board battery charger (CH) Emergency push- button (SW0) Connector (C2) Jumper bridge (w/o on- board battery charger) Figure 2:...
-
Page 125: Wiring Diagram (Battery Advance Version)
Service Manual – SW5500, FLOORTEC R 985 24 - Electrical System Wiring Diagram (Battery ADVANCE Version) MAIN MACHINE CONTROLLER FUSE (F1) KEY CIRCUIT FUSE (F2) HORN FUSE (F8) EMERGENCY PUSH-BUTTON (SW0) B+ Main machine controller power supply + 30/1 P0 P1 P2 15/54 MAIN MACHINE KEY (KEY) -
Page 126: Wiring Diagram (Battery Nilfisk Version)
Service Manual – SW5500, FLOORTEC R 985 24 - Electrical System Wiring Diagram (Battery NILFISK Version) MAIN MACHINE KEY CIRCUIT FUSE (F2) CONTROLLER FUSE (F1) HORN FUSE (F8) EMERGENCY PUSH-BUTTON (SW0) B+ Main machine controller power supply + C2.1 C2.2 30/1 P0 P1 P2 15/54... -
Page 127: Functional Description - Diesel, Lpg Version
Service Manual – SW5500, FLOORTEC R 985 24 - Electrical System Functional Description - Diesel, LPG Version The electrical system of Diesel and LPG versions is The solenoid valve (EV4) is powered when the key substantially equal to that of the battery versions, switch (KEY) is in position II, and for the first 10 the difference is that the 24V battery pack is seconds of operation when it is in position I After... - Page 128 Service Manual – SW5500, FLOORTEC R 985 24 - Electrical System Functional Description - Diesel, LPG Version (continues) Engine speed realy (ES4) Battery charging fuse (F4) Recharging contactor (ES10) Main Machine Controller (EB1) Starter motor GPL (MST) Starter motor Diesel (MST) Diode jumper (D1) GPL solenoid valve (EV4) Diesel solenoid valve (EV4)
-
Page 129: Wiring Diagram (Diesel Version)
Service Manual – SW5500, FLOORTEC R 985 24 - Electrical System Wiring Diagram (Diesel Version) MAIN MACHINE KEY CIRCUIT FUSE (F2) ALTERNATOR CONTROLLER FUSE (F1) FUSE (F4) HORN FUSE (F8) EMERGENCY PUSH-BUTTON (SW0) B+ Main machine controller power supply + 30/1 P0 P1 P2 15/54... -
Page 130: Wiring Diagram (Lpg Version)
Service Manual – SW5500, FLOORTEC R 985 24 - Electrical System Wiring Diagram (LPG Version) MAIN MACHINE CONTROLLER FUSE (F1) KEY CIRCUIT FUSE (F2) ALTERNATOR FUSE (F4) HORN FUSE (F8) EMERGENCY PUSH-BUTTON (SW0) B+ Main machine controller power supply + 30/1 P0 P1 P2 15/54... -
Page 131: Component Locations (Battery, Diesel, Lpg Versions)
Service Manual – SW5500, FLOORTEC R 985 24 - Electrical System Component Locations (Battery, Diesel, LPG versions) • Emergency push-button (SW0) • Beacon light (BE) • Main Machine Controller fuse (150A) (F1) • Key circuit fuse (10A) (F2) • Drive system fuse (160A) (F3) •... -
Page 132: Component Locations (Battery Version)
Service Manual – SW5500, FLOORTEC R 985 24 - Electrical System Component Locations (Battery version) • Battery charger (CH) • Batteries (BAT) • Wiring harnesses • Battery connector (C1) • Bridge jumper (without on-board battery charger) Battery charger (CH) Wiring harnesses Battery connector (C1) Batteries (BAT) BATTERY... -
Page 133: Component Locations (Diesel Version)
Service Manual – SW5500, FLOORTEC R 985 24 - Electrical System Component Locations (Diesel version) • Batteries (BAT) • Alternator (ALT) • Fuse for batteries (150A) (F0) • Battery charging fuse (125A) (F4) • Starter motor fuse (100A) (F6) • Engine compartment fan fuse (20A) (F7) •... -
Page 134: Component Locations (Lpg Version)
Service Manual – SW5500, FLOORTEC R 985 24 - Electrical System Component Locations (LPG version) • Batteries (BAT) • Recharging contactor (ES10) • Alternator (ALT) • Diode jumper (D1) • Fuse for batteries (125A) (F0) • Engine on/off relay (ES3) •... -
Page 135: Fuses
Service Manual – SW5500, FLOORTEC R 985 24 - Electrical System Fuses All circuits and components not managed directly by the Main Machine Controller (EB1) are protected by fuses Diesel (YANMAR) Fuse Battery LPG (HONDA) Pos. Type Value Protected Function Value Protected Function Value... -
Page 136: Maintenance And Adjustments
Service Manual – SW5500, FLOORTEC R 985 24 - Electrical System Maintenance and Adjustments Battery Type Display (WET or GEL-AGM) (Battery Version) Start the machine with the ignition key (A) In the first two seconds after ignition, the multifunction display (B) will indicate: ◦... -
Page 137: Cecking The Voltage Of The Batteries (Diesel, Lpg Version)
Service Manual – SW5500, FLOORTEC R 985 24 - Electrical System Cecking the voltage of the batteries (Diesel, LPG Version) The voltage of the batteries with components operational should be between 26V and 30V The voltage of the batteries with components switched off (wait 10 seconds with the machine stopped and components switched off) should be between 24V and 26V... -
Page 138: Battery Removal/Installation And Battery Type Setting (Wet Or Gel/Agm) (Battery Version)
Service Manual – SW5500, FLOORTEC R 985 24 - Electrical System Battery Removal/Installation and Battery Type Setting (WET or GEL/AGM) (Battery Version) WARNING: Do not tilt the lead batteries WARNING: Non-sealed WET batteries (WET) to prevent the highly always need an appropriate corrosive acid from leaking out container to prevent the acid of the batteries. - Page 139 Service Manual – SW5500, FLOORTEC R 985 24 - Electrical System Battery Removal/Installation and Battery Type Setting (WET or GEL/AGM) (Battery Version) (continues) Battery Setting (WET or GEL-AGM) Battery Removal Start the machine by turning the ignition key to 13 Drive the machine on a level floor. “I”, while holding down buttons (D) and (E) 14 Turn the ignition key to “0”, then engage the 10 Enter the “Parameters”...
-
Page 140: Troubleshooting
Service Manual – SW5500, FLOORTEC R 985 24 - Electrical System Troubleshooting Trouble Possible causes Remedy The machine is not working The batteries (BAT) are discharged or its Charge the batteries or clean/repair the connections are not efficient connections The batteries (BAT) are broken Check the battery no-load voltage/replace them (Battery Version) Battery charger (CH) faulty Replace... -
Page 141: Removal And Installation
Service Manual – SW5500, FLOORTEC R 985 24 - Electrical System Removal and Installation Battery Charger (Battery NILFISK Version) Removal Drive the machine on a level floor. Turn the ignition key to “0”, then engage the parking brake Open the battery compartment hood with the handle and fasten it with the support rod Disconnect the battery connector (A) Lift and remove the right side panel (B), disengaging it from the upper (C) and lower (D) fasteners Disconnect the wiring (E) from the terminals (F) and (G) of the batteries unit (H) - Page 142 Service Manual – SW5500, FLOORTEC R 985 24 - Electrical System Battery Charger (continues) (Battery NILFISK Version) Working from underneath the battery charger Installation (I), disconnect the electrical connection (J) of the 10 Assemble the components in the reverse order of connection cable to the Main Control Board removal Remove the four fastening screws (K) of the...
-
Page 143: Alternator (Diesel Version)
Service Manual – SW5500, FLOORTEC R 985 24 - Electrical System Alternator (Diesel Version) Removal Remove the engine/alternator assembly (see procedure in the Engine System - Diesel chapter) Working at the workbench, unscrew the perimeter screws (A, ) and remove the cover (B) Unscrew the screws (C) and remove the grid (D) Unscrew the screw (E) Unscrew the four screws (F) -
Page 144: Alternator (Lpg Version)
Service Manual – SW5500, FLOORTEC R 985 24 - Electrical System Alternator (LPG Version) Removal Remove the engine/alternator assembly (see procedure in the Engine System - LPG chapter) Working at the workbench, unscrew the perimeter screws (A) and remove the cover (B) Unscrew the screws (C) and remove the grid (D) Unscrew the screw (E) Unscrew the four screws (F) -
Page 145: General Wiring Diagram (Battery Advance Version)
Service Manual – SW5500, FLOORTEC R 985 24 - Electrical System General Wiring Diagram (Battery ADVANCE Version) MAIN MACHINE KEY CIRCUIT FUSE (F2) DRIVE WHEEL CONTROLLER FUSE (F1) CONTROLLER MAIN MACHINE CONTACTOR (ES2) CONTROLLER CONTACTOR TU.RD (ES1) HORN FUSE (F8) EXT_VACUUM ROAD_HOMOLOG_LIGHTS EMERGENCY... -
Page 146: General Wiring Diagram (Battery Nilfisk Version)
Service Manual – SW5500, FLOORTEC R 985 24 - Electrical System General Wiring Diagram (Battery NILFISK Version) MAIN MACHINE KEY CIRCUIT FUSE (F2) DRIVE WHEEL CONTROLLER FUSE (F1) MAIN MACHINE CONTROLLER CONTACTOR (ES2) CONTROLLER CONTACTOR TU.RD (ES1) HORN FUSE (F8) EXT_VACUUM ROAD_HOMOLOG_LIGHTS EMERGENCY... -
Page 147: General Wiring Diagram (Diesel Version)
Service Manual – SW5500, FLOORTEC R 985 24 - Electrical System General Wiring Diagram (Diesel Version) MAIN MACHINE KEY CIRCUIT FUSE (F2) ENGINE FUSE (F5) CONTROLLER FUSE (F1) MAIN MACHINE DRIVE WHEEL ALTERNATOR FUSE (F4) CONTROLLER CONTACTOR CONTROLLER TU.RD (ES1) CONTACTOR (ES2) HORN FUSE (F8) EXT_VACUUM... -
Page 148: General Wiring Diagram (Lpg Version)
Service Manual – SW5500, FLOORTEC R 985 24 - Electrical System General Wiring Diagram (LPG Version) MAIN MACHINE DRIVE WHEEL KEY CIRCUIT FUSE (F2) CONTROLLER FUSE (F1) CONTROLLER ALTERNATOR FUSE (F4) MAIN MACHINE CONTACTOR (ES2) TU.RD HORN FUSE (F8) CONTROLLER CONTACTOR (ES1) HORN RELAY (ES9) EMERGENCY... -
Page 149: 28 - Engine System, Diesel
Service Manual – SW5500, FLOORTEC R 985 28 - Engine System, Diesel Functional Description The engine system (YANMAR L70N) generates electric current for all machine functions The assembly consists of an internal combustion engine and alternator, which are both connected to the main crankshaft The engine is a single-cylinder air-cooled diesel fuel type Engine starting is performed by a starter motor... -
Page 150: Wiring Diagram
Service Manual – SW5500, FLOORTEC R 985 28 - Engine System, Diesel Wiring Diagram ENGINE FUSE (F5) KEY CIRCUIT FUSE (F2) EMERGENCY PUSH-BUTTON (SW0) B+ Main machine controller power supply + 30/1 P0 P1 P2 15/54 KEY (KEY) FUEL PUMP / VALVE output J2.6 ENGINE SUPPLY RELAY (ES7) Common power supply + signal output... -
Page 151: Component Locations
Service Manual – SW5500, FLOORTEC R 985 28 - Engine System, Diesel Component Locations • Diesel engine • Fuel reserve sensor (S6) • Filler neck • Engine oil pressure sensor • Fuel tank • Engine overheat sensor (S7) • Fuel opening/closing valve Engine overheat sensor (S7) Fuel reserve sensor (S6) Engine oil pressure sensor... -
Page 152: Maintenance And Adjustments
Service Manual – SW5500, FLOORTEC R 985 28 - Engine System, Diesel Maintenance and Adjustments Engine RPM Check Check Drive the machine on a level floor. Turn the ignition key to “0”, then engage the parking brake Lift and remove the left side panel, disengaging it from the upper and lower fasteners Check that the indicator (B) is present on the crankshaft, otherwise unscrew the screws (C) and remove the grid (D), then apply it Reposition the grid (D) and screw down the screws... -
Page 153: Engine Air Filter Cleaning/Check
Service Manual – SW5500, FLOORTEC R 985 28 - Engine System, Diesel Engine Air Filter Cleaning/Check A dirty air filter limits the passage of air, thus reducing engine performance. When working in particularly dusty areas, clean or replace the filters more often than specified in the maintenance programme. WARNING: Running the engine without air filters, or with damaged filters, can cause a faster engine wearing. -
Page 154: Engine Oil Level Check
Service Manual – SW5500, FLOORTEC R 985 28 - Engine System, Diesel Engine Oil Level Check WARNING: Running the engine with a low oil level can damage the engine itself. Drive the machine on a level floor. Turn the ignition key to “0”, then engage the parking brake Open the engine compartment hood with the handle and fasten it with the support rod Lift and remove the machine left side panel, disengaging it from the upper and lower fasteners Remove the cap (A) -
Page 155: Engine Oil Change
Service Manual – SW5500, FLOORTEC R 985 28 - Engine System, Diesel Engine Oil Change WARNING: The discharged engine oil must be disposed of properly according to the Law in force. Note: It is advisable to change the oil when the engine is still hot, to make the oil downflow easier. Drive the machine on a level floor. -
Page 156: Engine Oil Filter Check/Cleaning
Service Manual – SW5500, FLOORTEC R 985 28 - Engine System, Diesel Engine Oil Filter Check/Cleaning Drive the machine on a level floor. Turn the ignition key to “0”, then engage the parking brake Open the engine compartment hood with the handle and fasten it with the support rod Lift and remove the machine left side panel, disengaging it from the upper and lower fasteners Remove the bolt (A) Remove the cap (B) and remove the oil filter (C). -
Page 157: Troubleshooting
Service Manual – SW5500, FLOORTEC R 985 28 - Engine System, Diesel Troubleshooting Trouble Possible causes Remedy The engine does not start The oil level is low. Top up with the recommended oil to the proper Engine oil pressure sensor activation level Batteries (BAT) flat Recharge with a proper battery charger. - Page 158 Service Manual – SW5500, FLOORTEC R 985 28 - Engine System, Diesel Troubleshooting (continues) Trouble Possible causes Remedy The engine is overheating, Fan relay (ES6) faulty Replace shutting down, and activating the rectifier temperature sensor Fan fuse (F7) blown Replace Fan (M7) faulty Replace The filter element or elements are clogged...
-
Page 159: Removal And Installation
Service Manual – SW5500, FLOORTEC R 985 28 - Engine System, Diesel Removal and Installation Diesel Engine - Spare Parts (A) Engine complete (I) Inlet ait grid (B) Side exide muffler. (J) Oil drain gasket (C) Diesel Filter (K) Fuel inject nozzle (D) Diesel cartridge filter. -
Page 160: Alternator - Spare Parts
Service Manual – SW5500, FLOORTEC R 985 28 - Engine System, Diesel Alternator - Spare Parts (A) Alternator complete (B) Heat sink (C) Bridge rectifier. (D) Resistor (E) Grid side (F) Temperature sensor Figure 11:... -
Page 161: Engine/Alternator Unit
Service Manual – SW5500, FLOORTEC R 985 28 - Engine System, Diesel Engine/Alternator Unit Removal Drive the machine on a level floor. Turn the ignition key to “0”, then engage the parking brake Open the engine compartment hood with the handle and fasten it with the support rod Disconnect the batteries Lift and remove the machine left and right side panels, disengaging them from their upper and lower fasteners... - Page 162 Service Manual – SW5500, FLOORTEC R 985 28 - Engine System, Diesel Engine/Alternator Unit (Continues) 10 Loosen the retaining clamps and disconnect the hoses (J) and (K) on the diesel fuel lines; collect any fuel which leaks out Close with sealing plugs the disconnected fittings immediately, to prevent foreign materials from entering into the system 11 Loosen the retaining clamp (L) and disconnect the terminal (M) on the air vacuum hose 12 Disconnect the engine oil drain line (N) from the fastener...
- Page 163 Service Manual – SW5500, FLOORTEC R 985 28 - Engine System, Diesel Engine/Alternator Unit (Continues) 15 Unscrew the right-hand retaining nuts (S) and (T) on the engine/alternator unit 16 Unscrew the nuts (U) and remove the cross-member (V) 17 Screw down the lifting eyebolt (W) onto the Diesel engine (X), then use appropriate lifting equipment to lift and remove the engine/alternator unit (weight of assembly approx 121 lb (55 Kg)) Installation 18 Assemble the components in the reverse order of disassembly...
-
Page 164: Specifications
Service Manual – SW5500, FLOORTEC R 985 28 - Engine System, Diesel Specifications Model SW5500 D Make Yanmar Model L70N Dimensions 14.9 x 16.6 x 17.8 in (378 x 422 x 453 mm) Dry weight 90 lb (41.0 Kg) Displacement 320 cm Power 4.1 kW (5.5 hp) @ 3,000 rpm... -
Page 165: 29 - Engine System, Lpg
Service Manual – SW5500, FLOORTEC R 985 29 - Engine System, LPG Functional Description The engine system (Honda iGX 270) generates electric current for all machine functions The assembly consists of an internal combustion engine and alternator, which are both connected to the main crankshaft The engine is a single-cylinder air-cooled LPG type Engine starting is performed by a starter motor... -
Page 166: Str Regulator Technical Features (Automatic Speed Control)
Service Manual – SW5500, FLOORTEC R 985 29 - Engine System, LPG STR Regulator Technical Features (Automatic Speed control) This engine is equipped with a STR controller (automatic speed controller) that allows a start and a fast heating of the motor without any manual intervention before and after its start The STR controller controls the regulating valve and the air valve by means of a step motor to the throttle control step located inside the carburetor The actuator, together with a unit wax-based thermally connected (actuator assembly), controls the air valve of starting up a hot or cold engine... -
Page 167: Wiring Diagram
Service Manual – SW5500, FLOORTEC R 985 29 - Engine System, LPG Wiring Diagram KEY CIRCUIT FUSE (F2) EMERGENCY PUSH-BUTTON (SW0) 30/1 B+ Main machine controller power supply + P0 P1 P2 KEY (KEY) ENGINE START RELAY (ES3) 15/54 ENGINE START RELAY (ES5) FUEL PUMP / VALVE output J2.6 FUEL SOLENOID VALVE (EV4) -
Page 168: Component Locations
Service Manual – SW5500, FLOORTEC R 985 29 - Engine System, LPG Component Locations • LPG tank fastening band • Hose • LPG cylinder • Safety valve • LPG tank opening/closing valve • Pipe • LPG tank fitting • Hose LPG tank opening/closing valve LPG tank fitting Hose... - Page 169 Service Manual – SW5500, FLOORTEC R 985 29 - Engine System, LPG Component Layout (Continues) • LPG wiring harness • Fuel solenoid valve (EV4) • Motor • Fuel reserve sensor (S6) • Hose • LPG pressure regulator Fuel reserve sensor (S6) Fuel solenoid valve (EV4) Hose LPG pressure regulator...
-
Page 170: Maintenance And Adjustments
Service Manual – SW5500, FLOORTEC R 985 29 - Engine System, LPG Maintenance and Adjustments DIESEL VERSION Engine Air Filter Cleaning/Check A dirty air filter limits the passage of air, thus reducing engine performance. When working in particularly dusty areas, clean or replace the filters more often than specified in the maintenance programme. WARNING: Running the engine without air filters, or with damaged filters, can cause a faster engine wearing. -
Page 171: Engine Oil Level Check
Service Manual – SW5500, FLOORTEC R 985 29 - Engine System, LPG Engine oil level check WARNING: Running the engine with a low oil level can damage the engine itself. Note: The oil alert system will automatically stop the engine before the oil level goes down under the safety limit. -
Page 172: Engine Oil Change
Service Manual – SW5500, FLOORTEC R 985 29 - Engine System, LPG Engine Oil Change WARNING: The discharged engine oil must be disposed of properly according to the Law in force. Note: It is advisable to change the oil when the engine is still hot, to make the oil downflow easier. Drive the machine on a level floor. -
Page 173: Engine Spark Plug Check/Replacement
Service Manual – SW5500, FLOORTEC R 985 29 - Engine System, LPG Engine Spark Plug Check/Replacement For the type of spark plug to be used, see Technical Data WARNING: A wrong spark plug can damage the engine. Drive the machine on a level floor. Turn the ignition key to “0”, then engage the parking brake Open the engine compartment hood with the... -
Page 174: Lpg System Leakage Check
Service Manual – SW5500, FLOORTEC R 985 29 - Engine System, LPG LPG System Leakage Check WARNING: This procedure must be performed by personnel qualified to handle the LPG systems, according to the law in force. Moreover, it is necessary to wear accident-prevention clothes, according to the law in force (heavy gloves, antistatic non-synthetic clothes, suitable to cover the whole body, antistatic and antispark shoes, helmets with visor;... - Page 175 Service Manual – SW5500, FLOORTEC R 985 29 - Engine System, LPG LPG System Leakage Check (Continues) Apply evenly the spry product that detects gas leaks “SUPER BALL, OFF PROD C C I A A 186231 (VI)” (or equivalent) on all the fittings of the LPG system, starting from the fitting (A) of the LPG tank (D) to the fitting (F) between the hose and carburettor (G).
-
Page 176: Fuel Solenoid Valve Filter Cleaning
Service Manual – SW5500, FLOORTEC R 985 29 - Engine System, LPG Fuel Solenoid Valve Filter Cleaning WARNING: This procedure must be performed by personnel qualified to handle the LPG systems, according to the law in force. Moreover, it is necessary to wear accident-prevention clothes, according to the law in force (heavy gloves, antistatic non-synthetic clothes, suitable to cover the whole body, antistatic and antispark shoes, helmets with visor;... - Page 177 Service Manual – SW5500, FLOORTEC R 985 29 - Engine System, LPG Fuel Solenoid Valve Filter Cleaning (Continues) Remove the filter (E). The filter holder gasket (F) must be replaced with the corresponding spare part, before reassembly. Remove and discard the gaskets (F) and (G), then clean the filter (E), the flange (H) of the fuel solenoid valve body, the filter holder (I) and the fitting (J) with compressed air (maximum pressure 6 Bar).
-
Page 178: Co Regulation
Service Manual – SW5500, FLOORTEC R 985 29 - Engine System, LPG CO Regulation WARNING: This procedure must be performed by personnel qualified to handle the LPG systems, according to the law in force. Note: During the fumes analysis always make sure you check the following conditions: 1. - Page 179 Service Manual – SW5500, FLOORTEC R 985 29 - Engine System, LPG CO Regulation (continues) Screw the flow regulator fully in (regulator closed) and then unscrew it as follow: ◦ 3 turns in case of new device setting (D) ◦ 4 turns in case of old device setting (E) Figure 14: Start the engine and in case of bad carburetion or ignition failure operate on the setting screw so to ensure the proper running, by turning it clock or counterclokwise...
- Page 180 Service Manual – SW5500, FLOORTEC R 985 29 - Engine System, LPG CO Regulation (continues) – 5 3 Place the sweeper ignition key on 1, wait for opening the safety valve and then slowly aspirate with the syringe to open the regulator’s membrane Hold in position during next phase –...
-
Page 181: Troubleshooting
Service Manual – SW5500, FLOORTEC R 985 29 - Engine System, LPG Troubleshooting Trouble Possible causes Remedy The engine does not start Fuel is not reaching the carburettor Check that the LPG tank safety valve is open The oil level is low. The Oil Alert sensor (S7) is Top up with the recommended oil to the proper activated. -
Page 182: Removal And Installation
Service Manual – SW5500, FLOORTEC R 985 29 - Engine System, LPG Removal and Installation LPG System Emptying WARNING: This procedure must be performed by personnel qualified to handle the LPG systems, according to the law in force. Moreover, it is necessary to wear accident-prevention clothes, according to the law in force (heavy gloves, antistatic non-synthetic clothes, suitable to cover the whole body, antistatic and antispark shoes, helmets with visor;... -
Page 183: Lpg System Hose And Fitting
Service Manual – SW5500, FLOORTEC R 985 29 - Engine System, LPG LPG System Hose and Fitting WARNING: This procedure must be performed by personnel qualified to handle the LPG systems, according to the law in force. Moreover, it is necessary to wear accident-prevention clothes, according to the law in force (heavy gloves, antistatic non-synthetic clothes, suitable to cover the whole body, antistatic and antispark shoes, helmets with visor;... - Page 184 Service Manual – SW5500, FLOORTEC R 985 29 - Engine System, LPG LPG System Hose and Fitting (Continues) • The fittings (D) have inner gaskets or conical couplings to seal them. • The fittings (E) are provided with sealant. WARNING: If the fittings (E) are turned very slightly, their tightness can be compromised (because the sealant “brakes”), thus those fittings must be unscrewed and screwed again after having applied new sealant, as shown below.
-
Page 185: Pressure Regulator
Service Manual – SW5500, FLOORTEC R 985 29 - Engine System, LPG Pressure Regulator WARNING: This procedure must be performed by personnel qualified to handle the LPG systems, according to the law in force. Moreover, it is necessary to wear accident-prevention clothes, according to the law in force (heavy gloves, antistatic non-synthetic clothes, suitable to cover the whole body, antistatic and antispark shoes, helmets with visor;... - Page 186 Service Manual – SW5500, FLOORTEC R 985 29 - Engine System, LPG Pressure Regulator (Continues) Unscrew the fitting (D) on the line. Disconnect the electrical connections (E) and (F) Figure 19:...
- Page 187 Service Manual – SW5500, FLOORTEC R 985 29 - Engine System, LPG Pressure Regulator (Continues) 10 Remove the fastening screws (G) of the pressure regulator assembly with valves (H) 11 Remove the pressure regulator assembly with valves (H) 12 If necessary, unscrew the fuel solenoid valve (I) from the fitting (J) at the workbench. 13 Unscrew the fitting (K) from the pressure regulator (C).
-
Page 188: Fuel Reserve Sensor
Service Manual – SW5500, FLOORTEC R 985 29 - Engine System, LPG Fuel Reserve sensor WARNING: This procedure must be performed by personnel qualified to handle the LPG systems, according to the law in force. Moreover, it is necessary to wear accident-prevention clothes, according to the law in force (heavy gloves, antistatic non-synthetic clothes, suitable to cover the whole body, antistatic and antispark shoes, helmets with visor;... -
Page 189: Fuel Solenoid Valve
Service Manual – SW5500, FLOORTEC R 985 29 - Engine System, LPG Fuel Solenoid Valve WARNING: This procedure must be performed by personnel qualified to handle the LPG systems, according to the law in force. Moreover, it is necessary to wear accident-prevention clothes, according to the law in force (heavy gloves, antistatic non-synthetic clothes, suitable to cover the whole body, antistatic and antispark shoes, helmets with visor;... -
Page 190: Safety Valve
Service Manual – SW5500, FLOORTEC R 985 29 - Engine System, LPG Safety Valve WARNING: This procedure must be performed by personnel qualified to handle the LPG systems, according to the law in force. Moreover, it is necessary to wear accident-prevention clothes, according to the law in force (heavy gloves, antistatic non-synthetic clothes, suitable to cover the whole body, antistatic and antispark shoes, helmets with visor;... -
Page 191: Lpg Engine - Spare Parts
Service Manual – SW5500, FLOORTEC R 985 29 - Engine System, LPG LPG Engine - Spare Parts (A) Engine complete (G) Muffler gasket. (M) Gauge oil cap (B) Oil cap (H) Pipe exhaust gasket (N) Unit control (C) Engine coil ignition (I) Starter Motor (O) Air filter knob. -
Page 192: Alternator - Spare Parts
Service Manual – SW5500, FLOORTEC R 985 29 - Engine System, LPG Alternator - Spare Parts (A) Alternator complete (B) Heat sink (C) Bridge rectifier. (D) Resistor (E) Grid side (F) Temperature sensor Figure 25:... -
Page 193: Engine/Alternator Unit
Service Manual – SW5500, FLOORTEC R 985 29 - Engine System, LPG Engine/Alternator Unit Removal Empty the LPG system (see procedure in the relevant paragraph) Drive the machine on a level floor. Open the engine compartment hood with the handle and fasten it with the support rod Disconnect both the negative and positive terminals from the batteries Remove the machine right and left side panels by lifting them to disengage them from the fasteners Disconnect the engine harness (B) electrical connections (A) - Page 194 Service Manual – SW5500, FLOORTEC R 985 29 - Engine System, LPG Engine/Alternator Unit (Continues) Loosen the clamp and disconnect the terminal (H) on the vacuum line 10 Loosen the clamp and disconnect the terminal (I) on the LPG supply line WARNING: For removal / installation of the various hoses and fittings of the LPG system, see procedure in the relevant paragraph.
-
Page 195: Specifications
Service Manual – SW5500, FLOORTEC R 985 29 - Engine System, LPG Specifications Model SW5500 LPG FLOORTEC R 985 LPG Make Honda Model iGX-270 Dimensions 14 x 18.2 x 16.6 in (358 x 462 x 422 mm) Dry weight 67 lb (30.3 Kg) Displacement 270 cm Power... -
Page 196: 29 - Engine, Hybrid System
Service Manual – SW5500, FLOORTEC R 985 29 - Engine, Hybrid System Functional Description The “Hybrid System Kit” is applicable both to the unit (EB7), while on the diesel version it cuts off LPG or Diesel engine versions with the aim of the supply of the fuel pump (P2) allowing the user to work even with switched off Bypass of drive system enabling relay (ES8) -
Page 197: Wiring Diagram (Diesel Version)
Service Manual – SW5500, FLOORTEC R 985 29 - Engine, Hybrid System Wiring Diagram (Diesel Version) EMERGENCY PUSH-BUTTON (SW0) KEY (KEY) JC.1 J1.11 Drive system board enabling DISPLAY Return from KEY circuit J1.1 CONTROLLER (EB3) TRACTION ENABLE RELAY (ES12) BAT CHARGER DISAB input (NO) J1.16 HYBRIS SYSTEM RELAY (ES11) MAIN MACHINE... -
Page 198: Wiring Diagram (Lpg Version)
Service Manual – SW5500, FLOORTEC R 985 29 - Engine, Hybrid System Wiring Diagram (LPG Version) EMERGENCY PUSH-BUTTON (SW0) KEY (KEY) JC.1 J1.11 Drive system board enabling DISPLAY Return from KEY circuit J1.1 CONTROLLER (EB3) TRACTION ENABLE RELAY (ES12) BAT CHARGER DISAB input (NO) J1.16 HYBRID SYSTEM RELAY (ES11) MAIN MACHINE... -
Page 199: Component Locations (Battery, Diesel, Lpg Versions)
Service Manual – SW5500, FLOORTEC R 985 29 - Engine, Hybrid System Component Locations (Battery, Diesel, LPG versions) • Engine shut off switch (SW2) • Hybrid system battery charger (CH) • Bridge wire on the (ES8) relay connection • Hybrid system relay (ES11) Engine shut off switch (SW2) Hybrid system battery charger (CH) Bridge wire on the (ES8) relay connection... -
Page 200: Maintenance And Adjustments
Service Manual – SW5500, FLOORTEC R 985 29 - Engine, Hybrid System Maintenance and Adjustments Battery Charging WARNING: Charge the batteries with the installed battery charger when the last segment of the battery icon (A) starts flashing , or at the end of each job. Keeping the batteries charged make their life last longer. -
Page 201: Troubleshooting
Service Manual – SW5500, FLOORTEC R 985 29 - Engine, Hybrid System Troubleshooting Trouble Possible causes Remedy HYB parameter not correctly set to “YES” The broom system is activated Check the parameter setting (see hidden only when the engine is running parameters table in the Machine Settings Screen) The drive system does not work... -
Page 202: 42 - Sweep System, Main Broom
Service Manual – SW5500, FLOORTEC R 985 42 - Sweep System, Main Broom Functional Description Pressing the One-Touch button on the Main Control Board makes the main broom support system lower via the actuator (A1) The actuator is powered for 5 seconds, within which time it should reach the requested end stroke position (the actuator has internal limit switches with bypass diodes) The electric motor transmits the motion to the main broom via a reduction gear connected to a hexagonal driver that supports the broom... -
Page 203: Wiring Diagram
Service Manual – SW5500, FLOORTEC R 985 42 - Sweep System, Main Broom Wiring diagram BATTERY + J1.1 Drive system board enabling B+ Main machine controller power supply + MAIN CONTROL MAIN Main broom motor + BOARD (EB4) J1.1 Power + BROOM Dashboard serial connection J3.1... -
Page 204: Component Locations
Service Manual – SW5500, FLOORTEC R 985 42 - Sweep System, Main Broom Component Locations • One-Touch sweeping/vacuum button (raising/ • Main broom lowering of main broom) • Device to adjust the parallelism between the main • Main broom height adjusting knob broom and the floor •... - Page 205 Service Manual – SW5500, FLOORTEC R 985 42 - Sweep System, Main Broom Component Locations (Continues) • Rear skirt • Main broom actuator (A1) • Front skirt • Main broom wear sensor (S4) • Left side skirt • Main broom motor (M4) •...
-
Page 206: Maintenance And Adjustments
Service Manual – SW5500, FLOORTEC R 985 42 - Sweep System, Main Broom Maintenance and Adjustments Main Broom Height Check And Adjustment ◦ If the print (B) is not within specifications, Note: Brooms with harder or softer adjust the main broom height according to bristles are available. - Page 207 Service Manual – SW5500, FLOORTEC R 985 42 - Sweep System, Main Broom Main Broom Height Check and Adjustment (Continues) • Turn the fasteners and remove the left door (H) • Loosen the nuts (E) • Loosen the locknut (F) •...
-
Page 208: Skirt Height And Operation Check And Adjustment
Service Manual – SW5500, FLOORTEC R 985 42 - Sweep System, Main Broom Skirt Height and Operation Check and Adjustment Preliminary Operations Empty the hopper to prevent the weight of the debris affecting the skirt height check Drive the machine on a level ground that is suitable for checking the skirt height Turn the ignition key to “0”, then engage the parking brake Side Skirt Check Remove the left door by turning the fasteners... - Page 209 Service Manual – SW5500, FLOORTEC R 985 42 - Sweep System, Main Broom Skirt Height and Operation Check and Adjustment (Continues) Front and Rear Skirt Check Remove the main broom (see procedure in the relevant paragraph) Check the condition of the front (G) and rear skirts (H) and (I) Replace the skirts when they have cuts (C) larger than 0,8 in (20 mm) or cracks/tears (D) larger than 0,4 in (10 mm) 10 Check that the front skirt (G) and rear skirt (I) slightly rub the floor without coming off the ground (J).
-
Page 210: Troubleshooting
Service Manual – SW5500, FLOORTEC R 985 42 - Sweep System, Main Broom Troubleshooting Trouble Possible causes Remedy The main broom does not work and ALARM Main broom motor (M4) faulty Check the motor amperage/replace is shown on the display Front skirt jammed in broom Return it to position Front skirt incorrectly regulated and coming... -
Page 211: Main Broom Motor Current Draw Check
Service Manual – SW5500, FLOORTEC R 985 42 - Sweep System, Main Broom Main Broom Motor Current Draw Check Press the stud (E), sliding it upwards (causing WARNING: This procedure must be the Main Control Board (F) to lift slightly, then performed by qualified remove the fairing (B) by disengaging it from its personnel only. - Page 212 Service Manual – SW5500, FLOORTEC R 985 42 - Sweep System, Main Broom Main Broom Motor Current Draw Check (Continues) For safety purposes, to prevent accidental If the amperage is higher, perform the following lowering of the machine, apply two suitable procedures to detect and correct it: spacers under the right (I) and left (J) side ◦...
-
Page 213: Removal And Installation
Service Manual – SW5500, FLOORTEC R 985 42 - Sweep System, Main Broom Removal and Installation Main Broom Removal Pull the knob (C) as indicated by the arrow to WARNING: It is advisable to wear protective disengage the closing support (D) gloves when replacing the main broom because there can Open the closing support (D) together with... - Page 214 Service Manual – SW5500, FLOORTEC R 985 42 - Sweep System, Main Broom Main Broom (Continues) Installation The main broom must be installed with the bristles (I) oriented as shown in the figure. 10 Install the new main broom and ensure that the hexagonal mesh (J) fits into the relevant drive hub (G). 11 Turn and close the closing support (D) together with the left side skirt (E), until the knob (C) clicks;...
-
Page 215: Skirt
Service Manual – SW5500, FLOORTEC R 985 42 - Sweep System, Main Broom Skirt Left Side Skirt Removal and Installation Empty the hopper (as shown in the Instructions for Use Manual), because the weight of the waste inside the hopper can affect the skirt height check Drive the machine on a level ground that is suitable for checking the skirt height Turn the ignition key to “0”, then engage the parking brake Turn the fasteners and remove the machine left door... - Page 216 Service Manual – SW5500, FLOORTEC R 985 42 - Sweep System, Main Broom Skirt (Continues) Right Side Skirt Removal and Installation 10 Empty the hopper (as shown in the Instructions for Use Manual), because the weight of the waste inside the hopper can affect the skirt height check 11 Drive the machine on a level ground that is suitable for checking the skirt height 12 Turn the ignition key to “0”, then engage the parking brake...
- Page 217 Service Manual – SW5500, FLOORTEC R 985 42 - Sweep System, Main Broom Skirt (Continues) Front Skirt Removal and Installation 17 Empty the hopper (as shown in the Instructions for Use Manual), because the weight of the waste inside the hopper can affect the skirt height check 18 Drive the machine on a level ground that is suitable for checking the skirt height 19 Turn the ignition key to “0”, then engage the parking brake 20 Remove the side brooms (see...
- Page 218 Service Manual – SW5500, FLOORTEC R 985 42 - Sweep System, Main Broom Skirt (Continues) Rear Skirts Removal and Installation 26 Empty the hopper, because the weight of the waste inside the hopper can affect the skirt height check 27 Drive the machine on a level ground that is suitable for checking the skirt height 28 Turn the ignition key to “0”, then engage the parking brake 29 Remove the main broom (see procedure...
-
Page 219: Main Broom Motor
Service Manual – SW5500, FLOORTEC R 985 42 - Sweep System, Main Broom Main Broom Motor Removal Drive the machine on a level floor. Lift the hopper to the end-of-stroke WARNING: Place a safety rod under the lifted hopper. Turn the ignition key to “0”, then engage the parking brake Open the battery/engine compartment hood with the handle and fasten it with the support rod Disconnect the battery connector (Battery Version) - Disconnect the batteries (Diesel and LPG Version) Remove the main broom (see... - Page 220 Service Manual – SW5500, FLOORTEC R 985 42 - Sweep System, Main Broom Main broom motor (Continues) 10 Unscrew the nut (G) on the main broom motor (H) 11 Use a rubber mallet to tap the threaded pin (I) inwards, then remove it from the side broom compartment, complete with the drive hub (J) 12 Unscrew the four screws (K) and remove the main broom gear motor (H) 13 If necessary, remove the reduction unit from the motor on the workbench, according to the following...
-
Page 221: Main Broom Motor Carbon Brush Check/Replacement
Service Manual – SW5500, FLOORTEC R 985 42 - Sweep System, Main Broom Main Broom Motor Carbon Brush Check/Replacement Disassembly Remove the main broom motor (see procedure in the relevant paragraph) At the workbench, remove the nuts (A) and the guard (B) of the main broom motor (C) If necessary, clean the external side of the motor (C) in the area of the protection band (D) Disengage the cam lever (E) and remove the protection band (D) Remove the fastening screws (F) of the electrical connections of the four carbon brushes (G) -
Page 222: Main Broom Motor Driver
Service Manual – SW5500, FLOORTEC R 985 42 - Sweep System, Main Broom Main Broom Motor Driver Removal Drive the machine on a level floor. Lift the hopper to the end-of-stroke WARNING: Place a safety rod under the lifted hopper. Turn the ignition key to “0”, then engage the parking brake Remove the main broom (see procedure... - Page 223 Service Manual – SW5500, FLOORTEC R 985 42 - Sweep System, Main Broom Main Broom Motor Driver (continues) Use a rubber mallet to tap the threaded pin (E) inwards, then remove it from the side broom compartment, complete with the drive hub (F) If necessary, unscrew the hub lock nut (G) on the workbench and extract the driver (H), detaching it from the shaft with two spanners Installation...
-
Page 224: Main Broom Actuator
Service Manual – SW5500, FLOORTEC R 985 42 - Sweep System, Main Broom Main Broom Actuator Removal Drive the machine on a level floor. Turn the ignition key to “0”, then engage the parking brake Remove the main broom (see procedure in the relevant paragraph) Lower the main broom from the Main Control Board... - Page 225 Service Manual – SW5500, FLOORTEC R 985 42 - Sweep System, Main Broom Main Broom Actuator (continues) Installation 12 Assemble the components in the reverse order of removal, and note the following: ◦ If necessary, replace the lock nuts (G) and (H) of the screw to ensure correct fastening; also screw them down just enough to bring them together, ensuring free movement of the actuator (F) on the slots (J) and pin (K) Figure 23:...
-
Page 226: Main Broom Wear Sensor And Adjustment
Service Manual – SW5500, FLOORTEC R 985 42 - Sweep System, Main Broom Main Broom Wear Sensor and Adjustment Removal Drive the machine on a level floor. Remove the main broom (see procedure in the relevant paragraph) Turn the ignition key to “I”, and press the One-Touch button to engage the sweeping system Turn the ignition key to “0”, then engage the parking brake Open the battery/engine compartment hood with the handle and fasten it with the support rod... - Page 227 Service Manual – SW5500, FLOORTEC R 985 42 - Sweep System, Main Broom Main Broom Wear Sensor and Adjustment (continues) Adjustment 12 Use the knob (K) to lower the main broom until the end (L) of the lever (M) moves under the sensor (G), in position (N) 13 In this position, insert the sensor (G), the nut (J) and the locknut (I), then adjust the sensor (G) to the distance (P) of 4-5 mm;...
-
Page 228: Specifications
Service Manual – SW5500, FLOORTEC R 985 42 - Sweep System, Main Broom Specifications Model SW5500 B SW5500 D SW5500 LPG FLOORTEC R 985 B FLOORTEC R 985 LPG Main broom size (length x diameter) 33.5 x 14.2 in (850 x 360 mm) -
Page 229: 43 - Sweep System, Side Broom
Service Manual – SW5500, FLOORTEC R 985 43 - Sweep System, Side Broom Functional Description Pressing the right (or left) side broom button on the Main Control Board causes the corresponding side broom to lower via the corresponding actuator, right (A2) or left (A3) Each actuator is powered for 5 seconds, within which time it should reach the requested end stroke position (each actuator has internal limit switches with bypass diodes) In case of side impact, the system can return by means of a spring which absorbs the shock... -
Page 230: Wiring Diagram
Service Manual – SW5500, FLOORTEC R 985 43 - Sweep System, Side Broom Wiring diagram BATTERY + J1.11Drive system board enabling B+ Main machine controller power supply + MAIN CONTROL MAIN Main broom motor + BOARD (EB4) BROOM J1.1 Power + Dashboard serial connection J3.1 J1.2... -
Page 231: Component Locations
Service Manual – SW5500, FLOORTEC R 985 43 - Sweep System, Side Broom Component Locations • Right side broom lifting/lowering button • Side broom motor (M5) (M6) • Left side broom lifting/lowering button • Side broom • Side broom rotation speed adjustment buttons •... -
Page 232: Maintenance And Adjustments
Service Manual – SW5500, FLOORTEC R 985 43 - Sweep System, Side Broom Maintenance and Adjustments Side broom height check and adjustment Note: Brooms with harder or softer bristles are available. This procedure is applicable to all types of brooms. Height Adjustment Check the side broom distance from the ground, according to the following procedure: ◦... - Page 233 Service Manual – SW5500, FLOORTEC R 985 43 - Sweep System, Side Broom Side broom height check and adjustment (continues) For the right side broom, regulate by loosening the ring nut (C) and by adjusting the adjuster (D) until the correct print (A) is achieved Finally lock the adjuster (D) into position with the ring nut (C) For the left side broom, operate on the adjuster by loosening the ring nut (E) and by adjusting the adjuster (F) until the correct print (B) is achieved Finally lock the adjuster (F) into position with the ring nut (E)
-
Page 234: Troubleshooting
Service Manual – SW5500, FLOORTEC R 985 43 - Sweep System, Side Broom Troubleshooting Trouble Possible causes Remedy The right/left side broom does not clean The broom has not been properly adjusted in Adjust properly height/parallelism The broom is excessively worn Replace The side brooms do not work Side broom motor (M5), (M6) faulty... -
Page 235: Side Broom Motor Current Draw Check
Service Manual – SW5500, FLOORTEC R 985 43 - Sweep System, Side Broom Side Broom Motor Current Draw Check Unscrew the nut (C) on the front WARNING: This procedure must be performed by qualified Slide the sleeve (D) until it is flush on the personnel only. - Page 236 Service Manual – SW5500, FLOORTEC R 985 43 - Sweep System, Side Broom Side Broom Motor Current Draw Check (Continues) For safety purposes, to prevent accidental 14 If the amperage is higher, perform the following lowering of the machine, apply two suitable procedures to detect and correct it: spacers under the right (I) and left (J) side ◦...
-
Page 237: Removal And Installation
Service Manual – SW5500, FLOORTEC R 985 43 - Sweep System, Side Broom Removal and Installation Side Broom Detach and remove the pin (A) from the hub (B) Note: Brooms with harder or softer of the side broom (C) bristles are available. This procedure is applicable to all types Remove the side broom (C) from the hub (B) and of brooms. -
Page 238: Side Broom Motor
Service Manual – SW5500, FLOORTEC R 985 43 - Sweep System, Side Broom Side Broom Motor Disconnect the electrical connection (C) of the Removal side broom motor (B), located above the motor Remove the side broom of the motor to be itself (if necessary, cut any clamps in the way) removed (see procedure... -
Page 239: Side Broom Motor Carbon Brush Check/Replacement
Service Manual – SW5500, FLOORTEC R 985 43 - Sweep System, Side Broom Side Broom Motor Carbon Brush Check/Replacement Disassembly Remove the side broom motor (see procedure in the relevant paragraph) Take the motor (A) to the workbench and, if necessary, mark the position (B) of the cap (C) as to the motor body (for proper reassembly) Remove the screws (D) Carefully remove the cap (C) by disengaging the carbon brushes inside the motor armature... -
Page 240: Side Broom Actuator
Service Manual – SW5500, FLOORTEC R 985 43 - Sweep System, Side Broom Side Broom Actuator Removal Drive the machine on a level floor. Turn the ignition key to “0”, then engage the parking brake Open the battery/engine compartment hood with the handle and fasten it with the support rod Disconnect the battery connector (Battery Version) - Disconnect the batteries (Diesel and LPG Version) Remove the side brooms (see procedure... - Page 241 Service Manual – SW5500, FLOORTEC R 985 43 - Sweep System, Side Broom Side Broom Actuator (continues) 11 Unscrew the two screws (J) and remove the cover (K) at the base of the steering column 12 Unscrew the handwheels (L) on the left-hand side of the machine and remove the left door (M) 13 Unscrew the screws (N) on the right-hand side of the machine and remove the right door (M) 14 Working below the footboard (Q), unscrew the screws in the fastening positions (R) of the footboard itself...
- Page 242 Service Manual – SW5500, FLOORTEC R 985 43 - Sweep System, Side Broom Side Broom Actuator (continues) 16 Disconnect the electrical connection (S) of the side broom motor and the electrical connection (T) of the actuator 17 Cut the cable clamp (U) 18 Disconnect the spring (V) from the side (W) by using a lever (X) in the slot (Y) 19 Remove the cotter (Z) and extract the pin (AA), then remove the actuator and broom motor assembly (AB)
- Page 243 Service Manual – SW5500, FLOORTEC R 985 43 - Sweep System, Side Broom Side Broom Actuator (continues) Installation 22 Assemble the components in the reverse order of removal, and note the following: ◦ If necessary, replace the lock nut on the screw (AD) to ensure correct fastening; also screw it down just enough to bring it flush, ensuring free movement of the screw (AD) on the slots (AG) Figure 14:...
-
Page 244: Specifications
Service Manual – SW5500, FLOORTEC R 985 43 - Sweep System, Side Broom Specifications Model SW5500 B SW5500 D SW5500 LPG FLOORTEC R 985 B FLOORTEC R 985 LPG With one side broom 46.3 in (1,175 mm) Cleaning width With two side brooms... -
Page 245: 50 - Dust Control System
Service Manual – SW5500, FLOORTEC R 985 50 - Dust Control System Functional Description The dust raised in the compartment of the main broom, is collected in the rear cargo area by a flow of air generated by the dust control system The filter located between the vacuum system and the hopper, retains dirt which is then conveyed through a feedbox into the hopper itself The operation of the system depends on the activation of the main broom... -
Page 246: Wiring Diagram
Service Manual – SW5500, FLOORTEC R 985 50 - Dust Control System Wiring Diagram BATTERY + VACUUM SYSTEM B+ Main machine controller power supply + Vacuum system motor + MOTOR Vacuum system motor - Filter shaker motor + FILTER SHAKER MAIN MACHINE MOTOR CONTROLLER (EB1) -
Page 247: Component Locations
Service Manual – SW5500, FLOORTEC R 985 50 - Dust Control System Component Locations • Vacuum button • Filter shaker button • Vacuum fan motor (M1) • Filter shaker motor (M2 – M2) • Panel filter • Filter gasket Filter shaker button Vacuum button Vacuum fan motor (M1) Filter gasket... -
Page 248: Maintenance And Adjustments
Service Manual – SW5500, FLOORTEC R 985 50 - Dust Control System Maintenance and Adjustments Panel Dust Filter Cleaning and Integrity Check The dust filter must be regularly cleaned to maintain the efficiency of the vacuum system. Follow the recommended filter service intervals for the longest filter life. WARNING: Wear safety glasses when cleaning the filter. - Page 249 Service Manual – SW5500, FLOORTEC R 985 50 - Dust Control System Panel Dust Filter Cleaning and Integrity Check (Continues) This provides better quality cleaning but reduces the Method “A” life of the filter, which will have to be replaced more Collect dust from the filter.
-
Page 250: Troubleshooting
Service Manual – SW5500, FLOORTEC R 985 50 - Dust Control System Troubleshooting Trouble Possible causes Remedy No vacuuming Vacuum system motor (M1) broken Repair/replace Dust/debris vacuuming is insufficient The filter is clogged Clean the dust filter by using the filter shaker or by disassembling it. -
Page 251: Vacuum Fan Motor Current Draw Check
Service Manual – SW5500, FLOORTEC R 985 50 - Dust Control System Vacuum Fan Motor Current Draw Check WARNING: This procedure must be performed by qualified personnel only. Drive the machine on a level floor. Turn the ignition key to “0”, then engage the parking brake Unscrew the four screws (A) fastening the fairing (B) Unscrew the nut (C) on the front Slide the sleeve (D) until it is flush on the steering wheel. - Page 252 Service Manual – SW5500, FLOORTEC R 985 50 - Dust Control System Vacuum Fan Motor Current Draw Check (continues) Release the fasteners (K) then lift the vacuum system cover hood (L) all the way 10 Apply the clamp ammeter (M) on one cable (N) of the electric vacuum fan 11 Start the machine with the ignition key 12 Turn on the vacuum and check that the current draw of the fan motor is 8 - 10A at 24V ◦...
-
Page 253: Removal And Installation
Service Manual – SW5500, FLOORTEC R 985 50 - Dust Control System Removal and Installation Filter Shaker Motor Removal Drive the machine on a level floor. Turn the ignition key to “0”, then engage the parking brake Open the battery/engine compartment hood with the handle and fasten it with the support rod Disconnect the battery connector (Battery Version) - Disconnect the batteries (Diesel and LPG Version) Release the fasteners (A) then lift the vacuum system cover hood (B) all the way Working on the filter shaker assembly requiring removal, disconnect the electrical connection (C) of the... - Page 254 Service Manual – SW5500, FLOORTEC R 985 50 - Dust Control System Filter Shaker Motor (Continues) Installation 10 Assemble the components in the reverse order of removal, and note the following: ◦ When reinstalling the eccentric cylinder (I), respect the required position of the grub screw fastening surface ◦...
-
Page 255: Vacuum Fan Motor
Service Manual – SW5500, FLOORTEC R 985 50 - Dust Control System Vacuum Fan Motor Removal Drive the machine on a level floor. Lift the hopper to the end-of-stroke WARNING: Place a safety rod under the lifted hopper.. Turn the ignition key to “0”, then engage the parking brake Open the battery/engine compartment hood with the handle and fasten it with the support rod Disconnect the battery connector (Battery Version) - Disconnect the batteries (Diesel and LPG Version) Lift and remove the right side panel (A), disengaging it from the upper (B) and lower (C) fasteners... - Page 256 Service Manual – SW5500, FLOORTEC R 985 50 - Dust Control System Vacuum Fan (Continues) Unscrew the hood hinge (F) screws (G) 10 Remove the hood (F), disengaging the slot (H) of the lever (I) for releasing the hood from the pin (L) on the machine chassis 11 Cut the various cable clamps (M) on the workbench, then disconnect the electrical connections (N) of the two filter shaker motors and the electrical connection (P) of the electric fan.
- Page 257 Service Manual – SW5500, FLOORTEC R 985 50 - Dust Control System Vacuum Fan (Continues) 12 Unscrew the screws (Q) and remove the assembly (R) 13 Disconnect the terminals of the electrical cables (S) from the connector (T), then extract the electrical cables from the cable grommet (U) 14 Unscrew the screws (V), then remove the vacuum fan motor assembly (W) 15 If necessary, unscrew the nuts (X) and remove the flange (Y) from the electric fan (W).
-
Page 258: Specifications
Service Manual – SW5500, FLOORTEC R 985 50 - Dust Control System Specifications Model SW5500 B SW5500 D SW5500 LPG FLOORTEC R 985 B FLOORTEC R 985 LPG Filter Area 75.3 ft (7 m Filter efficiency 77% @ ,08 µm... -
Page 259: 51 - Dust Guard System
Service Manual – SW5500, FLOORTEC R 985 51 - Dust Guard System Functional Description The dust guard system sprays a thin film of water in front of each side broom, thus minimizing the dust raised by the broom itself The water used by the dust guard system is contained in a tank located inside the rear filter housing. The system is composed of a pump motor (P1) which is powered by the Main Machine Controller (EB1) The system is activated by pressing the DustGuard™... -
Page 260: Wiring Diagram
Service Manual – SW5500, FLOORTEC R 985 51 - Dust Guard System Wiring Diagram BATTERY + B+ Main machine controller power supply + SIDE CONTROL PANEL BOARD (EB5) J1.2 J1.3 J1.2 HOPPER ENABLING push-button input J1.1 J1.4 J1.5 MAIN MACHINE CONTROLLER (EB1) WATER Water pump motor +... -
Page 261: Component Locations
Service Manual – SW5500, FLOORTEC R 985 51 - Dust Guard System Component Locations • Dust guard system button • Water pump (P1) • Water tank • Water filter • Tank filler • Spraying nozzle Dust guard system button Water filter Water pump (P1) Spraying nozzle Water tank... -
Page 262: Maintenance And Adjustments
Service Manual – SW5500, FLOORTEC R 985 51 - Dust Guard System Maintenance and Adjustments Dust Guard System Water Filter Cleaning Note: It is not necessary to drain the water in the system in order to clean the filter; when removing the filter cover, usually only a minimal quantity of residual water will come out. -
Page 263: Water Nozzles And Filter Cleaning
Service Manual – SW5500, FLOORTEC R 985 51 - Dust Guard System Water Nozzles and Filter Cleaning Drive the machine on a level floor. Turn the ignition key to “0”, then engage the parking brake On the front side of the side brooms, remove the ring nuts (A) (bayonet connection) Remove and clean the nozzles (B), the gaskets (C) and the filters (D) with compressed air. -
Page 264: Troubleshooting
Service Manual – SW5500, FLOORTEC R 985 51 - Dust Guard System Troubleshooting Trouble Possible causes Remedy Little water comes out from the spray nozzles The nozzle filter and/or nozzle is clogged Clean/replace The water filter is clogged Clean/replace The pump is not working properly Repair/replace The water filter is clogged No water to the nozzles... -
Page 265: Removal And Installation
Service Manual – SW5500, FLOORTEC R 985 51 - Dust Guard System Removal and Installation Dust Guard System Water Pump Removal Drive the machine on a level floor. Turn the ignition key to “0”, then engage the parking brake Open the battery/engine compartment hood with the handle and fasten it with the support rod Disconnect the battery connector (Battery Version) - Disconnect the batteries (Diesel and LPG Version) Lift and remove the left side panel, disengaging it from the upper and lower fasteners Disconnect the pump (B) electrical connection (A) -
Page 266: Specifications
Service Manual – SW5500, FLOORTEC R 985 51 - Dust Guard System Specifications Model SW5500 B SW5500 D SW5500 LPG FLOORTEC R 985 B FLOORTEC R 985 LPG Dust guard system water tank capacity 8.4 US gal (32 liters) Pump... -
Page 267: 52 - Hopper System
Service Manual – SW5500, FLOORTEC R 985 52 - Hopper System Functional Description The hopper lifting and dumping system is operated by two hydraulic cylinders driven by an hopper pump (M3) with integrated hydraulic unit The hopper pump (M3) is powered by the Main Machine Controller (EB1) Activation of various solenoid valves allows the hopper pump (M3) to move the two hydraulic cylinders in the required direction, according to the following table: ACTIVATION OF OUTPUTS FOR HOPPER MOVEMENTS... - Page 268 Service Manual – SW5500, FLOORTEC R 985 52 - Hopper System Functional Description (continues) Hopper lifted sensor (S2) Hopper closed sensor (S1) Hopper pump (M3) Dumping valve (EV3) Raising valve (EV1) Lowering valve (EV2) Hopper dumping sensor (S3) Figure 1:...
-
Page 269: Wiring Diagram
Service Manual – SW5500, FLOORTEC R 985 52 - Hopper System Wiring Diagram BATTERY + B+ Main machine controller power supply + DISPLAY CONTROLLER (EB3) MAIN CONTROL J1.11Drive system el. board enabling BOARD (EB4) J1.1 Power + Main Control B. serial connection J3.1 J1.2 Main Control B. -
Page 270: Hopper System Hydraulic Diagrams
Service Manual – SW5500, FLOORTEC R 985 52 - Hopper System Hopper System Hydraulic Diagrams Hopper Down Hopper dumping Cylinder Hopper raising Cylinder Discharges/Recalls Hopper Raises/Lowers Hopper 5 l/1' 140bar 800W Reservoir Hopper pump Figure 3:... -
Page 271: Raise Hopper
Service Manual – SW5500, FLOORTEC R 985 52 - Hopper System Raise Hopper Hopper dumping Cylinder Hopper raising Cylinder Raises Hopper 5 l/1' 140bar 800W Reservoir Hopper pump Figure 4:... -
Page 272: Discharge Hopper
Service Manual – SW5500, FLOORTEC R 985 52 - Hopper System Discharge Hopper Hopper dumping Cylinder Hopper raising Cylinder Discharges Hopper 5 l/1' 140bar 800W Reservoir Hopper pump Figure 5:... -
Page 273: Recall Hopper
Service Manual – SW5500, FLOORTEC R 985 52 - Hopper System Recall Hopper Hopper dumping Cylinder Hopper raising Cylinder Recalls Hopper 5 l/1' 140bar 800W Reservoir Hopper pump Figure 6:... -
Page 274: Hopper Lowering
Service Manual – SW5500, FLOORTEC R 985 52 - Hopper System Hopper Lowering Hopper dumping Cylinder Hopper raising Cylinder Lowers Hopper 5 l/1' 140bar 800W Reservoir Hopper pump Figure 7:... -
Page 275: Component Locations
Service Manual – SW5500, FLOORTEC R 985 52 - Hopper System Component Locations • Hopper movement enabling button • Closed hopper sensor (S1) • Hopper lifting button • Hopper lifted sensor (S2) • Hopper lowering button • Hopper dumping sensor (S3) •... - Page 276 Service Manual – SW5500, FLOORTEC R 985 52 - Hopper System Component Layout (Continues) • Raising valve (EV1) • Hydraulic lifting cylinder • Lowering valve (EV2) • Hydraulic dumping cylinder • Dumping valve (EV3) • Hopper pump (M3) • Check valve •...
-
Page 277: Maintenance And Adjustments
Service Manual – SW5500, FLOORTEC R 985 52 - Hopper System Maintenance and Adjustments Hydraulic System Oil Level Check WARNING: Procedure to be performed with the hopper fully retracted. Drive the machine on a level floor. Turn the ignition key to “0”, then engage the parking brake Open the battery/engine compartment hood with the handle and fasten it with the support rod Check that the oil level in the hydraulic unit tank (A) is between the minimum (MIN) (B) and maximum (MAX) (C) marks shown... -
Page 278: Troubleshooting
Service Manual – SW5500, FLOORTEC R 985 52 - Hopper System Troubleshooting Trouble Possible causes Remedy The hopper does not dump. The hopper is too low. Lift the hopper at a minimum height of 13,7 in (350 mm). Hopper lifted sensor (S2) miscalibrated or Adjust/replace broken. -
Page 279: Removal And Installation
Service Manual – SW5500, FLOORTEC R 985 52 - Hopper System Removal and Installation Closed Hopper Sensor Removal Drive the machine on a level floor. Lift the hopper to the end-of-stroke WARNING: Place a safety rod under the lifted hopper. Turn the ignition key to “0”, then engage the parking brake Open the battery/engine compartment hood with the handle and fasten it with the support rod Disconnect the battery connector (Battery Version) - Disconnect the batteries (Diesel and LPG Version) - Page 280 Service Manual – SW5500, FLOORTEC R 985 52 - Hopper System Closed Hopper Sensor (Continues) Free up and disconnect the electrical connection (F) of the hopper closed sensor (G) Unscrew the nut (H) and remove the sensor (G) with wiring Installation 10 Assemble the components in the reverse order of removal Adjustment...
-
Page 281: Lifted Hopper Sensor
Service Manual – SW5500, FLOORTEC R 985 52 - Hopper System Lifted Hopper Sensor Removal Perform the points from 1 to 7 of the Closed Hopper Sensor procedure Free up and disconnect the electrical connection (F) of the hopper lifted sensor (G) Unscrew the nut (H) and remove the sensor (G) with wiring Installation Assemble the components in the reverse order of removal... -
Page 282: Hopper Rotated Sensor
Service Manual – SW5500, FLOORTEC R 985 52 - Hopper System Hopper Rotated Sensor Cut the various clamps (C) for the sensor wiring Removal Drive the machine on a level floor. Unscrew the nut (D) and remove the sensor (B) Raise the hopper to head height;... -
Page 283: Hopper
Service Manual – SW5500, FLOORTEC R 985 52 - Hopper System Hopper Removal Drive the machine on a level floor. Partially raise the hopper, then close it, making it rest on a platform (A) approx 50 cm high Open the battery/engine compartment hood with the handle and fasten it with the support rod Disconnect the battery connector (Battery Version) - Disconnect the batteries (Diesel and LPG Version) Remove the hopper dumping cylinder (B) (see procedure... - Page 284 Service Manual – SW5500, FLOORTEC R 985 52 - Hopper System Hopper (Continues) Installation Assemble the components in the reverse order of removal, and note the following: ◦ If the hopper is changed, check the three hopper sensors in the following positions: −...
-
Page 285: Hydraulic Control Unit
Service Manual – SW5500, FLOORTEC R 985 52 - Hopper System Hydraulic Control Unit Removal Drive the machine on a level floor. Ensure that the hopper is closed Turn the ignition key to “0”, then engage the parking brake Open the battery/engine compartment hood with the handle and fasten it with the support rod Disconnect the battery connector (Battery Version) - Disconnect the batteries (Diesel and LPG Version) Lift and remove the right side panel (A), disengaging it from the upper (B) and lower (C) fasteners Working above the hydraulic unit (D), free the caps (E) and the disconnect the electrical terminals (F) - Page 286 Service Manual – SW5500, FLOORTEC R 985 52 - Hopper System Hydraulic Control Unit (Continues) Disconnect the electrical connections (G) of the solenoid valves Unscrew the lines (H), collecting any hydraulic fluid which may come out in a suitable container; immediately plug the disconnected fittings to prevent impurities entering the hydraulic system.
-
Page 287: Hopper Lifting Hydraulic Cylinder
Service Manual – SW5500, FLOORTEC R 985 52 - Hopper System Hopper Lifting Hydraulic Cylinder Removal Drive the machine on a level floor. Ensure that the hopper is empty Raise the hopper slightly (A), then close it, resting it on two planks (B) 8-10 cm tall Turn the ignition key to “0”, then engage the parking brake Open the battery/engine compartment hood with the handle and fasten it with the support rod Lift and remove the right side panel (C), disengaging it from the upper (D) and lower (E) fasteners... - Page 288 Service Manual – SW5500, FLOORTEC R 985 52 - Hopper System Hopper Lifting Hydraulic Cylinder (continues) Remove the cover (I), then unscrew the nut below and remove the corresponding upper nut on the hydraulic cylinder (J) Working through the slot (K), unscrew the screw (L) and remove the lower pin (M) of the hydraulic cylinder (J) 10 Remove the hydraulic cylinder (M) Installation...
-
Page 289: Hopper Dumping Hydraulic Cylinder
Service Manual – SW5500, FLOORTEC R 985 52 - Hopper System Hopper Dumping Hydraulic Cylinder Removal Drive the machine on a level floor. Ensure that the hopper is empty Lift the hopper to head height WARNING: Place a safety rod under the lifted hopper. Turn the ignition key to “0”, then engage the parking brake Working from the left-hand side of the hopper, unscrew the nut (A) and remove the washer Supporting the hopper (B), disconnect the rod (C) from the pin, then rotate the hopper downwards... - Page 290 Service Manual – SW5500, FLOORTEC R 985 52 - Hopper System Hopper Dumping Hydraulic Cylinder (continues) Installation 11 Assemble the components in the reverse order of removal, and note the following: ◦ After the installation of the hydraulic cylinder (either the same or a new one), fill the tank with hydraulic fluid up to the Max level, then perform some movements with the hopper (the hydraulic system is self-bleeding);...
-
Page 291: Hydraulic Fluid Changing
Service Manual – SW5500, FLOORTEC R 985 52 - Hopper System Hydraulic Fluid Changing WARNING: Procedure to be performed with the hopper fully retracted. Removal Drive the machine on a level floor. Turn the ignition key to “0”, then engage the parking brake Open the battery/engine compartment hood with the handle and fasten it with the support rod Unscrew the cap (A) on the hydraulic unit tank, then use a syringe to remove all the hydraulic fluid in the tank... -
Page 292: Specifications
Service Manual – SW5500, FLOORTEC R 985 52 - Hopper System Specifications Model SW5500 B SW5500 D SW5500 LPG FLOORTEC R 985 B FLOORTEC R 985 LPG Hopper Capacity 5.3 ft³ (150 liters) Maximum liftable 240 Kg weight Maximum lifting height... -
Page 293: 90 - Options
Service Manual – SW5500, FLOORTEC R 985 90 - Options Description Illustration DUSTGUARD™ SYSTEM KIT (See Dust Guard System chapter) HYBRID KIT (See Hybrid System chapter) SAFETY BELT KIT... - Page 294 Service Manual – SW5500, FLOORTEC R 985 90 - Options Description Illustration ROOF COVER KIT PROTECTION ROOF KIT WORKING LIGHT KIT...
- Page 295 Service Manual – SW5500, FLOORTEC R 985 90 - Options Description Illustration LEFT SIDE BROOM KIT SIDE BROOM GUARD KIT...
Need help?
Do you have a question about the SW5500 B and is the answer not in the manual?
Questions and answers