
Related Manuals for V-TUF RUCKVAC


Summary of Contents for V-TUF RUCKVAC
- Page 1 ® BACKPACK VACUUM CLEANER OPERATOR MANUAL Please read this manual before using the RUCKVAC Vacuum Cleaner...
-
Page 2: Important Safety Instructions
11. Do not pick up hard or sharp objects such as glass, nails, screws, coins, etc. 12. Do not use without all filters in place. Use ONLY filters and accessories provided by V-TUF. Failure to do so will void the warranty. 13. Turn off all controls before plugging or unplugging vacuum cleaner into electrical outlet. - Page 3 15. Do not pick up flammable or combustible materials (lighter fluid, gasoline, kerosene, etc.) or use in the presence of explosive liquids or vapour. 16. Do not pick up toxic material (chlorine bleach, ammonia, drain cleaner, etc.). 17. Do not use in an enclosed space filled with vapours given off by oil based paints, paint thinner, moth proofing substances, flammable dust, or other explosive or toxic vapours.
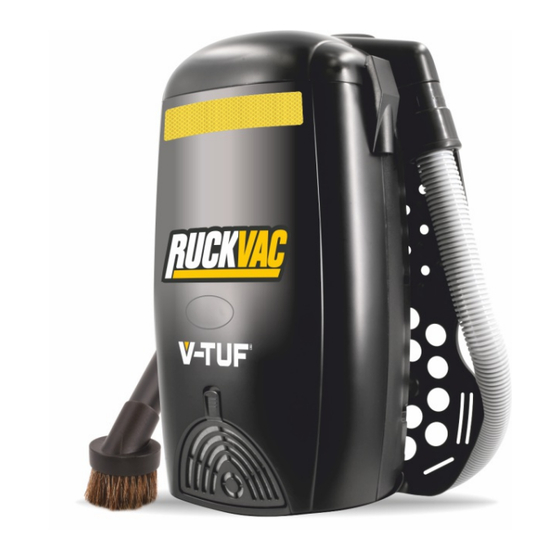
- Page 4 GETTING TO KNOW YOUR RUCKVAC BACKPACK VACUUM...
- Page 5 1. Main Unit 13. Dusting Brush 2. Exhaust Grill Port 14. Crevice Tool 3. On/Off Power Switch 15. Pet Hair Remover 4. Canister Lid Tabs 16. Exhaust Grill 5. Waist Band 17. Paper Dust bag 6. Shoulder Straps 18. Waist Band Back Support Panel 7.
-
Page 6: Assembling Your Vacuum
OPERATING INSTRUCTIONS WARNING To reduce the risk of electric shock, the power cord must be disconnected before removing the dust bag, cloth bag, changing the filters or performing maintenance or trouble – Shooting checks. ASSEMBLING YOUR VACUUM Note. Always remove the power plug from the wall outlet before assembling or removing accessories. - Page 7 Canister Lip Clip Fig 1 Fig 2 Canister Lip Shake-Out Bag Fig 3 Fig 4 Left-Handed Right-Handed Placement Placement Fig 5 Fig 6...
-
Page 8: Using The Attachments
3. To remove the flexible hose, unplug the power cord and then turn the hose. To remove the telescopic tube from the flexible hose, press on the telescopic tube release button and pull it out. (Fig.7) 4. Step on the Floor to Carpet selector to adjust the height of the brushes. There are two different heights one for floors and one for carpets. - Page 9 1. Change the Du st Bag or empty the Shake-Out Bag frequently. 2. Replace the Pre-Motor and exhaust filters as needed. 3. Ensure that the rotating brush is kept free of hair and string which may accumulate and decrease brush performance. 4.
-
Page 10: Using Your Vacuum
USING YOUR VACUUM 1. Insert the power plug into the wall outlet. 2. Connect hose and telescopic tube if desired. 3. Correctly place shoulder straps on each shoulder and secur e the waist band with hook and loop strips. (Fig.16) Caution. - Page 11 Shoulder Straps Waist Band & Tool Storage Power Switch Fig 16 Fig 17 Bag Duster Canister Lip Clip Fig 18 Fig 19...
- Page 12 Wash once a month or when suction appears reduced. WARNING Allow 24 hours for drying before replacing in unit. ® V-TUF.COM...
Need help?
Do you have a question about the RUCKVAC and is the answer not in the manual?
Questions and answers