Table of Contents
Advertisement
Quick Links
Advertisement
Table of Contents

Related Manuals for Avalue Technology SID-21V-Z37-A1R


Summary of Contents for Avalue Technology SID-21V-Z37-A1R
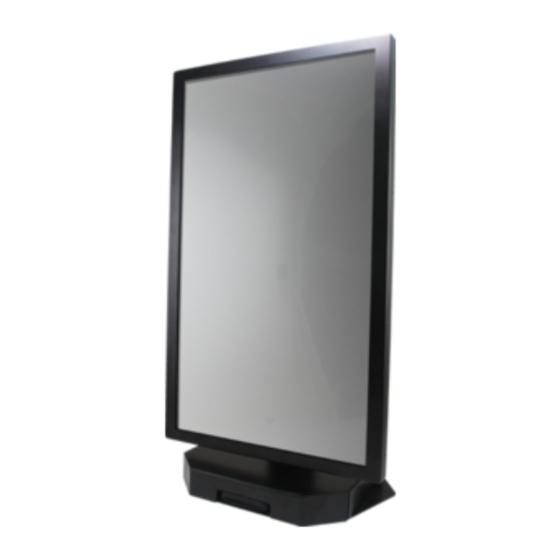
- Page 1 SID-21V-Z37-A1R AVALUE TECHNOLOGY, INC. April 20 , 2016...
- Page 2 CORRECT THE INTERFERENCE AT HIS OWN EXPENSE. Disclaimer Avalue Technology Inc. reserves the right to make changes, without notice, to any product, including circuits and/or software described or contained in this manual in order to improve design and/or performance. Avalue Technology assumes no responsibility or liability for the use...
- Page 3 If you still cannot find the answer, gather all the information or questions that apply to your problem, and with the product close at hand, please call Avalue Technology through the number provided below. Our engineers are well trained and are ready to give you the support you need to get the most from your Avalue products.
- Page 4 Write the RMA number visibly on the outside of the package and ship it prepaid to your dealer. SID-21V-Z37-A1R User Manual Page 3 of 24 Revision 1.0...
-
Page 5: Table Of Contents
REPARING THE USB K ......................19 OOTING TO THE BIOS U ......................19 PPLYING THE PDATE ...................... 20 OADING PTIMIZED EFAULTS ....................20 PDATING IRMWARE USB K ....................... 20 REPARING THE SID-21V-Z37-A1R User Manual Page 4 of 24 Revision 1.0... - Page 6 ....................20 EBOOTING TO ECOVERY ........................21 PPLYING THE PDATE ......................21 OMPLETING THE PDATE ....................22 ECHANICAL RAWINGS ........................22 ATTERY RAWING ........................23 YSTEM RAWINGS SID-21V-Z37-A1R User Manual Page 5 of 24 Revision 1.0...
-
Page 7: Revision History
EVISION ISTORY Revision Descriptions Date Number First Release April 20 , 2016 SID-21V-Z37-A1R User Manual Page 6 of 24 Revision 1.0... -
Page 8: Getting Started
NCLUDED Before you begin installing your SID-21V-Z37-A1R, please make sure that the following materials have been shipped: 1 x SID-21V-Z37-A1R Unit, mounted on Stand w/ Card Reader 1 x ACC-BAT-3SP1-01R 1 x 6ft. Power Cord SID-21V-Z37-A1R User Manual Page 7 of 24 Revision 1.0... -
Page 9: Technical Specifications
Shipping Weight 25 lbs. (Including Battery) Color Black Reliability EMI Test CE, FCC class B Operating Temperature 0°C ~ 40°C Operating Humidity 0%~90% relative humidity, non-condensing Storage Temperature -20°C ~ 60°C SID-21V-Z37-A1R User Manual Page 8 of 24 Revision 1.0... -
Page 10: System Connector Overview
2.2.1 T OVER ONNECTORS BAT1 YSTEM OVER 2.2.2 B OTTOM OVER ONNECTORS HDMI DC IN . 2B: S YSTEM OTTOM OVER 2.2.3 B ATTERY ONNECTIONS DOCK BAT2 . 2C: B ATTERY OARD SID-21V-Z37-A1R User Manual Page 9 of 24 Revision 1.0... -
Page 11: Onnector Verview
Continuous discharging to 8.25 V When the pack voltage is 12.6 V, and the Charge Termination charge current is less than or equal to 117 mA Condition the charging should be terminated. SID-21V-Z37-A1R User Manual Page 10 of 24 Revision 1.0... -
Page 12: Battery Handling
2.3.2 B ATTERY ANDLING To ensure safety and maximum life of your product please follow the precautions outlined below: Avoid shorting the battery Do not immerse in water. SID-21V-Z37-A1R User Manual Page 11 of 24 Revision 1.0... -
Page 13: Battery Installation (Optional )
Please make sure the unit is unplugged and powered off. Lay the unit flat, screen side down, on a smooth surface. Locate and open the hinged Top Cover (highlighted in blue). Once opened, locate the battery bracket. SID-21V-Z37-A1R User Manual Page 12 of 24 Revision 1.0... -
Page 14: Emoving The Attery Racket
Remove the 4 screws (M3x5) that secure the battery bracket to the system. Remove the bracket from the system. Locate the battery connection board under the bracket. NTEGRATING THE ATTERY . 3C: B ATTERY MOUNTED ON OARD SID-21V-Z37-A1R User Manual Page 13 of 24 Revision 1.0... -
Page 15: Completing The Installation
The system can now be placed upright on a flat, stable surface. Plug in the power cord and turn the system on. Verify the battery is being recognized by the system and is charging in Settings>Battery. SID-21V-Z37-A1R User Manual Page 14 of 24 Revision 1.0... -
Page 16: Able Anagement
Locate the Cable Cover on the Base Stand (highlighted in blue) Remove the 4 screws that keep the cover in place and pull the cover off of the Arm. SID-21V-Z37-A1R User Manual Page 15 of 24 Revision 1.0... -
Page 17: Removing The Base From The Arm
1 along the backside of the arm. The arm should slide out of the hole in the base NOTE: Please use caution while other cables may be routed through this hole. SID-21V-Z37-A1R User Manual Page 16 of 24 Revision 1.0... -
Page 18: Outing The Ables Hrough The Ase
Bases hole opening. Mount the Arm back onto the Base using the 3 screws that were removed earlier. SID-21V-Z37-A1R User Manual Page 17 of 24 Revision 1.0... -
Page 19: Cable Routing On Bottom Cover
Close the Bottom Cover. As illustrated in Fig. 4E, leave several inches of extra cable slack in the door. This will prevent any strain on the cable if the display was tilted on the mount. SID-21V-Z37-A1R User Manual Page 18 of 24 Revision 1.0... -
Page 20: Completing The Installation
BIOS PDATING THE After installing your SID-21V-Z37-A1R assembly, please make sure all of your cables are installed properly. After powering on the unit and verifying the operating system loads, it may be recommended to update the BIOS before initial functional use. -
Page 21: Loading Optimized Defaults
PDATING IRMWARE After installing your SID-21V-Z37-A1R assembly, please make sure all of your cables are installed properly. After powering on the unit and verifying the operating system loads, it may be recommended to update the Android firmware before initial functional use. - Page 22 Please select “Reboot system now” to reboot the system and get into the newly updated Android OS. Please note you may need to unplug USB disk before you reboot the system. SID-21V-Z37-A1R User Manual Page 21 of 24 Revision 1.0...
- Page 23 7. M ECHANICAL RAWINGS ATTERY RAWING SID-21V-Z37-A1R User Manual Page 22 of 24 Revision 1.0...
- Page 24 YSTEM RAWINGS SID-21V-Z37-A1R User Manual Page 23 of 24 Revision 1.0...
Need help?
Do you have a question about the SID-21V-Z37-A1R and is the answer not in the manual?
Questions and answers