Table of Contents
Advertisement
Quick Links
Advertisement
Table of Contents

Related Manuals for Anritsu PowerMaster MA245 A Series


Summary of Contents for Anritsu PowerMaster MA245 A Series
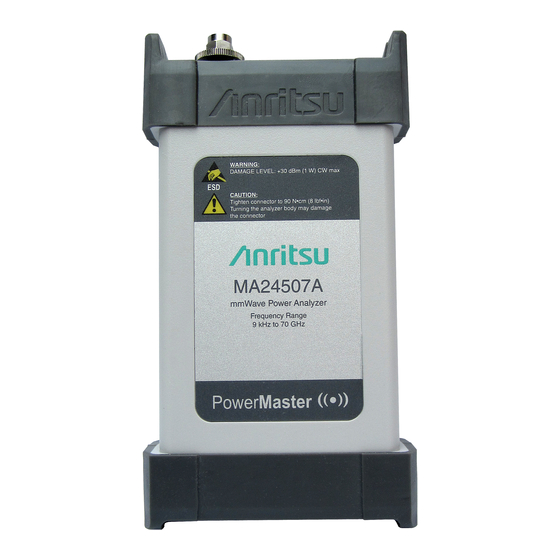
- Page 1 User Guide Anritsu Power Master™ Using PowerXpert™ MA24507A, mmWave Power Analyzer, 9 kHz to 70 GHz MA24510A, mmWave Power Analyzer, 9 kHz to 110 GHz Anritsu Company PN: 10585-00029 490 Jarvis Drive Revision: C Morgan Hill, CA 95037-2809 Published: February 2018...
- Page 2 Title-2 PN: 10585-00029 Rev. C MA245xxA PowerMaster UG...
-
Page 3: Table Of Contents
Contacting Anritsu ........ - Page 4 Table of Contents (Continued) Power Hunter Settings ............3-9 Start/Stop Frequency.
- Page 5 Table of Contents (Continued) RF Connector Precautions ........... . 4-2 Handle With Care .
- Page 6 Table of Contents (Continued) Command Requirements ........... . . 7-2 Query Commands .
-
Page 7: Chapter 1-General Information
This manual provides general information, installation and operating instruction for the Anritsu MA24507A and MA24510A Power Master™ power analyzer using the PowerXpert™ application and remote programming. Introduction This chapter contains general information about Anritsu MA245xxA Power Master. It includes the following information: • General description of the device • Identification number •... -
Page 8: Powerxpert Program
All Anritsu power analyzers are assigned a unique seven digit serial number, such as “1601015”. The serial number is printed on a label that is affixed to the unit. When ordering parts or corresponding with Anritsu Customer Service, please use the correct serial number with reference to the specific instrument's model number. -
Page 9: Customer Asset Tag Placement
To provide maximum protection against damage in transit, the power analyzer should be repackaged in the original shipping container. If this container is no longer available and the unit is being returned to Anritsu for repair, please advise Anritsu Customer Service and use the following process to package the power analyzer for... -
Page 10: Contacting Anritsu
From here, you can select the latest sales, service and support contact information in your country or region, provide online feedback, complete a “Talk to Anritsu” form to get your questions answered, or obtain other services offered by Anritsu. -
Page 11: Chapter 2-Installation (Pc Only)
Chapter 2 — Installation (PC Only) Introduction ™ This chapter provides information on installing the Anritsu PowerXpert application and the MA245xxA Power Master backend software, • “Hardware and Software Requirements” for the Anritsu PowerXpert application • “Installing PowerXpert” procedure Hardware and Software Requirements The following are the recommended minimum PC specifications for installing and using the software: •... -
Page 12: Installing Powerxpert
Once the file is opened, the Installation begins. You see a Preparing Setup screen with a progress bar indicating the status of the Preparation Setup. Figure 2-1. Anritsu Preparing Setup 4. Select Next on the Welcome screen. Figure 2-2. Anritsu Welcome Screen PN: 10585-00029 Rev. - Page 13 Installation (PC Only) 2-4 Installing PowerXpert 5. Read the license agreement and select “I Agree”. 6. Select Next. Figure 2-3. PowerXpert License Agreement 7. Select the Complete (Recommended) button. 8. Select Next. Figure 2-4. Select Setup Type MA245xxA PowerMaster UG PN: 10585-00029 Rev.
- Page 14 2-4 Installing PowerXpert Installation (PC Only) 9. Select Install. Figure 2-5. Installing Anritsu PowerXpert Application The software loads and installs to the selected location. Figure 2-6. Installing Anritsu PowerXpert Application 10. Select Finish to complete the installation. Figure 2-7. Anritsu PowerXpert Installation Complete PN: 10585-00029 Rev.
-
Page 15: Setting Powerxpert To Run In Windows Xp Compatibility Mode
Setting PowerXpert to Run in Windows XP Compatibility Mode Figure 2-8. Setting PowerXpert to Run in Windows XP Compatibility Mode The PowerXpert application can be launched from the Windows Start menu from the Anritsu program group. Select Install the software automatically (Recommended), and then click Next. Figure 2-9. - Page 16 2-5 Setting PowerXpert to Run in Windows XP Compatibility Mode Installation (PC Only) PN: 10585-00029 Rev. C MA245xxA PowerMaster UG...
-
Page 17: Chapter 3-Using Power Master With Powerxpert
This chapter provides instructional information on using the Anritsu MA245xxA Power Master with PowerXpert. PowerXpert is a data analysis and control software for use with Anritsu’s USB power sensors and power analyzers. PowerXpert provides a graphical user interface (GUI), making the PC appear like a traditional power meter. -
Page 18: Powerxpert Overview
These lower task bar parameter settings are available to select and change manually. Changes to these settings are applied by pressing the Enter key. (The lower task bar parameter settings are used in Continuous mode only) Figure 3-1. Anritsu PowerXpert Application GUI Overview (1 of 2) PN: 10585-00029 Rev. C MA245xxA PowerMaster UG... -
Page 19: Power Analyzer Modes Of Operation
Power sensor / analyzer information area showing model and serial number, communications port, and firmware version,“Sensor Information Area”. Figure 3-1. Anritsu PowerXpert Application GUI Overview (2 of 2) Power Analyzer Modes of Operation The USB MA245xxA Power Master operates in three modes: • Continuous Mode For display settings available and function see Figure 3-2, “Continuous Mode User Interface Screen”... -
Page 20: Continuous Mode
3-5 Continuous Mode Using Power Master with PowerXpert Continuous Mode Continuous Mode is the default mode in which the MA245xxA Power Master starts and displays the peak or average power of the input signal. In this mode, the power analyzer is “continuously triggered” and collects data at all times. -
Page 21: Continuous Mode Settings
Using Power Master with PowerXpert 3-6 Continuous Mode Settings Continuous Mode Settings Changing the settings in Continuous Mode requires that the “Apply Above Settings Button” to be selected to activate any changed settings. Measurement – CW/Channel Power The CW/Channel mode pull down lets you select between Channel Power and CW Max mode. In Channel Power mode, the sensor will calculate the average integrated power across the entire user-defined span. -
Page 22: Graticule Display Settings
3-6 Continuous Mode Settings Using Power Master with PowerXpert Graticule Display Settings The parameter settings available below the display screen provide control of the graticule power vs time settings. See Figure 3-3 Index Description Time Span (min): Defaults to 1 minute. Manual setting range is 0.1 to 1440 minutes Power Max (dBm): Defaults to Auto. -
Page 23: Continuous Mode Numerical Display Area
Using Power Master with PowerXpert 3-6 Continuous Mode Settings Continuous Mode Numerical Display Area The Continuous Mode numerical display window contains the following information: 1601015 Index Description Communications port to which the sensor is connected Model number of the connected power sensor Serial number of the connected power sensor Channel power or CW max mode Averaging count... -
Page 24: Power Hunter Mode
3-7 Power Hunter Mode Using Power Master with PowerXpert Power Hunter Mode Power Hunter Mode allows the user to search for up to six CW amplitude peaks within a user-defined frequency span. The Power Hunter Mode display window contains the following information. Power Hunter Mode Setting Options/Range... -
Page 25: Power Hunter Settings
Using Power Master with PowerXpert 3-8 Power Hunter Settings Power Hunter Settings Power Hunter mode only supports CW max mode. Start/Stop Frequency Start and stop frequencies define the frequency window in which power analyzer will search for CW “peaks”. If six sensors are connected, PowerXpert will return the six highest CW values and the associated frequencies. -
Page 26: Power Hunter Mode Numerical Display Area
3-8 Power Hunter Settings Using Power Master with PowerXpert Power Hunter Mode Numerical Display Area The Power Hunter mode numerical display window contains the following information: Index Description Communications port to which the sensor is connected Model number of the connected power sensor Serial number of the connected power sensor CW mode setting (always CW max in Power Hunter mode) Averaging count... -
Page 27: Power Reading Display
Using Power Master with PowerXpert 3-8 Power Hunter Settings Power Reading Display The power reading window displays the frequency and power for each of the six highest CW peaks within the start and stop frequency range. The delta channel 1 column displays the power difference in dB between each channel and channel 1. -
Page 28: Channel Monitor Mode
3-9 Channel Monitor Mode Using Power Master with PowerXpert Channel Monitor Mode Channel Monitor Mode allows the user to enter up to six different frequencies and monitor power at those frequencies simultaneously. The Channel Monitor display window contains the following information. Channel Monitor Mode Setting Options/Range... -
Page 29: 3-10 Channel Monitor Mode Settings
Using Power Master with PowerXpert 3-10 Channel Monitor Mode Settings 3-10 Channel Monitor Mode Settings Measurement – CW/Channel Mode The CW/Channel mode pull down lets you select between Channel Power and CW Max mode. In Channel Power mode, the sensor will calculate the average integrated power across the entire user-defined span. Channel Power mode should be used when measuring average power of modulated signals. -
Page 30: Channel Monitor Mode Numerical Display Area
3-10 Channel Monitor Mode Settings Using Power Master with PowerXpert Channel Monitor Mode Numerical Display Area The Channel Monitor mode numerical display window contains the following information: Index Description Communications port to which the sensor is connected Model number of the connected power sensor Serial number of the connected power sensor Channel/CW mode setting Averaging count... -
Page 31: Channel Monitor Display
Using Power Master with PowerXpert 3-10 Channel Monitor Mode Settings Channel Monitor Display The Channel Monitor readings display window is where the user enters the center frequencies. To monitor a frequency, simply click on one of the channels, type in the center frequency in GHz, and press enter or click out of the channel. -
Page 32: Graticule Settings And Graphical Display Area
3-11 Graticule Settings and Graphical Display Area Using Power Master with PowerXpert 3-11 Graticule Settings and Graphical Display Area This section provides a brief overview of the graticule settings and graphical display areas that are presented in the different operating modes of PowerXpert. The Power versus Time graph is used in all modes and provides the ability to plot measured power with respect to time (or time slots). -
Page 33: 3-12 Sensor Information Area
For detailed information on Zeroing the USB power sensors, refer to the latest USB power sensor with PowerXpert User Guide – 10585-00020, available at:.http://www.anritsu.com. Averages The Averages setting allows you to specify the number of measurements that are averaged to calculate the displayed power. -
Page 34: 3-13 Tools Menu
3-13 Tools Menu Using Power Master with PowerXpert 3-13 Tools Menu The Tools menu provides the option of zeroing all sensors, capturing the PowerXpert screen display, enabling the log data. The grayed out selections are not available with the MA245xxA Power Master, but become available when a MA24208A, MA24218A, MA24330A, MA24340A, or MA24350A power sensor is connected and selected. -
Page 35: Capture Screen
Using Power Master with PowerXpert 3-13 Tools Menu Capture Screen The Capture Screen utility captures a PowerXpert screenshot and launches the Save image dialog that allows you to save the image in BMP, JPEG, PNG, or GIF file formats. Figure 3-14. Save Image Dialog Log Data The Log Data feature provides the ability to record data in a comma separated value file and is accessed from the Tools | Log Data toolbar. - Page 36 3-13 Tools Menu Using Power Master with PowerXpert Sample log data is shown in a Microsoft Excel spreadsheet file below: Figure 3-16. Log Data Enhanced Modulation On Data logging is stopped by accessing the Tools | Log Data toolbar and pressing Stop in the Log data dialog. Figure 3-17.
-
Page 37: Show Multiple Sensor Display
Only one MA245xxA Power Master power analyzer can be connected to a PC at a time, but one MA245xxA Power Master power analyzer can be used with multiple other Anritsu USB power sensors, such as the MA241xxA, MA242xxA and MA243xxA USB power sensors. -
Page 38: 3-14 Settings Menu
If this occurs: 1. Close the application and disconnect the power analyzer or sensor. 2. Open the PowerXpert application and reconnect the power analyzer or power sensor. 3. If the problem persists, contact an Anritsu service center. 3-22 PN: 10585-00029 Rev. C... -
Page 39: 3-15 Help
Using Power Master with PowerXpert 3-15 Help 3-15 Help The Help menu provides options to launch the online documentation and provides an informational About dialog. V 1.0 Figure 3-22. About PowerXpert MA245xxA PowerMaster UG PN: 10585-00029 Rev. C 3-23... - Page 40 3-15 Help Using Power Master with PowerXpert 3-24 PN: 10585-00029 Rev. C MA245xxA PowerMaster UG...
-
Page 41: Chapter 4-Power Analyzer Care
Chapter 4 — Power Analyzer Care Introduction Anritsu Power analyzers are high quality precision laboratory instruments and should receive the same care and respect afforded such instruments. Follow the precautions listed below when handling or connecting these devices. Complying with these precautions will guarantee longer component life and less equipment downtime due to connector or device failure. -
Page 42: Clean The Connectors
4-3 RF Connector Precautions Power Analyzer Care Clean the Connectors The precise geometry that makes the RF component’s high performance possible can easily be disturbed by dirt and other contamination adhering to the connector interfaces. When not in use, keep the connectors covered. Connectors must be cleaned using a lint-free cotton swab that has been dampened with Isopropyl alcohol (IPA). -
Page 43: Connection Techniques
Connection Techniques Connection Procedure Table 4-1 lists the Anritsu Company torque wrench and open end wrench part numbers for connectors used on power sensors and power analyzers. Table 4-1. Connector Wrench Requirements – Torque Wrenches and Settings – Open End Wrenches... -
Page 44: Disconnection Procedure
4-5 RF Connector Preventive Care Power Analyzer Care Disconnection Procedure 1. Use an open end wrench to prevent the connector body from turning. 2. Use another wrench to loosen the connector nut. 3. Complete the disconnection by hand, turning only the connector nut. 4. -
Page 45: Pin Depth Measurement
There are some dimensions that are critical for the mechanical integrity, non-destructive mating and electrical performance of the connector. Connector gauge kits are available for many connector types. Please refer to Anritsu Application Note 10200-00040. The mechanical gauging of coaxial connectors will detect and prevent the following problems:... -
Page 46: Pin Depth Dimensions
4-5 RF Connector Preventive Care Power Analyzer Care Pin Depth Dimensions Based on RF components returned for repair, destructive pin depth of mating connectors is the major cause of failure in the field. Before mating, measure the pin depth of the device that will mate with the RF component. The dimensions measured are shown in Figure 4-1. -
Page 47: Pin Depth Gauge
Power Analyzer Care 4-5 RF Connector Preventive Care Pin Depth Gauge Use an Anritsu Pin Depth Gauge or equivalent as shown in Figure 4-2 to accurately measure pin depths. Note A destructive pin depth has a center pin that is too long in respect to the connector’s reference plane. -
Page 48: Connector Cleaning
4-6 Connector Cleaning Power Analyzer Care Connector Cleaning Connector interfaces should be kept clean and free of dirt and other debris. Clean connectors with lint-free cotton swabs. Isopropyl alcohol is the recommended solvent. Figure 4-3 on page 4-9 illustrates the cleaning procedures for male and female connectors. - Page 49 Power Analyzer Care 4-6 Connector Cleaning Do NOT use Industrial Solvents or Water on connector. Use only Isopropyl Alcohol. Dampen only, DO NOT saturate. FEMALE MALE Use only isopropyl alcohol and the proper size of cotton swab. Gently rotate the swab around the center pin being careful not to stress or bend the pin or you will damage the connector.
- Page 50 4-6 Connector Cleaning Power Analyzer Care 4-10 PN: 10585-00029 Rev. C MA245xxA PowerMaster UG...
-
Page 51: Chapter 5-Using The Power Master
This section presents common procedures for using the MA245xxA Power Master with a PC. These procedures refer to the MA245xxA Power Master and to the Anritsu PowerXpert PC application buttons and menus that were previously described. Before attempting these procedures, you should be familiar with the Anritsu PowerXpert PC application. -
Page 52: Basic Power Measurement
Do not turn the body of the power analyzer as this will cause excessive wear to the connector. 2. Back off the connection by turning the connector nut counter clockwise 1/4 turn. 3. Tighten the connection (clockwise) using a 8 in-lb torque wrench (Anritsu part number: 01-201). PN: 10585-00029 Rev. C MA245xxA PowerMaster UG... -
Page 53: Zeroing The Power Analyzer
This section details some of the error messages that may appear on the application screen. In most cases, the error condition can be easily corrected. The status LED for MA245xxA Power Master will blink green when an error state occurs. If the error condition cannot be corrected, note the error message and contact an Anritsu Service Center. - Page 54 5-3 Error States Using the Power Master PN: 10585-00029 Rev. C MA245xxA PowerMaster UG...
-
Page 55: Chapter 6-Power Master Operational Testing
25 ºC to 30 ºC. For calibration, verification, and to maintain the factory specifications of your power analyzer, please Note send the power analyzer to qualified Anritsu Customer Service Centers. Refer to the following sections for required equipment and test procedures: •... -
Page 56: Required Equipment
Adapter inlineWR10 to 1mm female (adapter for multiplier output) Reference Power Sensor Rhode Schwarz NIST Calibration or equivalent NRP-Z58 (110 GHz) Adapter Anritsu 34WFV50 For testing MA24510A below 75 GHz. Type W1 Calibration Kit Anritsu 3656B Personal Computer Chapter 2 PN: 10585-00029 Rev. -
Page 57: Vswr Verification
Table 6-3, then the power analyzer is damaged and it is not necessary to perform further testing. There are no user-serviceable parts inside the power analyzer. Contact your local Anritsu Service Note Center and return defective power analyzer with a detailed description of the observed problem. - Page 58 6-4 VSWR Verification Power Master Operational Testing Table 6-4. MA24510A Reflection Coefficient Measurement Result Reflection Coefficient Maximum Reflection Frequency Uncertainty Coefficient (Typical) Actual Measurement 50 MHz to 12.4 GHz 0.015 0.126+0.015=0.141 12.4 to 26.5 GHz 0.015 0.251+0.015=0.266 26.5 to 40 GHz 0.016 0.251+0.016=0.257 40 to 50 GHz...
-
Page 59: Frequency Response Test
Connect the reference sensor to the attenuator. Turn Off synthesizer RF output. MA245xxA Index Description Synthesizer 10 dB Attenuator Adapter MA245xxA Power Master PC with Anritsu PowerXpert Application Figure 6-1. MA245xxA Power Master < 67 GHz Frequency Response Setup MA245xxA PowerMaster UG PN: 10585-00029 Rev. C... - Page 60 14. Calculate the absolute difference between the Reference power and MA245xxA Power Master measurement. 15. Compare the power difference to the maximum allowed difference specified. If the difference exceeds the maximum allowed difference, contact Anritsu Customer Service. PN: 10585-00029 Rev. C MA245xxA PowerMaster UG...
- Page 61 Power Master Operational Testing 6-5 Frequency Response Test Table 6-5. MA245xxA Power Master Test Measurement Results MA245xxA Absolute Value of Maximum Reference Power MA245xxA Difference in Power Allowed Frequency Measurement Measurement Measurements Difference (GHz) (dBm) (dBm) (dB) (dB) 0.05 10.0 20.0...
- Page 62 6-5 Frequency Response Test Power Master Operational Testing PN: 10585-00029 Rev. C MA245xxA PowerMaster UG...
-
Page 63: Chapter 7-Remote Operation
10. Click yes. 11. Run Anritsu Device Monitor to automatically load the firmware. You will see a Windows error message stating that the backend loader is incomplete. This is to be expected. At this point, the device will re-enumerate as a different device. The drivers will need to be installed again for this new device. Repeat... -
Page 64: Remote Programming Interface
SCPI commands. In order to provide the SCPI interface via TCPIP socket, the Anritsu Device Monitor must be running on the PC where the device is connected. The Anritsu Device Monitor will recognize when the device is plugged in and launch the necessary background software automatically. -
Page 65: Data Parameter Notations
Remote Operation 7-3 Command Requirements Extended Numeric Extended numeric parameters include values such as MAXimum and MINimum. Discrete Discrete parameters, such as INTernal and EXTernal, are used to control program settings to a predetermined finite value or condition. Boolean Boolean parameters represent binary conditions and may be expressed as ON, OFF or 1, 0. Data Parameter Notations The following syntax conventions are used for data parameter descriptions in this manual: Table 7-2. -
Page 66: Notational Conventions
7-4 Notational Conventions Remote Operation Notational Conventions The SCPI interface standardizes command syntax and style that simplifies the task of programming across a wide range of instrumentation. As with any programming language, the exact command keywords and command syntax must be used. Unrecognized commands or improper syntax will not function. Table 7-3. -
Page 67: Default Power Analyzer Settings
Remote Operation 7-5 Programming the MA245xxA Power Master Default Power Analyzer Settings The power analyzer settings in Table 7-4 apply to the MA245xxA Power Master. Table 7-4. General Default Settings Setting Command Default Value Average Count [:SENSe]:AVERage:COUNt Average State [:SENSe]:AVERage:STATe Center Frequency [:SENSe]:FREQuency:CENTer 35,000,004,500 Channel Power State [:SENSe]:CHPower:STATe... -
Page 68: System Common Commands
Title: Identification Query Description: This command returns the following information in <string> format separated by commas: manufacturer name (“Anritsu”), model number, serial number, firmware package number. The model number and options are separated by a “/” and each option is separated by a “/”. - Page 69 Remote Operation 7-6 System Common Commands *RST Title: Reset Description: This command restores most application and system settings to their factory default value. System settings affected by this command are Ethernet configuration. Note that the unit will power-cycle after this command is executed. After executing this command communication will be lost.
-
Page 70: System Commands
7-7 System Commands Remote Operation System Commands System commands control instrument functions and some general purpose functions.These commands affect instrument functionality that does not directly relate to data collection, display or transfer. :SYSTem:ERRor[:NEXT]? Title: System Error Queue Description: If an error occurs, the error number and message are placed in the error queue, which can be read by this query command. -
Page 71: Ma245Xxa Power Master Commands
Remote Operation 7-8 MA245xxA Power Master Commands MA245xxA Power Master Commands General purpose commands for the MA245xxA Power Master are used to set/read the general settings of the power analyzer. These commands are not mode or trigger dependent. The following considerations must also be observed: •... - Page 72 7-8 MA245xxA Power Master Commands Remote Operation :CALCulate:CWMax:THReshold:STATe <0|1|ON|OFF> :CALCulate:CWMax:THReshold:STATe? Title: CW Max Threshold State Description: Turn ON|OFF the threshold that the power must exceed to be reported by a :FETch:CWMax? query. Parameters: <0|1|ON|OFF> Query Output: 0|1 Default Value: OFF :FETCh:CWMax? Title: Fetch CW Max Power Description: Returns the most recent CW max power measurement result.
- Page 73 Remote Operation 7-8 MA245xxA Power Master Commands :INITiate:CONTinuous <0|1|ON|OFF> :INITiate:CONTinuous? Title: Sweep Type Description: Specifies whether the sweep/measurement is triggered continuously. If the value is set to ON or 1, another sweep/measurement is triggered as soon as the current one completes. If continuous is set to OFF or 0, the instrument remains initiated until the current sweep/measurement completes, then enters the “idle”...
- Page 74 7-8 MA245xxA Power Master Commands Remote Operation :STATus:OPERation[:EVENt]? Title: Get Operation Status Description: This command requests information about the current status of the instrument. Each bit of the return value represents some operation. Only a subset of the bits are implemented for each application.
- Page 75 Remote Operation 7-8 MA245xxA Power Master Commands [:SENSe]:AVERage:COUNt <numeric_value> [:SENSe]:AVERage:COUNt? Title: Sense Average Count Description: Sets the effective number of averages. Parameters: <numeric_value> Query Output: <NR2> Default Value: 10 Range: 2 to 1000 [:SENSe]:AVERage:STATe <0|1|ON|OFF> [:SENSe]:AVERage:STATe? Title: Sense Average State Description: Specifies whether successive power readings are averaged or not.
- Page 76 7-8 MA245xxA Power Master Commands Remote Operation [:SENSe]:FREQuency:CHWidth <numeric_value>{HZ|KHZ|MHZ|GHZ} [:SENSe]:FREQuency:CHWidth? Title: Channel Width Description: Sets the channel width for power measurements. The measured channel is centered around the [:SENSe]:FREQuency:CENTer value. The center frequency plus half the channel width may not exceed the maximum measuring frequency of the instrument. Parameters: <numeric_value>...
- Page 77 Remote Operation 7-8 MA245xxA Power Master Commands [:SENSe]:RESolution HIGH|MEDium|LOW [:SENSe]:RESolution? Title: Power Resolution Mode Description: Specifies the resolution of the power measurement in CW max mode only. The resolution determines the relative precision of the frequency reported when getting the CW max power results with the :FETCh:CWMax? query.
- Page 78 7-8 MA245xxA Power Master Commands Remote Operation 7-16 PN: 10585-00029 Rev. C MA245xxA PowerMaster UG...
-
Page 79: Appendix A-Installing The Ma245Xxa Demo Application
• Launch the Anritsu Device Monitor (installed with PowerXpert). • Connect the MA245xxA Power Master. Loading the MA245xxA Demo Application The MA245xxA Demo Application is available on the Anritsu Website. Go to http://www.anritsu.com to find and load the MA245xxA Demo Application. From the Anritsu Website: 1. -
Page 80: A-3 Loading The Ma245Xxa Demo Application
A-3 Loading the MA245xxA Demo Application 5. Select “Connect to GS Sensor”. • You will see a message appear in the Status field “Connected to the GS Sensor” as shown in Figure A-2 Figure A-2. Connected to Sensor Screen 6. Confirm connection by selecting the pull-down arrow of the “Command:” field. •... - Page 81 A-3 Loading the MA245xxA Demo Application 7. Select *IDN. 8. Select the “Execute” button. • You will see a status string appear as in Figure A-4. Assure that the latest firmware is installed in your MA245xxA Power Master. Figure A-4. Power Master Status Once the device is opened successfully, you can select or type-in other commands in the Command drop-down box.
- Page 82 A-3 Loading the MA245xxA Demo Application PN: 10585-00029 Rev. C MA245xxA PowerMaster UG...
- Page 83 Appendix B — Glossary of Terms Appendix Overview The following terms are related to this product and technology. Glossary 3 dB rule : The 3 dB rule provides a means to estimate relative power values. A 3 dB gain indicates that power increases to twice the power (a multiple of 2).
-
Page 84: B-2 Glossary
(Emulated LAN) using a single point-to-multipoint connection. Calibration : When making measurements, the instrument must be calibrated in order to remove residual errors due to measurement setup conditions. Anritsu recommends performing the calibration under the same conditions as the measurement: temperature, frequency, number of points, source power, and IFBW. - Page 85 B-2 Glossary Coaxial Cable : Coaxial Cable (Coax) is a type of electrical communications medium used in the LAN environment. This cable consists of an outer conductor concentric to an inner conductor, separated from each other by insulating material, and covered by some protective outer material.
- Page 86 B-2 Glossary Demodulation : Demodulation is the process of recovering the original modulating signal from a modulated carrier. The original modulating signal is usually the information being transmitted, typically voice or data. In other words, demodulation is an operation on a carrier wave in order to recover the wave with which the carrier was originally modulated.
- Page 87 B-2 Glossary GHz : GigaHertz (GHz) is one billion (1 x 10E9) hertz, which is a measurement of frequency. GPIB : General Purpose Interface Bus (GPIB): The IEEE 488 General Purpose Interface Bus (GPIB) is an instrumentation interface for integrating instruments, computers, printers, plotters, and other measurement devices into systems.
- Page 88 PAPR : Peak to Average Power Ratio, the peak divided by the root Means Square (RMS) of the waveform. It is the square of the Crest Factor. PowerXpert : PowerXpertô application, a data analysis and control software for use with Anritsuís USB power sensors.
- Page 89 B-2 Glossary RMS : Is the square root of the arithmetic mean of the squares of the values, or the square of the function that defines the continuous waveform. Waveforms made by summing known simple waveforms have an RMS that is the root of the sum of squares of the component RMS values.
- Page 90 Alphabetical Index of Programming Commands :ABORt ................. . 7-9 :CALCulate:CWMax:COUNt <integer>...
- Page 92 Anritsu Company 490 Jarvis Drive Anritsu utilizes recycled paper and environmentally conscious inks and toner. Morgan Hill, CA 95037-2809 http://www.anritsu.com...
Need help?
Do you have a question about the PowerMaster MA245 A Series and is the answer not in the manual?
Questions and answers