Table of Contents
Advertisement
Quick Links
Installation, Operating and Servicing
Instructions
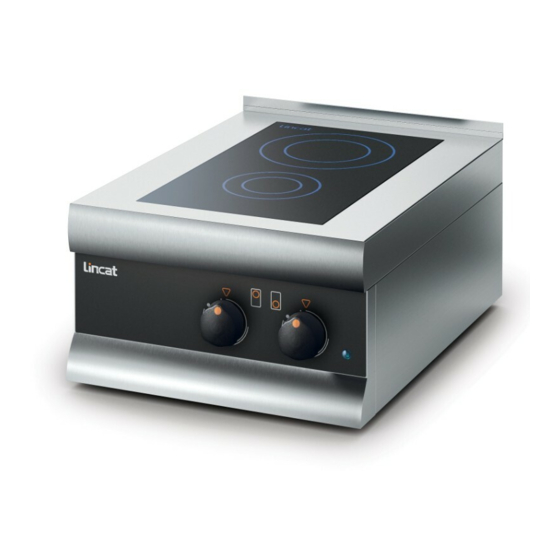
Silverlink Induction Hobs
SLI21, SLI3, SLI42, SLI3W
Please make a note of your product details for
future use:
Date Purchased:_________________________
Model Number:__________________________
Serial Number:__________________________
Dealer:_________________________________
_______________________________________
IS 564 ECN 3766
Page 1 of 13
Advertisement
Table of Contents

Related Manuals for Lincat Silverlink SLI21


Summary of Contents for Lincat Silverlink SLI21
- Page 1 Installation, Operating and Servicing Instructions Silverlink Induction Hobs SLI21, SLI3, SLI42, SLI3W Please make a note of your product details for future use: Date Purchased:_________________________ Model Number:__________________________ Serial Number:__________________________ Dealer:_________________________________ _______________________________________ IS 564 ECN 3766 Page 1 of 13...
-
Page 2: Table Of Contents
WARNING! This symbol is used whenever there is a risk of personal injury. CAUTION! This symbol is used whenever there is a risk of damaging your Lincat product. NOTE: This symbol is used to provide additional information, hints and tips. -
Page 3: Warnings And Precautions
WARNINGS AND PRECAUTIONS This appliance must be installed, commissioned and serviced by a qualified person in accordance with national and local regulations in force in the country of installation. If a supply cord is damaged, it must be replaced by the manufacturer, its service agent or similarly qualified person. -
Page 4: Technical Data
TECHNICAL DATA Model Height (mm) Width (mm) Depth (mm) Weight (kg) SLI21 18.1 SLI3 17.8 SLI42 26.4 SLI3W 16.6 Power Ratings: Model SLI21 Amps Supply SLI21 (twin zone) 13.0 230V/1ph/50Hz Heat input rear zone, normal Heat input rear zone, boost 13.0 Heat input front zone, normal Heat input front zone, boost... -
Page 5: Installation And Commissioning
INSTALLATION AND COMMISSIONING This appliance must be earthed. If replacing the plug connect the terminals as follows: Green and Yellow wire Earth Blue wire Neutral Brown wire Live Supply cords shall be oil resistant, sheathed flexible cable not lighter than ordinary polychloroprene or equivalent elastomer sheathed cord (code 60245 IEC 57) The SLI21, SLI3 and SLI3W appliances have a single supply cord. - Page 6 Exhaust minimum clearance to any partitions, walls or furniture; C=100mm. Floor stands: The SLI21, SLI3, SLI3W may be mounted on a Lincat CC4 ambient pedestal or SLS4 stand. The SLI42 may be mounted on a Lincat CC6 ambient pedestal or SLS6 stand.
-
Page 7: Operating Instructions
OPERATING INSTRUCTIONS Only qualified or trained personnel should use this appliance. Do not place metal objects, aluminium foil and plastic vessels on the ceramic glass surface, and do not use the surface for storage. Rings, watches and similar objects could get hot when in close proximity to the hob surface. - Page 8 Control knob operation: AUTOMATIC HEAT-UP REAR HOB & CONTROL LOCK FRONT HOB POW ER BOOST LEVEL 1 LEVEL 9 MAINS NEON The following symbols are observed through the ceramic glass (or SLI3W fascia): Power level setting (1-9) Power boost function Automatic heat up control Control lock function Pan detection (no pan present)
- Page 9 Power level settings 9 power level settings are available. The table gives the percentage of maximum power for each setting with the time limit for operation at that power. Power level % of power 15% 19% 31% 45% 64% 100% Time limit (mins) Power boost function Power boost is activated by turning the control clockwise from level 9.
-
Page 10: Cleaning
There are numerous ‘E’ symbol error codes identifying issues within the system which are primarily of use when reporting a fault to the Service Department at Lincat. Some errors can be cleared by turning the control off, or completely turning off and unplugging the appliance before reconnecting, or by allowing the unit to cool down. -
Page 11: Servicing, Maintenance And Component Replacement
SERVICING, MAINTENANCE AND COMPONENT REPLACEMENT Replacement of air filter Cool the appliance and disconnect from supply, the filter is located in the base of the appliance. Raise the latch and lift the filter away from the base. Replace the used filter with a new one and reverse the procedure to re-fit. -
Page 12: Fault Finding
FAULT FINDING Please refer to the Service Help Desk number on the final page of this manual. SPARE PARTS LIST Part Number Description FE37 Foot FG03 Fanguard FI36 Air filter KN278 Control knob NE43 Neon S/R0181 Cooling fan MOUNTING ON CC4/CC6 PEDESTALS SUPPLY CORD CC4/CC6 BACK GROMMET... -
Page 13: Service Information And Guarantee
Type number All available on serial plate Serial number Lincat reserve the right to carry out any work under warranty, given reasonable access to the appliance, during normal working hours, Monday to Friday, 08:30 to 17:00. GUARANTEE This unit carries a comprehensive UK mainland twelve month/2 year warranty. The guarantee is in addition to, and does not diminish your statutory or legal rights.
Need help?
Do you have a question about the Silverlink SLI21 and is the answer not in the manual?
Questions and answers