
Subscribe to Our Youtube Channel
Related Manuals for Gree GJC12AG-E6RNB3A


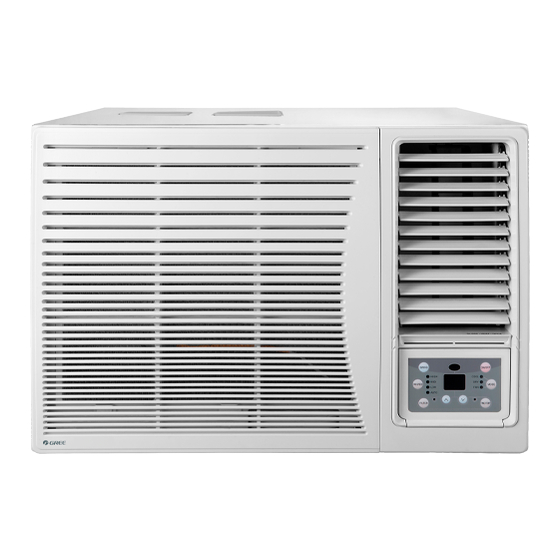
Summary of Contents for Gree GJC12AG-E6RNB3A
- Page 1 Change for Life Service Manual odels: GJC12AG-E6RNB3A GJC12AG-E6DRNB9A GJC12AG-E6DRNC9A GJC12AG-E6DRNC2A (Refrigerant:R32) GREE ELECTRIC APPLIANCES,INC.OF ZHUHAI...
-
Page 2: Table Of Contents
Service Manual Table of Contents Part Ⅰ :Technical Information ..............1 1.Summary ......................1 2.Specifications ....................2 3.Outline Dimension Diagram ..............4 4.Refrigerant System Diagram ..............5 5.Electrical Part ....................6 5.1 Wiring Diagram ....................6 5.2 PCB Printed Diagram ..................7 6.Function and Control ..................9 6.1 Introduction of Control Panel ................9 6.2 Introduction of Remote Controller ..............10 6.3 Function Introduction ..................13 Part Ⅱ... -
Page 3: Part Ⅰ :Technical Information
Service Manual Part Ⅰ :Technical Information 1.Summary Models: GJC12AG-E6RNB3A GJC12AG-E6DRNB9A GJC12AG-E6DRNC9A GJC12AG-E6DRNC2A Remote Controller: T-ON T-OFF AUTO SWING COOL SLEEP LOCK YX1F SPEED HEAT MODE ON/OFF SWING SLEEP TIMER Technical Information... -
Page 4: Specifications
Service Manual 2.Specifications GJC12AG-E6DRNB9A GJC12AG-E6DRNC9A Model GJC12AG-E6RNB3A GJC12AG-E6DRNC2A CC055024400 CC055026600 Product Code CC055009800 CC055034200 Rated Voltage 220~240 Power Rated Frequency Supply Phases Cooling Capacity 3650 Heating Capacity Cooling Power Input 1030 Heating Power Input Cooling Current Input Heating Current Input... - Page 5 Service Manual Compressor Manufacturer ZHUHAI LANDA COMPRESSOR CO.,LTD Compressor Model QXF-B096zC190 Compressor Oil FW68DA or equivalent Compressor Type Rotary Compressor LRA. Compressor RLA Compressor Power Input Compressor Overload Protector 1NT11L-6233/KSD115 C/HPC115/95U1 Throttling Method Capillary Set Temperature Range 16~30 Cooling Operation Ambient Temperature 16~43 Range Heating Operation Ambient Temperature...
-
Page 6: Outline Dimension Diagram
Service Manual 3.Outline Dimension Diagram Note:Take B3 Panel for example. Fence or Likewise Over 500mm Over Over 500mm 500mm Less than 220 mm Unit:mm Note: There must be no barriers within 1m in front of it. Technical Information... -
Page 7: Refrigerant System Diagram
Service Manual 4.Refrigerant System Diagram CENTRIFUGAL AXIAL FAN OR CROSS FAN COOLED AIR HOT DISCHARGED AIR COMPRESSOR OUTDOOR COILS INDOOR COILS CAPILLARY REFRIGERANT FLOW DIRECTION Technical Information... -
Page 8: Electrical Part
Service Manual 5.Electrical Part 5.1 Wiring Diagram ●Instruction Symbol Symbol Color Symbol Symbol Color Symbol Name White Green CAP. Capacitor Yellow Brown COMP Compressor Blue Grounding wire YEGN Yellow-Green Black ●Electric Diagram Please don't touch any terminal when the voltage of terminal P(DC+) and N(DC-) at AP1 is higher than 30V to prevent the risk of electric shock ! -
Page 9: Pcb Printed Diagram
Service Manual 5.2 PCB Printed Diagram 5.2.1 Silk screen on main board ●Top view Interfaces for neutral wire, live wire and earthing U\V\W interface of compressor wire Communication interface Interface of AC fan Interface of temperature sensor Interface of 4-way valve (reserved) Interface of overload protection of compressor ●Bottom view Technical Information... - Page 10 Service Manual 5.2.2 Silk screen on display board ●Top view Terminal of swing motor Terminals connected with main board Interface of temperature sensor Buttons LED indicator Infrared receiver Buzzer dual-8 nixie tube display Buttons ●Bottom view Technical Information...
-
Page 11: Function And Control
Service Manual 6.Function and Control After putting through the power, air conditioner will give out a sound and indicators on control panel will be on. After that, you operate the air conditioner through remote controller or control panel. 6.1 Introduction of Control Panel Note:If wireless remote controller is lost, open the surface panel and operate manually. -
Page 12: Introduction Of Remote Controller
Service Manual 6.2 Introduction of Remote Controller Buttons on Remote Controller ON/OFF button T-ON T-OFF MODE button AUTO SWING COOL SLEEP LOCK SPEED HEAT +/- botton MODE ON/OFF FAN button SWING SWING button SLEEP TIMER SLEEP button TIMER button Icon Display on Remote Controller Timer on Timer off Sending signal T-ON T-OFF... - Page 13 Service Manual When selecting auto mode, air conditioner will operate automatically according to ex-factory setting. Set temperature can't be adjusted and won't be displayed either. Press FAN button to adjust fan speed. When selecting cool mode, air conditioner will operate under cool mode. Then press + or -- button to adjust set temperature. Press FAN button to adjust fan speed.
- Page 14 Service Manual Replacement of Batteries in Remote Controller battery 1. Press the back side of remote controller on the spot marked with , and then push out the cover of battery box along the arrow direction. 2. Replace two No.7 (AAA 1.5V) dry batteries and make sure the positions of + and -- polar are correct.
-
Page 15: Function Introduction
Service Manual 6.3 Function Introduction Ⅰ Basic functions: 一、Cooling mode 1. Working condition and process for cooling: a.When Tinner amb. ≥Tpreset, the unit operates under cooling mode. Meanwhile, the fan and the compressor operate, and the fan oper- ates at set fan speed; b. - Page 16 Service Manual hours, the temperature will decreased by 1℃ . After that, the unit will operate at this time all the time. 9.3 When the initial temperature is set at 28 ~ 29℃ , after turning on the sleeping function, the temperature will increase by 1℃ every two hours.
-
Page 17: Part Ⅱ :Installation And Maintenance
Service Manual Part Ⅱ :Installation and Maintenance 7.Notes for Installation and Maintenance Safety Precautions: 11. Check if there is electric leakage on the unit body. If Important! yes, please eliminate the electric leakage. 12. Replace the fuse with a new one of the same speci- fication if it is burnt down;... - Page 18 Service Manual Safety Precautions for Refrigerant 1. To realize the function of the air conditioner unit, a special refrigerant circulates in the system. The used refrigerant is the fluoride R32,which is specially cleaned. The refrigerant is flammable and inodorous. Furthermore, it can leads to explosion under certain conditions.
- Page 19 Service Manual Maintenance notes 1. Check whether the maintenance area or the room area meet the requirement of the nameplate. It’s only allowed to be operated in the rooms that meet the requirement of the nameplate. 2. Check whether the maintenance area is well-ventilated. The continuous ventilation status should be kept during the operation process.
-
Page 20: Installation
Service Manual 8.Installation 8.1 Installation Precaution Window type conditioner is so valuable and the improper installation of it will cause a lot of damage! Please associate the professional technician to install the unit and don’t install it by yourself.Otherwise, we are not responsible for the damage like this. 8.2 Location ●... -
Page 21: Drain Water
Service Manual 8.6 Drain Water Drain pan and drain hose need to be installed before using. Drain hose is not included in the products, you need to purchase it locally to satisfy your particular needs. Use the following procedure to install drain pan and drain hose. -
Page 22: Maintenance
Service Manual 9.Maintenance 9.1 Malfunction Analysis Measure insulation resistance The breaker trips at once when it to ground to see if there is any is set to “ON”. leakage. Trip of breaker or blow of fuse The circuit or the part of the air conditioner has malfunction. - Page 23 Service Manual Improper set of temperature Adjust set temperature If cooling (heating) load is Check the forecasted load of cooling (heating) proper Check and fill the leakage, then The refrigerant has leakage or is vacuumize it and supplement the re- insufficient frigerant as required Leakage between the high pres-...
- Page 24 Service Manual The indoor fan motor is burned or breaks or has the heat protector Replace the fan motor or the defective part. malfunction. The built-in heat protector of the Replace the fan motor The fan does not motor breaks frequently because the run when it is set motor is abnormal.
- Page 25 Service Manual The torque of the swing motor is not enough First, check whether the connection is Wrong connection The swing fan wrong. If no, replace the parts does not run. The controller is damaged(IC2003 is damaged, the swing relay can not close, etc) C o n t r o l l e r m a l f u n c t i o n ( I C 2 0 0 3 Change controller...
- Page 26 Service Manual Installation and Maintenance...
-
Page 27: Flashing Led Of Indoor/Outdoor Unit And Primary Judgement
Service Manual 9.2 Flashing LED of Indoor/Outdoor Unit and Primary Judgement Display Method of Indoor Unit Display Method of Outdoor Unit Indicator Display (during Indicator has 3 kinds of Malfunction Dual-8 blinking, ON 0.5s and OFF display status and during A/C Status Possible Causes Name... - Page 28 Service Manual Display Method of Outdoor Display Method of Indoor Unit Unit Indicator has 3 kinds of Indicator Display (during display status and during Malfunction blinking, ON 0.5s and OFF Dual-8 A/C Status Possible Causes blinking, ON 0.5s and OFF Name 0.5s) Code...
- Page 29 Service Manual Display Method of Outdoor Display Method of Indoor Unit Unit Indicator has 3 kinds of Indicator Display (during display status and during Malfunction blinking, ON 0.5s and OFF Dual-8 A/C Status Possible Causes blinking, ON 0.5s and OFF Name 0.5s) Code...
- Page 30 Service Manual Display Method of Outdoor Display Method of Indoor Unit Unit Indicator has 3 kinds of Indicator Display (during display status and during Malfunction blinking, ON 0.5s and OFF Dual-8 A/C Status Possible Causes blinking, ON 0.5s and OFF Name 0.5s) Code...
- Page 31 Service Manual Display Method of Outdoor Display Method of Indoor Unit Unit Indicator has 3 kinds of Indicator Display (during display status and during Malfunction blinking, ON 0.5s and OFF Dual-8 A/C Status Possible Causes blinking, ON 0.5s and OFF Name 0.5s) Code...
- Page 32 Service Manual Display Method of Outdoor Display Method of Indoor Unit Unit Indicator has 3 kinds of Indicator Display (during display status and during Malfunction Dual-8 A/C Status Possible Causes blinking, ON 0.5s and OFF 0.5s) blinking, ON 0.5s and OFF Name Code 0.5s...
- Page 33 Service Manual Display Method of Outdoor Display Method of Indoor Unit Unit Indicator has 3 kinds of Indicator Display (during display status and during Malfunction Dual-8 A/C Status Possible Causes blinking, ON 0.5s and OFF 0.5s) blinking, ON 0.5s and OFF Name Code 0.5s...
- Page 34 Service Manual Display Method of Outdoor Display Method of Indoor Unit Unit Indicator has 3 kinds of Indicator Display (during display status and during Malfunction Dual-8 A/C Status Possible Causes blinking, ON 0.5s and OFF 0.5s) blinking, ON 0.5s and OFF Name Code 0.5s...
- Page 35 Service Manual Display Method of Outdoor Display Method of Indoor Unit Unit Indicator has 3 kinds of Indicator Display (during display status and during Malfunction Dual-8 A/C Status Possible Causes blinking, ON 0.5s and OFF 0.5s) blinking, ON 0.5s and OFF Name Code 0.5s...
- Page 36 Service Manual Display Method of Outdoor Display Method of Indoor Unit Unit Indicator has 3 kinds of Indicator Display (during display status and during Malfunction Dual-8 A/C Status Possible Causes blinking, ON 0.5s and OFF 0.5s) blinking, ON 0.5s and OFF Name Code 0.5s...
-
Page 37: Exploded View And Parts List
Service Manual 10.Exploded View and Parts List The component picture is only for reference; please refer to the actual product. Installation and Maintenance... - Page 38 Service Manual Part Code Description GJC12AG-E6RNB3A GJC12AG-E6DRNB9A GJC12AG-E6DRNC9A Product Code CC055009800 CC055024400 CC055026600 Cabinet Assy 00000600003 00000600003 00000600003 Condenser Assy 01100200518 01100200518 01100200518 Discharge Tube Sub-assy 03001300361 03001300361 03001300361 Rear Cover Plate 22241017 22241017 22241017 Rear Clapboard 20051030 20051030 20051030...
- Page 39 Service Manual Part Code Description GJC12AG-E6DRNC2A Product Code CC055034200 Cabinet Assy 00000600003 Condenser Assy 01100200518 Discharge Tube Sub-assy 03001300361 Rear Cover Plate 22241017 Rear Clapboard 20051030 Axial Flow Fan 10331162 Fan Motor 1501106106 Connected Board(front & back) 01207700003 Motor Support 01701032 Front Clapboard Sub-Assy 01700200002...
-
Page 40: Removal Procedure
Service Manual 11.Removal Procedure Caution: pull out the power,discharge the refrigerant completely before removal. Step Procedure 1. Remove panel assy Open the air-inlet panel; remove the filter; remove the screws in the middle, at the left side and right side of the panel;... - Page 41 Service Manual Procedure Step Screws Cabinet 3. Remove electric box 2 Remove remote control plate, earthing screw and temp sensor in turn. Then remove electric box 2 and controller cover plate sub-assy. Temp sensor Earthing screw Electric box 2 Controller cover plate sub-assy Installation and Maintenance...
- Page 42 Service Manual Step Procedure 4. Remove top cover sub-assy and rear cover plate Rear Cover Plate Remove screws fixing the upper cover plate and then remove the upper cover plate sub-assy; remove the fixing screws fixing the rear cover plate and then remove the rear cover plate.
- Page 43 Service Manual Step Procedure 7. Remove Air Outlet Sub-Assy and Seat Board Sub-Assy Remove the screws fixing the air outlet sub-assy,and then draw out air outlet sub-assy and seat board of air duct. Air Outlet Sub-Assy Seat Board Sub-Assy Screws 8.
- Page 44 Service Manual Step Procedure Condenser Screws 10. Remove axial flow blade Remove the nuts of axial flow blade; remove the washer and then remove the axial flow blade. Axial flow blad 11. Remove Clapboard and Centrifugal Fan Remove the screws fixing the isolation sheet, and then draw out the isolation sheet;...
- Page 45 Service Manual Step Procedure 12. Remove motor Remove the screws of motor support; take out the motor support; remove the screws of motor and then remove the motor. Motor Screws 13. Remove compressor Unsolder each connection pipe (Note: discharge the refrigerant completely before unsoldering).
-
Page 46: Appendix
Service Manual Appendix: Appendix 1: Reference Sheet of Celsius and Fahrenheit Conversion formula for Fahrenheit degree and Celsius degree: Tf=Tcx1.8+32 Set temperature Fahrenheit Fahrenheit Fahrenheit display Fahrenheit display Fahrenheit Celsius display Fahrenheit Celsius Celsius(°C) temperature (°F) temperature (°F) (°C) temperature (°F) (°C) (°F) -
Page 47: Appendix 2: List Of Resistance For Ambient Temperature Sensor
Service Manual Appendix 2: List of Resistance for Ambient Temperature Sensor Resistance Table of Ambient Temperature Sensor (15K) Temp(°C) Resistance(kΩ) Temp(°C) Resistance(kΩ) Temp(°C) Resistance(kΩ) Temp(°C) Resistance(kΩ) 138.1 18.75 3.848 1.071 128.6 17.93 3.711 1.039 121.6 17.14 3.579 1.009 16.39 3.454 0.98 108.7 15.68... - Page 48 Service Manual Resistance Table of Ambient Temperature Sensor (20K) Temp(°C) Resistance(kΩ) Temp(°C) Resistance(kΩ) Temp(°C) Resistance(kΩ) Temp(°C) Resistance(kΩ) 181.4 25.01 5.13 1.427 171.4 23.9 4.948 1.386 162.1 22.85 4.773 1.346 153.3 21.85 4.605 1.307 20.9 4.443 1.269 137.2 4.289 1.233 129.9 19.14 4.14 1.198...
- Page 49 Service Manual Resistance Table of Ambient Temperature Sensor (50K) Temp(°C) Resistance(kΩ) Temp(°C) Resistance(kΩ) Temp(°C) Resistance(kΩ) Temp(°C) Resistance(kΩ) 853.5 18.34 4.75 799.8 93.42 17.65 4.61 89.07 16.99 4.47 703.8 84.95 16.36 4.33 660.8 81.05 15.75 4.20 620.8 77.35 15.17 4.08 580.6 73.83 14.62 3.96...
- Page 50 Tel: (+86-756) 8522218 Fax: (+86-756) 8669426 Email: gree@gree.com.cn Http://www.gree.com HONG KONG GREE ELECTRIC APPLIANCES SALES LIMITED Add: Unit 2612,26/F.,Miramar Tower 132 Nathan Road,TST,Kowloon,HK Tel: (852) 31658898 Fax: (852) 31651029 For product improvement, specifications and appearance in this manual are subject to change without prior notice.
Need help?
Do you have a question about the GJC12AG-E6RNB3A and is the answer not in the manual?
Questions and answers