
Subscribe to Our Youtube Channel
Related Manuals for ChamSys MagicQ MQ50


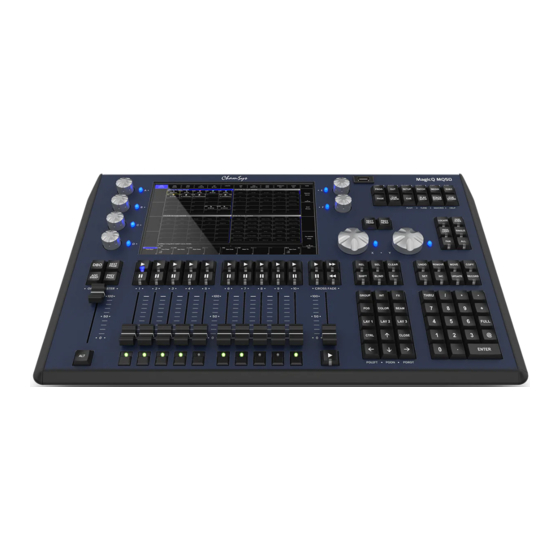
Summary of Contents for ChamSys MagicQ MQ50
- Page 1 ChamSys MagicQ MQ50, MQ70 and MQ80 Console Installation, Software manual and Warranty Certificate...
- Page 2 ChamSys reserves the right to revise the content of this document without any obligation to notify any person or company of such revision, however, ChamSys has no obligation to make, and does not commit to make, any such revisions. Download the latest version from www.chamsys.co.uk...
-
Page 3: Table Of Contents
MagicQ Console Quick Start Manual Table of Contents Care of Your Console ..............................4 Safety Notes .................................. 4 Quick Start Guide to using MagicQ Consoles ......................5 Introduction .................................. 5 MagicQ Consoles ................................. 5 Uninterruptable Power Supply’s (UPS) ........................5 Connections .................................. -
Page 4: Care Of Your Console
Safety Notes Do not open the console unless you are a skilled person authorised and trained by ChamSys in console maintenance and repair. The console contains components with voltages that may shock. -
Page 5: Quick Start Guide To Using Magicq Consoles
MagicQ Stadium and MagicQ Compact consoles have a solid state drive instead of a traditional magnetic rotating hard drive. The MagicQ MQ50 and MQ70 compact consoles feature a Micro SD card for show data storage rather than a solid state drive. -
Page 6: Connections
MagicQ Console Quick Start Manual Connections MQ50/70 Console The picture below shows the connections on the MQ70 Compact console. Reset button Console lamp Recovery Button Power Power Audio Midi LTC Network HDMI Remote USB Switch Socket Ports Ports Ports Input... -
Page 7: Plugging Up
MagicQ Console Quick Start Manual MQ80 Console The picture below shows the connections on the MQ80 Compact console. Reset button Console lamp MIDI/TC ports Power Power Socket Remote USB Ports Network Ports Monitor Audio Switch Trigger port ports input Plugging Up Connect the power lead to the power socket labelled LINE INPUT. -
Page 8: Powering Down
MagicQ Console Quick Start Manual Powering Down To power down the console it is necessary to quit the MagicQ application. The console operating system then performs an automatic shutdown and turns itself off when complete. To quit the MagicQ application, press the SETUP button and then the QUIT soft button. -
Page 9: Console Layout
All MagicQ consoles layout are very similar - the programming interface is consistent across the entire range of consoles. The MagicQ MQ50 and MQ70 console do not have the physical ‘S’ buttons directly below the display, pressing on the touch screen above the fader has the same effect as using the ‘S’ buttons on these consoles. - Page 10 MagicQ Console Quick Start Manual Touch Screen & Encoders Around the central screen area there are 8 rotary encoders and soft buttons. The buttons around the display referred to as soft buttons since their function changes according to the active window on the touch screen.
- Page 11 MagicQ Console Quick Start Manual Windows The area in the centre of the screen is the windows section in which the various control windows are displayed. There are two main types of windows – boxes style windows which have large boxes such as the Group Window and spreadsheet style editing windows such as the Patch Window.
- Page 12 MagicQ Console Quick Start Manual Towards the bottom of the touch screen are two small windows, the Status Display and the Input Display. The Status Display shows the current date and time, the ADD / SWAP status of the console and other relevant status information.
- Page 13 MagicQ Console Quick Start Manual Playback The Playback area is situated directly below the touch screen and consists of 10 playbacks each with a fader and four buttons (FLASH, GO, STOP, SELECT). The area above each of the playbacks on the touch screen is used to provide information about the status of the playback.
- Page 14 MagicQ Console Quick Start Manual Getting Going Starting up the Console After powering up you are presented with the introductory Help Window. Choose Continue Show. You can revert to the Help Window by pressing the HELP button at any time.
- Page 15 MagicQ Console Quick Start Manual Starting a New Show To start a new show, open the Setup window using the Setup key, toggle to ‘view settings’ using the top left soft button. Then press the NEW SHOW soft button. This will clear the current show from memory – shows that have been previously saved to disc will not be affected.
- Page 16 MagicQ Console Quick Start Manual Enabling Console Outputs To enable output of channel data select the DMX IO VIEW in the Setup Window. This window enables modification of the inputs and outputs for the 64 universes on the Pro2014, 24 universes on the MQ80 and 12 universes on the Expert and MQ60/70.
- Page 17 MagicQ Console Quick Start Manual Using ArtNet and ArtNet to DMX interfaces To output ArtNet on a Universe enable it and ensure that the output type is set to ArtNet. Choose which ArtNet Universe you wish to Output the MagicQ Universe on. MagicQ defaults to outputting MagicQ universe 1 on the first ArtNet Universe (Art 0).
- Page 18 MagicQ Console Quick Start Manual Connecting External Monitors MagicQ compact consoles have HDMI connectors for External monitor connection. These monitors can be touch screen monitors on MQ70 or MQ80 Compact consoles The monitor output is used for showing extra windows. To enable windows to be moved onto external monitors, enable it in Setup, View System, View Monitors.
- Page 19 MagicQ Console Quick Start Manual Supported touch monitors For the MQ70 & MQ80 consoles we have tested and recommend the iiyama Prolite T2336MSC, Hanns G HT225HPB, Asus VT207N and Dell S2240T Touch monitors. Note these are not supported on MQ60 console.
- Page 20 MagicQ Console Quick Start Manual Patching Open the Patch Window by pressing the PATCH button. The Patch Window has three views, VIEW HEADS, VIEW CHANS and VIEW DMX. In this section we describe patching in VIEW HEADS. Choose the head you wish to patch by pressing the CHOOSE HEAD soft button. The Window will change to give you a list of manufacturers and heads.
- Page 21 MagicQ Console Quick Start Manual To patch a dimmer, simply press CHOOSE DIMMER rather than CHOOSE HEAD and then patch one or more dimmers as above. In the Patch Window all the lighter coloured fields can be configured. To modify a field, first move the cursor to the field, then input the new value using the keypad and keyboard, and finally press ENTER.
- Page 22 MagicQ Console Quick Start Manual Controlling Heads Selecting Heads In order to control intelligent heads it is necessary to be able to select which heads to use. The MagicQ console keeps track of the currently selected heads to enable it to determine which heads to apply changes to. The operator can select head individually or can use groups to recall configurations of heads that are used frequently.
- Page 23 MagicQ Console Quick Start Manual Recalling a Group Once a group has been recorded then pressing the touch screen for the group will make all the heads in the group selected. All other heads will be deselected. Use SHIFT to select multiple groups. There is a Setup option to allow the user to default to selecting multiple groups.
- Page 24 MagicQ Console Quick Start Manual Locating Heads The first action you are likely to want to do is to locate the heads – i.e. to put them into a starting position. Select the required heads and then press the LOCATE button. Locating a head brings all the attributes for that head into the programmer.
- Page 25 MagicQ Console Quick Start Manual For indexed attributes such as colour wheels and gobo wheels, the button associated with each encoder can be used to bump the attribute value to the next range. Pressing SHIFT and the button bumps back to the previous range.
- Page 26 MagicQ Console Quick Start Manual Recording a Palette To record a favourite combination of attributes into a palette (e.g. a rotating triangle with a prism on a MAC500), first modify the attributes to the values you wish to record. Then press RECORD and select the palette entry you wish to record.
- Page 27 MagicQ Console Quick Start Manual Recording a Cue Stack (Chase or Theatre Stack) Recording a Cue Stack is the same as recording a Cue - you simply record multiple Cues onto a Playback and you end up with a Cue Stack.
- Page 28 MagicQ Console Quick Start Manual Saving Your Show MagicQ utilises a large hard disk to enable storage of a virtually infinite number of shows. When you are programming a show the show is stored in memory. In order to store your show on the disk you need to press the SAVE SHOW soft button in the Setup Window.
- Page 29 MagicQ Console Quick Start Manual Hints for Operators Used to Other Consoles Users familiar with Hog II Consoles Choose “Hog II Warp Mode” or “Theatre Tracking Mode” Feature MagicQ Hog II Alternate functions SHIFT Playback select SEL (S) CHOOSE (C)
- Page 30 MagicQ Console Quick Start Manual Users familiar with Avolites Consoles Choose “Normal Mode” MagicQ operates most like a Avolite console when you set it into “Normal” mode rather than “Tracking mode”. You can choose the mode when you start a show, and also at any time via “Prog Mode” on Soft Button B in the Setup Window.
- Page 31 MagicQ Console Quick Start Manual Users familiar with Strand Consoles Choose “Theatre Tracking” Channels Unlike Strand consoles MagicQ does not distinguish between intensity channels and attribute channels. MagicQ consoles support 9160 channels of any type – e.g. you could patch 9160 dimmers, or you could patch 9160 channels of moving lights, or any combination.
-
Page 32: Troubleshooting
MagicQ Console Quick Start Manual Troubleshooting No Outputs Check whether the desk is operating correctly by opening the Outputs Window and looking at the channel data. If channels are not at their correct levels then check: Are the Grand Master and Playback Master (Sub Master) faders up? - Page 33 MagicQ Console Quick Start Manual Screen Problems If the screen is blank – then this may be because of the screen saver. Try pressing SHIFT. If the screen remains blank even after pressing buttons then try holding CTRL and pressing the bottom right soft button (soft button closest to the large encoder wheels) twice.
-
Page 34: Reporting Problems
Log files are stored in the log folder and are named according to the time and date the session was started – a new log file is started each time the console re-starts. The time and date of the file is the time that the session ended. Please email the log files and show files to support@chamsys.co.uk. Page 34 of 40... - Page 35 MagicQ Console Quick Start Manual Upgrading Console Software New versions of MagicQ console software are made available on the downloads page of the ChamSys website – www.chamsys.co.uk in the form of .cdc files. Ensure you have saved your current show file to a USB memory stick or to an external computer via network before you change software version.
-
Page 36: Restoring Default Console Settings
MagicQ Console Quick Start Manual Restoring Default Console Settings The console software upgrade utility has 2 other functions – reset to factory defaults and erase console. “Reset to factory defaults” changes settings back to factory settings but does not erase any user data. It is recommended that the current show is saved to a known file name before carrying out a factory reset. -
Page 37: Appendix
MagicQ Console Quick Start Manual Appendix DMX, Ethernet and ArtNet DMX data is transmitted in a serial form. This means that there is one cable carrying the data, which is sentbit by bit (a bit is a 1 or 0), one after another. The entire transmission of DMX data for a DMX universe is known as a DMX Packet. -
Page 38: Fcc Part 15 Notice
Connect the equipment into an outlet on a circuit different from that to which the receiver is connected. You may also consult your local ChamSys Ltd dealer or an experienced radio/TV technician for assistance. NOTICE: The FCC regulations provide that any changes or modifications not expressly approved by ChamSys Ltd could void the user’s authority to operate the equipment. -
Page 39: Disposal And Recycling Of Unwanted Consoles
MagicQ Console Quick Start Manual Disposal and Recycling of unwanted consoles Please be aware that ChamSys products must be disposed of in accordance with the WEEE disposal and recycling regulations (http://ec.europa.eu/environment/waste/weee/index_en.htm). ChamSys products must not be disposed of through normal household waste. - Page 40 For Warranty claims please contact the dealer you purchased the console from. If you are based outside of the UK please contact your local dealer. Your local dealer can be located here: www.chamsys.co.uk/contact This MagicQ console was manufactured on: ……………………...
Need help?
Do you have a question about the MagicQ MQ50 and is the answer not in the manual?
Questions and answers