Table of Contents
Advertisement
Quick Links
ChamSys MQ70/MQ50 Service Document
ChamSys MQ70 / MQ50
Service Document
This manual covers the MQ70 and MQ50 Compact consoles.
MAINTENANCE SHOULD BE CARRIED OUT BY EXPERIENCED AND
QUALIFIED PERSONNEL ONLY
WARNING – LIVE 240V AC. DISCONNECT MAINS BEFORE
PERFORMING ANY MAINTENANCE
Page 1 of 25
www.chamsys.co.uk
Advertisement
Table of Contents

Related Manuals for ChamSys MQ70


Summary of Contents for ChamSys MQ70
- Page 1 ChamSys MQ70/MQ50 Service Document ChamSys MQ70 / MQ50 Service Document This manual covers the MQ70 and MQ50 Compact consoles. MAINTENANCE SHOULD BE CARRIED OUT BY EXPERIENCED AND QUALIFIED PERSONNEL ONLY WARNING – LIVE 240V AC. DISCONNECT MAINS BEFORE PERFORMING ANY MAINTENANCE Page 1 of 25 www.chamsys.co.uk...
-
Page 2: Section 1: An Overview Of The Console And All Components
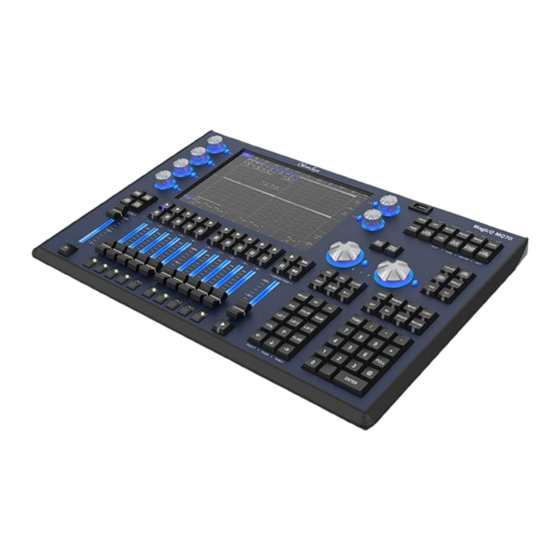
ChamSys part numbers, where applicable. Note that these parts are for an MQ70 console, as an example. Parts for the MQ50 console are in most cases the same, but the few differences there will be highlighted with asterisks (*) and alternate part numbers for the MQ50 parts will be listed. -
Page 3: Section 2: Testing To Determine Faults
ChamSys MQ70/MQ50 Service Document Section 2: Testing to determine faults. All ChamSys consoles contain built-in hardware tests to help diagnose any faults that may occur. To access these tests on any MagicQ console, first power on the console. The board test mode can then be accessed using one of two methods, listed below. - Page 4 ChamSys MQ70/MQ50 Service Document Once in board test mode you can begin testing the keys, faders and encoders on the console straight away, as described below. When testing these, you will see the name of the key, fader or encoder used appear in the command box down the bottom right of the screen, as in the image below.
- Page 5 ChamSys MQ70/MQ50 Service Document Testing encoders: The letter for the encoder will be listed in the command box when testing it, with positive values when turning the encoder clockwise and negative values when turning the encoder anti-clockwise. Once fully turning in one direction, the encoder...
-
Page 6: Section 3: Full Disassembly Of The Console
Here are instructions for complete disassembly of an MQ70 or MQ50 console. The example is for an MQ70 console, but the MQ50 console is similar, and any differences will be highlighted. Note that in some cases for repairs, only partial disassembly will be required, by following the relevant steps. - Page 7 ChamSys MQ70/MQ50 Service Document Step two: The front panel can now be lifted from the front, up to around 90 degrees as pictured, below. Be careful when doing so, as there is a total of 7 connections running between the front panel and base of the console, as highlighted in the images below.
- Page 8 ChamSys MQ70/MQ50 Service Document On all MQ50 consoles, and MQ70 consoles since issue no. 03, the blue display cable runs into a separate adaptor PCB, as pictured below, fixed to the underside of the main PCB. There is then an orange ribbon cable running from this PCB into the display. The part numbers for the PCB and ribbon cable are also listed below.
- Page 9 ChamSys MQ70/MQ50 Service Document Disassembly of the base: Processor removal: Disconnect the 5x connections on the processor PCB as pictured below, highlighted red. 2. Remove the 6x black self-threading screws from the network ports on the rear panel using a PZ1 screwdriver as pictured, right.
- Page 10 ChamSys MQ70/MQ50 Service Document DMX PCB removal: Remove the 10x black self-threading screws from the DMX and LTC ports on the rear of the console (as pictured, below) using a PZ1 screwdriver. 2. Disconnect the 2x cables as highlighted in the image below. Both can simply be pulled off with a little force.
- Page 11 ChamSys MQ70/MQ50 Service Document Removing the power supply: First, unplug the 3x connectors into the power supply as pictured, right. All connectors just pull off with a little force, but make sure to remember their orientation. You can use the picture, right for reference.
- Page 12 ChamSys MQ70/MQ50 Service Document Removing the kickstand, feet, and remaining metalwork: The kickstand can be removed by unscrewing the 3x M3x5 screws through the top and the 6x M3x4 black countersunk screws through the underside of the console using a PZ1 screwdriver.
- Page 13 ChamSys MQ70/MQ50 Service Document Disassembly of the front panel: Step one: Pull off all fader caps from the faders – 12 in total. Step two: Pull off the A-F encoder knobs. This is only required if the encoders need replacing, as removal is not necessary for disassembly.
- Page 14 ChamSys MQ70/MQ50 Service Document Front panel metalwork screw locations Front panel metalwork removed with light guides attached Page 14 of 25 www.chamsys.co.uk...
- Page 15 ChamSys MQ70/MQ50 Service Document Removing the display assembly: With the front panel removed front all metalwork, you will now be able to also remove the display assembly, if required. This is done by first unplugging the connector on the top side of the PCB as pictured, below. Before removal, you will need to lift the tab on the connector, using either a small flat head screwdriver, or your fingernail.
- Page 16 You will now be able to replace the display, if required. All steps for complete disassembly of an MQ70 or MQ50 console have now been detailed. In section 4, below you can find some tips for reassembly, while in section 5 are instructions for solving some common hardware issues that can occur.
-
Page 17: Section 4: Reassembly Tips
ChamSys MQ70/MQ50 Service Document Section 4: Reassembly Tips. Reassembly of the console is much the same as dismantling, but in reverse. Below are some tips to bear in mind during the process. • Place encoder light guides on the PCB before... - Page 18 ChamSys MQ70/MQ50 Service Document • When placing the bezel extrusions back in place, ensure they sit within the clips on the front panel metalwork, as pictured below. There are 3 on each side. These should fit in fairly easily, with little force required.
-
Page 19: Section 5: Resolving Some Common Issues
ChamSys MQ70/MQ50 Service Document Section 5: Resolving some common issues. Below are some common issues that can appear on an MQ70 or MQ50 console and how to solve these, including replacing faders, encoders, and keys. Replacing faders: Faders can naturally wear down with use and may end up needing replacement if noise is being experienced, or they feel scratchy, or unusually loose. - Page 20 ChamSys MQ70/MQ50 Service Document Replacing cherry switches: To replace a cherry switch on the console you will first need to carefully remove the key cap. Do this by carefully lifting it with either a key cap removal tool, or 2x small flat head screwdrivers, as pictured. Use gentle force equally on each side to lift the key cap.
-
Page 21: Section 6: Magicq Console Fault Finding
ChamSys MQ70/MQ50 Service Document Section 6: MagicQ Console Fault Finding Here are some common faults that could be experienced with a console, but solvable without the need of hardware repairs by following the tips below. No output from the console:... -
Page 22: Section 7: Resetting Or Restoring The Console
ChamSys MQ70/MQ50 Service Document • Pressing CTRL 9 on an external keyboard – this resets the front panel. • Pressing CTRL 0 on an external keyboard – this resets the MagicQ application. • Pressing CTRL BREAK on the external keyboard – this shuts down the console. -
Page 23: Section 8: Backup Archives And Log Files
Please email the log files and show files to support@chamsys.co.uk Note: To provide more accurate logs to the ChamSys team, please enable extended logging on the desk under Setup > View Settings Hardware. -
Page 24: Section 9: Upgrading Console Software
New versions of MagicQ console software are made available on the downloads page of the ChamSys website – www.chamsys.co.uk/download There are different versions of the MagicQ software available. Download the MQ70 and MQ50 software installer from the website, which ends with the extension .cdz Note: if downloading on Mac based systems check OSX has not added “._”... -
Page 25: Technical Specifications
Weight: 7kg (15.4lb) 7kg (15.4lb) If you are experiencing any issues with a console that are not covered in this document, or have any further questions, please contact ChamSys support for more information. Tel: +44 (0)2380 238 666 Email: support@chamsys.co.uk Page 25 of 25 www.chamsys.co.uk...
Need help?
Do you have a question about the MQ70 and is the answer not in the manual?
Questions and answers