Table of Contents
Advertisement
Available languages
Available languages
Quick Links
ALLEN + ROTH and logo design are trademarks or
registered trademarks of LF, LLC. All rights reserved.
ATTACH YOUR RECEIPT HERE
Serial Number ____________________________ Purchase Date _________________________
Questions, problems, missing parts? Before returning to your retailer, call our
customer service department at 1-866-439-9800, 8 a.m. - 8 p.m., EST, Monday - Sunday.
VR20265
SINGLE-HANDLE
1
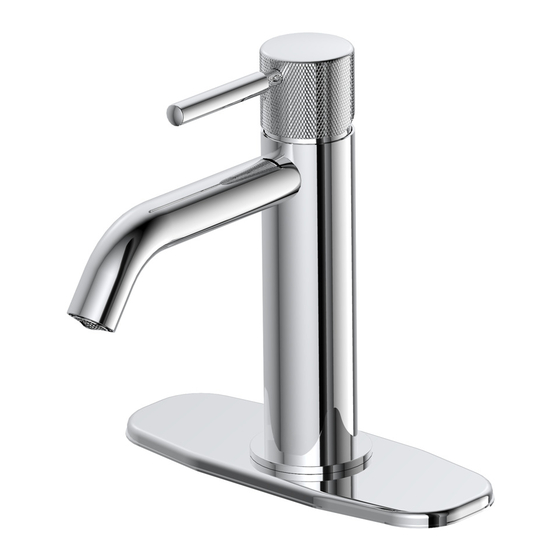
ITEM #80375181
BATH FAUCET
MODEL #FS1A9281CP
Français p. 9
#2564468
Advertisement
Table of Contents

Related Manuals for Allen + Roth FS1A9281CP


Summary of Contents for Allen + Roth FS1A9281CP
- Page 1 ITEM #80375181 #2564468 SINGLE-HANDLE BATH FAUCET ALLEN + ROTH and logo design are trademarks or registered trademarks of LF, LLC. All rights reserved. MODEL #FS1A9281CP Français p. 9 ATTACH YOUR RECEIPT HERE Serial Number ____________________________ Purchase Date _________________________ Questions, problems, missing parts? Before returning to your retailer, call our customer service department at 1-866-439-9800, 8 a.m.
-
Page 2: Package Contents
PACKAGE CONTENTS PART DESCRIPTION QUANTITY Faucet Body Deck Plate Putty Plate Rubber Washer Metal Washer Water Supply Line Lock Nut DRAIN ASSEMBLY COMPONENTS Main Plunger Rubber Washer Lock Nut Drain Assembly... -
Page 3: Safety Information
SAFETY INFORMATION Please read and understand this entire manual before attempting to assemble, operate or install the product. WARNING • The product should be installed by a locally licensed plumber. • Please do not use plumber’s putty on plastic components. Use silicone caulk if sealant is required. •... - Page 4 ASSEMBLY INSTRUCTIONS Remove pre-assembled lock nut (G), metal washer (E), and rubber washer (D) from shank of faucet body (A). 3a. Without deck plate installation. Place the faucet (A) in the appropriate faucet hole of the sink (not included). 3b. With deck plate installation. Position the putty plate (C) and deck plate (B) onto the sink, install faucet (A) through top of sink.
- Page 5 ASSEMBLY INSTRUCTIONS Slide rubber washer (D) and metal washer (E) onto shank of faucet body (A). Secure faucet body (A) to sink with lock nut (G) and preassembled screws. Connect water supply lines. Install the main plunger (AA) and the drain assembly (DD) above sink.
- Page 6 ASSEMBLY INSTRUCTIONS Using a coin, remove aerator from faucet. Turn on water supply. Flush out any debris and check for leaks around drain. Replace aerator.
-
Page 7: Care And Maintenance
CARE AND MAINTENANCE • Clean periodically with a soft cloth. Avoid abrasive cleaners, steel wool and harsh chemicals as these will dull the finish and void your warranty. TROUBLESHOOTING PROBLEM POSSIBLE CAUSE CORRECTIVE ACTION Leak from under handle. Locking nut has come loose. Tighten the locking nut. -
Page 8: Replacement Parts List
REPLACEMENT PARTS LIST For replacement parts, call our customer service department at 1-866-439-9800, 8 a.m. - 8 p.m., EST, Monday - Sunday. PART DESCRIPTION PART # Metal Handle A662B38 Index Button A66D558 Trim Cap A508014 Adjusting Ring A603A38N Ceramic Disc Cartridge A507084N Aerator 1.2gpm A553058N... - Page 9 ARTICLE #80375181 #2564468 ROBINET DE SALLE DE BAINS À POIGNÉE ALLEN + ROTH et le logo sont des marques de UNIQUE commerce ou des marques de commerce déposées de LF, LLC. Tous droits réservés. MODÈLE #FS1A9281CP JOIGNEZ VOTRE REÇU ICI Numéro de série...
-
Page 10: Contenu De L'emballage
CONTENU DE L’EMBALLAGE PIÈCE DESCRIPTION QUANTITÉ Corps du robinet Applique Plaque à mastic Rondelle en caoutchouc Rondelle métallique Conduite d’eau Écrou de blocage COMPOSANTS DE L’ENSEMBLE D’ÉVACUATION Bouchon principal Rondelle en caoutchouc Écrou de blocage Ensemble de drain... -
Page 11: Consignes De Sécurité
CONSIGNES DE SÉCURITÉ Assurez-vous de lire et de comprendre l’intégralité du présent manuel avant de tenter d’assembler, d’installer ou d’utiliser l’article. AVERTISSEMENT • L’installation de ce produit doit être effectuée par un plombier qualifié. • N’appliquez pas de mastic de plomberie sur les pièces en plastique. En cas de besoin, utilisez du calfeutrant à... - Page 12 INSTRUCTIONS POUR L’ASSEMBLAGE Retirez l’écrou de blocage préassemblé (G), la rondelle d’espacement en métal (E) et la rondelle d’espacement en caoutchouc (D) de la tige du corps du robinet (A). 3a. Installation sans l’applique. Insérez le robi-net (A) dans le trou approprié du robinet du lavabo (non inclus).
- Page 13 INSTRUCTIONS POUR L’ASSEMBLAGE Glissez la rondelle en caoutchouc (D) et la rondelle métallique (E) sur la tige du corps du robinet (A). Fixez le corps du robinet (A) au lavabo à l’aide de l’écrou de blocage (G) et des vis préassemblées. Raccordez les conduites d’alimentation en eau.
- Page 14 INSTRUCTIONS POUR L’ASSEMBLAGE Retirez l’aérateur du robinet à l’aide d’une pièce de monnaie. Ouvrez l’alimentation en eau. Évacuez les débris et vérifiez si le drain fuit. Remettez l’aérateur en place.
-
Page 15: Entretien
ENTRETIEN • Nettoyez l’article périodiquement à l’aide d’un linge doux. N’utilisez pas de nettoyant abrasif, de laine d’acier ni de produit chimique puissant; ceux-ci risquent de ternir le fini et leur utilisation annulera votre garantie. DÉPANNAGE PROBLÈME CAUSE POSSIBLE MESURE CORRECTIVE La poignée fuit. -
Page 16: Liste Des Pièces De Rechange
LISTE DES PIÈCES DE RECHANGE Pour obtenir des pièces de rechange, veuillez communiquer avec notre service à la clientèle au 1 866 439-9800, entre 8 h et 20 h (HNE), du lundi au dimanche. PIÈCE DESCRIPTION Nº DE PIÈCE Poignée en métal A662B38 Capuchon indicateur A66D558...
Need help?
Do you have a question about the FS1A9281CP and is the answer not in the manual?
Questions and answers