Table of Contents
Advertisement
Available languages
Available languages
ALLEN + ROTH and logo design are
trademarks or registered trademarks of LF, LLC.
All rights reserved.
ATTACH YOUR RECEIPT HERE
_________________________
Serial Number
Questions, problems, missing parts? Before returning to your retailer, call our
customer service department at 866-439-9800, 8 a.m. - 8 p.m., EST, Monday - Sunday.
You could also contact us at partsplus@lowes.com.
SS22295
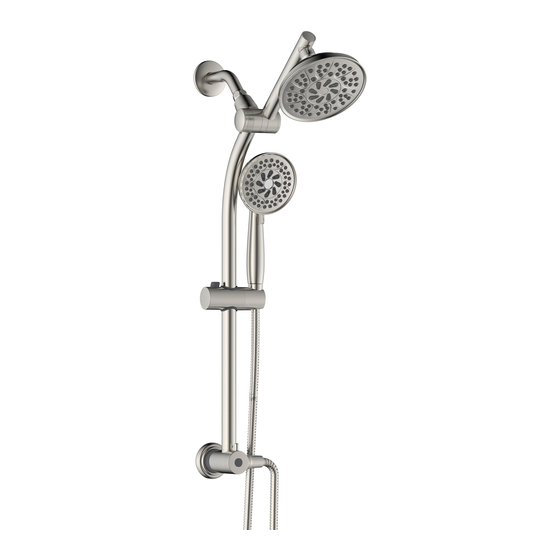
Dual Shower Head with Slide Bar
MODEL # 58101-X607011 / 58101-X6001 / 58101-X6032 /
Purchase Date
1
ITEM # 5283486 / 5340027 / 5340029 /
5340028 / 5340030
58101-X602707 / 58101-X604408
Español p. 9
_________________________
Advertisement
Table of Contents

Related Manuals for Allen + Roth 58101-X607011


Summary of Contents for Allen + Roth 58101-X607011
- Page 1 ITEM # 5283486 / 5340027 / 5340029 / 5340028 / 5340030 Dual Shower Head with Slide Bar ALLEN + ROTH and logo design are MODEL # 58101-X607011 / 58101-X6001 / 58101-X6032 / trademarks or registered trademarks of LF, LLC. 58101-X602707 / 58101-X604408 All rights reserved.
-
Page 2: Package Contents
PACKAGE CONTENTS PART DESCRIPTION QUANTITY Slide bar Showerhead Hand shower Hose... -
Page 3: Safety Information
HARDWARE CONTENTS (not shown to actual size) Adhesive Pad Rubber Sealing Washer Mounting Screw Plastic Anchor SAFETY INFORMATION Please read and understand this entire manual before attempting to assemble, operate, or install the product. WARNING • Follow the installation instructions carefully. Proper installation is the installer’s responsibility. •... - Page 4 ASSEMBLY INSTRUCTIONS 1. Remove the existing showerhead by turning it in a counterclockwise direction. Note: A wrench (not included) may be required. Clean any debris or old thread sealant from the threads of the shower arm after the showerhead has been removed. 2.
- Page 5 ASSEMBLY INSTRUCTIONS 3. Attach slide bar (A) to shower arm and tighten by turning clockwise until slightly firm. Do not overtighten. Using base of slide bar as a guide for centering on the wall, affix suction cup to the wall at approximately 26-1/16 in. below the shower arm.
- Page 6 ASSEMBLY INSTRUCTIONS 7. Insert one of the rubber sealing washers into the end of the hose connector (D) and hand tighten to the hand shower (C). Hand tighten only. 8. Turn the hand shower holder to the widest opening side facing up and set hand shower into the hand shower holder.
-
Page 7: Care And Maintenance
CARE AND MAINTENANCE • Clean carefully by gently wiping with a grit-free damp cloth. • Use only mild soap with water. • Never use acids, harsh chemicals, or abrasive detergents to clean the faucet surface. TROUBLESHOOTING PROBLEM POSSIBLE CAUSE CORRECTIVE ACTION There is a leak from the 1. -
Page 8: Warranty
WARRANTY This slide bar has been manufactured under the highest standard of workmanship. All parts of this slide bar are warranted to be free from leaks or drips during domestic use for as long as the original purchaser owns this product. THIS EXCLUDES INDUSTRIAL, COMMERCIAL, OR BUSINESS USE. The manufacturer will replace FREE OF CHARGE, under the warranty conditions the entire unit or any part (at our option) which proves defective in material and/or workmanship under normal installation, use and service. - Page 9 5340028 / 5340030 Cabezal de ducha doble con barra deslizable ALLEN + ROTH y el diseño del logotipo MODELO # 58101-X607011 / 58101-X6001 / 58101-X6032 / son marcas comerciales o marcas 58101-X602707 / 58101-X604408 comerciales registradas de LF, LLC. Todos los derechos reservados.
-
Page 10: Contenido Del Paquete
CONTENIDO DEL PAQUETE PIEZA DESCRIPCIÓN CANTIDAD Barra deslizable Ducha Ducha de mano Manguera... -
Page 11: Información De Seguridad
ADITAMENTOS (no se muestran en tamaño real) Almohadilla adhesiva Arandela selladora de goma Tornillo de montaje Ancla de expansión de plástico INFORMACIÓN DE SEGURIDAD Lea y comprenda completamente este manual antes de intentar ensamblar, usar o instalar el producto. ADVERTENCIA •... -
Page 12: Instrucciones De Ensamblaje
INSTRUCCIONES DE ENSAMBLAJE 1. Retire el cabezal de ducha existente al girarlo en dirección contraria a las manecillas del reloj. Nota: es posible que se requiera de una llave (no se incluye). Limpie cualquier desecho o sellador para roscas anterior del brazo de la ducha una vez que haya retirado la cabeza. - Page 13 INSTRUCCIONES DE ENSAMBLAJE 3. Fije la barra deslizable (A) al brazo de la ducha y apriétela girándola en dirección de las manecillas del reloj hasta que quede ligeramente firme. No apriete demasiado. Use la base de la barra deslizable como guía para centrar en la pared y fije la ventosa en la pared a aproximadamente 66,19 cm por debajo del brazo de la ducha.
- Page 14 INSTRUCCIONES DE ENSAMBLAJE 7. Coloque una de las arandelas selladoras de goma en el otro extremo del conector de manguera (D) y apriete a mano hasta la ducha de mano (C). Apriete a mano solamente. 8. Gire el soporte de la ducha de mano hasta la máxima abertura mirando hacia arriba y coloque la ducha de mano en el soporte de la ducha de mano.
-
Page 15: Cuidado Y Mantenimiento
CUIDADO Y MANTENIMIENTO • Limpie cuidadosa y suavemente con un paño limpio. • Lave solo con agua y jabón suave. • Nunca limpie la superficie con ácidos, agentes químicos fuertes ni detergentes abrasivos. SOLUCIÓN DE PROBLEMAS PROBLEMA ACCIÓN CORRECTIVA CAUSA POSIBLE 1. -
Page 16: Lista De Piezas De Repuesto
GARANTÍA Esta barra deslizable se fabricó bajo los estándares de mano de obra más elevados. Todas las piezas de este barra deslizable están garantizadas contra fugas o goteos durante el uso doméstico mientras lo posea el propietario original. ESTO EXCLUYE EL USO INDUSTRIAL, COMERCIAL O EN OFICINA.
Need help?
Do you have a question about the 58101-X607011 and is the answer not in the manual?
Questions and answers
I just installed the # 5283486 and water started spraying out the side of the 2 way diverter valve. I found a crack in the housing where the 2 seals slip into. When I took it apart to check further a small piece broke off.