Table of Contents
Advertisement
Available languages
Available languages
ALLEN + ROTH and logo design are trademarks
or registered trademarks of LF, LLC.
All rights reserved.
BRYTON
ATTACH YOUR RECEIPT HERE
Serial Number _______________ Purchase Date ______________
Questions, problems, missing parts? Before returning to the store, call our customer
service department at 866-439-9800, 8 a.m. - 8 p.m., EST, Monday - Sunday. You could also
contact us at ascs@lowes.com.
AS23196
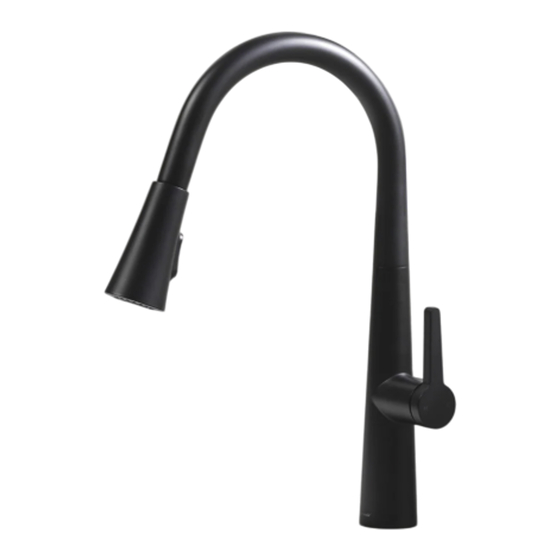
PULL-DOWN KITCHEN
FAUCET WITH LED LIGHT
Item #2517065, 2517064
MODELS 21-K131HCP-AR
21-K131HSS-AR
21-K131HMB-AR
Español p. 9
05/2023
Advertisement
Table of Contents

Related Manuals for Allen + Roth BRYTON 21-K131HCP-AR


Summary of Contents for Allen + Roth BRYTON 21-K131HCP-AR
- Page 1 Item #2517065, 2517064 PULL-DOWN KITCHEN ALLEN + ROTH and logo design are trademarks FAUCET WITH LED LIGHT or registered trademarks of LF, LLC. All rights reserved. BRYTON MODELS 21-K131HCP-AR 21-K131HSS-AR 21-K131HMB-AR Español p. 9 ATTACH YOUR RECEIPT HERE Serial Number _______________ Purchase Date ______________ Questions, problems, missing parts? Before returning to the store, call our customer service department at 866-439-9800, 8 a.m.
-
Page 2: Package Contents
PACKAGE CONTENTS PART DESCRIPTION QUANTITY PART DESCRIPTION QUANTITY Faucet body Weight Optional deckplate Aerator key Optional gasket Due to constant design and quality improvements, the product inside may look slightly different from the picture. HARDWARE CONTENTS (not shown actual size) Rubber Washer Metal Washer Lock nut... -
Page 3: Safety Information
SAFETY INFORMATION Please read and understand this entire manual before attempting to assemble, operate or install the product. CAUTION • If you solder the joints during installation of the faucet, the seats, cartridges, and washers must be removed before using a flame or the warranty will be voided on these parts. •... -
Page 4: Installation Instructions
INSTALLATION INSTRUCTIONS Shut off the water at the supply valves under the sink or at the main water supply. Disconnect the supply lines. Remove the existing faucet from the sink. Clean and dry the surface area where the new faucet will be mounted. - Page 5 INSTALLATION INSTRUCTIONS (Continued) From underneath the sink, secure the faucet body (A) to the sink using the rubber washer (AA), metal washer (BB), and lock nut (CC). Secure the lock nut (CC) with the hex bolts (DD). NOTE: It is helpful to have a second person hold the faucet in place while tightening the hex bolts on the lock nut.
-
Page 6: Care And Cleaning
INSTALLATION INSTRUCTIONS (Continued) Once the installation is complete, remove the sprayhead (7.1) from the spout (7.2) on the faucet body (A) to flush the water lines. Turn on the water supply and allow both hot and cold water to run for at least one minute to flush away any debris that could cause damage to internal parts. - Page 7 ROUGH-IN...
-
Page 8: Replacement Parts
REPLACEMENT PARTS For replacement parts, call our customer service department at 866-439-9800, 8 a.m. - 8 p.m., EST, Monday - Sunday. You could also contact us at ascs@lowes.com. PART # PART DESCRIPTION 21-K131HCP-AR 21-K131HSS-AR 21-K131HMB-AR LED sprayhead RP 13126CP RP 13126SS RP 13126MB Mounting nut RP 13128... - Page 9 ARTÍCULO #2517065, 2517064 GRIFO PARA COCINA ALLEN + ROTH y el diseño del logotipo EXTENSIBLE CON LUZ LED son marcas comerciales o marcas registradas de LF, LLC. Todos los derechos reservados. BRYTON MODELOS 21-K131HCP-AR 21-K131HSS-AR 21-K131HMB-AR ADJUNTE SU RECIBO AQUÍ...
- Page 10 CONTENIDO DEL PAQUETE PARTE DESCRIPCIÓN CANTIDAD PARTE DESCRIPCIÓN CANTIDAD Cuerpo del grifo Peso Placa de cubierta opcional Llave de aeirador Empaque opcional Debido a las constantes mejoras de diseño y calidad, es posible que el producto en el interior se vea ligeramente diferente de la imagen. ADITAMENTOS (no se muestran en tamaño real) Arandela de Arandela de...
-
Page 11: Información De Seguridad
INFORMACIÓN DE SEGURIDAD Lea y comprenda completamente este manual antes de intentar ensamblar, usar o instalar el producto. PRECAUCIÓN • Si suelda las juntas durante la instalación del grifo, se deben retirar los asientos, los cartuchos y las arandelas antes de usar la llama. De lo contrario, se anulará la garantía de dichas piezas. •... -
Page 12: Instrucciones De Instalación
INSTRUCCIONES DE INSTALACIÓN Cierre la válvula de entrada de agua debajo del lavamanos o el suministro de agua principal. Desconecte las líneas de entrada. Retire el grifo existente del lavamanos. Limpie y seque el área superficial donde se colocará el nuevo grifo. Para instalar con la placa de cubierta opcional para un lavamanos de 3 orificios, diríjase al paso 3. - Page 13 INSTRUCCIONES DE INSTALACIÓN (Continuación) Desde debajo del lavamanos, asegure el cuerpo del grifo (A) al lavamanos con la arandela de goma (AA), la arandela de metal (BB) y la tuerca de seguridad (CC). Asegure la tuerca de seguridad (CC) con los pernos hexagonales (DD). NOTA: es útil que una segunda persona sostenga el grifo en su lugar mientras aprieta los pernos hexagonales en la tuerca de seguridad.
-
Page 14: Cuidado Y Limpieza
INSTRUCCIONES DE INSTALACIÓN (Continuación) Una vez completada la instalación, retire el cabezal del rociador (7.1) del pico (7.2) en el cuerpo del grifo (A) para descargar las tuberías de agua. Abra el suministro de agua y deje correr el agua fría y caliente durante al menos un minuto para eliminar cualquier residuo que pueda dañar las piezas internas. - Page 15 DIBUJO DE INSTALACIÓN...
-
Page 16: Piezas De Repuesto
PIEZAS DE REPUESTO Para obtener piezas de repuesto, llame a nuestro Departamento de Servicio al Cliente al 866-439-9800, de lunes a domingo de 8 a.m. a 8 p.m., hora estándar del Este. También puede ponerse en contacto con nosotros en ascs@lowes.com. PIEZA # PIEZA DESCRIPCIÓN...
Need help?
Do you have a question about the BRYTON 21-K131HCP-AR and is the answer not in the manual?
Questions and answers
where is the handle set screw? Allen-Roth pull-down kitchen faucet with LED light.