Table of Contents
Advertisement
Quick Links
Table of content
1. General
2. Product overview
5.1 Settings
1. General
The X-Eye Presence & Airbutton sensors can detect if a person is in front of the sensor and - if so - indicate the distance of
that person in relation to the sensor. Next to this, the sensor will provide an Airbutton trigger when a person places their hand
close to the sensor. This document provides explanation of the available functionalities and instructions on how to install and
integrate the sensor into your digital signage installation.
The information in this document is created for users who are familiar with the Nexmosphere API and are able to control a
basic setup with a Nexmosphere API controller. If this is not the case yet, please read the general documentation on the
Nexmosphere serial API first.
2. Product overview
The X-Eye Presence & Airbutton sensors are available in 2 different models:
XY-240
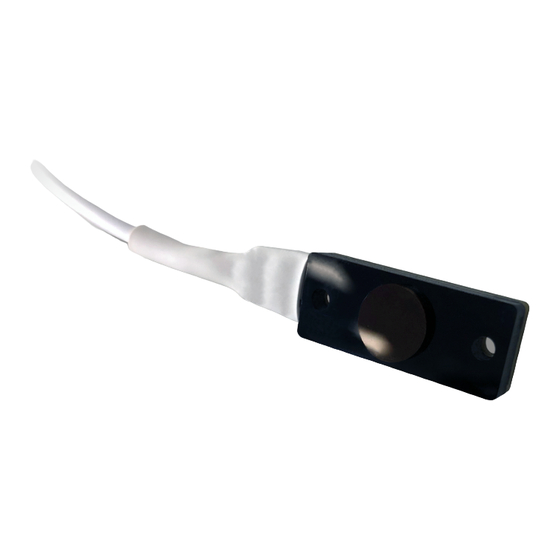
The shape of the models are different, please refer to the datasheets for mechanical dimensions.
The sensor specifications are as follows:
detection range
beam angle
The X-Eye Presence & Airbutton sensors utilize InfraRed laser
emitters with an SPAD receiving array and Time-of-Flight technology
to measure the distance of a person or object in relation to the
sensor. The working principle is that the sensor emits photons which
are reflected by the objects or persons in front of the sensor. The
reflected photons are received by and an array of photodetectors. By
measuring the time of flight of the reflected photons, the distance of
the person or object in front of the sensor is calculated.
L e H a v r e 1 3 6
5 6 2 7 S W E i n d h o v e n • T h e N e t h e r l a n d s
X-EYE 200 SERIES | PRESENCE & AIRBUTTON SENSOR
XY-241
XY-240
0 - 250 cm
27°
T + 3 1 4 0 2 4 0 7 0 7 0
E s u p p o r t @ n e x m o s p h e r e . c o m
XY-241
0 - 170 cm
27°
© 2021 Nexmosphere. All rights reserved. v2.0 / 08-21
All content contained herein is subject to change without prior notice
PRODUCT MANUAL
1
1
2
2
3
3
3
3
4
6
6
7
8
10
1
Advertisement
Table of Contents

Related Manuals for Nexmosphere X-EYE 200 Series


Summary of Contents for Nexmosphere X-EYE 200 Series
-
Page 1: Table Of Contents
The information in this document is created for users who are familiar with the Nexmosphere API and are able to control a basic setup with a Nexmosphere API controller. If this is not the case yet, please read the general documentation on the Nexmosphere serial API first. -
Page 2: Functionality And Api Commands
PRODUCT MANUAL | X-EYE 200 SERIES - PRESENCE & AIRBUTTON SENSOR 3. Functionalities and API commands The X-Eye Presence sensors provide the following functionalities: Presence & Airbutton detection - detects if a person or object is present and indicates the detected distance zone Absolute distance measurement - detects if a person or object is present and indicates the absolute distance in cm The following sections will cover each of these functionalities in detail. -
Page 3: Absolute Distance Measurement
PRODUCT MANUAL | X-EYE 200 SERIES - PRESENCE & AIRBUTTON SENSOR 3.2 - Absolute distance measurement Next to providing distance zone information, the X-Eye Example commands sensor can also be set to provide absolute distance Person detected at 43cm distance X001B[Dv=043] measurements in units of 1 cm. -
Page 4: Installation Requirements And Guidelines
PRODUCT MANUAL | X-EYE 200 SERIES - PRESENCE & AIRBUTTON SENSOR 4 - Installation requirements and guidelines When integrating an X-Eye Presence & Airbutton sensor into your digital signage installation, several installation requirements and guidelines need to be taken into account in order for the sensor to perform optimal and operate stable. - Page 5 PRODUCT MANUAL | X-EYE 200 SERIES - PRESENCE & AIRBUTTON SENSOR Installation behind front panel Both the XY-240 and XY-241 can be installed behind a front panel with a cut-out. The XY-241 has an embossed cylinder of 9.8mm diameter. We recommend to make a circular cut-out of 10mm diameter in the front panel through which the embossed cylinder can be placed.
-
Page 6: Settings
PRODUCT MANUAL | X-EYE 200 SERIES - PRESENCE & AIRBUTTON SENSOR 5.1 - Settings The X-Eye sensor has multiple settings which determine the behaviour and output of the sensor. The settings can be adjusted by sending X-talk setting commands via the API. After a power cycle, the settings always return back to default. -
Page 7: Advanced Settings: Field Of View
PRODUCT MANUAL | X-EYE 200 SERIES - PRESENCE & AIRBUTTON SENSOR 5.2 - Advanced settings: Field of View adjustment The following settings provide advanced control over the sensor's Field of View (FoV). Adjusting these settings can cause the sensor to stop being able to make accurate measurements. After a power cycle, the settings always return back to default. -
Page 8: Advanced Settings: Output And Error Filtering
PRODUCT MANUAL | X-EYE 200 SERIES - PRESENCE & AIRBUTTON SENSOR 5.3 - Advanced settings: Output and error filtering The following settings provide advanced control over the sensor's filter settings and error handling which determine the requirements for a sensor reading to be considered valid. Next to that, they provide control over the output format. Please note that typically these settings do not need to be adjusted. - Page 9 PRODUCT MANUAL | X-EYE 200 SERIES - PRESENCE & AIRBUTTON SENSOR Setting 25: Maximum distance for Error 8 Setting 26: Maximum signal level for Error 8 X001S[25:X] X001S[26:X] Set max distance for Error 8 Set max signal level for Error 8 X is a value between 1-250 and its default value is 50.
-
Page 10: Quick Test
PRODUCT MANUAL | X-EYE 200 SERIES - PRESENCE & AIRBUTTON SENSOR 6. Quick test In order to test if the X-Eye Presence & Airbutton sensor is installed correctly, please follow the test procedure below: Step 1 - Setup First, connect the X-Eye sensor to an Xperience controller.
Need help?
Do you have a question about the X-EYE 200 Series and is the answer not in the manual?
Questions and answers