Carrier Infinity SYSTXCCITC01-B Owner's Manual
Hide thumbs
Also See for Infinity SYSTXCCITC01-B:
- Installation instructions manual (120 pages) ,
- Support sheet (2 pages) ,
- Installation instructions manual (112 pages)
Table of Contents
Advertisement
Quick Links
SYSTXCCITC01-B, SYSTXCCWIC01-B,
SYSTXCCICF01-B, SYSTXCCWIF01-B
Infinity® System Control
The features and functions outlined in this Owner's Manual reflect Version 1.3 or later software.
Occupancy sensing is only available with Series B Infinity System Controls. See the Downloads
section of www.MyInfinityTouch.Carrier.com for the latest software release and literature.
US Patents: Carrier® U.S. Pat No. 7,243,004, Carrier® U.S. Pat No. 7,775,452, pointSET™
U.S. Pat No. 7,415,102
Owner's Manual
A170203
1
A180218C
Advertisement
Table of Contents

Related Manuals for Carrier Infinity SYSTXCCITC01-B


Summary of Contents for Carrier Infinity SYSTXCCITC01-B
- Page 1 Occupancy sensing is only available with Series B Infinity System Controls. See the Downloads section of www.MyInfinityTouch.Carrier.com for the latest software release and literature. US Patents: Carrier® U.S. Pat No. 7,243,004, Carrier® U.S. Pat No. 7,775,452, pointSET™ U.S. Pat No. 7,415,102...
-
Page 3: Table Of Contents
Table of Contents 1. Introduction ................5 2. - Page 4 10.2. Set Backlight Levels ............. 28 10.3.
-
Page 5: Introduction
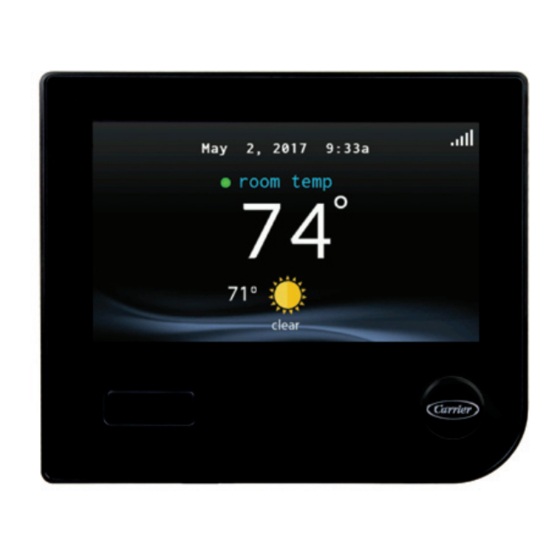
2.1. Information Displayed NOTE: When you connect your system to the Internet and register on the My Infinity website, you can access nearly all of the consumer features on the Carrier® Home mobile app. See the WIRELESS section for more information. -
Page 6: Wi-Fi® Connectivity Status
2.3. Wi-Fi® Connectivity Status A13258C Connectivity status to the home Wi-Fi network and MyInfinity Server is displayed in the top right hand corner of the Home Screen. Infinity System Control is connected to the home Wi-Fi network and the MyInfinity Server, the signal strength bars will be displayed in white as depicted in the image below. - Page 7 Connection strength to the home Wi-Fi network will continue to be displayed by the number of solid bars. If this problem persists, please contact 1-800-Carrier for assistance. A170247 • Pressing on the Connectivity Status bars from the Home Screen will allow you to view the Remote Access Status screen.
-
Page 8: Information Buttons
The Main Screen is where most interactions will take place. Touch anywhere on the Home Screen to arrive at the Main Screen. The most convenient way to interact with your control is using the Carrier® Home mobile app. See the WIRELESS section for more details on connecting your product to the Internet. -
Page 9: Set Day And Time
When the feature is enabled and AUTO mode is selected, the simultaneous heating and cooling demand auto mode will alternate between heating and cooling, depending on demand, every half hour. This may result in higher energy usage but provide the benefit of greater comfort. Your installing contractor is able to enable this feature, if desired. -
Page 10: Adjusting Heating
3.5. Adjusting Heating NOTE: If OFF is selected, the Heat, Cool, Auto and Fan Only will not be available. When changing from the OFF mode to Heat, Cool, Auto, or Fan Only, it is normal for the system to run the blower for a minute or two. During this time, the system is using the True Sense™ feature to determine the filter usage. -
Page 11: Adjusting Heating
• Touch the activity under the Touch ’N’ Go® feature on the left side of the screen; then select the desired activity of HOME, AWAY, SLEEP, or WAKE. • Touch the HOLD UNTIL button, then touch HOLD. • To return to the scheduled program touch HOLD, and then touch PER SCHEDULE. 3.9. -
Page 12: Occupancy Override
• Once you have selected the desired activity for ALL ZONES, you will have the option to either permanently (HOLD) or temporarily (HOLD UNTIL) override your programmed schedule. A14239 – Selecting the HOLD option will permanently override your programmed schedule until you CANCEL ALL ZONES. -
Page 13: Features
A170203 The Occupancy Sensing feature can be enabled or disabled under the “sensors” icon on the main screen. See Occupancy Setup section on page 48. When the Occupancy Sensing feature is enabled, the current scheduled activity is HOME or WAKE, and timing is “per schedule,” the activity and set point(s) change to AWAY automatically when the space is determined to be Unoccupied. -
Page 14: View Current Humidity Level
Your menu screen offers more features and control for your Infinity System Control. Touch the MENU button at the bottom right of the Main Screen. The most convenient way to program your control is using the Carrier® Home mobile app. See the WIRELESS section for more details on connecting your product to the Internet. - Page 15 A14241 – For example to change your HOME comfort profile, touch the HOME icon. – Use the Up (Y) and Down (B) buttons to change the fan settings, heating and cooling temperatures. When you are done, press the DONE button on the bottom right. –...
-
Page 16: Home Comfort Profile Humidity Control
A14242 5.2. Home Comfort Profile Humidity Control • Touch WHEN AT HOME to set your humidity settings while the home is occupied to enjoy superior comfort. A14243 • If you have a humidifier installed for your system, touch HEATING HUMIDITY to set the desired humidity level within the home. - Page 17 A14244 – Once your Humidifier is turned ON, use the Up (Y) and Down (B) buttons to set the desired humidity level between 5-45%. – Press SAVE when finished, or CANCEL to discard any changes. • Next, select your desired humidity level during cooling by touching COOLING HUMIDITY.
-
Page 18: Home Comfort Profile Fresh Air Control
5.3. Home Comfort Profile Fresh Air Control • If a ventilator is installed in your home, select the amount of fresh air to circulate during heating mode by touching Heating Fresh Air. NOTE: This option may not be available with the ERVXXNVA ventilator due to its simplified control design. -
Page 19: Away Comfort Profile Humidity Control
5.4. Away Comfort Profile Humidity Control You may wish to have different humidity settings when you’re away. Press the Menu area on the Main Screen to access the additional menu selections. Select Comfort Profiles, then select Humidity and Fresh Air Profiles option. A14247 •... -
Page 20: Vacation Comfort Profile Humidity Control
• If a ventilator is installed in your home, select the amount of fresh air to circulate during heating mode by touching HEATING FRESH AIR. NOTE: This option may not be available with the ERVXXNVA ventilator due to its simplified Control design. -
Page 21: Vacation Comfort Profile Fresh Air Control
SD memory card. The most convenient way to program your control is using the Carrier® Home mobile app. See the WIRELESS section for more details on connecting your product to the Internet. -
Page 22: View Or Edit Schedule
A14249 6.1. View or Edit Schedule • To set a specific day use the Left (A) and Right (") buttons beside the day names. – If you wish to copy this schedule to other days, touch COPY above the day. –... -
Page 23: Upload My Schedule
• If you select NO, you will see the newly created schedule. 6.3. Upload My Schedule As noted earlier, programming the control with the Carrier® Home mobile app is the most convenient way. You can program a system that is not connected to the Internet using a PC or MAC computer using the process shown, below. -
Page 24: Vacation
– The MyInfinity Desktop application provides you the ability to create your schedule for the Infinity System Control. • Once the schedules are complete, insert a micro SD card memory device into your computer. Add a new folder to the micro SD card device labeled User. Make sure that this folder is at the top of the folder chain in the micro SD card;... -
Page 25: Reminders
• Use the Up (Y) and Down B) buttons to set the time and date of when your vacation begins; then touch NEXT. The Control won’t allow you to select a vacation start date/time earlier than the current date/time. • Use the Up (Y) and Down (B) buttons set the fan speed and the temperature range you wish to keep your house;... -
Page 26: Operating Status
• You have the option of choosing a pop-up reminder for your air filter, humidifier, UV lights, or ventilator pre-filter. NOTE: This option my not be available with the ERVXXNVA ventilator due to its simplified Control design. • To enable a reminder, touch YES. •... -
Page 27: Temperature Control Status
A12108 9.3. Temperature Control Status The Temperature Control Status allows you to take a quick look at the actual temperatures, and temperature set points for each zone in your system. • When you are done looking at your zone status, press DONE. The system will indicate which mode is running by showing flashing arrows towards either the heating or cooling set point. -
Page 28: Display
10. Display The following display preferences can be adjusted for Infinity System Control, Temperature Units (°F or °C), Backlight Levels, Sound Settings and Screen Saver Settings. A14256 10.1. Temperature Units Select the desired temperature units, either °F for Fahrenheit, or °C for Celsius and touch SAVE. -
Page 29: Sound Settings
– Brightness levels include OFF or 1-10. NOTE: After 30 seconds of inactivity on the touch screen, the backlight level will be set back to the current selected level which may be OFF. A14258 10.3. Sound Settings The control can emit a ”click” sound in response to each screen touch. Select ENABLED to turn this sound on;... -
Page 30: Activate Screen Lock
A14260 10.5. Activate Screen Lock • A message will pop up asking if you want to proceed with the screen lock. Selecting Yes will lock the screen and take you back to the home screen. A13247 • To unlock the screen, press and hold UNLOCK in the bottom left hand corner for 10 seconds. -
Page 31: Energy Tracking
A13248 • The screen will change and the Control will then be accessible. If the screen is to be locked again, return to the menu, select the screen lock and touch YES. 11. Energy Tracking The Infinity System Control has the ability to monitor and estimate the energy consumption of certain models of your Infinity System. -
Page 32: Time / Date
A12113 12. Time / Date The TIME/DATE icon allows you to set the time and date for the Infinity System Control. A14250 12.1. Set Time and Date The time and date can either be set manually or can be synchronized with the web server (only for Wi-Fi connected units). -
Page 33: Setup Daylight Savings Time
A14251 • Use the Up (Y) and Down (B) buttons to make the appropriate changes. • When you have completed all of the settings touch SAVE. 12.3. Setup Daylight Savings Time You can program your Infinity System Control to automatically adjust for daylight saving time. From this screen, you can also choose to override the preprogrammed start and end dates for daylight saving. -
Page 34: Enable Time Synchronization
A14217 12.5. Enable Time Synchronization For systems with Wi-Fi® capability, after setting up the time zone, the time synchronization can then be done. Both must be done in order to enable time synchronization. A14253 13. Service Selecting the SERVICE icon from the menu screen will allow you to view service contact information, set-up or modify service reminders and update the software for your wall Control. -
Page 35: Service Information
Your dealer information is easily accessible and may already be pre-programmed in your Control by your dealer. Select the SERVICE INFORMATION option. • Either your dealer’s contact information or the Carrier service number, 1-800-Carrier, will appear. • This information will also appear if your system requires service. -
Page 36: Updating Software Using Micro Sd Card
• When software updates are available, they will be posted to on the downloads page of the MyInfinity website, www.MyInfinityTouch.Carrier.com/Infinity/Downloads. NOTE: You will obtain best results using a micro SD card that is 4 GB to 32 GB in size. Your micro SD card must be formatted as FAT32. - Page 37 A13253 • Highlight the TSTAT folder in the WinZip window by clicking on the folder icon ONCE to highlight the proper folder to be downloaded to the micro SD card. Then click on EXTRACT. • Choose the micro SD card memory device root directory as the location to extract the folder from the zip file.
-
Page 38: Updating Software Using Wi-Fi
A13254C • Plug the micro SD card into the bottom of the Infinity System Control and click on the UPDATE SOFTWARE USING MICRO SD CARD. • Press Yes to continue with the software upgrade. The upload and installation will take several minutes. - Page 39 A13255 Touch anywhere inside the software update reminder message to install the latest software or customize your reminder messages for software updates. (Note: The version numbers shown below are examples. Actual version numbers will vary.) A150194 Selecting YES will initiate the software update process. Your Infinity System Control will reboot in order to complete the software update process.
-
Page 40: Model / Serial Numbers
A150204 13.6. Model / Serial Numbers This screen will allow you to access the model numbers and serial numbers for the installed equipment. A14255 14. Photo Upload With the Infinity System Control, you can upload a personal photo to act as a screen saver. Select the PHOTO UPDATE icon from the menu screen. -
Page 41: Heat Source (If Applicable)
PC or MAC. Install the software on your computer, then go to the Menu and select Photo Export. Follow the instructions on-screen in the PC application. • Touch the upload photo icon on the menu screen on the Infinity System Control. •... -
Page 42: Home Automation System Interface (If Applicable)
MyInfinity web server, with, and the availability of, the user’s Internet service provider or mobile device carrier service, or that the ability to remotely access and adjust the settings of the Infinity System Control will not be negatively affected by the network-related modifications, upgrades, or similar activity of the user’s Internet service provider or mobile... - Page 43 A170241C • Select WIRELESS from the menu screen. • Make sure the Wi-Fi connection is enabled, by touching ENABLED. • Touch SETUP A WI-FI CONNECTION to begin the process. • Next, touch SCAN FOR AVAILABLE ACCESS POINTS. A13235 • On the next screen look for the SSID of the router/access point. After being selected, it will be outlined in faint blue and will be indicated by a checkmark.
- Page 44 A150175 • The selected network will show. Choose an appropriate Wi-Fi security. Usually auto-detect will correctly identify the type of security used. If the network has no security it will show as on the left, but a secured network will prompt for the Wi-Fi security key. A150191 •...
- Page 45 • After the control has connected to the network, go to www.MyInfinityTouch.com, or use the Carrier® Home mobile app to register the unit. Registration requires the MAC address and serial number of the Infinity System Control. On the wall control to find the serial number and MAC address of the Infinity System Control , click on Menu, Down Arrow, Wireless and View MyInfinity Registration Info.When using the Carrier®...
-
Page 46: Weather
A13242C 18. Weather When the Infinity System Control is connected to a Wi-Fi® network, use the WEATHER icon to retrieve the weather forecast based your postal code. A170242C • To enter your postal code, touch CHANGE CURRENT LOCATION. • Next, select your country (United States or Canada). •... -
Page 47: Sensors
19. Sensors 19.1. Menu An occupancy sensor is built into the main system control. This sensor is used to control occupancy for the entire home, including all zones in zoning systems. By selecting the SENSORS icon in the menu, a menu will be shown that offers options to setup the occupancy sensor. -
Page 48: Occupancy Setup
Sensors Menu for Non-Zoning System A170286 19.2. Occupancy Setup Home or zone (for zoning systems) occupancy setup is used to enable or disable the occupancy sensing feature in the home or each zone (for zoning systems). NON-ZONING SYSTEMS A170174... -
Page 49: Utility Demand Event Response Setup
ZONING SYSTEMS A170175 NOTE: Occupancy sensing indicator ONLY displays on the main and home screen when the occupancy sensing feature is ENABLED. 20. Utility Demand Event Response Setup This section is only applicable if your utility company is running a demand response or price response program in which you have agreed to participate. -
Page 50: When A Utility Event Is In Progress
20.2. When a utility event is in progress… • The temperature set points will be automatically adjusted depending on the utility event setup. The adjusted heating and cooling temperatures will be displayed in green on the Main Screen along with a “utility event” message. •... -
Page 51: Demand Response
point for the duration of the event. Unless otherwise indicated, all settings temperatures will be shown in Fahrenheit degrees. A14264 20.5. Demand Response Demand response determines how the heating and cooling set points will be adjusted during a demand response event with two choices - offsets or absolute temperature. When offsets are selected, the heating and cooling set points are adjusted by the number of degrees selected. -
Page 52: Response Limits
programmed, the Infinity System Control will use the more favorable set point for the duration of the event. A14266 20.7. Response Limits Response limits are minimum heating and maximum cooling temperatures allowed during a utility event. These limits are not exceeded and are intended to protect the occupant premises from extreme temperatures that might otherwise be imposed by a utility event. -
Page 53: Statement Information
A14268 21. Statement Information This device complies with Part 15 of the FCC Rules. Operation is subject to the following two conditions: (1) This device may not cause harmful interference, and (2) This device must accept any interference received, including interference that may cause undesired operation. Changes or modifications not expressly approved by the party responsible for compliance could void the user’s authority to operate the equipment. - Page 54 Pour se conformer aux limites d’exposition RF FCC et IC pour la population générale / l’exposition incontrôlée, l’antenne utilisée pour cet émetteur doit être installée pour assurer une distance de séparation d’au moins 20 cm de toutes les personnes et fonctionnant conjointement avec toute autre antenne ou émetteur.
- Page 56 Infinity®Evolution®, Touch ’N’ Go®, True Sense™ and HYBRID HEAT® are trademarks or registered trademarks of Carrier Corporation in the United States and other countries. Other brands and product names are trademarks of their respective holders. Wi-Fi® is a registered trademark of Wi-Fi Alliance Corporation.
Need help?
Do you have a question about the Infinity SYSTXCCITC01-B and is the answer not in the manual?
Questions and answers