
Subscribe to Our Youtube Channel
Related Manuals for Grundig GWN48430CG


Summary of Contents for Grundig GWN48430CG
- Page 1 WASHING MACHINE USER‘S MANUAL GWN48430CG www.grundig.com Document Number 2820526900/ 11-05-18.(14:31)
- Page 2 Please read these instructions first before using your appliance Dear Customer, Thank you for choosing a Grundig appliance. Please take some time to read this user manual before using your appliance, to ensure you know how to safely operate the controls and functions.
-
Page 3: Table Of Contents
TABLE OF CONTENTS Important instructions for safety End Time ......29 and environment Starting the programme ... .29 Loading door lock. -
Page 4: Important Instructions For Safety And Environment
Important instructions for safety and environment This section contains safety instructions that will help protect from risk of personal injury or property damage. Failure to follow these instructions shall void any warranty. General safety • This product can be used by children at and above 8 years old and by persons whose physi- cal, sensory or mental capabilities are not fully developed or who lack experience and knowl-... -
Page 5: Electrical Safety
Electrical safety • If the product has a failure, it should not be op- erated unless it is repaired by the Authorised Service Agent. There is the risk of electric shock! • This product is designed to resume operating in the event of powering on after a power interrup- tion. -
Page 6: Product Safety
Product safety • The water supply and draining hoses must be securely fastened and remain undamaged. Otherwise, there is the risk of water leakage. • Never open the loading door or remove the filter while there is still water in the drum. Otherwise, risk of flooding and injury from hot water will oc- cur. -
Page 7: Intended Use
Intended use • This product has been designed for domestic use. It is not suitable for commercial use and it must not be used for anything other than its in- tended use. • Use the product only for washing and rinsing of textile products that are marked accordingly. -
Page 8: Compliance With The Weee Directive
Compliance with the WEEE Directive This product complies with EU WEEE Directive (2012/19/EU). This product bears a classification symbol for waste electrical and electronic equipment (WEEE). This product has been manufactured with high quality parts and materials which can be reused and are suitable for recycling. Do not dispose of the waste product with normal do- mestic and other wastes at the end of its service life. -
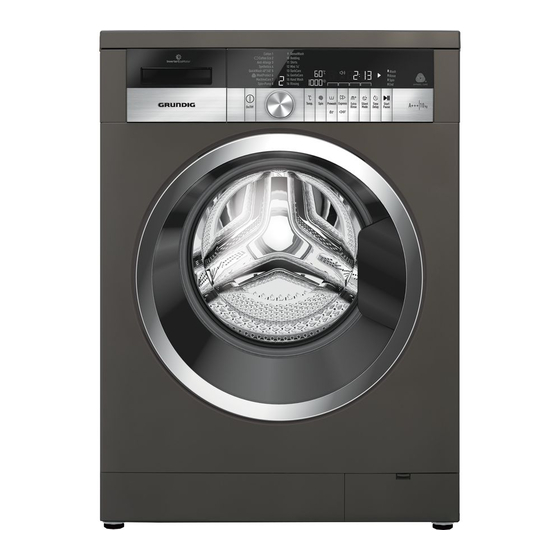
Page 9: Your Washing Machine
Your washing machine Overview 1- Power cable 2- Top panel 3- Control panel 4- Filter cap 5- Adjustable feet 6- Loading door 7- Detergent drawer 8- Drain hose... -
Page 10: Package Contents
Package Contents 1- Power cable 2- Drain hose 3- Transportation safety bolts * 4- Mains water inlet hose (One of the following filter types is used for the mains hose connection.) a- Electronic water shut-off b- Mechanical water shut-off c- Standard 5- Liquid detergent container** 6- User Manual 7- Blind plug***... -
Page 11: Technical Specifications
Technical specifications Complying Commission Delegated Regulation (EU) No 1061/2010 Supplier name or trademark GRUNDIG Model name GWN48430CG Rated capacity (kg) Energy efficiency class / Scale from A+++ (Highest Efficiency) to D (Lowest Efficiency) A+++ Annual Energy Consumption (kWh) Energy consumption of the standard 60°C cotton programme at full load (kWh) 0,920 Energy consumption of the standard 60°C cotton programme at partial load (kWh) -
Page 12: Installation
Installation • Do not place heat sources such as Hobs, Irons, Ovens, etc. on the To make the product ready for use, washing machine and do not use review the information in the user them on the product. manual and make sure that the Removing packaging reinforcement electricity, tap water supply and water Tilt the machine backwards to remove... -
Page 13: Connecting Water Supply
• Remove transportation safety • Tighten all hose nuts by hand. bolts by turning them gently. Never use a tool when tightening the nuts. • Open the taps completely after • Attach the plastic covers supplied making the hose connection in the User Manual bag into the to check for water leaks at the holes on the rear panel. -
Page 14: Adjusting The Feet
• Adjust the feet until the product stands level and balanced. • Tighten all lock nuts again by hand. • To prevent flowing of dirty water back into the machine and to allow for easy discharge, do not immerse the hose end into the dirty water or do not drive it in the drain more than 15 cm. - Page 15 Electrical requirements Connect the brown (live) wire to Before you insert the plug into the wall the terminal in the plug marked ‘L’ or socket make sure that the voltage and coloured red. the frequency shown in the rating label With the alternative plugs a 13A fuse corresponds to your electricity supply.
-
Page 16: Preparation
Preparation Sorting the laundry • Sort laundry according to type of fabric, colour, and degree of soiling and allowable water temperature. • Always obey the instructions given on the garment tags. LAUNDRY WASH SYMBOLS Machine Wash Symbols WASH Maximum Water Temperatures ... -
Page 17: Things To Be Done For Energy Saving
Initial use products only with an appropriate programme. Before starting to use the product, • Do not wash colours and whites make sure that all preparations are together. New, dark coloured completed in accordance with the cottons release a lot of dye. Wash instructions in sections "Important them separately. -
Page 18: Loading The Laundry
Loading the laundry • In a programme with prewash, do not put liquid detergent into • Open the loading door. the prewash compartment • Place laundry items loosely into (compartment nr. „1“). the machine. • Do not select a programme •... - Page 19 Using softeners • Put tablet detergents into the main wash compartment Pour the softener into the softener compartment of the detergent drawer. (compartment nr. „2“) or directly • Do not exceed the (>max<) into the drum before washing. level marking in the softener Tablet detergents may leave compartment.
-
Page 20: Tips For Efficient Washing
• Oxygen based bleaches can be Clothes used together with detergents; Powder and liquid detergents however, if its thickness is not recommended for colors can be the same with the detergent, used at dosages recommended put the detergent first into the for heavily soiled clothes. -
Page 21: Operating The Product
Operating the product Control panel 1 - Programme Selection display 6 - Auxiliary Function buttons 2 - Display 7 - Spin Speed Adjustment button 3 - Programme Follow-up indicator 8 - Temperature Adjustment button 4 - Start / Pause button 9 - Programme Selection knob 5 - End Time Adjustment button 10 - On / Off button... -
Page 22: Preparing The Machine
Preparing the machine Programmes • Check if the hoses are connected • Cotton tightly. Use this programme for your cotton • Plug in your machine. laundry (such as bed sheets, duvet and • Turn the tap on completely. pillowcase sets, towels, bathrobes, •... - Page 23 • SenseWash • Hand Wash Use this to wash your frequently Use this programme to wash your woolen/delicate clothes that bear washable cotton, synthetic or blended “not machine- washable” tags and for (cotton+synthetic) clothes. Programme detects the type and quantity of the which hand wash is recommended.
-
Page 24: Temperature Selection
• Bedding Temperature selection Use this programme to wash your fiber Whenever a new programme duvets that bear „machine washable“ is selected, the recommended tag. Make sure that you have loaded temperature for the programme the duvet correctly in order not to appears on the temperature indicator. -
Page 25: Selecting The Spin Speed
Selecting the spin speed If you want to discharge the water at the end of the programme without Whenever a new programme is spinning, use function. No Spin selected, the recommended spin speed of the selected programme is displayed on the indicator. -
Page 26: Programme And Consumption Table
Programme and consumption table Auxiliary functions Selectable temperature range Programme (°C) °C SenseWash **** **** 1400 • • • • Cold-60 60** 50,5 0,920 1400 Cold-60 Cotton Eco 60** 0,805 1400 Cold-60 40** 0,805 1400 Cold-60 2,03 1400 • • •... - Page 27 The auxiliary functions in the table may vary according to the model of your machine. Water and power consumption may vary subject to the changes in water pressure, water hardness and temperature, ambient temperature, type and amount of laundry, selection of auxiliary functions and spin speed, and changes in electric voltage.
-
Page 28: Auxiliary Function Selection
Auxiliary function selection • Prewash A Prewash is only worthwhile for Select the desired auxiliary functions heavily soiled laundry. Not using the before starting the programme. Prewash will save energy, water, Whenever a programme is selected, detergent and time. frames of the auxiliary function symbols that can be selected together •... -
Page 29: End Time
End Time Additional laundry may be With the function, the startup End Time loaded during the End Time of the programme may be delayed countdown period. At the end of up to 24 hours. After pressing the countdown, End Time indicator button, the displayed time is the Time turns off, washing cycle starts... -
Page 30: Changing The Selections After
Changing the selections after Changing the auxiliary function, speed and temperature programme has started Depending on the step the programme Adding laundry after the programme has has reached, you can cancel or activate started: the auxiliary functions; see, "Auxiliary button is When the Start / Pause function selection". -
Page 31: Cancelling The Programme
Cancelling the programme Your machine is equipped The programme is cancelled when the with a “Standby Mode” machine is turned off and on again. In case of not starting any programme Press and hold On / Off button for 3 or waiting without making any other seconds. -
Page 32: Quick User Guide Preparing The Machine
Quick User Guide Cancelling the programme The programme is cancelled when the Preparing the machine machine is turned off and on again. • Check if the hoses are connected Press and hold On / Off button for 3 tightly. seconds. •... -
Page 33: Maintenance And Cleaning
Maintenance and Cleaning the loading door and the drum cleaning For products with drum cleaning Service life of the product extends and programme, please see Operating the frequently faced problems decrease if product - Programmes. cleaned at regular intervals. Cleaning the detergent drawer Repeat Drum Cleaning process in Clean the detergent drawer at regular every 2 months. -
Page 34: Cleaning The Water Intake Filters
Cleaning the water intake filters Draining remaining water and cleaning the pump filter There is a filter at the end of each water intake valve at the rear of the The filter system in your machine machine and also at the end of each prevents solid items such as buttons, water intake hose where they are coins and fabric fibers clogging the... -
Page 35: If The Product Has An Emergency Draining Hose, To Discharge The Water
If the product has an • Open the filter cap. • If the filter cap is composed of emergency draining hose, two pieces, press the tab on the to discharge the water: filter cap downwards and pull the piece out towards yourself. You can remove the filter cover by slightly pushing downwards with a •... -
Page 36: Troubleshooting
Troubleshooting Program does not start after closing the door. *Press the Start / Pause / Cancel • Start / Pause / Cancel button was not pressed. >>> button. Reduce the • It may be difficult to close the loading door in case of excessive loading. >>> amount of laundry and make sure that the loading door is closed properly. - Page 37 Loading door cannot be opened. Drain the water by • Door lock is activated because of the water level in the machine. >>> running the Pump or Spin programme. Wait until the • Machine is heating up the water or it is at the spinning cycle. >>> programme completes.
- Page 38 Washing performance is poor: Laundry turns grey. (**) Use the • Insufficient amount of detergent was used over a long period of time. >>> recommended amount of detergent appropriate for water hardness and the laundry. • Washing was made at low temperatures for a long time over a long period of time. >>> Select the proper temperature for the laundry to be washed.
- Page 39 Laundry became stiff after washing. (**) Using insufficient amount of detergent for • Insufficient amount of detergent is used. >>> the water hardness can cause the laundry to become stiff in time. Use appropriate amount of detergent according to the water hardness. If detergent is put in the prewash •...
- Page 40 Foam is overflowing from the detergent drawer. Mix 1 tablespoonful softener and ½ l water and pour into • Too much detergent is used. >>> the main wash compartment of the detergent drawer. • Put detergent into the machine suitable for the programmes and maximum loads indicated in the “Programme and consumption table”.
- Page 41 Accidental damage, misuse or abuse of a product. An attempted repair of a product by anyone other than a Grundig Approved Engineer (the “Engineer”). Installation or use of a product where such installation or use fails to meet the requirements contained in this guarantee or the User Instructions Booklet.
- Page 42 11. Optional extras, where available (i.e. extendable feet) are supplied on a chargeable basis only. Does Grundig offer replacements? This is a repair-only guarantee. On occasion, the Manufacturer may at its sole discretion, replace your product with a new product instead of carrying out a repair.
- Page 43 You can register by first visiting grundig.co.uk/register and by following the online instructions. Grundig Free standing and Built-in appliances come with a 36 month parts and labour guarantee as standard, which can be extended to a 60 months parts and labour guarantee by registering within 90 days of the original purchase date To make a claim against your Grundig Eco Inverter Motor Guarantee (the “Guarantee”), all customer and product details must...
- Page 44 Send us a secure message through our online contact us form. Please visit our website, click Contact Us and choose a product support topic from the list of options. Complete the required details and click send message. Product registrations For UK and Republic of Ireland product registrations please visit grundig.co.uk/register.
- Page 48 www.grundig.com...
Need help?
Do you have a question about the GWN48430CG and is the answer not in the manual?
Questions and answers