
Related Manuals for Grundig GWN 48230 K


Summary of Contents for Grundig GWN 48230 K
- Page 1 LAVATRICE MANUALE UTENTE GWN 48230 K www.grundig.com Numero del documento 2820524746_IT/ 25-02-16.(12:14)
- Page 2 Leggere prima il manuale utente! Gentile cliente, Grazie per aver scelto un elettrodomestico Grundig. Speriamo che questo elettrodomestico, realizzato con tecnologia di alta qualità e di ultima generazione, offrirà le migliori prestazioni. Pertanto, la preghiamo di leggere l'intero manuale utente e tutti gli altri documenti allegati con attenzione prima di usare l'elettrodomestico e di conservarli come riferimento per usi futuri.
-
Page 3: Table Of Contents
INDICE Istruzioni importanti per la Avvio del programma....34 sicurezza e l'ambiente Blocco sportello di carico ...34 Cambiare le selezioni dopo che il Sicurezza generale. -
Page 4: Istruzioni Importanti Per La Sicurezza E L'ambiente
Istruzioni importanti per la sicurezza e l'ambiente Questa sezione contiene istruzioni sulla sicurezza che aiutano a proteggere dal rischio di lesioni perso- nali o danni alla proprietà. La mancata osservanza di queste istruzioni rende la garanzia priva di vali- dità. Sicurezza generale •... - Page 5 rato da un agente autorizzato per l'assistenza. C'è il rischio di shock elettrico! • L'elettrodomestico è progettato per riprendere a funzionare in caso di ripristino di corrente dopo un guasto elettrico. Se si desidera annullare il programma, vedere la sezione "Annullamento del programma".
-
Page 6: Uso Previsto
• Non aprire mai lo sportello né togliere il filtro mentre vi è ancora dell’acqua nel cestello. Altrimenti si verifica il rischio di allagamenti e lesioni provocate dall'acqua calda. • Non forzare per aprire lo sportello di carico bloccato. Lo sportello di carico sarà pronto per l’apertura pochi minuti dopo la fine del ciclo di lavaggio. -
Page 7: Sicurezza Dei Bambini
Sicurezza dei bambini • I materiali di imballaggio sono dannosi per i bambini. Tenere i materiali di imballaggio in un luogo sicuro lontano dalla portata dei bambini. • I materiali elettrici sono dannosi per i bambini. Tenere i bambini lontani dall'elettrodomestico mentre questo è... -
Page 8: Informazioni Sulla Confezione
servizio. Portarlo a un centro di raccolta per il riciclo delle apparecchiature elettriche ed elettroniche. Consultare le autorità locali per conoscere i centri di raccolta più vicini. Conformità con la direttiva RoHS: il prodotto acquistato è conforme alla direttiva RoHS UE (2011/65/UE). -
Page 9: La Lavatrice
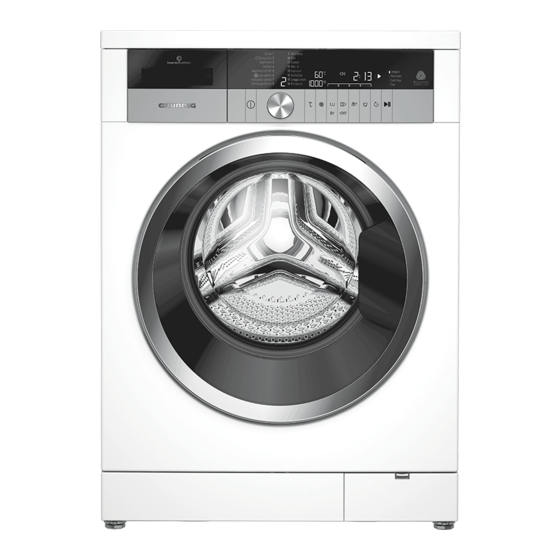
La lavatrice Panoramica 1- Cavo di alimentazione 2- Pannello superiore 3- Pannello di controllo 4 - Copertura filtro 5- Piedini regolabili 6- Sportello di carico 7 - Cassetto del detersivo 8- Flessibile di scarico... -
Page 10: Contenuto Della Confezione
Contenuto della confezione 1- Cavo di alimentazione 2- Flessibile di scarico 3- Bulloni di sicurezza per il trasporto * 4- Flessibile ingresso rete idrica (Si usa uno dei seguenti tipi di filtro per il collegamento del flessibile di rete). a- Disattivazione idrica elettronica b- Disattivazione idrica meccanica c- Standard 5- Contenitore detersivi liquido**... -
Page 11: Specifiche Tecniche
Specifiche tecniche Conforme al regolamento della commissione delegata (UE) N. 1061/2010 Nome fornitore o marchio commerciale GRUNDIG Nome modello GWN 48230 K Capacità valutata (kg) Classe efficienza energetica / Scala da A+++ (Massima efficienza) a D (Efficienza A+++ minima) Consumo energetico annuale (kWh) Consumo energetico del programma standard Cotone 60°C a pieno carico (kWh) -
Page 12: Installazione
Installazione Assicurarsi che i flessibili di ingresso e scarico Rivolgersi al più vicino agente dell'acqua nonché il autorizzato per l'assistenza per cavo di alimentazione l'installazione dell'elettrodomestico. non siano piegati, Per rendere l'elettrodomestico schiacciati o strappati pronto per l'uso, rivedere le quando si riposiziona informazioni del manuale utente e l'elettrodomestico dopo le... -
Page 13: Rimozione Dei Rinforzi Dell'imballaggio
Rimozione dei rinforzi •* Rimuovere i bulloni di sicurezza di trasporto ruotandoli dell'imballaggio delicatamente. Ribaltare la lavasciuga all'indietro per rimuovere i rinforzi dell’imballaggio. Tirare il nastro per rimuovere i rinforzi dell’imballaggio. •* Inserire i coperchietti in plastica nei fori del pannello posteriore, in dotazione nel sacchetto allegato al manuale utente. -
Page 14: Collegamento Della Fornitura Idrica
Collegamento della rosso (sinistra) (max. 90 ºC) è per l'ingresso dell'acqua calda, il fornitura idrica flessibile blu (destra) (max. 25 ºC) La pressione idrica è per l'ingresso dell'acqua fredda. necessaria per utilizzare l'elettrodomestico è compresa tra 1 e 10 bar (0,1 – 1 MPa). -
Page 15: Collegamento Dello Scarico
di acqua e danni conseguenti, consentire uno scarico facile, tenere i rubinetti chiusi quando la non immergere l'estremità del lavatrice non è in uso. flessibile nell'acqua sporca o non tenerla ad una distanza superiore Collegamento dello scarico a 15 cm. Accorciarlo se è troppo •... -
Page 16: Collegamento Elettrico
•* Regolare i piedini finché di rete. • Non eseguire collegamenti l'elettrodomestico non è allo stesso livello e in equilibrio. usando prolunghe o spine multiple. AVVERTENZA: Cavi di alimentazione danneggiati devono essere sostituiti da un agente autorizzato per l'assistenza. •* Stringere di nuovo a mano tutti i Trasporto dell'elettrodomestico dadi di blocco. -
Page 17: Preparazione
Preparazione Selezione del bucato • Selezionare il bucato in base al tipo di tessuto, al colore, al livello di sporco e alla temperatura di lavaggio consentita. • Rispettare sempre le istruzioni presenti sulle etichette dei capi. SIMBOLI LAVAGGIO BUCATO Simboli lavaggio elettrodomestico LAVAGGIO Massima... -
Page 18: Preparazione Del Bucato Da Lavare
Preparazione del • Il bucato molto sporco di materiale come farina, polvere bucato da lavare di calcare, polvere di latte, ecc. • Gli indumenti con accessori in deve essere scosso prima di metallo, quali reggiseni, fibbie metterlo nell'apparecchio. Tali di cinture o bottoni metallici tipi di polvere sul bucato possono possono danneggiare la lavatrice. -
Page 19: Uso Iniziale
Uso iniziale Tipo di Peso (g.) bucato Prima di cominciare ad usare Accappatoio l'elettrodomestico, assicurarsi 1200 di eseguire tutte le preparazioni Tovaglioli secondo le istruzioni delle Copripiumone sezioni "Istruzioni importanti Lenzuola per la sicurezza e l'ambiente" e Federa per "Installazione". cuscino Per preparare l'elettrodomestico Tovaglia... -
Page 20: Uso Di Detersivo E Ammorbidente
Uso di detersivo e ammorbidente "1"). • Non selezionare un programma Quando si usano detersivi, con prelavaggio se si usa un ammorbidente, appretto, sacchetto detergente o una tinte per tessuti, candeggina sfera detergente. Mettere il o anticalcare, leggere le sacchetto detergente o la sfera istruzioni del produttore sulla direttamente tra il bucato confezione e seguire i valori... - Page 21 Uso di detersivo in gel e compresse detersivo per piccole quantità di bucato o bucato poco sporco. • Se la consistenza del detersivo Uso di ammorbidenti in gel è fluida e la lavatrice Versare l’ammorbidente nello non contiene un contenitore scomparto apposito del cassetto del speciale per detersivo liquido, detersivo.
-
Page 22: Consigli Per Un Lavaggio Efficace
Uso di candeggina Consigli per un lavaggio efficace • Selezionare un programma Indumenti con prelavaggio e aggiungere Colori chiari e capi bianchi la candeggina all'inizio del (Intervallo di temperatura prelavaggio. Non versare consigliata basato sul detersivo nello scomparto del livello di sporco: 40-90 °C) pre-lavaggio. - Page 23 Indumenti Indumenti Colori Colori scuri (Intervallo di temperatura (Intervallo di temperatura consigliata basato sul consigliata basato sul livello di sporco: freddo - livello di sporco: freddo - 40 °C) 40 °C) Detersivi in polvere e Detersivi liquidi consigliati liquidi consigliati per i adatti per capi colorati e Molto capi colorati possono...
-
Page 24: Funzionamento Dell'elettrodomestico
Funzionamento dell'elettrodomestico Pannello di controllo 7 - Pulsanti di regolazione velocità 1 - Display di selezione del della centrifuga programma 8 - Pulsante di regolazione della 2 - Display temperatura 3 - Indicatore di follow-up del 9 - Manopola di selezione del programma programma 4 - Tasto avvio / pausa... -
Page 25: Preparazione Dell'elettrodomestico
Preparazione I programmi sono dotati di dell'elettrodomestico limitatore per la velocità di centrifuga appropriata • Assicurarsi che i flessibili siano per quel particolare tipo di collegati in modo sicuro. tessuto. • Collegare l'elettrodomestico alla presa elettrica. Quando si seleziona il •... - Page 26 alle etichette degli abiti. Usare programma Cotone con pre-lavaggio detersivi appropriati per i capi in e di impostare la temperatura a 50- lana. 60°C. Molti tipi di abiti sono rilevati in Il ciclo di lavaggio della lana modo corretto e lavati in sicurezza di questo elettrodomestico con il programma automatico.
- Page 27 • Mini 14' • Autopulizia cestello Usare questo programma per lavare Usare questo programma i capi in cotone poco sporchi, in poco regolarmente (una volta ogni tempo. 1-2 mesi) per pulire il cestello e garantire l'igiene necessaria. Avviare • Capi Scuri il programma senza bucato nella Usare questo programma per lavare lavasciuga.
-
Page 28: Selezione Della Temperatura
Selezione della temperatura Se si passa all'opzione di Quando viene selezionato un lavaggio a freddo e si preme nuovo programma, la temperatura il pulsante di regolazione consigliata per il programma viene della temperatura un'altra visualizzata sull’indicatore della volta, la temperatura temperatura. - Page 29 La velocità di centrifuga può essere Il pulsante di regolazione cambiata dopo l'inizio del lavaggio se della centrifuga serve solo le fasi del lavaggio sono adatte. Se le per diminuire la velocità di fasi di lavaggio non sono appropriate, centrifuga. allora non può...
-
Page 30: Tabella Programma E Consumo
Tabella Programma e consumo Funzione ausiliaria °C gamma Programma (°C) temperatura selezionabile MultiSense **** **** 1200 • • • • Freddo-60 Cotone Eco 60** 0.92 1200 Freddo-60 Cotone Eco 60** 0,81 1200 Freddo-60 Cotone Eco 40** 0.81 1200 Freddo-60 Cotone 2.03 1200 •... - Page 31 ** “Cotone eco 40°C e Cotone eco 60°C sono i programmi standard”. Questi programmi sono definiti ‘programma cotone standard 40°C’ e ‘programma cotone standard 60°C’ e sono mostrati sul pannello con i simboli Le funzioni ausiliarie nella tabella possono variare in funzione del modello della lavatrice.
-
Page 32: Selezione Funzione Ausiliaria
Selezione funzione ausiliaria Anche le caselle della funzione ausiliaria adatta per il programma Selezionare le funzioni ausiliarie corrente dopo l'inizio del lavaggio desiderate prima di avviare il restano accese. Si seleziona o si programma. Quando è selezionato annulla la funzione ausiliaria la un programma, le caselle con i cui casella è... -
Page 33: Ora Di Fine
• Prelavaggio Display del tempo Conviene effettuare il prelavaggio Il tempo rimanente per il solo con bucato molto sporco. completamento del programma Non usare il prelavaggio consente mentre è in corso è visualizzato di risparmiare energia, acqua, come “01:30” in formato ore e detersivo e tempo. -
Page 34: Avvio Del Programma
Avvio del programma Non usare detersivo • Premere il tasto avvio/pausa per liquido quando si attiva la avviare il programma. funzione ora di fine! Esiste • Il pulsante Avvio / Pausa che era il rischio di macchiare gli spento, ora resta acceso in modo indumenti. -
Page 35: Cambiare Le Selezioni Dopo Che Il Programma È Iniziato
Cambiare le selezioni dopo Il programma selezionato che il programma è iniziato comincia daccapo. Aggiunta di bucato dopo l'inizio del programma: Modifica di funzione ausiliaria, Quando si preme il pulsante avvio/ velocità e temperatura pausa , se il livello dell'acqua A seconda della fase raggiunta dal all'interno dell'elettrodomestico è... -
Page 36: Annullamento Del Programma
Fine del programma Per attivare il blocco bambini: Tenere premuti il pulsante della 1 Quando il programma è completo, funzione ausiliaria per 3 secondi. viene visualizzato il simbolo di fine. Quando il conto alla rovescia "CL Se non si preme alcun pulsante per 3-2-1"... -
Page 37: Guida Rapida Per L'utente Preparazione Dell'elettrodomestico
Guida rapida per l'utente Avvio del programma • Premere il pulsante Avvio / Pausa Preparazione per avviare il programma. dell'elettrodomestico • La spia di follow-up del • Assicurarsi che i flessibili siano programma che mostra l'avvio collegati in modo sicuro. del programma si accenderà. -
Page 38: Blocco Bambini
Blocco bambini Usare la funzione di blocco bambini per evitare che i bambini possano interferire con il funzionamento dell'elettrodomestico. In questo modo si possono evitare cambiamenti ai programmi in corso. Si può accendere e spegnere l'elettrodomestico con il pulsante di accensione / spegnimento quando il blocco bambini è... -
Page 39: Manutenzione E Pulizia
Manutenzione e pulizia •* Lavare il cassetto del detersivo e il sifone con abbondante acqua La vita di servizio tiepida in un lavandino. Indossare dell'elettrodomestico è più lunga guanti di protezione o usare una e i problemi affrontati di frequente spazzola adatta per evitare di diminuiscono se si esegue la pulizia toccare i residui nel cassetto... -
Page 40: Pulizia Del Corpo E Del Pannello Di
Pulire i filtri di ingresso Dopo ogni lavaggio, assicurarsi che nessuna sostanza estranea resti nel dell'acqua cestello. C'è un filtro nella parte terminale di ciascuna valvola di immissione dell’acqua sul lato posteriore della lavasciuga e anche alla fine di ciascun flessibile di immissione dell’acqua, nel punto di collegamento al rubinetto. -
Page 41: Eliminare Eventuale Acqua Residua E Pulire Il Filtro Della Pompa
Eliminare eventuale Per pulire il filtro sporco e scaricare l’acqua: acqua residua e pulire •* Scollegare la lavasciuga per il filtro della pompa interrompere l’alimentazione. Il sistema filtro della lavasciuga evita AVVERTENZA: La che gli oggetti solidi come bottoni, temperatura dell’acqua monete e fibre si blocchino nella all’interno della macchina pompa durante lo scarico dell'acqua... - Page 42 Quando l'elettrodomestico ha un Se il coperchio del filtro si compone flessibile di scarico di emergenza, di un unico elemento, tirare il coperchio da entrambi i lati sulla per scaricare l'acqua: parte alta per aprire. Si può rimuovere la copertura del filtro •* Estrarre il flessibile di scarico di spingendo leggermente...
-
Page 43: Ricerca E Risoluzione Dei Problemi
Ricerca e risoluzione dei problemi Il programma non si avvia dopo la chiusura dello sportello. • Il pulsante >>> remere il pulsante Avvio / Avvio / Pausa / Annulla non è stato premuto. Pausa / Annulla. Impossibile avviare o selezionare il programma. •... - Page 44 La lavatrice scarica direttamente l'acqua che aspira. Collegare il • Il flessibile di scarico potrebbe non essere all'altezza giusta. >>> flessibile di scarico dell’acqua come descritto nel manuale operativo. Non si vede acqua nella lavatrice durante il lavaggio. • Il livello dell’acqua non è visibile dall’esterno dell'elettrodomestico. Questo non è un guasto.
- Page 45 La lavatrice non passa alla fase di centrifuga. (*) • Potrebbe esserci uno squilibrio del carico all’interno dell'elettrodomestico. >>> sistema automatico di rilevamento carico non bilanciato potrebbe essersi attivato a causa della distribuzione sbilanciata del bucato nel cestello. • L'elettrodomestico non centrifuga se l’acqua non è stata completamente Controllare il filtro e il flessibile di scarico.
- Page 46 Colore degli abiti sbiadito. (**) Non caricare l'elettrodomestico in È • stato caricato bucato in eccesso. >>> eccesso. Tenere i detersivi chiusi in un ambiente privo di • Il detersivo in uso è umido. >>> umidità e non esporli a temperature eccessive. Selezionare il programma e la •...
- Page 47 Residui di detersivo nel cassetto del detersivo. (**) Asciugare il cassetto dosatore • Il detersivo è posto in un cassetto bagnato. >>> prima di mettervi il detersivo. • Il detersivo potrebbe essersi inumidito. >>> Tenere i detersivi chiusi in un ambiente privo di umidità...
- Page 48 Se la biancheria non è disposta in maniera uniforme nel cestello, la lavatrice non eseguirà la fase della centrifuga, per evitare danni alla lavatrice e all'ambiente circostante. Ridisporre la biancheria ed eseguire una nuova centrifuga. Pulire il ** Potrebbe non essere applicata la regolare pulizia del cestello.>>> cestello regolarmente.
-
Page 49: Washing Machine
WASHING MACHINE USER‘S MANUAL GWN 48230 K www.grundig.com Document Number 2820524746_EN/ 25-02-16.(12:27) - Page 50 Please read this user manual first! Dear Customer, Thank you for preferring a Grundig product. We hope that you get the best results from your product which has been manufactured with high quality and state-of-the-art technology. Therefore, please read this entire user manual and all other accompanying documents carefully before using the product and keep it as a reference for future use.
- Page 51 TABLE OF CONTENTS Important instructions for safety Changing the selections after and environment programme has started ..80 Child Lock ......81 General safety .
-
Page 52: Important Instructions For Safety And Environment
Important instructions for safety and environment This section contains safety instructions that will help protect from risk of personal injury or property damage. Failure to follow these instructions shall void any warranty. General safety •• This product can be used by children at and above 8 years old and by persons whose physi- cal, sensory or mental capabilities are not fully developed or who lack experience and knowl-... - Page 53 •• Connect the product to a grounded outlet pro- tected by a 16 A fuse. Have the grounding instal- lation made by a qualified electrician. Our com- pany shall not be liable for any damages that will arise when the product is used without ground- ing in accordance with the local regulations.
-
Page 54: Intended Use
the detergent package. •• Place the product on a rigid, flat and level surfa- •• Do not place it on a long-pile rug or similar sur- faces. •• Do not place the product on a high platform or near the edge on a cascaded surface. ••... -
Page 55: Compliance With The Weee Directive
While washing the laundry at high temperatures, the loading door glass becomes hot. Therefore, keep child- ren away from the loading door of the machine while the washing operation is in progress. Compliance with the WEEE Directive This product complies with EU WEEE Directive (2012/19/EU). -
Page 56: Your Washing Machine
Your washing machine Overview 1- Power cable 2- Top panel 3- Control panel 4- Filter cap 5- Adjustable feet 6- Loading door 7- Detergent drawer 8- Drain hose... -
Page 57: Package Contents
Package Contents 1- Power cable 2- Drain hose 3- Transportation safety bolts * 4- Mains water inlet hose (One of the following filter types is used for the mains hose connection.) a- Electronic water shut-off b- Mechanical water shut-off c- Standard 5- Liquid detergent container** 6- User Manual 7- Blind plug***... -
Page 58: Technical Specifications
Technical specifications Complying Commission Delegated Regulation (EU) No 1061/2010 Supplier name or trademark GRUNDIG Model name GWN 48230 K Rated capacity (kg) Energy efficiency class / Scale from A+++ (Highest Efficiency) to D (Lowest Efficiency) A+++ Annual Energy Consumption (kWh) Energy consumption of the standard 60°C cotton programme at full load (kWh) -
Page 59: Installation
Installation Appropriate installation location •• Place the machine on a rigid floor. Refer to the nearest Authorised Do not place it on a long pile rug Service Agent for installation of the or similar surfaces. product. To make the product ready ••... -
Page 60: Removing The Transportation Locks
Removing the Keep the transportation transportation locks safety bolts in a safe place to reuse when the washing WARNING: Do not remove machine needs to be moved the transportation locks again in the future. before taking out the Never move the product packaging reinforcement. -
Page 61: Connecting To The Drain
•* Connect the special hoses •* Open the taps completely after supplied with the product to the making the hose connection water inlets on the product. Red to check for water leaks at the hose (left) (max. 90 ºC) is for connection points. -
Page 62: Adjusting The Feet
Adjusting the feet •• In case the hose is elevated after laying it on the floor level WARNING: In order to or close to the ground (less than ensure that the product 40 cm above the ground), water operates more silently discharge becomes more difficult and vibration-free, it must and the laundry may come out... -
Page 63: Electrical Connection
Electrical connection Connect the product to a grounded outlet protected by a 16 A fuse. Our company shall not be liable for any damages that will arise when the product is used without grounding in accordance with the local regulations. ••... -
Page 64: Preparation
Preparation Sorting the laundry •• Sort laundry according to type of fabric, colour, and degree of soiling and allowable water temperature. •• Always obey the instructions given on the garment tags. LAUNDRY WASH SYMBOLS Machine Wash Symbols WASH Maximum Water Temperatures Symbol(s) Drying... -
Page 65: Preparing Laundry For Washing
Preparing laundry for washing •• Laundry that are subjected to materials such as flour, lime •• Laundry items with metal dust, milk powder, etc. intensely attachments such as, underwired must be shaken off before placing bras, belt buckles or metal into the machine. -
Page 66: Initial Use
Initial use Laundry Weight (g) type Before starting to use the product, Bathrobe make sure that all preparations are 1200 completed in accordance with the Napkin instructions in sections "Important Duvet cover safety and environment instructions" Bed Sheet and "Installation". Pillowcase To prepare the product for washing Tablecloth... - Page 67 Detergent Drawer Choosing the detergent type The detergent drawer is composed of The type of detergent to be used three compartments: depends on the type and colour of the fabric. – (1) for prewash – (2) for main wash •• Use different detergents for coloured and white laundry.
- Page 68 Using liquid detergents Tablet detergents may If the product contains a liquid leave residues in the detergent cup: detergent compartment. If •• Place the liquid detergent cup in you encounter such a case, compartment nr. "2". place the tablet detergent ••...
-
Page 69: Tips For Efficient Washing
put the detergent first into the Clothes compartment nr. "2" in the Colours detergent drawer and wait until (Recommended the detergent flows while the temperature range based machine is taking in water. Add on soiling level: cold -40 the bleaching agent from the °C) same compartment while the Powder and liquid... - Page 70 Clothes Dark colours (Recommended temperature range based on soiling level: cold -40 °C) Liquid detergents suitable for colours and dark Heavily colours can be used at Soiled dosages recommended for heavily soiled clothes. Liquid detergents suitable for colours and dark Normally colours can be used at Soiled...
-
Page 71: Operating The Product
Operating the product Control panel 1 - Programme Selection display 6 - Auxiliary Function buttons 2 - Display 7 - Spin Speed Adjustment button 3 - Programme Follow-up indicator 8 - Temperature Adjustment button 4 - Start / Pause button 9 - Programme Selection knob 5 - End Time Adjustment button 10 - On / Off button... -
Page 72: Preparing The Machine
Preparing the machine Programmes are limited •1 Check if the hoses are connected with the highest spin tightly. speed appropriate for that •2 Plug in your machine. particular type of fabric. •3 Turn the tap on completely. When selecting a •4 Place the laundry in the machine. - Page 73 • Cotone Eco (Cotton Economic) “The Wool wash cycle of this Use this programme to wash your machine has been tested and normally soiled, durable cotton and approved by The Woolmark linen laundry. Although it washes Company for the washing longer than all other programmes, of Woolmark garments it provides high energy and water...
-
Page 74: Temperature Selection
temperatures. It is recommended inside of the machine gets dry. to use liquid detergent or woolen This is not a washing shampoo for dark coloured laundry. programme. It is a maintenance programme. • Camicie (Shirts Do not run the programme Use this programme to wash the when there is something in cotton, synthetic and synthetic... -
Page 75: Selecting The Spin Speed
Spin speed adjustment No modification can be made in the programmes button functions only in that do not allow the spin speed decrement temperature adjustment. direction. Rinse Hold option is You can also change the temperature indicated with “ı_ı” symbol after the washing starts. -
Page 76: Programme And Consumption Table
Programme and consumption table Auxiliary functioan Selectable Programme (°C) temperature range °C MultiSense **** **** 1200 • • • • Cold-60 Cotone Eco 60** 0.92 1200 Cold-60 Cotone Eco 60** 0,81 1200 Cold-60 Cotone Eco 40** 0.81 1200 Cold-60 Cotone 2.03 1200 •... - Page 77 ** “Cotton eco 40°C and Cotton eco 60°C are standard programmes.” These programmes are known as '40°C cotton standard programme' and '60°C cotton standard programme' and shown on the panel with symbols. The auxiliary functions in the table may vary according to the model of your machine.
-
Page 78: Auxiliary Function Selection
Auxiliary function selection Some functions cannot Select the desired auxiliary functions be selected together. If a before starting the programme. second auxiliary function Whenever a programme is selected, conflicting with the first frames of the auxiliary function one is selected before symbols that can be selected starting the machine, the together with it illuminate. -
Page 79: End Time
• Prewash Time display A Prewash is only worthwhile for Remaining time for the completion heavily soiled laundry. Not using the of the programme while it is running Prewash will save energy, water, is displayed as “01:30” in hours and detergent and time. -
Page 80: Starting The Programme
Starting the programme •1 Press Start / Pause button to start the programme. The Start / Pause button which •2 was dimmed starts to illuminate steadily now, indicating that the If you want to cancel the End Time programme has started. function;... -
Page 81: Changing The Selections After
Changing the selections after Changing the programme selection after programme has started: programme has started The programme change is Adding laundry after the programme not allowed when the current has started: programme is running. When the Start / Pause button is You can select the new programme pressed, if the water level inside the after switching the current... -
Page 82: Child Lock
Child Lock If you press On / Off button Use Child Lock function to prevent when the Child Lock is children from tampering with the enabled, the programme machine. Thus you can avoid any will not be cancelled. You changes in a running programme. should cancel the Child Lock first. -
Page 83: Quick User Guide Preparing The Machine
Quick User Guide End of programme When the programme completes, Preparing the machine End symbol will be displayed. •* Check if the hoses are connected If you do not press any button for 10 tightly. minutes, the machine will switch to •* Plug in your machine. -
Page 84: Maintenance And Cleaning
Maintenance and •* After cleaning, seat the siphon well in its place and insert the cleaning drawer back. Service life of the product extends Cleaning the loading and frequently faced problems door and the drum decrease if cleaned at regular For products with drum cleaning intervals. -
Page 85: Cleaning The Body And Control Panel
Cleaning the water intake filters After every washing check that no foreign substance is left in the drum. There is a filter at the end of each water intake valve at the rear of the machine and also at the end of each water intake hose where they are connected to the tap. -
Page 86: Draining Remaining Water And Cleaning The Pump Filter
Draining remaining water and In order to clean the dirty filter and discharge the water: cleaning the pump filter •* Unplug the machine to cut off the The filter system in your machine supply power. prevents solid items such as buttons, coins and fabric fibers clogging the WARNING: Temperature pump impeller during discharge of... - Page 87 •* Some of our products have emergency draining hose and some does not have. Follow the steps below to discharge the water. If the product has an emergency draining hose, to discharge the water: •* Pull the emergency draining hose out from its seat •* Place a large container at the...
-
Page 88: Troubleshooting
Troubleshooting Program does not start after closing the door. •• >>> ress the Start / Pause / Cancel art / Pause / Cancel button was not pressed. button. Programme cannot be started or selected. •• Washing machine has switched to self protection mode due to a supply problem Press and hold On / Off button for 3 (line voltage, water pressure, etc.). - Page 89 No water can be n in the machine during washing. •• The water level is not visible from outside of the washing machine. This is not a failure. Loading door cannot be opened. Drain the •• Door lock is activated because of the water level in the machine. >>> water by running the Pump or Spin programme.
- Page 90 Washing performance is poor: Laundry turns grey. (**) •• Insufficient amount of detergent was used over a long period of time. >>> the recommended amount of detergent appropriate for water hardness and the laundry. •• Washing was made at low temperatures for a long time over a long period of Select the proper temperature for the laundry to be washed.
- Page 91 Laundry became stiff after washing. (**) Using insufficient amount of •• Insufficient amount of detergent is used. >>> detergent for the water hardness can cause the laundry to become stiff in time. Use appropriate amount of detergent according to the water hardness. If detergent is put in the ••...
- Page 92 Too much foam forms in the machine. (**) •• Improper detergents for the washing machine are being used. >>> detergents appropriate for the washing machine. Use only sufficient amount of •• Excessive amount of detergent is used. >>> detergent. Store detergent in a closed ••...
- Page 96 www.grundig.com...
Need help?
Do you have a question about the GWN 48230 K and is the answer not in the manual?
Questions and answers