
Related Manuals for Grundig GWN 49630 CW


Summary of Contents for Grundig GWN 49630 CW
-
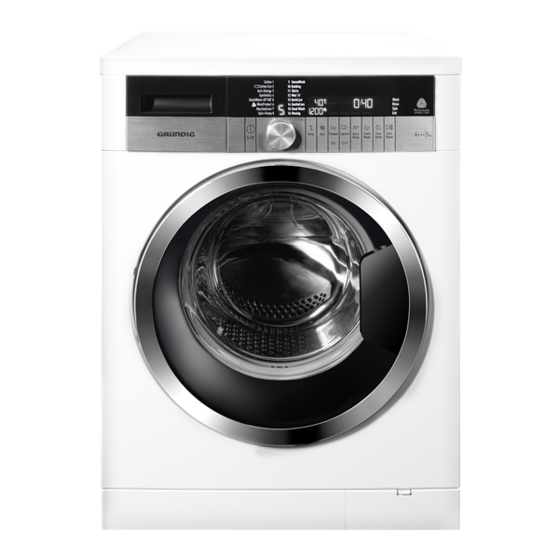
Page 1: Washing Machine
WASHING MACHINE USER‘S MANUAL GWN 49630 CW www.grundig.com Document Number 2820524785/ 25-02-16.(11:44) - Page 2 Please read this user manual first! Dear Customer, Thank you for preferring a Grundig product. We hope that you get the best results from your product which has been manufactured with high quality and state-of- the-art technology. Therefore, please read this entire user manual and all other accompanying documents carefully before using the product and keep it as a reference for future use.
-
Page 3: Table Of Contents
TABLE OF CONTENTS Important instructions for safety End Time ......30 and environment Starting the programme ... .30 Loading door lock. -
Page 4: Important Instructions For Safety And Environment
Important instructions for safety and environment This section contains safety instructions that will help protect from risk of personal injury or property damage. Failure to follow these instructions shall void any warranty. General safety • This product can be used by children at and above 8 years old and by persons whose physi- cal, sensory or mental capabilities are not fully developed or who lack experience and knowl-... -
Page 5: Product Safety
tion. If you wish to cancel the programme, see "Cancelling the programme" section. • Connect the product to a grounded outlet pro- tected by a 16 A fuse. Have the grounding instal- lation made by a qualified electrician. Our com- pany shall not be liable for any damages that will arise when the product is used without ground- ing in accordance with the local regulations. -
Page 6: Intended Use
• Use detergents, softeners and supplements suit- able for automatic washing machines only. • Follow the instructions on the textile tags and on the detergent package. • Place the product on a rigid, flat and level sur- face. • Do not place it on a long-pile rug or similar sur- faces. -
Page 7: Compliance With The Weee Directive
• Store all detergents and additives in a safe place away from the reach of the children by closing the cover of the detergent container or sealing the detergent package. While washing the laundry at high temperatures, the loading door glass becomes hot. -
Page 8: Package Information
Package information • Packaging materials of the product are manu- factured from recyclable materials in accordance with our National Environment Regulations. Do not dispose of the packaging materials together with the domestic or other wastes. Take them to the packaging material collection points desig- nated by the local authorities. -
Page 9: Your Washing Machine
Your washing machine Overview 1- Power cable 2- Top panel 3- Control panel 4- Filter cap 5- Adjustable feet 6- Loading door 7- Detergent drawer 8- Drain hose... -
Page 10: Package Contents
Package Contents 1- Power cable 2- Drain hose 3- Transportation safety bolts * 4- Mains water inlet hose (One of the following filter types is used for the mains hose connection.) a- Electronic water shut-off b- Mechanical water shut-off c- Standard 5- Liquid detergent container** 6- User Manual 7- Blind plug***... -
Page 11: Technical Specifications
Technical specifications Complying Commission Delegated Regulation (EU) No 1061/2010 Supplier name or trademark GRUNDIG Model name GWN49630CW Rated capacity (kg) Energy efficiency class / Scale from A+++ (Highest Efficiency) to D (Lowest Efficiency) A+++ Annual Energy Consumption (kWh) Energy consumption of the standard 60°C cotton programme at full load (kWh) 0.920... -
Page 12: Installation
Installation Removing packaging reinforcement To make the product ready for use, review the information in the user Tilt the machine backwards to remove manual and make sure that the the packaging reinforcement. Remove electricity, tap water supply and water the packaging reinforcement by pulling drainage systems are appropriate. -
Page 13: Connecting Water Supply
water inlets on the product. Red hose (left) (max. 90 ºC) is for hot water inlet, blue hose (right) (max. 25 ºC) is for cold water inlet. • Attach the plastic covers supplied in the User Manual bag into the holes on the rear panel. -
Page 14: Connecting To The Drain
Connecting to the drain m. To avoid water leak failures, the connection between the • The end of the drain hose must extension hose and the drain be directly connected to the hose of the product must be fitted wastewater drain or to the well with an appropriate clamp as washbasin. -
Page 15: Electrical Connection
Electrical connection approved BS1362 fuse of the same rating must be used. Do not forget Connect the product to a grounded to refit the fuse cover. In the event of outlet protected by a 16 A fuse. Our losing the fuse cover, the plug must company shall not be liable for any not be used until a replacement fuse damages that will arise when the... - Page 16 Transportation of the product • Unplug the product before transporting it. • Remove water drain and water supply connections. • Drain all water that has remained in the product. • Install transportation safety bolts in the reverse order of removal procedure; . Never move the product without the transportation safety bolts properly fixed in place!
-
Page 17: Preparation
Preparation Sorting the laundry • Sort laundry according to type of fabric, colour, and degree of soiling and allowable water temperature. • Always obey the instructions given on the garment tags. LAUNDRY WASH SYMBOLS Machine Wash Symbols WASH Maximum Water Temperatures Symbol(s) Drying... -
Page 18: Things To Be Done For Energy Saving
Initial use products only with an appropriate programme. Before starting to use the product, • Do not wash colours and whites make sure that all preparations are together. New, dark coloured completed in accordance with the cottons release a lot of dye. Wash instructions in sections "Important them separately. -
Page 19: Loading The Laundry
Loading the laundry • When using a programme without prewash, do not put any detergent • Open the loading door. into the prewash compartment • Place laundry items loosely into (compartment nr. "1"). the machine. • In a programme with prewash, •... - Page 20 • Use lesser detergent for small • Put tablet detergents into amounts or lightly soiled clothes. the main wash compartment (compartment nr. "2") or directly Using softeners into the drum before washing. Pour the softener into the softener compartment of the detergent drawer. Tablet detergents may leave •...
-
Page 21: Tips For Efficient Washing
the detergent flows while the Clothes machine is taking in water. Add Powder and liquid detergents the bleaching agent from the recommended for colours can be same compartment while the used at dosages recommended machine is still taking in water. for heavily soiled clothes. -
Page 22: Operating The Product
Operating the product Control panel 1 - Programme Selection display 6 - Auxiliary Function buttons 2 - Display 7 - Spin Speed Adjustment button 3 - Programme Follow-up indicator 8 - Temperature Adjustment button 4 - Start / Pause button 9 - Programme Selection knob 5 - End Time Adjustment button 10 - On / Off button... -
Page 23: Preparing The Machine
Preparing the machine Programmes •1 Check if the hoses are connected • Cotton tightly. Use this programme for your cotton •2 Plug in your machine. laundry (such as bed sheets, duvet and •3 Turn the tap on completely. pillowcase sets, towels, bathrobes, •4 Place the laundry in the machine. - Page 24 • GentleCare WARNING: Do not wash your Use this programme to wash your woolen and delicate clothes in this delicate clothes. It washes with a programme. gentle action without any interim If the temperature shown in the temperature indicator is not spin compared to the Synthetics suitable for the garment, then programme.
-
Page 25: Temperature Selection
WARNING: Do not wash the items Temperature Adjustment button apart from duvets such as carpets, functions only in the temperature rugs and etc. in the machine. decrement direction. Permanent damage occurs in the machine. Finally, “-” symbol indicating the cold option appears on the display. - Page 26 Spin speed adjustment button functions only in the spin speed decrement direction. Rinse Hold option is indicated with “ı_ı” symbol and No Spin option is indicated with “_” symbol. If you are not going to unload your laundry immediately after the programme completes, you can use function in order to prevent Rinse Hold...
-
Page 27: Programme And Consumption Table
Programme and consumption table Selectable Programme (°C) temperature range °C Cotton Eco 60** 0.92 1600 Cold-60 Cotton Eco 60** 0.85 1600 Cold-60 Cotton Eco 40** 1600 Cold-60 Cotton 1600 • • • • Cold-90 Cotton 1600 • • • • Cold-90 Cotton 1600... - Page 28 Indicative values for Synthetics programmes (EN) Remaining Moisture Remaining Moisture Content (%) ** Content (%) ** ≤ 1000 rpm > 1000 rpm Synthetics 60 1.13 / 150 Synthetics 40 / 115 * You can see the washing time of the programme you have selected on the display of the machine. It is normal that small differences may occur between the time shown on the display and the real washing time.
-
Page 29: Auxiliary Function Selection
The auxiliary functions in the table may Some functions cannot be selected vary according to the model of your together. If a second auxiliary machine. function conflicting with the first one is selected before starting the Water and power consumption may vary machine, the function selected first subject to the changes in water pressure, will be canceled and the second... -
Page 30: End Time
• Silent Mode •1 Open the loading door, place the laundry and put detergent, etc. Use to wash the cottons with lesser energy consumption and silently. •2 Select the washing programme, Spin steps are cancelled for a silent temperature, spin speed and, if required, the auxiliary functions. -
Page 31: Changing The Selections After
when the water level is unsuitable. Changing the programme selection after programme has started: "Door Locked" symbol is lit on the The programme change is not allowed display when the loading door is when the current programme is locked. running. You can select the new programme after switching the current programme to standby. -
Page 32: Cancelling The Programme
To activate the Child Lock: When you press On/Off button, the Press and hold Auxiliary Function completed programme steps will be button for 3 seconds. After the displayed. countdown as "CL 3-2-1" on the display 5.20 Your machine is equipped is over "Child Lock Enabled"... -
Page 33: Quick User Guide Preparing The Machine
Quick User Guide Preparing the machine Cancelling the programme • Check if the hoses are connected The programme is cancelled when the tightly. machine is turned off and on again. • Plug in your machine. Press and hold On / Off button for 3 •... -
Page 34: Maintenance And Cleaning
Maintenance and cleaning Cleaning the loading door Service life of the product extends and frequently faced problems decrease if and the drum cleaned at regular intervals. For products with drum cleaning Cleaning the detergent drawer programme, please see Operating the product - Programmes. -
Page 35: Cleaning The Body And Control Panel
carefully in their places and Foreign metal substances will tighten the hose nuts by hand. cause rust stains in the drum. Clean the stains on the drum Draining remaining water and surface by using cleaning agents cleaning the pump filter for stainless steel. -
Page 36: If The Product Has An Emergency Draining Hose, To Discharge The Water
If the product has an • Open the filter cap. • If the filter cap is composed of emergency draining hose, two pieces, press the tab on the to discharge the water: filter cap downwards and pull the piece out towards yourself. If the filter cap is one piece, pull the cap from both sides at the top to open. -
Page 37: Troubleshooting
Troubleshooting Program does not start after closing the door. *Press the Start / Pause / Cancel • Start / Pause / Cancel button was not pressed. >>> button. Programme cannot be started or selected. • Washing machine has switched to self protection mode due to a supply problem (line Press and hold On / Off button for 3 seconds to reset voltage, water pressure, etc.). - Page 38 Loading door cannot be opened. Drain the water by • Door lock is activated because of the water level in the machine. >>> running the Pump or Spin programme. Wait until the • Machine is heating up the water or it is at the spinning cycle. >>> programme completes.
- Page 39 Washing performance is poor: Laundry turns grey. (**) Use the • Insufficient amount of detergent was used over a long period of time. >>> recommended amount of detergent appropriate for water hardness and the laundry. • Washing was made at low temperatures for a long time over a long period of time. >>> Select the proper temperature for the laundry to be washed.
- Page 40 Laundry became stiff after washing. (**) Using insufficient amount of detergent for • Insufficient amount of detergent is used. >>> the water hardness can cause the laundry to become stiff in time. Use appropriate amount of detergent according to the water hardness. If detergent is put in the prewash •...
- Page 41 Laundry remains wet at the end of the programme. (*) • Excessive foam might have occurred and automatic foam absorption system might have Use recommended amount of been activated due to too much detergent usage. >>> detergent. Machine does not switch to spinning step when the laundry is not evenly distributed in the drum to prevent any damage to the machine and to its surrounding environment.
-
Page 42: Guarantee
• The cost of functional replacement parts, but excluding consumable items. • The labour costs of a Grundig approved repairer to carry out the repair. What is not covered? • Transit, delivery or accidental damage or misuse and abuse. -
Page 43: Service
Otherwise please call the appropriate number above where service can be obtained at a charge. Should you experience any difficulty in obtaining service please contact the Grundig Customer Help-Line. Tel: 0845 603 1234 e-mail:service@Grundig.co.uk... - Page 44 www.grundig.com...
Need help?
Do you have a question about the GWN 49630 CW and is the answer not in the manual?
Questions and answers
Hi! When was this machine for sale? I just bought this used, and wondered how old it was. The seller did not know. It’s Gwn 49630 cr