Table of Contents
Advertisement
Quick Links
Advertisement
Table of Contents

Subscribe to Our Youtube Channel
Related Manuals for Occhio io verticale cc


Summary of Contents for Occhio io verticale cc
- Page 1 io verticale » cc « Montageanleitung Mounting instructions » cc «...
-
Page 3: Table Of Contents
Inhalt / Contents Sicherheitshinweise Safety precautions Produktbeschreibung Product description Linse und inserts einsetzen Inserting lens and inserts Montage io verticale » cc « Mounting io verticale » cc « up / down zusammen control up / down steuern simultaneously up / down getrennt control up / down steuern ( optional ) individually ( optional ) -
Page 4: Sicherheitshinweise
Sicherheitshinweise Lesen Sie die Montage-/ Gebrauchs anweisung sorgfältig durch, bevor Sie die Leuchte Dieses Zeichen macht Sie auf installieren. Beachten Sie die Situationen aufmerksam, bei Sicherheitshinweise in dieser denen Sie direkt in das Licht der Anleitung genau und bewahren LED blicken könnten. Dies kann Sie die Anleitung auf. -
Page 5: Safety Precautions
Safety precautions Read through the mounting/ use instructions carefully before installing the luminaire. Follow This symbol draws your attention to the safety precautions in these situations in which you could look instructions closely and keep the directly into the light of the LED. instructions in a safe place. -
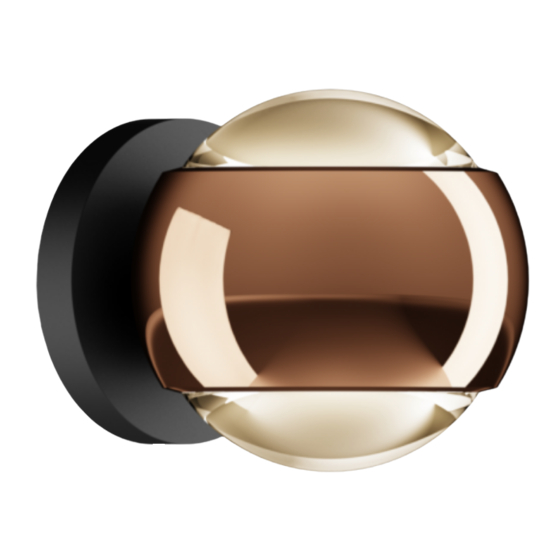
Page 6: Produktbeschreibung
Wanddose mit externem Vor- schaltgerät, Anschluss an Strom- quelle ( Treiber ) . Leistung 18W oder 13W*, dimmbar bauseits über dimmbares Vorschaltgerät. Occhio light module wechselbar. Weitere Versionen: io alto v, io giro, io giro doppio, io piano, io... -
Page 7: Product Description
( driver ) . Power 18 W or 13 W*; dimmable via customer- supplied dimmable power supply unit. The Occhio light module is replaceable. Other versions: io alto v, io giro, io giro doppio, io piano, io piano v... -
Page 9: Linse Und Inserts Einsetzen
Linse und inserts einsetzen Inserting lens and inserts... - Page 10 Linse und inserts einsetzen Inserting lens and inserts Linse / lens* soft edge Glas* satiniertes Glas fresnel Linse soft edge glass* satinised glass fresnel lens Blende* / aperture* head Blende* / aperture* soft edge Glas* satiniertes Glas fresnel Linse soft edge glass* satinised glass fresnel lens Linse /...
- Page 12 Inserts einsetzen (optional) Inserting inserts (optional) Click!
- Page 13 Blende nur ohne inserts Use aperture just without verwenden. inserts.
-
Page 15: Mounting Io Verticale " Cc
Montage io verticale » cc « Mounting io verticale » cc «... -
Page 16: Montage Io Verticale " Cc
Montage io verticale » cc « Mounting io verticale » cc «... - Page 17 Dübel / screw anchor Linse / lens Schrauben / screws Blende / aperture Montageplatte / io verticale » cc « mounting plate Blende / aperture Linse / lens Occhio release-tool...
- Page 18 Montage io verticale » cc « Mounting io verticale » cc « up- / downlight – max. 500 mA (max. 350 mA chrome, rose gold, bronze) Vor der Montage alle Before mounting, disconnect stromführen den Leitungen all currentcarrying lines from vom Stromnetz trennen! the mains supply!
-
Page 19: Up / Down Zusammen Steuern
up / down zusammen steuern control up / down simultaneously Keine Kabel bei der Be Do not pinch any cables festigung einklemmen! during mounting! - Page 20 Montage io verticale » cc « Mounting io verticale » cc « up- / downlight uplight – – max. 500 mA (max. 350 mA chrome, rose gold, bronze) downlight – max. 2 × 250 mA (max. 2 × 175 mA chrome, rose gold, bronze) Vor der Montage alle Before mounting, disconnect...
-
Page 21: Up / Down Getrennt Steuern (Optional)
up / down getrennt steuern (optional) control up / down individually (optional) Keine Kabel bei der Be Do not pinch any cables festigung einklemmen! during mounting! - Page 22 Montage io verticale » cc « Mounting io verticale » cc « Festen Halt der Leuchte Check that the luminaire is held überprüfen! in place firmly. Die Leuchte ist nun fertig The luminaire is now fully montiert. mounted.
- Page 23 360° Zum Ausrichten der Leuchte To adjust the luminaire rotate am Cover drehen. the cover.
-
Page 25: Remove Io Verticale " Cc
Demontage io verticale » cc « Remove io verticale » cc «... -
Page 26: Demontage Io Verticale " Cc
Demontage io verticale » cc « Remove io verticale » cc « Before dismounting, Vor der Demontage alle disconnect all current stromführen den Leitungen carrying lines from the vom Stromnetz trennen! mains supply! 1 Leuchte bis zum Anschlag 1 Turn the luminaire till it stop. drehen. - Page 27 Die Oberfläche der Leuchte When used in continuous kann im Dauerbetrieb heiß operation, the surface of the werden. luminaire can become hot. 1 Tool gedrückt halten. 1 Press and hold the tool. 2 Leuchte nach oben neigen. 2 Tilt the luminaire upwards.
-
Page 29: Steuerung Mit Der " Air " App (Optional)
Steuerung mit der » air « App (optional) Control with the » air « app (optional) - Page 30 Steuerung mit der » air « App (optional) Control with the » air « app (optional) Die Occhio air Produkte lassen sich mit der »air« App einrichten und steuern, sie ist verfügbar für iOS- und Android-Geräte die im jeweiligen Store heruntergeladen werden kann.
- Page 31 Occhio air products can be set up and controlled with the »air« app; it is available for iOS and Android devices and can be downloaded at the particular store. After the app is opened, the lumi- naires and modules that are within...
- Page 33 Steuerung mit dem » air « controller (optional) Control with the » air « controller (optional)
-
Page 34: Control With The " Air " Controller (Optional)
Intuitive remote control with four programmable buttons ( setup via mit vier programmierbaren Tasten ( Einrichtung via Occhio air App ) . Occhio air app ) . Individual lumi- Unabhängig von der App können naires, groups and scenes can be einzelne Leuchten, Gruppen und controlled regardless of the app. - Page 35 schalten / switching dimmen / + – – IIII einzelne Leuchten, Gruppen, einzelne Leuchten, Gruppen, oder Szenen schalten oder Szenen dimmen + – – IIII switch individual luminaires, dims individual luminaires, groups or scenes groups or scenes 2700 K 4000 K 2700 K 4000 K faden *...
-
Page 37: Anhang
Anhang Appendix... -
Page 38: Pflegehinweise
Leuchte nur in abgekühltem Zustand reinigen! Zur Reinigung der Leuchte ein trockenes Mikro- fasertuch verwenden. Detaillierte Pflegehinweise sind unter www.occhio.de/de/company/faq zu finden. Always allow the luminaire to cool down before cleaning! To clean the luminaire, use a dry microfibre cloth. Detailed care instructions are available at www.occhio.de/en/company/faq. -
Page 39: Info & Kontakt
Info & Kontakt Information & contact Weitere Fragen beantwortet gerne Ihr Occhio Fachhändler Your Occhio specialist retailer will gladly answer any other questions www.occhio.de info @ occhio.de... -
Page 40: Technische Daten
Technische Daten Technische Daten Leuchte Artikelbezeichnung Occhio io verticale » cc « Abmessungen L 116 × B 100 × H 94 mm Schutzklasse max. 500 ( 350 mA chrom, rose gold, Anschluss bronze ) konst. / > 36 V DC Dimmung mit geeignetem Vorschaltgerät... -
Page 41: Technical Data
Technical data Technical data luminaire Product designation Occhio io verticale » cc « Dimensions L 116 × W 100 × H 94 mm Safety class max. 500 ( 350 mA chrome, rose gold, Connection bronze ) const. / > 36 V DC... - Page 44 Fon +49-89-44 77 86 30 Fax +49-89-44 77 86 39 info @ occhio.de www.occhio.de MA- 9 6679 Mont a geanl e i t u ng i o vert i c al e cc de en MA-96679 Montageanleitung io verticale cc de en 010040429569667910 010040429569667910...
Need help?
Do you have a question about the io verticale cc and is the answer not in the manual?
Questions and answers