Table of Contents
Advertisement
Quick Links
PLEASE CONTACT US IF YOU ARE MISSING ANY PARTS OR HAVE QUESTIONS REGARDING THE OPERATION OF
THIS SPREADER, VISIT THE EARTHWAY WEBSITE OR CONTACT SUPPORT AT:
PHONE: 574-848-7491 EMAIL: SUPPORT@EARTHWAY.COM
HELPFUL HINTS:
If your spreader does not spread evenly, be sure the FRONT on the gear box points to the front of the spreader.
The impeller must turn clockwise. Reversing the gearbox will cause the impeller to turn counter clockwise.
Clean the impeller plate after each use. Ice melt stuck on the impeller blades will cause uneven spreading.
Your spreader is designed to be pushed at three miles per hour, which is a brisk walking speed. Slower or
Clean and dry your spreader thoroughly after each use. Coat all metal surfaces (pay special attention to the
inside & outside of tubing - it's easiest to do while assembling) with light oil, Fluid Film
materials.
Gears are permanently lubricated at the factory. Do not open the gearbox or dirt may enter.
IF YOUR SPREADER COMES SEMI ASSEMBLED, SKIP TO STEP #7
32100
Qty 2
36210
Qty 2
36214
31100
Qty 4
Qty 4
12152
Qty 2
1. Remove and identify all loose parts from carton
(Qty 4 #36214)
1/4-20 X 1½"
Phillips Panhead
OCT 2019 REV
.
READ THE DIRECTIONS BEFORE ASSEMBLY
36300
32103
Qty 6
Qty 9
33108
Qty 1
33109
Qty 1
31120
Qty 5
31106
Qty 2
12148
Qty 2
.
(Qty 4 #36300)
1/4-20 SS Locknut
90399 STAINLESS
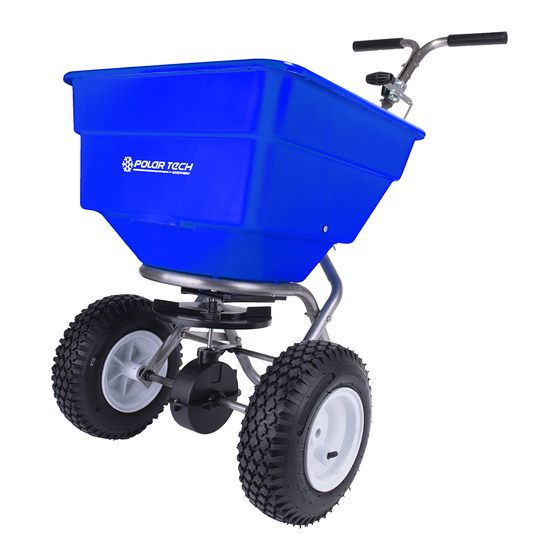
ICE MELT SPREADER
ASSEMBLY & OPERATION
13
16
31
2. Position hopper on side. Install frame using (4) 1/4-20 x 1-1/2"
Pan Head Phillips bolts and (4) 1/4-20 nylon insert locknuts. First put
bolts through holes in frame then through holes in bottom of hopper.
Secure with locknuts. TIGHTEN THESE LOCKNUTS NOW - DO NOT
TIGHTEN WITH POWER TOOLS. TIP: coat stainless steel bolts
with wax or grease before tightening to prevent them from seizing.
or silicon spray
®
Do not use powdered
24
23
17
9
29
25
26
40
12
11
28
PAGE 1
Advertisement
Table of Contents

Related Manuals for EarthWay PolarTech 90399


Summary of Contents for EarthWay PolarTech 90399
- Page 1 ICE MELT SPREADER ASSEMBLY & OPERATION PLEASE CONTACT US IF YOU ARE MISSING ANY PARTS OR HAVE QUESTIONS REGARDING THE OPERATION OF THIS SPREADER, VISIT THE EARTHWAY WEBSITE OR CONTACT SUPPORT AT: PHONE: 574-848-7491 EMAIL: SUPPORT@EARTHWAY.COM HELPFUL HINTS: READ THE DIRECTIONS BEFORE ASSEMBLY If your spreader does not spread evenly, be sure the FRONT on the gear box points to the front of the spreader.
- Page 2 The word “FRONT” on the secure. gearbox must point to Front of the hopper. The EarthWay Next, insert Cross Brace thru the Gearbox Brace as shown above. logo is on the front of the hopper.
- Page 3 Drive wheel side 2” Cotter Pin Bushing Install the axle as shown above Coast wheel side 1” Cotter Pin Bushing 7. Slide axle bushing over axle and into axle bearing to both sides as shown. 8. Install drive wheel onto the axle and align with the cotter pin hole nearest to lower handles as shown.
- Page 4 13. Install handle shaft to lower handles and pivot & bracket assembly as shown. Using 1/4 -20 x 2” bolts and locknuts. TIGHTEN BOLTS AND NUTS NOW. 1/4 - 20 Lock-nut Pivot Bracket 1/4 - 20 x 2” Bolt 14. Install (1) 1/4-20 Hex nut (not a locknut) on to control rod as Long End...
- Page 5 1 YEAR LIMITED WARRANTY Earthway Products, Inc. warrants this product free of defects in original workmanship and materials for a period of one year to the end user with the original purchase receipt. If a manufacturing non-conformance is found, Earthway Products, Inc.
- Page 6 EarthWay Products Bristol, IN 46507 Phone: 574-848-7491 www.earthway.com 77002 OPTIONAL Heavy-Duty Rain Cover 60060R OPTIONAL Heavy-Duty Rain Cover 1” & Side Deflector Kit 1-1/2” 2” 2-1/4” 2-3/4” 60166R OPTIONAL 3-Side Salt Deflector Kit 90399 Ice Melt Spreader - Parts List...
Need help?
Do you have a question about the PolarTech 90399 and is the answer not in the manual?
Questions and answers