Table of Contents
Advertisement
Quick Links
Advertisement
Table of Contents

Subscribe to Our Youtube Channel
Related Manuals for Axis Q3517-SLVE


Summary of Contents for Axis Q3517-SLVE
- Page 1 AXIS Q3517-SLVE Network Camera AXIS Q3517-SLVE Network Camera User Manual...
-
Page 2: Table Of Contents
AXIS Q3517-SLVE Network Camera Table of Contents Solution overview ......... . . -
Page 3: Solution Overview
AXIS Q3517-SLVE Network Camera Solution overview Solution overview... -
Page 4: Product Overview
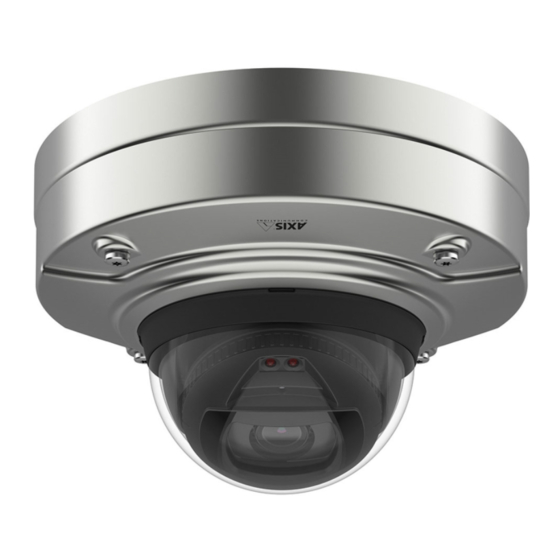
AXIS Q3517-SLVE Network Camera Product overview Product overview Network connector Control button I/O connector Audio out Audio in DC connector SD card slot Status LED (2x) Function button 10 Heater 11 IR LED (2x) CAUTION The heater may be hot. - Page 5 AXIS Q3517-SLVE Network Camera Product overview Mounting bracket Unit casing Camera unit View protector Dome cover...
-
Page 6: Find The Device On The Network
Find the device on the network Find the device on the network To find Axis devices on the network and assign them IP addresses in Windows®, use AXIS IP Utility or AXIS Device Manager. Both applications are free and can be downloaded from axis.com/support. - Page 7 AXIS Q3517-SLVE Network Camera Find the device on the network 2. Retype the password to confirm the spelling. 3. Click Create login. The password has now been configured.
-
Page 8: Additional Settings
AXIS Q3517-SLVE Network Camera Additional settings Additional settings Webpage overview Live view control bar Live view Product name User information, color themes, and help Video control bar Settings toggle... - Page 9 AXIS Q3517-SLVE Network Camera Additional settings Settings tabs Need more help? You can access the built-in help from the device’s webpage. The help provides more detailed information on the device’s features and their settings.
-
Page 10: Image Quality
Image quality Capture modes Capture mode defines the maximum frame rate available in the Axis product. Depending on which capture mode you select, you may not be able to use WDR. A capture mode consists of a resolution and the corresponding frame rate available in the product. The capture mode setting affects the camera’s field of view and aspect ratio. - Page 11 AXIS Q3517-SLVE Network Camera Additional settings The illustration shows before and after an image has been straightened. 1. Go to Settings > Image > Image correction. 2. Turn on Straighten image. Reduce noise in low-light conditions To reduce noise in low-light conditions, you can adjust one or more of the following settings: •...
- Page 12 AXIS Q3517-SLVE Network Camera Additional settings • For environments with certain artificial light and bright light, for example outdoors with fluorescent lighting at night and sun during daytime, select Flicker-reduced. Select the same frequency as the power line frequency. •...
-
Page 13: Privacy Masks
2. Turn on WDR. 3. If you still have problems, go to Exposure and adjust the Exposure zone to cover the area of interest. Find out more about WDR and how to use it at axis.com/web-articles/wdr. Privacy masks A privacy mask is a user-defined area that prevents users from viewing a part of the monitored area. In the video stream, privacy masks appear as blocks of solid color or blurred image elements. -
Page 14: Overlays
Create an action rule: 9. Go to Settings > System > Events > Action rules. 10. Create an action rule with AXIS Video Motion Detection as trigger. 11. From the list of actions, select Overlay text. 12. Type “Motion detected”. - Page 15 Additional settings Note H.264 is a licensed technology. The Axis product includes one H.264 viewing client license. To install additional unlicensed copies of the client is prohibited. To purchase additional licenses, contact your Axis reseller. H.264 can, without compromising image quality, reduce the size of a digital video file by more than 80% compared to the Motion JPEG format and by as much as 50% compared to the MPEG-4 standard.
-
Page 16: Events
1. Go to Settings > System > Events and add an action rule. 2. Type a name for the action rule. 3. From the list of triggers, select Applications and then select AXIS Video Motion Detection (VMD). 4. From the list of actions, select Record video. - Page 17 9. Select SD card from the list of storage options. 10. Click Ok. Record video when a PIR detector senses motion This example explains how to connect an Axis PIR detector to the camera, and set up the camera to start recording when the detector senses motion. Required hardware •...
-
Page 18: Applications
Applications Applications AXIS Camera Application Platform (ACAP) is an open platform that enables third parties to develop analytics and other applications for Axis products. To find out more about available applications, downloads, trials and licenses, go to axis.com/applications. To find the user manuals for Axis applications, go to axis.com. - Page 19 AXIS Q3517-SLVE Network Camera Additional settings Note • We recommended running one application at a time. • Avoid running applications when the built-in motion detection is active. To watch this video, go to the web version of this document. www.axis.com/products/online-manual/43183#t10001688...
-
Page 20: Troubleshooting
5. Use the installation and management software tools to assign an IP address, set the password, and access the video stream. The installation and management software tools are available from the support pages on axis.com/support. It is also possible to reset parameters to factory default through the web interface. Go to Settings > System > Maintenance and click Default. -
Page 21: Technical Issues, Clues And Solutions
Axis device. Check all cabling and reinstall the device. Possible IP address conflict The static IP address in the Axis device is used before the DHCP server sets a dynamic address. with another device on the... -
Page 22: Performance Considerations
IP addresses obtained from a DHCP server are dynamic and may change. If the IP address has been changed by DHCP changed, use AXIS IP Utility or AXIS Device Manager to locate the device on the network. Identify the device using its model or serial number, or by the DNS name (if the name has been configured). - Page 23 Heavy network utilization due to poor infrastructure affects the bandwidth. • Viewing on poorly performing client computers lowers perceived performance and affects frame rate. • Running multiple AXIS Camera Application Platform (ACAP) applications simultaneously may affect the frame rate and the general performance.
-
Page 24: Specifications
This product supports microSD/microSDHC/microSDXC cards. For SD card recommendations, see axis.com. microSD, microSDHC, and microSDXC Logos are trademarks of SD-3C LLC. microSD, microSDHC, microSDXC are trademarks or registered trademarks of SD-3C, LLC in the United States, other countries or both. -
Page 25: Connectors
AXIS Q3517-SLVE Network Camera Specifications • As leveling Assistant – This function helps to ensure the image is level. Press the button for about 2 seconds to start the leveling assistant and press again to stop. The status LED (see ) and buzzer signal assist leveling of the image. The image is level when the buzzer beeps continuously. - Page 26 AXIS Q3517-SLVE Network Camera Specifications Function Notes Specifications DC ground 0 V DC DC output Can be used to power auxiliary equipment. 12 V DC Note: This pin can only be used as power out. Max load = 50 mA 3–4...
- Page 27 User Manual Ver. M3.2 AXIS Q3517-SLVE Network Camera Date: April 2021 © Axis Communications AB, 2018 - 2021 Part No. T10121793...
Need help?
Do you have a question about the Q3517-SLVE and is the answer not in the manual?
Questions and answers