Axis Q35 Series User Manual
Hide thumbs
Also See for Q35 Series:
- User manual (78 pages) ,
- Installation manual (34 pages) ,
- Repainting instructions (9 pages)

Related Manuals for Axis Q35 Series


Summary of Contents for Axis Q35 Series
- Page 1 AXIS Q35 Series AXIS Q3518-LVE Network Camera User Manual Available from A1 Security Cameras www.a1securitycameras.com email: sales@a1securitycameras.com...
-
Page 2: Table Of Contents
AXIS Q35 Series Table of Contents Solution overview ......... . . -
Page 3: Solution Overview
AXIS Q35 Series Solution overview Solution overview Available from A1 Security Cameras www.a1securitycameras.com email: sales@a1securitycameras.com... -
Page 4: Product Overview
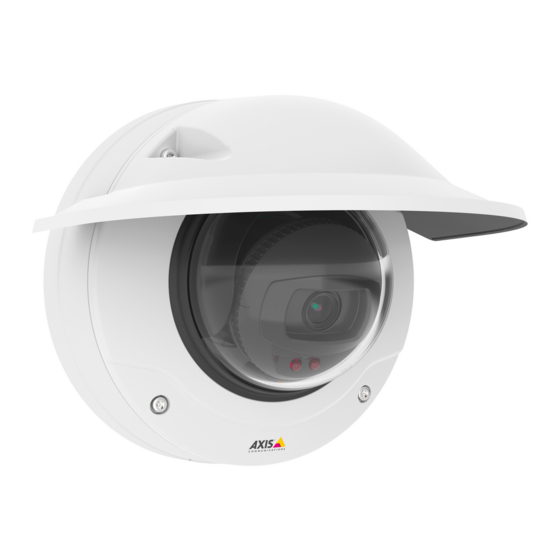
AXIS Q35 Series Product overview Product overview AXIS Q3518-LVE Network connector Control button I/O connector Audio out Audio in DC connector SD card slot Status LED (2x) Function button 10 Heater 11 IR LED (2x) CAUTION The heater may be hot. -
Page 5: Setup
HTTPS connection and then change the password. The device password is the primary protection for the data and services. Axis devices do not impose a password policy as they may be used in various types of installations. To protect your data we recommend that you: • Change the default password that comes with each device. -
Page 6: About The Product's Built-In Help
AXIS Q35 Series Setup 3. Click Create login. The password has now been configured. About the product's built-in help You can access the built-in help from the product’s webpage. The help provides more detailed information on the product’s features and their settings. - Page 7 AXIS Q35 Series Setup Left: no zoom. Right: remote zoom applied. How to hide parts of the image with privacy masks What is a privacy mask? A privacy mask is a user-defined area that prevents users from viewing a part of the monitored area. In the video stream, privacy masks appear as blocks of solid color or blurred image elements.
- Page 8 AXIS Q35 Series Setup How to select exposure mode There are different exposure mode options in the camera that adjusts aperture, shutter speed, and gain to improve image quality for specific surveillance scenes. Go to Settings > Image > Exposure and select between the following exposure modes: • For most use cases, select Automatic exposure.
-
Page 9: Overlays
Setup Note WDR may cause artifacts in the image. Find out more about WDR and how to use it at axis.com/web-articles/wdr Overlays About overlays Overlays are superimposed over the video stream. They are used to provide extra information during recordings, such as a timestamp, or during product installation and configuration. - Page 10 H.264 or MPEG-4 Part 10/AVC Note H.264 is a licensed technology. The Axis product includes one H.264 viewing client license. Installing additional unlicensed copies of the client is prohibited. To purchase additional licenses, contact your Axis reseller. H.264 can, without compromising image quality, reduce the size of a digital video file by more than 80% compared to the Motion JPEG format and by as much as 50% compared to the MPEG-4 standard.
-
Page 11: Events
4. Go to Settings > System > Events and add an action rule. 5. Type a name for the action rule. 6. From the list of triggers, select Applications and then select AXIS Video Motion Detection (VMD). 7. From the list of actions, select Record video. -
Page 12: Applications
Applications About applications AXIS Camera Application Platform (ACAP) is an open platform that enables third parties to develop analytics and other applications for Axis products. To find out more about available applications, downloads, trials and licenses, go to axis.com/applications To find the user manuals for Axis applications, go to axis.com Available from A1 Security Cameras www.a1securitycameras.com email: sales@a1securitycameras.com... - Page 13 AXIS Q35 Series Setup Note • Several applications can run at the same time but some applications might not be compatible with each other. Certain combinations of applications might require too much processing power or memory resources when run in parallel. Verify that the applications work together before deployment.
-
Page 14: Troubleshooting
AXIS Q35 Series Troubleshooting Troubleshooting If you can’t find what you’re looking for here, try the troubleshooting section at axis.com/support How to reset to factory default settings Important Reset to factory default should be used with caution. A reset to factory default resets all settings, including the IP address, to the factory default values. -
Page 15: Technical Issues, Clues And Solutions
Axis product. Check all cabling and reinstall the product. Possible IP address conflict The static IP address in the Axis product is used before the DHCP server sets a dynamic address. with another device on the... -
Page 16: Performance Considerations
• Heavy network utilization due to poor infrastructure affects the bandwidth. • Viewing on poorly performing client computers lowers perceived performance and affects frame rate. • Running multiple AXIS Camera Application Platform (ACAP) applications simultaneously may affect the frame rate and the general performance. -
Page 17: Specifications
AXIS Q35 Series Specifications Specifications To find the latest version of the product’s datasheet, go to the product page at axis.com and locate Support & Documentation. LED Indicators Note • The Status LED can be configured to flash while an event is active. -
Page 18: Connectors
AXIS Q35 Series Specifications • Connecting to an AXIS Video Hosting System service. To connect, press and hold the button for about 3 seconds until the status LED flashes green. Function Button The function button has multiple functions: • As leveling Assistant – This function helps to ensure the image is level. Press the button for about 2 seconds to start the leveling assistant and press again to stop. - Page 19 AXIS Q35 Series Specifications Function Notes Specifications DC ground 0 V DC DC output Can be used to power auxiliary equipment. 12 V DC Note: This pin can only be used as power out. Max load = 50 mA 3–4 Configurable Digital input or Supervised input –...
- Page 20 User Manual Ver. M1.4 AXIS Q35 Series Date: June 2018 © Axis Communications AB, 2018 Part No. T10129037 Available from A1 Security Cameras www.a1securitycameras.com email: sales@a1securitycameras.com...
Need help?
Do you have a question about the Q35 Series and is the answer not in the manual?
Questions and answers