Table of Contents
Advertisement
Quick Links
Advertisement
Table of Contents

Related Manuals for Acclaim Lighting aria Dyna Accent


Summary of Contents for Acclaim Lighting aria Dyna Accent
- Page 1 Dyna Accent OUTDOORLINK S Y S T E M User guide...
-
Page 3: Table Of Contents
CONTENTS INTRODUCTION ............2 Welcome Safety, maintenance and cleaning Supplied items and optional extras Outdoor Linking System part codes INSTALLATION ............5 Tilt adjustment Tilt range Fitting a base plate Pan adjustment Fitting a ground spike Fitting a spread lens Fitting a snoot Power and control wiring Input wiring protection Cabling with OLS... -
Page 4: Introduction
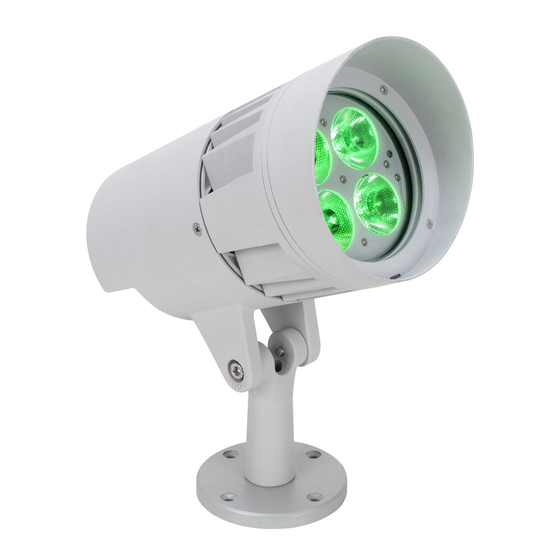
INTRODUCTION WELCOME Welcome to the Dyna Accent range from Acclaim Lighting. These rugged LED-powered fixtures are designed to replace traditional external flood lights while using a fraction of the power. Featuring a die-cast aluminum body throughout with full IP66 environmental rating, these fixtures are built to last. -
Page 5: Supplied Items And Optional Extras
SUPPLIED ITEMS Dyna Accent With integral mounting stand and 6 foot (1.8m) power/control tails. 6mm Allen wrench (hex key) OPTIONAL EXTRAS Spread lens , 40 , 60 and 10 x 60 available 4” (100mm) Snoot Ground spike (with threaded joiner) Base plates 2 versions available, for use either with 4”... -
Page 6: Outdoor Linking System Part Codes
OUTDOOR LINKING SYSTEM PART CODES T-junction [OLST] Feed cables 1’ (30cm) [OLSF1] 5’ (1.5m) [OLSF5] 10’ (3m) [OLSF10] 25’ (7.6m) [OLSF25] 50’ (15.2m) [OLSF50] Link cables 1’ (30cm) [OLSL1] 5’ (1.5m) [OLSL5] 10’ (3m) [OLSL10] 25’ (7.6m) [OLSL25] 50’ (15.2m) [OLSL50] Terminator [OLSEC]... -
Page 7: Installation
INSTALLATION TILT ADJUSTMENT The Dyna Accent fixture uses two bolts to adjust and lock off its tilt angle. A 1/4” (6mm) Allen wrench (hex key) is used to adjust the tilt angle. Tilt adjustment bolt Tilt adjustment bolt 1/4”(6mm) Allen wrench (supplied) The tilt angle of the Dyna Accent head is adjustable through a range of nearly 180 degrees. -
Page 8: Tilt Range
TILT RANGE The head of the Dyna Accent can be rotated through almost 180 degrees, although the downward tilt limit is restricted slightly when used with either of the base plate options. www.acclaimlighting.com... -
Page 9: Fitting A Base Plate
FITTING A BASE PLATE Two types of base plate are available, both have an outside diameter of 4.45” (113mm); one is solid, for direct surface mounting, while the other is hollow for use on standard 4” round electrical outlet boxes. Both base plate types are attached to the Dyna Accent fixture in the same way. -
Page 10: Pan Adjustment
PAN ADJUSTMENT When the Dyna Accent fixture is used with one of the base plates, make pan adjustments by loosening the lock nut on the underside of the base plate (using a 1” (26mm) wrench). When the desired pan position is achieved, tighten the lock nut. Lock nut www.acclaimlighting.com... -
Page 11: Fitting A Ground Spike
FITTING A GROUND SPIKE The optional ground spike kit provides extra flexibility for landscape illumination projects. Note: This procedure can be carried out in any order, however, if you attach the fixture to the spike once it is in the ground, the actions of attachment could loosen the spike’ s grounding, particularly in soft soil. -
Page 12: Fitting A Spread Lens
FITTING A SPREAD LENS The standard beam angle is either 5 or 10 degrees, depending on model. These can be adjusted by inserting an appropriate spread lens into the inside of the front panel. TO FIT A SPREAD LENS Notes: This operation is best achieved with the Dyna Accent front face lying horizontally. Install spread lenses only in dry conditions to avoid any build up of condensation. -
Page 13: Fitting A Snoot
FITTING A SNOOT In installations where any light spill from the Dyna Accent must be eradicated from a nearby surface, the optional 4” snoot is recommended. Note: If required, a spread lens can be fitted together with the snoot, see page 10. TO FIT A SNOOT Note: This operation is best achieved with the Dyna Accent front face lying horizontal. -
Page 14: Power And Control Wiring
POWER AND CONTROL WIRING The combined power and control cord (roughly six feet, 1.8m in length) enters the casing via a water-tight gland at the rear of the fixture. The cord can be supplied either with bare tails or an Outdoor Linking System connector (see page 15). For models with bare tails, the power cord color designations are as follows: r t h [ E a... -
Page 15: Input Wiring Protection
Ensure that appropriate care is taken to protect the junction where the mains and control inputs are joined to the feed cable. An optional IP66-rated junction box is available from Acclaim Lighting [Part #: AJBOX1] which provides separated mains and control inputs for connection to the combined feed-in cable:... - Page 16 CONTROL When connecting multiple fixtures, without the Outdoor Linking System options, connect the DMX control input lines to the first fixture and feed the output of that fixture to the next. The final fixture in the line should have a 120Ω terminating resistor connected between the DMX + and DMX –...
-
Page 17: Cabling With Ols
CABLING WITH OLS OUTDOORLINK Dyna Accents can be specified with Outdoor Link System connectors pre-fitted instead of bare tails. OLS S Y S T E M greatly simplifies the task of distributing power and control to multiple fixtures. OLS is a collection of feed and link cables (of various lengths) plus a T-junction and a terminator, all utilizing IP67-rated connectors together with robust all-weather construction. - Page 18 TYPICAL OLS CONFIGURATION IMPORTANT: A terminator must be fitted to the final T-junction to simultaneously protect the live connections and correctly terminate the DMX control feed. If a link cable is used between any T-junction and a fixture input, the link cable must not exceed 10’...
-
Page 19: Wireless Control
WIRELESS CONTROL The embedded Aria™ wireless system allows you to control any number of Dyna Accent fixtures that are within range of an Aria transmitter set to use the same wireless address: Notes: Optional Aria The wireless address is totally transmitter independent of the DMX address. -
Page 20: Configuration
CONFIGURATION The user display/control panel is located on the rear surface of the fixture and is concealed behind a removable panel. Use a 1/8th (3mm) Allen wrench (hex key) to remove the two bolts and the panel. Alternatively, remove one bolt and loosen the other to allow the panel to be swung out of the way. -
Page 21: Entering The Menu
ENTERING THE MENU User Press and hold the MENU button for roughly 7 display seconds until the Main Menu entry is shown, then use the buttons to navigate the menu, as described below. The menu will automatically exit roughly eight seconds after the last button press. Main Menu MENU For a certain period after the menu has first been... - Page 22 MAIN MENU ITEMS DMX Address Allows you to set the DMX start address for this fixture. Depending on the model, between one and five DMX addresses are required. See page 21. Factory Setting Clears all user settings and returns all options to their default states.
-
Page 23: Setting The Dmx Address
SETTING THE DMX ADDRESS When external control (wired or wireless) is used, the DMX start address of the fixture needs to match the start address being used by the controlling device. Color fixtures use four DMX channels (for Red, Green, Blue and White), beginning with the one chosen here; white-only models require just one DMX channel. -
Page 24: Adjusting The Gamma Setting
ADJUSTING THE GAMMA SETTING Like most light sources, the manner in 100% which LED emitters operate means they Gamma = 2.8 Gamma = 2.4 exhibit a non-linear response. This means Gamma = 2.2 that to achieve changes in output levels Gamma = 2.0 which look proportional and correct to Gamma = No (default) -
Page 25: Changing The Display Settings
CHANGING THE DISPLAY SETTINGS This option contains four settings related directly to the user display: • Display Invert - allows you to invert the text on the user display so that it reads correctly when the fixture is mounted upside-down. •... -
Page 26: Running A System Test
RUNNING A SYSTEM TEST This option assists in testing all of the emitters. When engaged, the emitters will flash on and off. Color models will cycle in turn through the various emitter colors. Note: You can also test the emitters remotely via RDM, see page 32. TO RUN A SYSTEM TEST 1 Enter the user menu (see page 19). -
Page 27: Configuring Aria Wireless Dmx
CONFIGURING ARIA WIRELESS DMX Each Dyna Accent fixture includes an internal Aria™ wireless DMX receiver unit to allow it to be remotely controlled by an Acclaim Lighting Aria transmitter. Fifteen radio channels are available to choose from, allowing you to avoid potential interference sources, such as WiFi access points, and set up parallel wireless links between different sets of Aria units. -
Page 28: Using The Automation Features (Photocell)
USING THE AUTOMATION FEATURES (PHOTOCELL) The fixture includes two related features which allow you to automate standalone operation: • The in-built photocell can enable fixture output (at 100%) when the ambient light level falls below a pre-determined level. • The auto shutoff timer determines how long the fixture should remain outputting after it has been triggered by the photocell. -
Page 29: Determining Solo Behavior
DETERMINING SOLO BEHAVIOR You can choose how the fixture should behave when it is running solo, either because an external control input is not being used at all or because a connection has been temporarily lost. There are three solo behavior choices: •... -
Page 30: Configuration Via Rdm
MAKING A TEMPORARY CONTROL LINK WITH THE XMT-350 Each Acclaim lighting XMT-350 DMX/RDM tool is supplied with a 5-pin male XLR lead that can be used to make a temporary control input link with the Dyna Accent feed-in cable. Use a 3-pin terminal block, wire nuts, conn blocks or Wago®... - Page 31 CONFIGURING THE DMX ADDRESS VIA RDM When external control (wired or wireless) is used, the DMX start address of the fixture needs to match the start address being used by the controlling device. Color fixtures use four (or five) DMX channels (for Red, Green, Blue and White (and/or Amber)), beginning with the one chosen here;...
- Page 32 MODEL entry: DYNA ACCENT LABEL: DYNA ACCENT MODEL: DYNA ACCENT MAN: ACCLAIM LIGHTING DMX START ADDRESS: DMX PERSONALITY: MODE1: 4CH- DMX SLOTS: 5 Press the button to view the options: DYNA ACCENT WIRELESS ON/OFF WIRELESS ADDR PHOTO SENS. ON/OFF PHOTO SENS.
- Page 33 MODEL entry: DYNA ACCENT LABEL: DYNA ACCENT MODEL: DYNA ACCENT MAN: ACCLAIM LIGHTING DMX START ADDRESS: DMX PERSONALITY: MODE1: 4CH- DMX SLOTS: 5 Press the button to view the options: DYNA ACCENT WIRELESS ON/OFF WIRELESS ADDR PHOTO SENS. ON/OFF PHOTO SENS.
- Page 34 This can be achieved either using the System Test option within the internal menu (see page 24) or using your RDM (Remote Device Management) tool. Various third party DMX/ RDM tools are available; Acclaim Lighting recommends the XMT-350 for this task. TO TEST EMITTER OUTPUT USING THE XMT-350 1 Connect the XMT-350 to the DMX input line of the Dyna Accent installation.
-
Page 35: Further Information
FURTHER INFORMATION TROUBLESHOOTING NO LIGHT OUTPUT IS VISIBLE WHEN EXPECTED. • Check that power is correctly applied to the fixture and that there is no damage to the power input cord. • Use the menu to perform an emitter test. •... -
Page 36: Optimizing Signal Strength Via Channel Selection
OPTIMIZING SIGNAL STRENGTH VIA CHANNEL SELECTION Aria™ wireless transceivers use radio frequencies contained within the Industrial Scientific and Medical (ISM) band that runs between 2.4GHz and 2.5GHz. As one of the few license- free radio bands agreed upon in most countries, many other devices also use this band, most notably WiFi. -
Page 37: Specifications
SPECIFICATIONS Models 2700K, 3000K, 3500K, 4000K, 5700K or RGBW Native beam angle 5º (standard for Dyna Accent White models) 10º (standard for Dyna Accent Color models) Spread lens options 20º, 40º, 60º or 10º x 60º Total lumens Up to 1,910 lm (Dyna Accent White 5700K, 5 Up to 1,092 lm (Dyna Accent Color, 10 Center beam Candela 183,000 cd (Dyna Accent White 5700K, 5... -
Page 38: Dimensions
DIMENSIONS 11.38” (289mm) Ø6.14” (156mm) 11.06” (281mm) GROUND SPIKE AND JOINER 1/2" NPT thread Ø2.36" (60mm) 1.1" (28mm) 0.94" (24mm) 0.63" (16mm) Ø10.43" (265mm) www.acclaimlighting.com... - Page 39 4” ELECTRICAL BOX BASE PLATE 2.48" (63mm) 4 x Ø0.18" (4.5mm) Ø 0.28" (7mm) c’sink 2.48" (63mm) Ø4.45" (113mm) Ø4.29" (109mm) 0.39" (10mm) LOCK NUT (SUPPLIED WITH BOTH BASE PLATE TYPES) 1/2" NPT thread 0.79" (20mm) 0.31" (8mm) 1.02" (26mm) Ø0.53"...
-
Page 40: Limited Product Warranty
If the requested repairs or service (including parts replacement) are within the terms of this warranty, Acclaim Lighting will pay return shipping charges only to a designated point within the United States. If the entire instrument is sent, it must be shipped in its original package. - Page 42 www.acclaimlighting.com...
Need help?
Do you have a question about the aria Dyna Accent and is the answer not in the manual?
Questions and answers