
Subscribe to Our Youtube Channel
Related Manuals for stellar labs STUD KING MD25

Summary of Contents for stellar labs STUD KING MD25
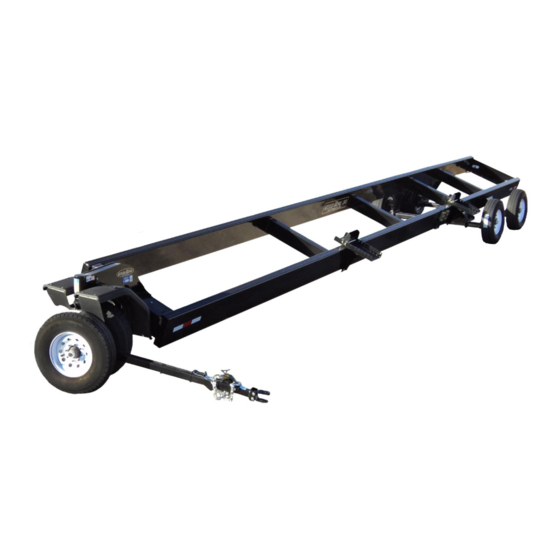
- Page 1 Owner’s Manual Head Transports Models MD25, MD32, MD38, MD42, MD48 Stellar Industries 2421 15 St. SW Mason City, IA 50401 Ph. (641) 424-3601 Fax (641) 423-0059 www.md-products.com...
- Page 2 INDEX Warranty & Safety Information 1 - Limited Warranty 2 - Safety 3 - Equipment Safety Guidelines 4 - Before You Begin Transport Operation 5 - Saddle Adjustment 6 - Ratchet Tie Downs 6 - Placing a Head on the Trailer 7 - Optional Attachments 8 - Unloading the Head 9 - Hooking Up the Transport...
-
Page 3: Year Limited Warranty
1 YEAR LIMITED WARRANTY This document is to certify that we warrant to the original purchaser equipment manufactured by Stellar Industries, identified and recorded by serial number, to be free of defects in material and workmanship under normal use and service. Should defects in either circumstance arise, Stellar Industries will replace, free of cost to the original purchaser, any part or parts that in our judgment show evidence of such defects. - Page 4 TAKE NOTE - THIS SAFETY ALERT SYMBOL FOUND THROUGHOUT THIS MANUAL IS USED TO CALL YOUR ATTENTION TO INSTRUCTIONS INVOLVING YOUR PERSONAL SAFETY AND THE SAFETY OF OTHERS. FAILURE TO FOLLOW THESE INSTRUCTIONS CAN RESULT IN INJURY OR DEATH. SIGNAL WORDS: Note the use of the signal words DANGER, WARNING and CAUTION with the safety messages.
- Page 5 Safety of the operator is one of the main concerns in designing and developing a new piece of equipment. Designers and manufacturers build in as many safety features as possible. However, every year many accidents occur which could have been avoided by a few seconds of thought and a more careful approach to handling equipment.
-
Page 6: Before You Begin
BEFORE YOU BEGIN Carefully study and Do not use the unit until understand this manual. you are sure that the area Don't hurry the learning is clear, especially of process or take the unit children animals. for granted. Ease into it ... - Page 7 TRANSPORT OPERATION This requires your utmost attention! Never allow anyone within close proximity during loading as injury may occur during process of moving the head onto the transport. Saddle Adjustment Your Stud King head transport comes standard with two wrench free adjustable saddles which can be moved along the frame by simply loosening the lever nut on the inside of the saddle assembly below the frame.
- Page 8 NEW UNIVERSAL 3 – 1 SADDLE SETUP (USED ON TRAILERS MANUFACTURED AFTER 10-15-19) Side Panels Snap Rings UNIVERSAL 3-1 SADDLE SETUP If your new Stud King head transport comes with new 3-1 universal saddles, here are some simple instructions on how to set them up for different heads. If you are hauling a corn head with stands, the saddles are set up to from the factory already (as shown in picture above).
- Page 9 PLACING THE HEAD ON THE TRAILER Insure the head is equally spaced from front to rear. The head should rest against the back stops on the saddles. Insure the weight rests against a strong structure on the head. Your ratchet strap should be used on center nearest the throat.
- Page 10 OPTIONAL ATTACHMENTS Your Stud King transport comes equipped to work for a variety of corn & heads, however there may occasionally be a need for a special attachment in grain order to achieve a better fit for your head. Stellar Industries offers the following attachments as an added option: ...
- Page 11 UNLOADING HEAD FROM TRAILER Move the head trailer to a level location. Carefully remove the strap, as the load may have shifted during transportation. As you move the combine up to the head, insure that no one is in between your combine and the trailer. As suggested in the loading process, never allow anyone within close proximity while unloading, as injury is always a possibility when lifting these heavy components from the trailer.
- Page 12 HOOKING UP AND PULLING THE TRANSPORT HOOKING UP YOUR TRANSPORT Your Stud King head transport is equipped with an extendable tongue feature to ease the process of hooking the trailer to its tow vehicle. To operate this system first remove the safety pin from the tongue latch then lift up on the latch handle while pulling forward.
- Page 13 ELECTRONIC BREAKAWAY SAFETY SYSTEM Stud King transports equipped with electronic brakes will come with an electronic breakaway safety system consisting of a breakaway switch mounted to the tongue and battery box mounted to the right side of the gooseneck. This system will engage the brakes should your transport become unhooked from the tow vehicle during transport.
- Page 14 As a precaution, always recheck the hardware on equipment following every 100 hours of operation. Correct all problems. Follow the maintenance safety procedures. Check your load often to insure your load is secure, make any adjustments necessary en route. ...
-
Page 15: Performing Maintenance
PERFORMING MAINTENANCE Proper scheduled maintenance on your Stud King transport plays a vital role for years of trouble free operation and use. This section will go over the standard service procedures as well as replacement of various parts on your trailer. Before you begin, please always keep the following in mind: ... - Page 16 BRAKE DRUM INSPECTION There are two areas of the brake drum that are subject to wear and require periodic inspection. These two areas are the drum surface where the brake shoes make contact during stopping and the armature surface where magnets contacts (only on electric brakes).
- Page 17 BEARING INSPECTION Wash all grease and oil from the bearing cone using a suitable solvent. Dry the bearings with clean, lint free cloth and inspect the rollers completely. If any pitting, marring, or corrosion is present, then replace the bearing. The bearing cup inside the hub must be inspected also.
- Page 18 Safe-T-Lube Hubs Your axle is equipped the Safe- T -Lube Feature, the bearings can be periodically lubricated without removing the hubs from the axle. This feature consists of axle spindles that have been specially drilled and fitted with a grease zerk in their ends. When grease is pumped into the zerk, it is channeled to the inner bearing and then flows back to the outer bearing and eventually backs out the grease cap hole.
- Page 19 surrounded by four natural rubber cords incased in the main structural member of the axle beam. The wheel/hub spindle is attached to a lever, called the torsion arm, which is fastened to the rubber-encased bar. load applied, rotates causing rolling/compressive resistance in the rubber cords. This action provides the same functions as conventional sprung axles with operating advantages including independent suspension.
- Page 20 Torque Requirements It is extremely important to apply and maintain proper wheel mounting torque on your trailer axle. Torque is a measure of the amount of tightening applied to a fastener (nut or bolt) and is expressed as length time's force. For example, a force of 90 pounds applied at the end of a wrench one foot long will yield 90 ft-lbs of torque.
- Page 21 WHEEL TORQUE SPECIFICATIONS Wheel Size Torque Specification Stage Stage Stage 15” 20-25 ft-lbs 50-60 ft-lbs 90-120 ft-lbs 16” 20-25 ft-lbs 50-60 ft-lbs 90-120 ft-lbs Incorrect wheel nuts or improperly tightened wheel nuts can cause the wheel to become loose and even come off. Be sure the use the correct wheel nuts TIRE WEAR CHART...
- Page 22 LIGHTING & MARKING It is the responsibility of the customer to know the lighting and marking requirements of the local highway authorities and to install and maintain the equipment to remain compliant with the regulations. Depending on the electrical package you purchased on your trailer it may or may not include brakes, this is an option.
- Page 23 If not connected to the compatible terminal unexpected results can happen, for example: if the brake connection is in line with the turn signal connection the brakes will engage when the turn signal is operated. Be sure the receptacle on the towing vehicle is wired correctly to the trailer receptacle.
- Page 24 BEFORE EACH TOW Check that the taillights, brake lights and turn signals work. Check that the electric brakes work by operating the brake controller inside the tow vehicle. Pull the pin from the switch and try to pull the trailer. A much greater force is needed to pull the trailer when the brake is activated.
- Page 25 MAINTAINANCE SCHEDULE 3 Months or 6 Months or 12 Months or Item Function Weekly 12,000 Miles 3000 Miles 6000 Miles Lug Nut Tighten to specs outlined Torque Tire Inflate to specs on sidewall Pressure Inspect for Brakes Wear & Scoring Inspect for Hubs &...
-
Page 26: Parts Lists
PARTS LISTS TONGUE ASSEMBLY A50-00780 Complete Tongue Assembly L50-00046 Inner Tongue L50-00045 Outer Tongue F50-00061 Latch Spring H06-01230 Safety Chain Assembly W50-00053 Clevis 1" Pin H06-01586 3" Pintle Ring H06-00393 2 5/16" Ball Coupler A50-00779 Tongue Latch BREAKAWAY BOX & SWITCH PART # ITEM DESCRIPTION E07-00370... - Page 27 RATCHET ASSEMBLY NUMBER DESCRIPTION PART # 4x10 Ratchet A52-00607K Assembly 4x12 Ratchet A52-00608K Assembly 4x14 Ratchet A52-00609K Assembly Ratchet Only H06-00037 Lever Nut H13-00478 3/8 – 16 X 4.5 H13-03145 Carriage Bolt Red – 2” x 8’5” Ratchet Strap H06-00065 FRONT FENDER ASSEMBLY NUMBER DESCRIPTION...
- Page 28 FRONT END ASSEMBLY NUMBER DESCRIPTION PART # 8 Bolt Front End W50-00759 8 Bolt Front End W50-01351 w/Brakes Gooseneck Cap H04-00379 Outer Gooseneck Tube M50-00241 Poly Gooseneck Ring H04-00042 Gooseneck Rider Ring L50-00043 Shock Absorber Kit A50-00481 Not Shown 9500 lb Frt Load Spring F50-01273 DRAPER PLATES Left Draper Plate...
- Page 29 NEW AND OLD STYLE SADDLE ASSEMBLY OLD STYLE – Model Year 2019 & earlier NEW 3 in 1 SADDLE - Year 2020 NUMBER DESCRIPTION PART # Old Style Saddle Assembly 4”x10” Saddle Mount Assembly A52-00540 4”x12” Saddle Mount Assembly A52-00476 4”x14”...
- Page 30 WIRE HARNESS & LIGHTS E05-00381 6" Oval Taillight and Grommet E05-00399 LED Side Marker Light Red lx4 E05-00398 LED Side Marker Light Amber lx4 25’, 32' Trailer Wire Harness (No Brake) E05-00769 E05-01028 32' Trailer Wire Harness (With Brake) E05-00761 38' Trailer Wire Harness (No Brake) E05-01029 38' Trailer Wire Harness (With Brake)
- Page 32 Subject to Change without Notification. © 2021 Stellar Industries, Inc.
Need help?
Do you have a question about the STUD KING MD25 and is the answer not in the manual?
Questions and answers