Table of Contents
Advertisement
Quick Links
User Manual
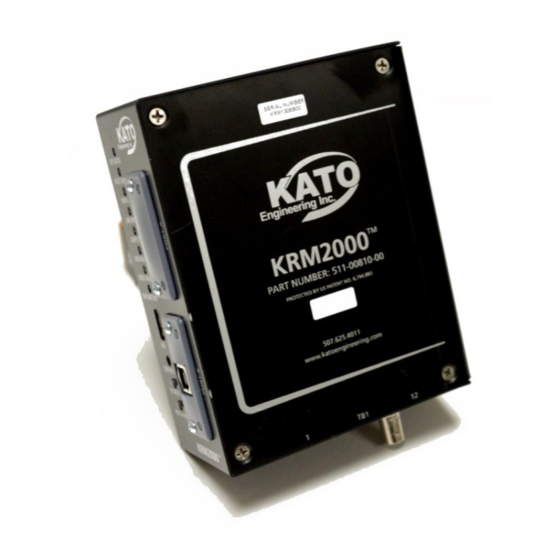
KRM2000
Kato Rotor Monitoring System
Protected by Patents:
US #6794883B2
EP #1499903A4
Revision 1.0.5
January 5, 2018
Manual # 352-56001-09
PLEASE READ THIS MANUAL AND ALL INCLUDED MANUALS IN ITS ENTIRETY BEFORE UNPACKING,
INSTALLING, AND OPERATING THE KRM2000
SYSTEM. IF YOUR MANUAL CAME ON A CD, READ ALL THE
TM
FILES INCLUDED ON THE CD.
Advertisement
Table of Contents

Related Manuals for Nidec Kato Engineering KRM2000


Summary of Contents for Nidec Kato Engineering KRM2000
- Page 1 User Manual KRM2000 Kato Rotor Monitoring System Protected by Patents: US #6794883B2 EP #1499903A4 Revision 1.0.5 January 5, 2018 Manual # 352-56001-09 PLEASE READ THIS MANUAL AND ALL INCLUDED MANUALS IN ITS ENTIRETY BEFORE UNPACKING, INSTALLING, AND OPERATING THE KRM2000 SYSTEM.
- Page 2 2 | Kato Engineering, Inc.
- Page 3 This page intentionally left blank (back of front cover). 3 | Kato Engineering, Inc.
- Page 4 Kato Engineering Inc. P.O. Box 8447 Mankato, MN USA 56002-8447 Tel: 507-625-4011 Fax: 507-345-2798 Email: katoengineering@mail.nidec.com Internet: www.kato-eng.com 4 | Kato Engineering, Inc.
- Page 5 WARNING: IN ORDER TO PREVENT INJURY OR EQUIPMENT DAMAGE, EVERYONE INVOLVED IN THE INSTALLATION, OPERATION, AND MAINTANCENCE OF THIS PRODUCT MUST BE QUALIFIED AND TRAINED OF THE CURRENT SAFETY STANDARDS THAT GOVERN HIS OR HER WORK. 5 | Kato Engineering, Inc.
-
Page 6: Table Of Contents
Table of Contents Revision History ......................9 Introduction ........................9 Safety Instructions ....................9 System Description ....................10 2.2.1 Inductive Power Loop Antenna ..............12 2.2.2 Dipole Receiver Antenna ................12 2.2.3 Receiver ......................12 2.2.4 Power Supply ....................12 2.2.5 Transmitter ..................... - Page 7 5.4.3 Ground Fault ....................31 5.4.4 PWM Re-enable Time Limit ................. 31 5.4.5 Loop Undervoltage ..................31 5.4.6 Loop Overcurrent ................... 31 5.4.7 Radio Link Error .................... 31 5.4.8 Diode Fault..................... 31 Monitoring Features ....................32 5.5.1 Data Points ..................... 32 Maintenance .........................
- Page 8 List of Tables Table 1 Revision History ....................... 9 Table 2 Terminal Connection Descriptions, Receiver ............19 Table 3 Supported Active Network Modules ..............28 Table 4 Replacement/Spare Parts ..................33 Table 5 Troubleshooting Guide ................... 34 Table 6 CIP Instance Attributes Model ................37 Table 7 Ethernet/IP CIP Object Dictionary .................
-
Page 9: Revision History
1 Revision History The following table contains the Revision History which pertains to this document only. Table 1 Revision History Revision Date Description Engineer 1.0.0 11/2013 Original 1.0.1 2/2014 Modified figures 14 and 15 1.0.2 3/2014 Added vibration to environmental section 1.0.3 3/2014 Updated power supply ratings... -
Page 10: System Description
2.2 System Description The KRM2000 rotor monitoring system utilizes 5 components to provide the basic functions as described previously. (1) Stationary induction power loop antenna (2) Stationary dipole receiver antenna (3) Non-rotating receiver (4) Power supply (5) Rotor mounted transmitter Figure 1 demonstrates these components and their general location. - Page 11 Figure 1 Typical Location of Rotor Monitoring System Components WARNING: WHEN OPERATING THE KRM2000 , MAKE SURE ALL PROTECTIVE GUARDS ARE IN PLACE. FAILURE TO DO SO MAY RESULT IN SERIOUS INJURY OR DEATH. 11 | Kato Engineering, Inc.
-
Page 12: Inductive Power Loop Antenna
2.2.1 Inductive Power Loop Antenna The loop antenna provides power to the rotor mounted transmitter through inductive coupling. The loop antenna is powered by the receiver, which is connected through the loop antenna connection block. 2.2.2 Dipole Receiver Antenna The dipole receiver antenna is used to collect the data wirelessly from the rotor mounted transmitter back to the stationary mounted receiver. -
Page 13: Specifications
3 Specifications This section contains all of the dimensional, electrical, and environmental specifications, as well as 3.1 Dimensions the certifications for the KRM2000 Figure 2 Receiver Dimensions 13 | Kato Engineering, Inc. - Page 14 Figure 3 Transmitter Dimensions Figure 4 Power Supply Dimensions 14 | Kato Engineering, Inc.
-
Page 15: Electrical
3.2 Electrical CONTROL POWER (RECEIVER) DC Voltage: 18 – 31V DC Burden: 12.5W Polarity Protected: RELAY OUTPUTS (RECEIVER) Type: Form A x 3 Sealed Contact Material: AgSnO Operate Time: 10ms Release Time: 10ms Minimum Load: 100mA@5VDC Maximum Load: 2A@250VAC Resistive (120000 Operations) DIGITAL OUTPUTS (RECEIVER) Type: Source/Sink x 3... -
Page 16: Installation
4 Installation This section describes the mechanical and electrical installation requirements for the KRM2000 4.1 Mounting rotor monitoring system. The mounting requirements for the transmitter, receiver, inductive power loop antenna, power supply, and the dipole antenna are described in this section. 4.1.1 Receiver The KRM2000 receiver can be DIN rail mounted in the horizontal direction, with a minimum of 3”... -
Page 17: Transmitter
4.1.2 Transmitter The transmitter is typically mounted on the diode wheel at the end of the shaft on the rotor. The figure below shows the typical mounting requirements. Blue Wire Connects to DC Plus Terminal Diode Wheel Rim --Bus Partial View KATO ROTOR MONITOR SYSTEM Black Wire... -
Page 18: Power Supply
Dipole Antenna Lead to Receiver Antenna Connectors Figure 8 Dipole Antenna Mounting 4.1.5 Power Supply The power supply is DIN rail mountable. For proper cooling of the power supply, there must be 3.15 inches of space above and below the power supply, and 1.97 inches for both of the sides. Typical DIN Rail Mounting Figure 9 Power Supply Mounting... -
Page 19: System Connections
4.2 System Connections The following section demonstrates the terminal requirements as well as overall system connections required for the KRM2000 rotor monitoring system. Connections are to be made as instructed in this manual and/or by any outside system drawings as governed by Kato Engineering only. 4.2.1 Receiver Table 2 Terminal Connection Descriptions, Receiver TERMINAL NAME... -
Page 20: Transmitter
4.2.2 Transmitter Right Side Diode Diode • (Red Wire) Wheel Wheel (- ) (Green Wire) • Trans- mitter Diode Wheel ( - ) • (Black Wire) Rotor Ground • (Connect To Mounting Bolt) (White Wire) Left Side Transmitter Diode Wheel (+) •... -
Page 21: Power Supply
4.2.4 Power Supply Figure 13 Terminal Connections, Power Supply 4.2.5 System Diagram Figure 14 System Diagram, Example 21 | Kato Engineering, Inc. -
Page 22: Electrical Installation
4.3 Electrical Installation This section provides in more detail the proper electrical installation procedure for the KRM2000 The intent of this section is to provide the user/installer with the most typical connection schemes available to this device. It is not possible to present all of the available connection types in this manual. -
Page 23: Digital Outputs, Receiver
4.3.2 Digital Outputs, Receiver The KRM2000 receiver has three digital outputs that can be utilized in either a source or sink configuration. The output source current is limited by an internal 10kΩ resistor, while the input sink current is limited to 250mA per input. If more current is required, slave relays can be added to increase the current capabilities. -
Page 24: Loop Antenna Output, Receiver
4.3.3 Loop Antenna Output, Receiver The loop antenna output of the receiver is an AC output that connects to the antenna bracket. This output is not polarity sensitive. The maximum cable length that can be utilized for this connection is 20ft, and can actually be shorter depending on the installation. -
Page 25: Transmitter
4.3.5 Transmitter The transmitter provides the ground fault protection through the generator field connections and the connection to the rotor itself (ground). Verify all connections are in place and secure before operation. Figure 19 Transmitter Wiring Detail 4.3.6 Power Supply The 24VDC power supply provides control power to the KRM2000 receiver. -
Page 26: Feature Description
5 Feature Description This section will describe all of the functional features and parameters provided with the KRM2000 5.1 Functional Block Diagram system. All programmable features are done through the KRM2000 receiver. The KRM2000 provides flexibility in communications, allowing for the user to collect data and make settings adjustments through many different protocols. - Page 27 of field excitation voltage and also the location of the ground fault. Thus an alarm based on the leakage current only would result in a ground fault alarm threshold that varies significantly with field voltage/fault location. Monitoring the actual field leakage resistance eliminates this variation resulting in an alarm point, which is much more predictable, thus reducing the possibility of premature or intermittent ground fault alarms.
-
Page 28: Setup Features
5.3 Setup Features The initial setup for the KRM2000 allows the user to configure the device to their system. This section details this function. 5.3.1 Loop Tuning Type The KRM2000 receiver has the ability to tune the inductive loop antenna utilizing one of two methods. - Page 29 connecting device to view the KRM2000™ as a serial port. Generally the operating system of the connecting device will handle the device driver installation and port binding. However it is recommended that prior to connecting to the device the relevant driver be downloaded from this link in order to insure the latest driver is always being used for the desired operating system.
-
Page 30: Eeprom
3. The Bluetooth module is placed back into discoverable, or connectable-only, mode and then removed from this mode by button push, or timeout, while no connection is communicating with the Bluetooth module. 5.3.3.3 Port B (USB) The KRM2000™ is provided with a USB module which requires a connection using a type B USB connection to allow for communication with external devices. -
Page 31: Ground Fault
THIS IS TO ENSURE THAT FALSE DETECTION/FALSE TRIPPING DOES NOT OCCUR WHICH IS VITAL FOR APPLICATIONS WHERE IT IS IMPARATIVE THAT THE GENERATOR SET DOES NOT SHUT DOWN. BECAUSE OF THIS FEATURE/DESIGN PHILOSOPHY, THE RECEIVERS MAY ON OCCASION ISSUE A “MALFUNCTION”. THERE IS NO NEED TO SHUTDOWN OR BE ALARMED WITH THIS CONDITION. -
Page 32: Monitoring Features
5.5 Monitoring Features This section describes all of the monitoring features provided in the KRM2000 5.5.1 Data Points The KRM2000 Receiver provides monitoring of the following data points: • Loop Voltage (V) • Loop Current (I) • Loop Frequency (kHz) •... -
Page 33: Maintenance
6 Maintenance No specific maintenance is required for the KRM2000 system beyond what is required for the exciter. During exciter maintenance, inspect all wiring between the receiver, transmitter, and inductive loop antenna to verify proper connections are maintained and ensure they are free of corrosion. -
Page 34: Troubleshooting
7 Troubleshooting This section provides the basic troubleshooting detail to follow if any issues occur during operation. It should be noted that not all possible scenarios can be documented here, and if at any point the issue can’t be resolved by the detail provided, please consult with the Kato Engineering service department. -
Page 35: Appendix
Board Failure (digital output Replace board failed high and/or relay output failed closed) Ground Fault Digital Output See Ground Fault LED See Ground Fault LED Illuminated Active (Low) and/or Ground Illuminated Fault Relay Output Active (Closed) Bad connection between Check connections KRM2000 receiver and external monitoring system... - Page 36 Ensure that you are on the same LAN as the connected module and start the Anybus IPconfig utility and press the “Scan” button. The Anybus modules connected to the network will now appear in the window as shown in the figure below. Figure 22 Anybus IPConfig Scan Example 4.
-
Page 37: Ethernet/Ip
8.2 Ethernet/IP The KRM2000™ is capable of being integrated to an Ethernet/IP network which allows for monitoring data by a Programmable Logic Controller (PLC) or other Distributed Control System (DCS) when an Ethernet/IP module is ordered with the KRM2000™. For specific information to other CIP objects available with the Ethernet/IP module please refer to the specific module documentation available at http://www.anybus.com/. - Page 38 Min value Default value Name Gnd Flt Trip Count Data Type Unsigned 32 bit integer No. of elements Access Descriptor Get/Set Value Max value Min value Default value Name Trip Zone Count Data Type Unsigned 32 bit integer No. of elements Access Descriptor Get/Set Value...
- Page 39 Name Reserved Data Type No. of elements Access Descriptor Value Max value Min value Default value Name Reserved Data Type No. of elements Access Descriptor Value Max value Min value Default value Name Gnd Flt Trip Lvl (Kohms) Data Type Float No.
- Page 40 No. of elements Access Descriptor Get/Set Value Max value 60.0 Min value Default value Name Loop Current Fault (Amps) Data Type Float No. of elements Access Descriptor Get/Set Value Max value 20.0 Min value Default value Name Reserved Data Type No.
- Page 41 Value Max value 30.0 Min value Default value Name Loop Current Data Type Float No. of elements Access Descriptor Value Max value 30.0 Min value Default value Name Linx RSSI Level (V) Data Type Float No. of elements Access Descriptor Value Max value Min value...
- Page 42 Min value Default value Name Ground Fault Resistance (Kohms) Data Type Unsigned 16 bit integer No. of elements Access Descriptor Value Max value 65535 Min value Default value Name Generator Field Voltage Data Type Unsigned 16 bit integer No. of elements Access Descriptor Value Max value...
- Page 43 Name Reserved Data Type No. of elements Access Descriptor Value Max value Min value Default value Name Reserved Data Type No. of elements Access Descriptor Value Max value Min value Default value Name GPIO A0 Test Mode Enable Data Type Unsigned 32 bit integer No.
- Page 44 No. of elements Access Descriptor Get/Set Value Max value 4294967295 Min value Default value Name GPIO C1 Test Mode Enable Data Type Unsigned 32 bit integer No. of elements Access Descriptor Get/Set Value Max value 4294967295 Min value Default value Name GPIO A0 Test Mode Data Data Type...
- Page 45 Value Max value 4294967295 Min value Default value Name GPIO C1 Test Mode Data Data Type Unsigned 32 bit integer No. of elements Access Descriptor Get/Set Value Max value 4294967295 Min value Default value Name GPIO A0 Test Display Data Data Type Unsigned 32 bit integer No.
- Page 46 Min value Default value Name GPIO C1 Test Display Data Data Type Unsigned 32 bit integer No. of elements Access Descriptor Get/Set Value Max value 4294967295 Min value Default value Name Reserved Data Type No. of elements Access Descriptor Value Max value Min value Default value...
- Page 47 Name Anybus Control Register Data Type Unsigned 32 bit integer No. of elements Access Descriptor Value Max value 4294967295 Min value Default value Name Connected Port Data Type Unsigned 16 bit integer No. of elements Access Descriptor Value Max value 65535 Min value Default value...
- Page 48 Access Descriptor Value Max value 255 (0xFF) Min value Default value ‘-’ Name DSP Software Revision Data Type Character (String) No. of elements Access Descriptor Value Max value 255 (0xFF) Min value Default value ‘-’ Name Part Numbers Data Type Character (String) No.
-
Page 49: Data Tables
Max value 4294967295 Min value Default value Table 8 General Control Register Name Description Default Rsvd External Filter 40Kohm external filter is present on the rotor. Present Reset to Reset KRM2000™set points to the factory Defaults defaults. Rsvd Tune loop Tune loop antenna for maximum loop voltage. -
Page 50: Table 12 Gpio Test Mode Enable Min/Max Table
Op_vars float Min/Max Data Table Gnd Flt Trip Lvl (Kohms) Max Gnd Flt Trip Lvl (Kohms) Min Loop Tuning Step Size Max Loop Tuning Step Size Min Trip Zone Re-enable Time Max Trip Zone Re-enable Time Min Loop Under Voltage Mal. Max Loop Under Voltage Mal. -
Page 51: Flash Programming Updates
8.4 Flash Programming Updates The KRM2000 receiver can be updated through the front USB port utilizing a cable with a type A connector. Refer to section 5.3.3 for the latest driver updates. Open up C2Prog.exe, which can be downloaded from http://www.codeskin.com/programmer. Once opened, select the appropriate .hex file, as shown below. - Page 52 Figure 25 Flash Port Configuration Figure 26 Flash Download Window 52 | Kato Engineering, Inc.
-
Page 53: Sensing Filter Option
8.5 Sensing Filter Option For special legacy products, such as the 9A5 exciter, a sensing filter is required for the transmitter. This sensing filter helps mitigate high voltage spikes that can be seen in certain applications. The figure below demonstrates the wiring of the sensing filter to the transmitter. When utilizing the sensing filter, a 40kΩ...
Need help?
Do you have a question about the Kato Engineering KRM2000 and is the answer not in the manual?
Questions and answers