
Related Manuals for Sony CDJ-500


Summary of Contents for Sony CDJ-500
- Page 1 CDJ-500 SERVICE MANUAL US Model Canadian Model Model Name Using Similar Mechanism CD Mechanism Type CDM-56 Base Unit Type BU-24 Optical Pick-up Type SPU3212 SPECIFICATIONS CD-ROM CHANGER MICROFILM...
- Page 2 LES COMPOSANTS IDENTIFIÉS PAR UNE MARQUE ! SUR LES DIAGRAMMES SCHÉMATIQUES ET LA LISTE DES PIÈCES SONT CRITIQUES POUR LA SÉCURITÉ DE FONCTIONNEMENT. NE REMPLACER CES COMPOSANTS QUE PAR DES PIÈCES SONY DONT LES NUMÉROS SONT DONNÉS DANS CE MANUEL OU DANS LES SUPPLÉMENTS PUBLIÉS PAR SONY.
-
Page 3: Table Of Contents
TABLE OF CONTENTS 1. SERVICE NOTE ..............4 2. GENERAL ................. 29 3. DISASSEMBLY 3-1. Front Panel ................. 30 3-2. Illumination Assy ..............31 3-3. CD Mechanism Deck ............31 3-4. Base Unit and Magnet Holder ..........32 3-5. CD Mechanism Section ............33 4. -
Page 4: Service Note
SECTION 1 SERVICE NOTE LOADING IN/OUT AGING TOTAL AGING Loading in and loading out are repeatedly carried out in this aging This mode is used for executing loading in and loading out of discs mode. in any slits sequentially. Operations are stopped when an error occurs. (When loading in or Operations are stopped when an error occurs. - Page 5 3.68s ------- • General CD-ROM Aspi4dos. sys 3.34 3.35 3.36s 3.36s • SONY test disc (TGRS-21: Green disc) (J-2501-110-A) Aspi8dos. sys 1.26 1.32 1.32s 1.32s • SCSI cable • Speakers with amplifier or equivalent. (Use only when checking the AUDIO output) Installing the “FIELD50.EXE”:...
- Page 6 Connection Connected to SCSI connector of the PC ANALOG-OUT SCSI SCSI TERM MODE ID SELECT DIGITAL-OUT 4 2 1 4 2 1 DRIVE CHANGER Connected to active speaker, etc. SCSI cable (Accessory) SCSI IN (only when checking the audio output) Fig.
- Page 7 Operating procedure: Note: Operations of this program are not guaranteed when used in the prompt mode with starting up Windows. Refer to the instruction manual of the PC used, set the DOS prompt mode, and execute the program. 1. Turn on the power of the PC and set the DOS prompt mode. 2.
- Page 8 The following screen appears when the file name is not already in use. The SCSI ID of the changer detected is displayed as the default value. For example, as the ID of the changer is set to “6” and the ID of the drive is set to “3”, these values will be displayed.
- Page 9 11. The following screen appears and the front door opens auto- matically. Insert the SONY test disc (TGRS-21: Green disc) in the 1st slot, and close the door. Take note that if the door is closed without inserting any disc, the...
- Page 10 12. When the inspections are executed, the status will be displayed at the bottom of the screen. The results of each inspection will be displayed on the right side of the screen. The results of the inspection will be displayed as OK or NG. The value of the test results will be displayed.
- Page 11 15. The following screen appears at the bottom, and 1 KHz sine wave is out put from the R-CH. If OK, enter “Y” and press the ENTER key. Like in step 14, enter “N” and press the ENTER key if negative. After checking, enter “Y”...
- Page 12 • If no problems occurred, the following will be displayed. File name entered at step 5. SCSI bus device Structure of this unit detected on the SCSI bus Serial number entered at step 7. Slot number (s) holding a disc. Test results...
- Page 13 • When an error has occurred, the following is displayed inspection results Displayed when SCSI errors occur For details of the error codes displayed here, refer to the PDF file of the instruction manual provided with the “FIELD50.EXE” program.
- Page 14 TROUBLE SHOOTING FLOW START POWER FAILURE POWER ON? POWER LED lights green EXECUTE FIELD50.EXE SCSI FAILURE DETECT as SCSI DEVICE? CDU-625&CDJ-C50S/500 are recognized as unique SCSI ID respectively. HARDWARE ERROR CAUTION on SCREEN? CHANGER LED FLASHING? KEY FAILURE INSERT DISC? General CD-ROM disc into SLOT 14 Green disc into SLOT 1 DISC SENSOR FAILURE...
- Page 15 START INSPECTION NO.1to6 SCSI INTEGRITY FAILURE NO.1 OK ? GO DRIVE CHECK SECTION NO.2 OK ? CHECK MECHANICAL PARTS NO.3 to 5 OK ? AUDIO FAILURE NO.6 OK ?
- Page 16 CHECK POINT POWER FAILURE • POWER MOUNT • FILTER MOUNT • POWER CORD • POWER HARNNES SCSI FAILURE(except CDU-625) • MAIN MOUNT • SCSI IN/OUT MOUNT • D.SW MOUNT • SCSI FFC CABLE • HARNNES(MAIN to D.SW) HARDWARE ERROR Check it out according to the sense code in the caution message, There are 6 cases, as follows.
- Page 17 DOWNLOADING THE CHANGER PROGRAM USING THE UPDATEF.EXE PROGRAM • Execute this program to rewrite the program of the changer of this unit. Preparations: • IBM PC compatible Personal computer and display: Use a personal computer with an HDD • OS: MS-DOS or PC-DOS version 5.0 or later.
- Page 18 4. Enter “UPDATEF” and press the ENTER key. The following screen appears. If CDJ-500 is detected, the number corresponded to SCSI adress is displayed. Press the ENTER key to update program for this changer. (It is not necessary to enter number.) Enter the number of the changer displayed or press the ENTER key.
- Page 19 5. The program searches for the HEX file for the changer stored in the directory and displays the lists. To download the latest HEX file, only press the ENTER key. (It is necessary enter number, to downlord another HEX file.) Detected HEX file Enter the number of the HEX file displayed or press the ENTER key.
- Page 20 8. The CHANGER indicator light up when download completes successfully. To restart the updated proglam, press the U but- ton to turn OFF the power, and press it again to turn ON the power again.” 9. Enter “UPDATEF” and press the ENTER key. The following is displayed on the screen.
- Page 21 DOWNLOADING THE DRIVE PROGRAM USING THE DWN-ASPI.EXE PROGRAM • Execute this program to rewrite the program of the drive of this unit. Preparations: • IBM PC compatible personal computer and display: Use a personal computer with an HDD • OS: MS-DOS or PC-DOS version 5.0 or later.
- Page 22 • To run this program in Windows, it must be set using the follow- ing procedure before hand. 1. Select “SYSTEM” on the “CONTROL PANEL” on Windows. 2. Display the “CD-ROM” device from “DEVICE MANAGER”, and select “SONY CD-ROM CDU625”. (See following diagram.) Uncheck “Sync data transfer”...
- Page 23 Operations: 1. Create a desired directory in the C drive of the PC used, and copy the DWN-ASPI.EXE file, and HEX file provided (e.g. 625_XXX.HEX). (The following assumes that the “CDJC50S” directory is cre- ated.) 2. The downloaded program can be executed on Windows 95/98. The following describes the state where the DOS prompt is ex- ecuted from Windows 98.
- Page 24 5. Check that the HEX file copied in item 1 is present in the HEX file displayed. 6. Press any key and end the program. 7. Enter the HEX file name checked at step 6 as “DWN-ASPI 625_XXX” and press the ENTER key. File name copied at item 1.
- Page 25 10. The following screen appears. Press the ENTER key. 11. The following screen appears and files are downloaded one by one.
- Page 26 12. When downloading is finished, the following screen appears. Newly rewritten program version...
- Page 27 13. When “Complete” is displayed at all items, it means that down- loading”. If “Failure” or “Verify Error!” is displayed, correct the cause and repeat the procedure again. Note: If downloading failed halfway through, the CD-ROM device name changes to CD ROM LOADER. Check system environment espe- cially SCSI configration.
- Page 28 Note: Note on repairring the Base Unit assy. When opening or repairing the unit, grounding is required to pre- vent damage caused by static electricity and is as follows: 1. Grounding for the human body Be sure to wear a wrist-strap for grounding (with impedance Ω) whose other end is ground.
-
Page 29: General
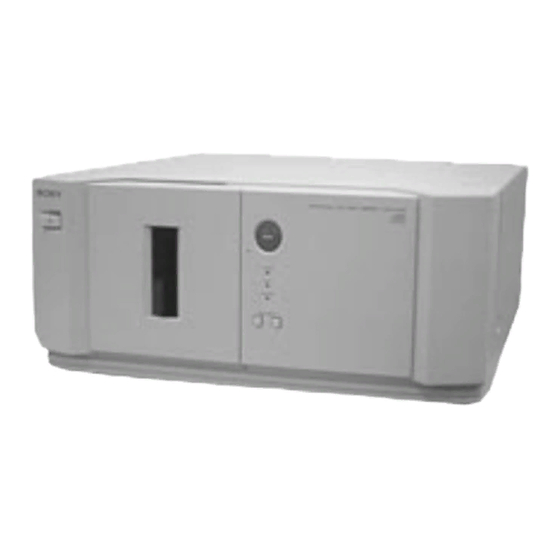
SECTION 2 GENERAL LOCATION OF PARTS AND CONTROLS Front Panel 1 u button 2 Emergency eject hole 3 OPEN button 4 POWER indicator 5 DRIVE indicator 6 CHANGER indicator 7 DISC SKIP + button 8 DISC SKIP – button... -
Page 30: Disassembly
SECTION 3 DISASSEMBLY Note: Follow the disassembly procedure in the numerical order given. 3-1. FRONT PANEL Connector Bracket (illumination) LED board: CN841 (with illumination assy) To MAIN board Screw (BVTT3x6) Two screws (BVTT3x6) Screw (BVTT3x6) !£ Claw Expand the front panel in the direction of arrow to release catching claws. -
Page 31: Illumination Assy
3-2. ILLUMINATION ASSY While pressing arrows A , B , and C , rotate the illumination assembly in arrow direction D and remove it. Note: Adhesives are given to these places. ILLUMINATION ASSY 3-3. CD MECHANISM DECK !¢ CD mechanism deck Three screws (BVTT3x10) Connectotr... -
Page 32: Base Unit And Magnet Holder
3-4. BASE UNIT AND MAGNET HOLDER Remove the torsion spring Two screws and take out the magnet holder (BTP2.6x8) with pulling up the claw toward you. Two screws (BTP2.6x8) Braket (DS) assy Magnet holder PC board assy Two screws (PTPWH2.6x8) Torsion spring (Holder) !£... -
Page 33: Cd Mechanism Section
3-5. CD MECHANISM SECTION NOTE: Adjust the position of the gear as shown in the figure when attaching. Screw (BTP2.6x8) Cover (Lever) Slider (Lock) Slider (Cam) Disc holder Screw (PTPWH M2) Cam cover !£ Slider (Loading) Screw (BTP2.6x8) !¡ Disc holder A2 !¢... -
Page 34: Mechanical Adjustments
SECTION 4 MECHANICAL ADJUSTMENTS 4-1. DISC HOLDER A ADJUSTMENT/CHUCKING Remove the screw and clamp PULLEY POSITION ADJUSTMENT Remove these screws Proceure: Remove this plate 1. Remove the plate shown in figure with the power OFF. (Fig.1) 2. Remove the shield, set the DIP switches on the back panel as shown below. - Page 35 10. After adjusting, apply screwlock. 15. After adjusting, apply screwlock. 11. Continue pressing the DISC SKIP – button. After loading out, 16. By pressing the DISC SKIP + and DISC SKIP - button, check continue pressing the DISC SKIP + button until loading in the loading in and out operations can be performed properly.
-
Page 36: Disc Sensor Adjustment
4-2. DISC SENSOR ADJUSTMENT 6. Press the DISC SKIP – button. The disc table starts to rotate in the counterclockwise direction. 7. Check that the waveform on the oscilloscope is the same as that Connection: MAIN Board adjusted in step 5. Repeat from step 4 if it is not. MAIN board 8. -
Page 37: Electrical Adjustments
SCSI cable (Attached or equal cable) 2. Set the COMMAND SW of the controller to the test mode. 5-1-1-3. Test Disc PARITY SONY Test Disc (YEDS-18) (3-702-101-01) SONY Test Disc (TGRS-21) (J-2501-110-A) 3. While pressing the TEST button of the MAIN BOARD, turn on the power of the CDJ-C50S or power supply unit. - Page 38 Note: AVA-2904E is supplied as an accessory of the set. PS/VP System SCSI Interface board Adaptec AHA-1520B or 2940 or AVA-2904 Attached or egual cable ATP625 Disc Firmware Program Disc To SCSI IN SONY Test Disc (TRGS-21) (for ATP) Active Speaker ATP/DOWNLOAD System...
- Page 39 Dip SW MAIN PCB CDM-56 *Note: It is not needed to disconnect the internal SCSI cable. SCSI TERM : ON MODE : OFF SCSI TERM TEST MODE S706 S707 SW601 ID2 ID1 PARITY MAIN BOARD Dip SW Function check...
-
Page 40: Trouble Shooting
5-2. TROUBLE SHOOTING c. Program error of host system This section describes trouble shooting methods. Section 4-2-2. shows the flowchart of the processing routine of the d. The SCSI TERM of DIP SW on the rear of set is not set to ON. unit. - Page 41 5-2-3. PROCEDURE OF ATP TEST 5-2-3-1. Pre-setting a. Connect the CDJ-500 to the Computer. (Refer to Fig. 5-1-3-2.) b. Set the Jumpers on the Adaptec SCSI board. (Refer to Fig. 5-1-3-2.) c. Set the COMMAND SW of back panel as below.
- Page 42 Y key. c. When “Place CD-ROM TEST DISC (TGRS-21)...” is dis- played, press the OPEN button of the CDJ-500 to open the door, insert the TGRS-21 DISC to the front slot and close the door.
- Page 43 Note: If all of test items are completed, words of OK will be displayed on the screen.If not, NG will be displayed. Sony SCSI CD-ROM Failure Verification Test Ver. 1.00.00 [Nov. -22-1996] Sony SCSI CD-ROM Failure Verification Test Ver. 1.00.00 [Nov.
- Page 44 Preparing The following tools and measuring equipments are necessary for performing this section. Oscilloscope TEST Sony Test Disc (YEDS-18) (3-702-101-01) SW601 a. Set the COMMAND SW on the back panel as below. PARITY b. While pressing the TEST button of the controller, turn on the power of the CDJ-C50S.
- Page 45 5-2-4-2. Flowchart Note: These flowchart is described assuming that IC failure causes any trouble. Start Mechanical Checking/Repairing Mechanical or Electrical trouble ? Mechanical Electrical IC303 (CPU) failure Nothing in action in Power-On ? IC305 (gate-array) failure No action IC304 (Flash-ROM) failure Proceeding Adjustment Action BU/Main PWB/HP PWB BU/OP checking/Replace BU...
- Page 46 Power on Reset Action Failed/Action NG Retry for detailed checking IC101 Focus Search (Refer to 5-2-4-6.) Trouble/Failed in Step (2)-(11) IC201 Spindle Motor Driver IC (Refer to 5-2-4-11.) (Spin-up/Focus-on) IC106 RF Signal (Refer to 4-2-4-13.) OK/Passed IC101 Check Focus/Tracking Servo Error Signal Trouble/Failed in Step (12)-(15) IC201 RF Signal (Refer to 5-2-4-13.)
- Page 47 Power on Reset Actions Step Item Drive Action Drive Power-On Sled Offset/Hall element Adjustment Tentative spindle servo gain setting LD On LD to turn on Focus Search OP lens to move up and down Focus On Spindle servo gain setting Tracking Servo On Spindle Servo On (10)
- Page 48 In the test mode, above listed function can be executed. Turn on c. If the lens does not move, check the resistance of the 2-axis ac- COMMAND SW on the back panel of CDJ-500. tuator coils. It should be 6.1±1.1Ω between FCS+ and FSC–.
- Page 49 5-2-4-9. Chucking Mechanism Check Laser Current a. Touch the IOP test land IOP on the MA-C30 Mounted Board. a. Listen the sound from the drive while the drive is spinning up. b. Measure the voltage generated by the laser current while the b.
- Page 50 • Refer to 5-2-4-1. and set the test mode. • Refer to 5-2-4-1. and set the test mode. • Insert a SONY test disc (YEDS-18) into the test drive. • Press the OPEN button to open the door, place the disc in the •...
- Page 51 SCSI TERM MODE S706 S707 ID2 ID1 ID0 PARITY TEST SW601 Adjustment Location : [ MA-C30 BOARD ] — Side B — TP VC RF Level Check & EF balance Check CNJ103 CNJ102 IC106 IC110 IC104 CNJ201 TP RF (RF EQ) RF Level Check TP TE EF balance Check...
-
Page 52: Theory Of Operation
SECTION 6 THEORY OF OPERATION P-CAV Drive Disc In Balalaned Disc cancellation function 1 VCAN (Vibration Cancel) motor adopted by SPINDLE By using latest P-CAV (partical CAV) technology, the CDM-56 re- alizes data transferring with variable transfer rate, from 12* (in- CDM-56 has new type of spindle motor that cancels imbalance of a ner track) to 24X (outer track). -
Page 53: Diagrams
CDJ-500 SECTION 7 DIAGRAMS AC FILTER board D. SW board LED board P. JACK board D. OUT board P. SW board SCSI OUT board SCSI IN board POWER board KEY board MAIN board DOOR MOTOR board DISC SENSOR (S) board... -
Page 54: Block Diagrams
CDJ-500 7-2. BLOCK DIAGRAMS RF 1 DIGITAL SERVO, – CD-ROM DRIVE (1/2) SECTION – DIGITAL SIGNAL PROCESSOR IC201 VCOREF Q202 IC202 PDOS SWITCH OPTICAL PICK-UP BLOCK (SPU3212) TMAXS SRPLL WRPLL SWITCH RF AMP TMAX Q207 LOCK IC101 LOCK LPFN DETECTOR... -
Page 55: Cd-Rom Drive (2/2) Section
CDJ-500 BUFFER MEMORY IC302 – CD-ROM DRIVE (2/2) SECTION – I/O 1 I/O16 2-5 • 7-10 • 31-34 • 36-39 16-19 • 22-26 28 29 13 54-60 • 62 • 63 65 66 67 68 71-78 • 80-87 MDB0-MDB15 •... -
Page 56: Main Section
CDJ-500 – MAIN SECTION – IC602 IC603 MOTOR DRIVE 3 RIN OUT+ TOUT TOUT LOADING MOTOR 2 FIN OUT– XEJECT XEJECT CHUCK CHUCK PWM1 16 RIN OUT– U CHK U CHK DISC TABLE SENSOR1-3 T.SENS1-3 TABLE MOTOR PWM0 17 FIN... -
Page 57: Power Supply Section
CDJ-500 WAVEFORMS – POWER SUPPLY SECTION – THIS NOTE IS COMMON FOR PRINTED WIRING – CD ROM SECTION – BOARDS AND SCHEMATIC DIAGRAMS. (In addition to this, the necessary note is printed T901 in each block.) POWER TRANSFORMER 1.2Vp-p 1.8Vp-p S901 For schematic diagrams. -
Page 58: Printed Wiring Board - Cd-Rom Drive Section
CDJ-500 7-3. PRINTED WIRING BOARD – CD-ROM DRIVE SECTION – • See page 53 for Circuit Boards Location. (Page 71) • Semiconductor Location Ref. No. Location IC104 IC106 IC110 IC112 IC501 Q205 Q206 (Page 75) Q701 (VC) (RFEQ) (TE) (Page 67) -
Page 59: Printed Wiring Board - Cd-Rom Drive Section
CDJ-500 7-4. PRINTED WIRING BOARD – CD-ROM DRIVE SECTION – • See page 53 for Circuit Boards Location. • Semiconductor Location Ref. No. Location D101 D201 D301 D701 IC101 IC103 IC105 IC107 IC109 IC111 IC201 IC202 IC203 IC301 IC302 IC303... -
Page 60: Schematic Diagram - Cd-Rom Drive (1/6) Section
CDJ-500 7-5. SCHEMATIC DIAGRAM – CD-ROM DRIVE (1/6) SECTION – • See page 57 for Waveforms. • See page 76 for IC Block Diagrams. (Page 64) (Page 63) (Page 68) (Page (Page 68) (Page 61) (Page 62) (Page 62) -
Page 61: Schematic Diagram - Cd-Rom Drive (2/6) Section
CDJ-500 7-6. SCHEMATIC DIAGRAM – CD-ROM DRIVE (2/6) SECTION – • See page 57 for Waveforms. • See page 76 for IC Block Diagrams. (Page 60) (Page 62) (Page 62) (Page 62) -
Page 62: Schematic Diagram - Cd-Rom Drive (3/6) Section
CDJ-500 7-7. SCHEMATIC DIAGRAM – CD-ROM DRIVE (3/6) SECTION – • See page 57 for Waveforms. • See page 76 for IC Block Diagrams. (Page 60) (Page (Page (Page (Page (Page (Page (Page (Page (Page (Page (Page (Page... -
Page 63: Schematic Diagram - Cd-Rom Drive (4/6) Section
CDJ-500 7-8. SCHEMATIC DIAGRAM – CD-ROM DRIVE (4/6) SECTION – • See page 57 for Waveforms. • See page 78 for IC Block Diagrams. • See page 83 for IC Pin Functions. (Page (Page (Page 74) (Page 66) (Page (Page... -
Page 64: Schematic Diagram - Cd-Rom Drive (5/6) Section
CDJ-500 7-9. SCHEMATIC DIAGRAM – CD-ROM DRIVE (5/6) SECTION – • See page 57 for Waveforms. • See page 78 for IC Block Diagrams. • See page 86 for IC Pin Functions. (Page 62) (Page 62) (Page 62) (Page 62) -
Page 65: Schematic Diagram - Cd-Rom Drive (6/6) Section
CDJ-500 7-10. SCHEMATIC DIAGRAM – CD-ROM DRIVE (6/6) SECTION – • See page 57 for Waveforms. • See page 79 for IC Block Diagrams. (Page 63) (Page 63) (Page (Page... -
Page 66: Schematic Diagram - Main Section
CDJ-500 7-11. SCHEMATIC DIAGRAM – MAIN SECTION – • See page 80 for IC Block Diagrams. • See page 88 for IC Pin Functions. (Page 68) (Page 68) (Page 68) (Page 70) (Page 62) (Page 68) (Page 74) (Page 68) -
Page 67: Printed Wiring Board - Main Section
CDJ-500 7-12. PRINTED WIRING BOARD – MAIN SECTION – • See page 53 for Circuit Boards Location. (Page (Page (Page (Page 75) (Page 69) (Page 75) (Page 59) (Page 69) (Page 69) (Page 69) (Page 71) (Page 69) (Page 69) (Page 69) •... -
Page 68: Schematic Diagram - Panel Section
CDJ-500 7-13. SCHEMATIC DIAGRAM – PANEL SECTION – (Page 66) (Page 60) (Page 66) (Page 60) (Page 72) (Page 66) (Page 66) (Page 66) (Page 66) (Page 66) -
Page 69: Printed Wiring Board - Panel Section
CDJ-500 7-14. PRINTED WIRING BOARD – PANEL SECTION – • See page 53 for Circuit Boards Location. (Page 67) (Page 58) (Page 73) (Page 67) (Page 67) (Page 67) (Page 58) (Page 67) (Page 67) (Page 67) -
Page 70: Schematic Diagram - Sensor Section
CDJ-500 7-15. SCHEMATIC DIAGRAM – SENSOR SECTION – (Page 66) (Page 60) -
Page 71: Printed Wiring Board - Sensor Section
CDJ-500 7-16. PRINTED WIRING BOARD – SENSOR SECTION – • See page 53 for Circuit Boards Location. (Page 71) (Page 67) -
Page 72: Schematic Diagram - Scsi Section
CDJ-500 7-17. SCHEMATIC DIAGRAM – SCSI SECTION – (Page 74) (Page 68) (Page 66) (Page 66) -
Page 73: Printed Wiring Board - Scsi Section
CDJ-500 7-18. PRINTED WIRING BOARD – SCSI SECTION – • See page 53 for Circuit Boards Location. (Page 67) (Page 73) (Page 69) (Page 75) -
Page 74: Schematic Diagram - Power Section
CDJ-500 7-19. SCHEMATIC DIAGRAM – POWER SECTION – • See page 82 for IC Block Diagrams. (Page 63) (Page 72) (Page 66) (Page 66) -
Page 75: Printed Wiring Board - Power Section
CDJ-500 7-20. PRINTED WIRING BOARD – POWER SECTION – • See page 53 for Circuit Boards Location. (Page 67) (Page 58) (Page 67) (Page 73) • Semiconductor Location Ref. No. Location Ref. No. Location D902 D908 D903 IC901 D904 D905... -
Page 76: Ic Block Diagrams
CDJ-500 7-21. IC BLOCK DIAGRAMS • MA-C30 Board IC105 TC4W53FU IC106 BA6849FP-E2 IC101 TA2112FN (EL) 20µA DRIVER 100k 150k GAIN SBAD CONTROL 16.7k CURRENT SENSE AMP 150k HALL AMP 2VRO 50µA TORQUE RFRP SENSE AMP 1– 3 STATUE DET. 2VRO... - Page 77 IC110 MC14066BF IN/OUT 14 V OUT/IN 13 CONTROL IN OUT/IN 12 CONTROL IN IN/OUT 11 IN/OUT CONTROL IN 10 OUT/IN CONTROL IN OUT/IN IN/OUT IC201 TC9449AF (BS, D, 24A) 73 72 71 70 69 68 67 66 65 64 63 62 61 60 59 58 57 56 55 54 53 52 51 TEBC RFGC 1 BIT...
- Page 78 IC301 CXD1818R 108 107 106 105 104 103 102 101 100 99 98 97 96 95 94 93 92 91 90 89 88 87 86 85 84 83 82 81 80 79 78 77 76 75 74 73 MDB1 GRST MDB0 XROF TST0...
- Page 79 IC303 HD6433032SSNM11F 59 58 57 56 55 54 53 52 51 50 49 48 47 46 45 44 PORT 6 PORT 5 ADDRESS BUS DATA BUS (HIGH) DATA BUS (LOW) CLOCK H8/300H CPU OSCILLATOR CONTROLLER INTERNUPTION (MASK ROM) CONTROLLER VREF AVSS WATCH DOG TIMER (WDT)
- Page 80 • MAIN Board IC604 SN74HC573BNS IC601 BA6287F OUT1 OUT2 DRIVER DRIVER VREF CONTROL LOGIC POWER SAVE IC603 BA6780 VIN1 VIN2 IC605 SN74HC138ANS DATA OUTPUTS FIN1 FIN2 RIN1 RIN2 IOUT VREF FBIN- VREG FBIN+ OUTPUT SELECT ENABLE OUT2+ OUT1+ OUT2- IC608 M51953BFP REFERENCE VOLTAGE ON/OFF...
- Page 81 IC602 uPD784031GC-8BT 63 62 61 77 76 75 74 73 72 71 70 69 68 67 66 65 64 TIMER/ COUNTER 0 (16 BIT) P32/SCL P33/SDO/SDA CONVERTER PORT 2 P34/T00 P35/T01 P74/AN14 P36/T02 P73/AN13 P37/T03 PROGRAMMABLE P72/AN12 CLOCKED INTERRUPT CONVERTER P71/AN11 SERIAL I/F CONTROLLER...
- Page 82 • POWER Board IC901 MC34166D2TR4 VOLTAGE FEEDBACK INPUT SWITCH OUTPUT INPUT VOLTAGE/ COMPEN- SATION...
-
Page 83: Ic Pin Functions
7-22. IC PIN FUNCTIONS • IC301 CD-ROM DECODER AND SCSI INTERFACE (CXD1818R) (MA-C30 board) Pin No. Pin Name Function – Ground – Power supply (+5V) XDB0 SCSI data bus bit0 – Ground XDB1 SCSI data bus bit1 – Ground – Power supply (+5V) XDB2 SCSI data bua bit2... - Page 84 Pin No. Pin Name Function – Ground – Power supply (+5V) XRES CXD1804R reset signal Address bus output bit0 to buffer memory Address bus output bit1 to buffer memory Address bus output bit2 to buffer memory Address bus output bit3 to buffer memory Address bus output bit4 to buffer memory Address bus output bit5 to buffer memory Address bus output bit6 to buffer memory...
- Page 85 Pin No. Pin Name Function Serial data output from sub CPU to CD DSP DATO DAT0 latch signal. Latch at leading edge XLAT DSTB DAT0 transfer clock – Ground – Power supply (+5V) Bit clock (Connected to CXD3000 BCKI pin/pin 30) BCKO Audio data output to DAC (Connected to CXD3000 PCMDI pin/pin 28) DACD...
- Page 86 • IC305 GATA ARRAY (BU6260AKV) (MA-C30 board) Pin No. Pin Name Function XULD Switch Switch XUSL Ground XSLT Ground XEJC Switch XHMT Headphone mute XAMT Audio mute XTOUT XLDO – Ground – Power supply XDRS DSP reset PRST CPU/Monet reset RSTB Reset VAIN...
- Page 87 Pin No. Pin Name Function GN1 O Spindle driver 1 on GN0 O Spindle driver 0 on CLV0 CLV on CAV0 CAV on Spindle control – Power supply EXC0 33.86MHz 16.93MHz EXC1 Ground – TEST Ground PWM1 Control the outside spindle motor DSP clock 33.86MHz DSP clock 33.86MHz PWM0...
- Page 88 • IC609 SCSI CONTROL (SYM53CF92A) (MAIN board) Pin No. Pin Name Function – Ground DREQ Not used DACK DMA controller DBWR DMA write signal – +5V Power supply DMA data bus DMA data bus DMA data bus – Ground DMA data bus DMA data bus DMA data bus –...
- Page 89 Pin No. Pin Name Function – Ground Address inputs Address inputs – Ground TEST Processor address data PAD0 Processor address data PAD1 Processor address data PAD2 PAD3 Processor address data – Ground PAD4 Processor address data PAD5 Processor address data Processor address data PAD6 Processor address data...
-
Page 90: Exploded Views
SECTION 8 EXPLODED VIEWS NOTE: The components identified by • Items marked “*” are not stocked since they are mark ! or dotted line with mark seldom required for routine service. Some delay ! are critical for safety. should be anticipated when ordering these items. Replace only with part number •... -
Page 91: Front Panel Section
8-2. FRONT PANEL SECTION not supplied not supplied not supplied M901 not supplied not supplied not supplied Ref. No. Part No. Description Remark Ref. No. Part No. Description Remark X-4950-435-1 DOOR ASSY 4-212-612-01 GEAR (A) 4-212-610-01 SHIELD (W) X-4950-368-1 BRACKET (DL) ASSY 4-933-134-71 SCREW (+PTPWH M2.6X6) 3-354-963-32 DAMPER X-4952-278-1 PANEL ASSY, FRONT... -
Page 92: Chassis Section
8-3. CHASSIS SECTION not supplied not supplied not supplied T901 not supplied not supplied not supplied not supplied not supplied Les composants identifiés par une The components identified by marque ! sont critiques pour la mark ! or dotted line with mark ! are critical for safety. -
Page 93: Mechanism Deck Section-1 (Cdm-56)
8-4. MECHANISM DECK SECTION-1 (CDM-56) not supplied not supplied 202 203 not supplied not supplied not supplied Ref. No. Part No. Description Remark Ref. No. Part No. Description Remark * 201 1-672-171-11 CHUCK SW BOARD 4-214-316-01 COVER (PULLEY) * 202 4-988-427-01 COVER, CAM 4-988-420-01 SLIDER (LOADING) 3-910-095-11 RUBBER, VIBRATION PROOF... -
Page 94: Mechanism Deck Section-2 (Cdm-56)
8-5. MECHANISM DECK SECTION-2 (CDM-56) Ref. No. Part No. Description Remark Ref. No. Part No. Description Remark * 251 1-672-168-11 TABLE SENSOR BOARD 4-988-432-01 GEAR (B) (LOADING) 4-219-823-01 SCREW (+PTPWH 2.6X8 B TYTE) * 258 1-672-169-11 DISC SENSOR (R) BOARD 4-214-143-01 BELT 8-729-926-31 PHOTO TRANSISTOR PT483F1 4-988-425-01 PULLEY... -
Page 95: Base Unit Section
8-6. BASE UNIT SECTION (BU-24) M101 not supplied not supplied not supplied not supplied M102 Les composants identifiés par une The components identified by marque ! sont critiques pour la mark ! or dotted line with mark ! are critical for safety. sécurité. -
Page 96: Electrical Parts List
AC FILTER CHUCK SW SECTION 9 ELECTRICAL PARTS LIST D.SW D.OUT Note: • SEMICONDUCTORS • Due to standardization, replacements in the parts list The components identified by In each case, u: µ , for example: may be different from the parts specified in the mark ! or dotted line with mark uA...: µ... - Page 97 D.SW DISC SENSOR (R) DISC SENSOR (S) DOOR MOTOR MA-C30 Ref. No. Part No. Description Remark Ref. No. Part No. Description Remark < SWITCH > < SWITCH > S706 1-570-598-11 SWITCH, DIP S701 1-762-149-11 SWITCH, PUSH (1 KEY)(DOOR) S707 1-554-556-00 SWITCH, DIP S702 1-762-936-11 SWITCH, LEVER (DOOR MOTOR) S703...
- Page 98 MA-C30 Ref. No. Part No. Description Remark Ref. No. Part No. Description Remark C132 1-163-007-11 CERAMIC CHIP 680PF C235 1-163-251-11 CERAMIC CHIP 100PF C134 1-163-038-91 CERAMIC CHIP 0.1uF C236 1-163-251-11 CERAMIC CHIP 100PF C138 1-163-031-11 CERAMIC CHIP 0.01uF C238 1-164-004-11 CERAMIC CHIP 0.1uF C240 1-124-778-00 ELECT CHIP...
- Page 99 MA-C30 Ref. No. Part No. Description Remark Ref. No. Part No. Description Remark < IC > R110 1-216-657-11 METAL CHIP 1.8K 0.5% 1/10W R111 1-216-671-11 METAL CHIP 6.8K 0.5% 1/10W IC101 8-759-471-19 IC TA2112FN(EL) R112 1-216-001-00 METAL CHIP 1/10W IC103 8-759-449-84 IC LA6539M-TE-L R113 1-216-001-00 METAL CHIP...
- Page 100 MA-C30 Ref. No. Part No. Description Remark Ref. No. Part No. Description Remark R192 1-216-669-11 METAL CHIP 5.6K 0.5% 1/10W R310 1-216-073-00 METAL CHIP 1/10W R193 1-216-669-11 METAL CHIP 5.6K 0.5% 1/10W R194 1-216-669-11 METAL CHIP 5.6K 0.5% 1/10W R311 1-216-033-00 METAL CHIP 1/10W R316...
- Page 101 MAIN Ref. No. Part No. Description Remark Ref. No. Part No. Description Remark A-4724-461-A MAIN BOARD, COMPLETE < RESISTOR > ******************** R601 1-216-041-00 METAL CHIP 1/10W < CAPACITOR > R602 1-216-041-00 METAL CHIP 1/10W R603 1-216-073-00 METAL CHIP 1/10W C601 1-163-038-91 CERAMIC CHIP 0.1uF R604...
- Page 102 MAIN P.JACK MOTOR P.SW POWER Ref. No. Part No. Description Remark Ref. No. Part No. Description Remark < VIBRATOR > C923 1-104-666-11 ELECT 220uF X601 1-760-225-11 VIBRATOR, CERAMIC < CONNECTOR > X602 1-767-325-21 OSCILLATOR, CRYSTAL CN905 1-564-321-00 PIN, CONNECTOR 2P CN906 1-691-766-11 PLUG (MICRO CONNECTOR) 4P **************************************************************...
- Page 103 SCSI IN SE-C7 SCSI OUT TABLE SENSOR Ref. No. Part No. Description Remark Ref. No. Part No. Description Remark A-4724-441-A SE-C7 BOARD, COMPLETE < IC > ********************* IC691 8-759-464-52 IC BH9598FP-YE2 1-790-251-11 WIRE (FLAT TYPE) (11 CORE) < RESISTOR > <...
- Page 104 CDJ-500 Ref. No. Part No. Description Remark ************* HARDWARE LIST ************* 7-685-646-79 SCREW +BVTP 3X8 TYPE2 N-S 7-682-135-01 SCREW +P 2.5X6 7-685-871-01 SCREW +BVTT 3X6 (S) 7-685-104-14 SCREW +P 2X6 TYPE2 SLIT 7-621-772-18 SCREW +B 2X4 7-624-105-04 STOP RING 2.3, TYPE -E...
Need help?
Do you have a question about the CDJ-500 and is the answer not in the manual?
Questions and answers