
Related Manuals for Fritsch ANALYSETTE 22 NeXT


Summary of Contents for Fritsch ANALYSETTE 22 NeXT
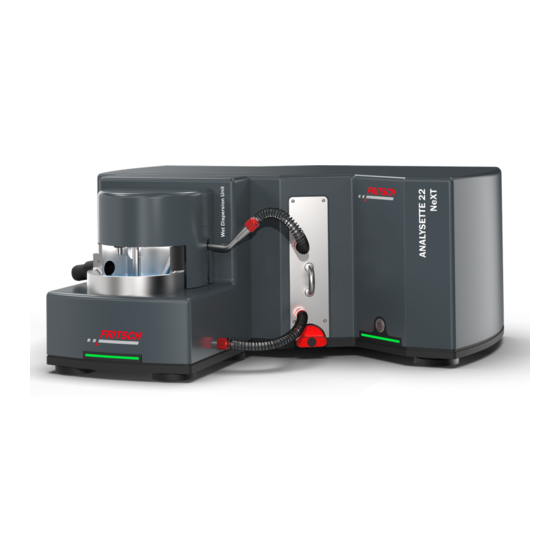
- Page 1 Operating instructions ANALYSETTE 22 NeXT LASER PARTICLE SIZER Valid starting with: 22.90X0/00001 Read the instructions prior to performing any task! Translation of the original operating instructions...
- Page 2 Fritsch GmbH Milling and Sizing Industriestraße 8 D - 55743 Idar-Oberstein Telephone: +49 (0) 6784/ 70-0 Fax: +49 (0) 6784/ 70-11 Email: info@fritsch.de Internet: www.fritsch-sizing.de Version 04/2020 Index 000...
- Page 3 Certifications and CE conformity Certification Fritsch GmbH has been certified by the SGS-TÜV Saar GmbH. An audit certified that Fritsch GmbH conforms to the requirements of the DIN EN ISO 9001:2015. CE Conformity The enclosed Conformity Declaration lists the guidelines the FRITSCH instrument conforms to, to be able to bear the CE mark.
-
Page 4: Table Of Contents
Table of contents Table of contents Safety information and use............6 1.1 Requirements for the user............. 6 1.2 Scope of application............... 6 1.3 Obligations of the operator............ 7 1.4 Information on hazards and symbols used in this manual..7 1.5 Information on hazards at the instrument......10 1.6 Device safety information............ - Page 5 Table of contents 5.1.4 Sample addition..............30 Using the device................31 6.1 Wet dispersion unit.............. 31 6.1.1 Fritsch test powder F500..........31 6.1.2 Dispersion of barely wettable samples......32 6.1.3 Measurement of hardly soluble samples......33 Accessories................... 34 7.1 Ultrasonic box..............34 7.1.1 Assembly of the ultrasonic box.........
-
Page 6: Safety Information And Use
Subject to technical modifications. 1.2 Scope of application The ANALYSETTE 22 NeXT can be universally used as an instrument to determine the particle size distribution of suspensions, emulsions and solids. It is mainly used in research and development and in quality and process control. -
Page 7: Obligations Of The Operator
1.3 Obligations of the operator Before using the ANALYSETTE 22 NeXT, this manual is to be carefully read and understood. The use of the ANALYSETTE 22 NeXT requires technical knowledge; only commercial use is permitted. - Page 8 Safety information and use DANGER! This symbol and keyword combination points out a directly hazardous situation that can result in death or serious injury if not avoided. WARNING! This symbol and keyword combination points out a pos- sibly hazardous situation that can result in death or serious injury if not avoided.
- Page 9 Safety information and use WARNING! This symbol and keyword combination points out a directly hazardous situation due to movable parts. Ignoring information with this designation can result in hand injuries. WARNING! This symbol and keyword combination points out a directly hazardous situation due to hot surfaces. Ignoring information with this designation can result in serious burn injuries due to skin contact with hot sur- faces.
-
Page 10: Information On Hazards At The Instrument
Safety information and use Designation Explanation References to sections in this manual and rele- vant documentation Lists without a specific order [Button] Operating elements (e.g. push button, switch), display elements (e.g. signal lamps) ‘Display’ Screen elements (e.g. buttons, function key assignment) 1.5 Information on hazards at the instrument There is a laser radiation hazard warning on the back of the device. -
Page 11: Laser
Unauthorised alteration of the device will void Fritsch's declaration of conformity to European directives and void the guarantee. If, after reading the operating manual, there are still questions or problems, please do not hesitate to contact our specialised per- sonnel. -
Page 12: Protective Equipment
Safety information and use WARNING! Laser radiation! Laser devices of laser class 3B and 4 are dangerous for the human eye, so that even an exposure time of 0.25 sec is sufficient to cause permanent damage to the retina. Therefore it is mandatory for every person who is operating the device with the housing open during repairs or maintenance to wear suitable safety goggles. -
Page 13: Technical Data
Technical data Technical data 2.1 Dimensions Measuring unit: NeXT: 66.6 x 31.9 x 29.4 cm (W x D x H) Supply unit: Wet dispersion unit: 29 x 27.2 x 29 cm (W x D x H) Accessories: Ultrasonic box: 29 x 9 x 27.9 cm (W x D x H) 2.2 Weight Measuring unit: NeXT Micro: 24 kg net... -
Page 14: Power Consumption
The measuring unit is connected via a table-top power supply with inte- grated fuse. 2 x 4 A fuses in the ultrasonic box. 2.8 Measuring ranges ANALYSETTE 22 NeXT Micro 0.5 - 1500 µm ANALYSETTE 22 NeXT Nano 0.01 - 3800 µm... -
Page 15: Installation
The machine is only to be lifted with suitable equipment and by qualified personnel. Fritsch laser particle sizers are delivered in wooden cases on pallets. Do not tilt or stack these crates. The laser particle sizers must be transported and stored in their packaging and protected from weather and outside influences. - Page 16 Installation Next remove the sample bath, the ultrasonic box (if ordered), the two accessories cases and the cardboard box with the hoses. Remove the next foam layer. Afterwards, take out the screen, the keyboard and the cardboard box with the connection kit of the measuring unit. Lift the wooden frame carefully away over the measuring unit.
-
Page 17: Ambient Conditions
Installation Lift the measuring unit out of the foam mouldings. Thanks to the grooves in the foam mouldings you can hold the device by the base plate and lift it out. 3.3 Ambient conditions WARNING! Mains voltage – The device may only be operated indoors. –... -
Page 18: Setting Up
Installation 3.4 Setting up Necessary connections: 1 x power socket 1 x liquids inlet 1 x liquids outlet Location requirements: Level, stable and non-vibrating base. It does not have to be fastened to the surface. Make sure when setting up the instrument that it is easily accessible so that it is easy to operate. -
Page 19: Accessory Case
Installation 3.6 Accessory case Connection kit, measuring unit The following parts for connecting the measuring unit are packed in a cardboard box: Power supply USB cable Multiple socket outlet Spring ring PC with operating system and MaScontrol Mouse Connection kit, wet dispersion unit The following parts for connecting the wet dispersion unit are packed in a cardboard box: Outlet hose with 25 mm inner diameter... - Page 20 Installation Service kit Powder spatula USB stick with software and documentation Screwdriver Dusazin Round jars with various bits, hose clamps, hose con- Precision wipes nectors and screws Cleaning sand Transport securing device deposit Standard test powder F 500 - 20 -...
-
Page 21: Electrical Connection
Installation 3.7 Electrical connection DANGER! Mains voltage! Connect the multiple socket outlet to a mains line pro- tected with a residual current circuit breaker. DANGER! Mains voltage! Changes to the connection line may only be made by a qualified person. Before establishing the connection, compare the voltage and current values stated on the type plate with the values of the mains system to be used. -
Page 22: Initial Start-Up
Initial start-up Initial start-up 4.1 Connections for measuring unit The following connections are located on the back of the measuring unit: Connections for dispersion units 24V mains connection USB port for connecting the measuring unit to the computer Do not connect the USB cable between measuring unit and computer until after the driver software is installed. - Page 23 Initial start-up Connect the supplied data cable to the "Measuring Unit" connec- tion (1) of the dispersion unit and to one of the "Dispersion Units" connections of the measuring unit. Connect the supplied outlet hose with inner diameter of 25 mm to the outlet connector (2).
-
Page 24: Preparation Of The Computer
Initial start-up 4.3 Preparation of the computer A pre-installed PC is included with the ANALYSETTE 22 as standard. If you are using your own PC, install the necessary software as follows. Do not connect the USB cable between measuring unit and computer until after the driver software is installed. - Page 25 Initial start-up The setup assistant for the installation opens. Click [Next] to con- tinue. Read through the terms of the licence and accept them by acti- vating the checkbox at the bottom left. The installation can then be continued by clicking [Next]. Enter the path for installing the software.
-
Page 26: Checking Communication
In the Configuration menu of the MaScontrol software, select the COM interface of the instrument. After you have connected the supply unit and installed the MaS- control software, you can measure the Fritsch test powder, as described in Ä Chapter 6.1.1 ‘Fritsch test powder F500’... -
Page 27: Supply Units
From measuring cell / ultrasonic box To measuring cell Status light 5.1.2 Selecting the liquids Fritsch GmbH recommends using fresh water of drinking water quality as measuring liquid for the dis- persion unit. CAUTION! When using the liquids listed below make sure that these are used in a well-ventilated room or under an extractor hood. - Page 28 They can often be measured in white spirit. DANGER! Before using other measuring liquids, consult Fritsch Gmbh in advance or call up the list of suitable chemi- cals on our homepage www.fritsch-sizing.de under the corresponding wet dispersion unit.
-
Page 29: Filling The Measuring Circuit
Supply units 5.1.3 Filling the measuring circuit The wet dispersion unit has a suspension volume of 150 - 500 ml. The radial pump has a capacity of 3.5 l per minute. In order to fill the measuring circuit of the wet dispersion unit, proceed as follows: Check whether the hose at the "Liquid in"... -
Page 30: Sample Addition
5.1.4 Sample addition Start the desired SOP in the "MaS control" program. (see Chapter Ä Chapter 6.1.1 ‘Fritsch test powder F500’ on page 31) When requested to add the sample: Add suspensions in small doses to the sample bath using a pip- ette until the beam absorption set in the SOP is reached. -
Page 31: Using The Device
This will indicate contamination or malfunctions in your system. Measure the supplied Fritsch test powder F500 with the wet dispersion unit as follows: Switch the measuring unit on the main switch to I (On). If you are using an ultrasonic box, switch it on as well by the main switch. -
Page 32: Dispersion Of Barely Wettable Samples
Adjust the beam. Select the SOP "Laser Alignment Wet". Click on "Start Measurement" to adjust the beam. Once the beam is adjusted, select the SOP "Fritsch test powder F500" in the measurement folder. Click on "Start Measurement" to measure the Fritsch test powder. -
Page 33: Measurement Of Hardly Soluble Samples
Using the device 6.1.3 Measurement of hardly soluble samples Samples which dissolve in the measuring liquid over time can be meas- ured in the ANALYSETTE 22. We recommend preparing a saturated meas- uring liquid. The particle size cannot be changed by dissolving - so the measuring results remain constant. -
Page 34: Accessories
Accessories Accessories 7.1 Ultrasonic box Mains connection / Main switch and measuring unit connection To wet dispersion unit (To Bath) From measuring cell (From Cell) NOTICE! Do not operate the sample bath without liquids. The ultrasonic box has a power of up to 50 watts and a frequency of 50 Hz (230V) and 60 Hz (115V). -
Page 35: Assembly Of The Ultrasonic Box
Accessories DANGER! Explosion hazard, combustible substances – Do not use highly flammable and flammable liquids such as alcohols, ketones and benzines etc. or any chemicals, which contain or could break down into chloride ions (some disinfectants, household deter- gents and washing-up liquids), in the dispersion unit. -
Page 36: Immersion Pump Set
Accessories 7.2 Immersion pump set The immersion pump set is intended for usage with water as a measuring liquid. If used in combination with other measuring liquids, this damages the immersion pump. The immersion pump set (22.9290.00) is needed if you want to connect a separate storage container for measuring liquid to the wet dispersion unit. -
Page 37: Cleaning
Cleaning Cleaning 8.1 Cleaning the devices DANGER! Mains voltage! – Before beginning with cleaning work, disconnect the mains plug and protect the device against being unintentionally switched back on! – Do not allow any liquids to flow into the device. –... -
Page 38: Cleaning The Wet Measuring Cell
Cleaning 8.3 Cleaning the wet measuring cell The measuring cell glasses do not need to be removed for cleaning. A disassembly is only necessary for an exchange or if there is heavy soiling. Ä Chapter 9.2 ‘Removing the measuring cell glasses’ on page 45 Use the cloths included in the service kit for cleaning the measuring cell glasses. -
Page 39: Removal Of The Wet Measuring Cell
Cleaning 8.3.2 Removal of the wet measuring cell In order to disassemble the measuring cell you need to take it out of the measuring unit. For this, proceed as follows: Turn the latch of the measuring cell drawer by 180°. The meas- uring cell is released automatically. -
Page 40: Design Of Wet Measuring Cell
Cleaning 8.3.3 Design of wet measuring cell Torx vertical screws M3x4, front Base body, wet measuring cell Cover wet measuring cell glass, front Measuring cell drawer Wet measuring cell glass, front O-ring 47 x 1.5 made of Viton O-ring 47 x 1.5 made of Viton 10 Wet measuring cell glass, back Locking plate 11 Cover wet measuring cell glass, back... -
Page 41: Removing The Wet Measuring Cell
Cleaning 8.3.4 Removing the wet measuring cell Once the measuring circuit is completely drained, it is possible that some liquid residues remain in the measuring cell itself. As a precaution use a paper towel or similar to immediately collect liquid flowing out. Loosen the eccentric tensioner. -
Page 42: Cleaning The Measuring Cell Glasses
Cleaning 8.3.5 Cleaning the measuring cell glasses The measuring cell glasses are made of sapphire glass. The glasses have an anti-reflective coating on the outside which is very soft. A scratch in the anti-reflective coating has the same effect as a scratch in the glass and can affect the measurement. -
Page 43: Sealing Rings
Cleaning 8.3.7 Sealing rings Rinse the seal rings under particle-free, running water and then dry them with lint-free soft tissue. 8.3.8 Mounting the wet measuring cell Once you have cleaned the parts, you have to re-install the measuring cell. To assemble the measuring cell, follow the same steps in reverse order: Insert the flow plate. -
Page 44: Maintenance
Maintenance Maintenance DANGER! Mains voltage – Before beginning with maintenance work, unplug the mains plug and protect the device against being unintentionally switched back on again! – Indicate maintenance work with warning signs. – Maintenance work may only be performed by spe- cialised personnel. -
Page 45: Replacing Hoses In Wet Dispersion Units
Maintenance 9.1 Replacing hoses in wet dispersion units Before replacing the hoses, the measuring liquid needs to be drained from the system. To do this, empty the system as described in Ä Chapter 8.3.1 ‘Emptying the system’ on page 38. To loosen the hoses, screw off the clamping thread and remove it from the hose. - Page 46 Maintenance On the opposite side, rotate the red twist lock now by 180°. Fold the locking plate open and remove it. Take out the flow plate now. Loosen the 4 Torx screws on the locking plate. Remove the mounting plate. The front measuring cell glass can now be pressed out in the direc- tion of the mounting plate.
-
Page 47: Disposal
FRITSCH declares it is prepared to take back used FRITSCH devices for recycling or disposal free of charge whenever a new device is purchased. The used FRITSCH device must be delivered free of charge to a FRITSCH establishment. In all other cases FRITSCH takes back used FRITSCH devices for recycling or disposal only against payment. -
Page 48: Guarantee Terms
Guarantee terms Guarantee period As manufacturer, FRITSCH GmbH provides – above and beyond any guar- antee claims against the seller – a guaranty valid for the duration of two years from the date of issue of the guarantee certificate supplied with the device. - Page 49 Any servicing done by persons not authorised by us and any use of parts that are not original FRITSCH accessories and spare parts will void the guar- antee.
-
Page 50: Exclusion Of Liability
FRITSCH GMBH distributor or Fritsch GmbH, Industriestr. 8, D-55743 Idar-Oberstein. FRITSCH GMBH takes the greatest care to ensure that the quality, relia- bility and safety of your products are continuously improved and adapted to the state of the art. The supplied products as well as this operating manual conform to the current state of the art when they leave the sphere of influence of FRITSCH GMBH. - Page 51 Exclusion of liability Fritsch GmbH excludes any liability, warranty, or other obligation to com- pensate for damages, regardless of whether this liability, warranty, or other obligation is explicit or implicit, contractual or arising from unlawful acts or prescribed contractually, by law, or otherwise. In no...
-
Page 52: Safety Logbook
Safety logbook Safety logbook Date Maintenance / Repair Name Signature - 52 -... -
Page 53: Index
Measuring ranges ..... . 14 Fritsch test powder Operating noise level ....13 Measuring F500 . - Page 54 Index Warning information ..... . . 7 WEEE ....... . . 47 Wet dispersion unit Connections .
- Page 56 © 2020 Fritsch GmbH Milling and Sizing Industriestraße 8 D - 55743 Idar-Oberstein Telephone: +49 (0) 6784/ 70-0 Fax: +49 (0) 6784/ 70-11 Email: info@fritsch.de Internet: www.fritsch-sizing.de...
Need help?
Do you have a question about the ANALYSETTE 22 NeXT and is the answer not in the manual?
Questions and answers