
Related Manuals for Dahua H1


Summary of Contents for Dahua H1
- Page 1 Wireless Alarm Hub Quick Start Guide V1.0.0 ZHEJIANG DAHUA VISION TECHNOLOGY CO., LTD.
-
Page 2: Cybersecurity Recommendations
Cybersecurity Recommendations Mandatory actions to be taken towards cybersecurity 1. Change Passwords and Use Strong Passwords: The number one reason systems get “hacked” is due to having weak or default passwords. It is recommended to change default passwords immediately and choose a strong password whenever possible. - Page 3 In the event that your social media, bank, email, etc. account is compromised, you would not want someone collecting those passwords and trying them out on your video surveillance system. Using a different username and password for your security system will make it more difficult for someone to guess their way into your system.
-
Page 4: Foreword
Foreword General This Guide introduces the functions, installation wirings and operations of the wireless alarm hub. Models H1、H1G、H1F、ARC2000E-SW-imou、G2、DHI-ARC2000E-SW、ARC2000E-SW、 ARC2000E-SW-LC Safety Instructions The following categorized signal words with defined meaning might appear in the Guide. Signal Words Meaning Indicates a high potential hazard which, if not avoided, will result in DANGER death or serious injury. - Page 5 FCC Supplier’s Declaration of Conformity , Alarm Hub / H1G H1, H1F, ARC2000E-SW-imou, G2, DHI-ARC2000E-SW, ARC2000E-SW, ARC2000E-SW-LC This device complies with part 15 of the FCC Rules. Operation is subject to the following two conditions: (1) This device may not cause harmful interference, and (2) this device must accept any interference received, including interference that may cause undesired operation.
- Page 6 All the designs and software are subject to change without prior written notice. The product ⚫ updates might cause some differences between the actual product and the Guide. Please contact the customer service for the latest program and supplementary documentation. There still might be deviation in technical data, functions and operations description, or ⚫...
-
Page 7: Important Safeguards And Warnings
Important Safeguards and Warnings The following description is the correct application method of the device. Please read the Guide carefully before use, in order to prevent danger and property loss. Strictly conform to the Guide during application and keep it properly after reading. Operating Requirement Do not place and install the device in an area exposed to direct sunlight or near heat ⚫... -
Page 8: Table Of Contents
Table of Contents Cybersecurity Recommendations ......................II Foreword ..............................IV Important Safeguards and Warnings ....................VII 1 Overview .............................. 9 Profile ............................9 Feature ............................9 Structure ............................9 Dimension ........................... 10 2 Installation ............................12 Installation Dimension ......................... 12 Installation Procedure ......................... -
Page 9: Overview
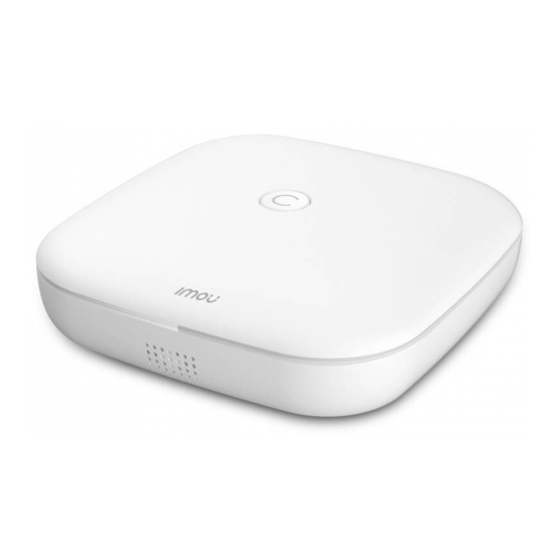
Overview Profile Able to connect alarm devices, this alarm hub can communicate with the alarm devices through network, and report alarm information. It supports 2G/4G, Wi-Fi, and wired network. This hub adapts to residences and shops with high security demands, so users manage numerous alarm devices conveniently, and obtain reliable security service. -
Page 10: Dimension
With SIM card slot, the device goes online. SIM card slot Basic version H1 does not have SIM card slot. Power port 5V power port. Network port Connect wired network. - Page 11 Device dimension (2) (unit: mm) Error! Use the Home tab to apply 标题 1 to the text that you want to app ear here. 11...
-
Page 12: Installation
Fix the bracket with self-tapping screws. After installation, insert SIM card or network cable, connect power supply and turn on hub switch, to configure and use the hub conveniently in the future. However, H1 model does not support SIM card. - Page 13 Installation with screws To ensure normal network connection, insert SIM card before power-on. Error! Use the Home tab to apply 标题 1 to the text that you want to app ear here. 13...
-
Page 14: Operation
Operation You can download Imou APP, add the alarm hub, configure network, pair with accessories, arm and delete the accessories. Downloading APP You can search Imou client in APP market, download and login APP. Alternatively, you can scan the QR code as below to download the APP. See Figure 3-1. QR code Android users, please go to Android APP market to search and download Imou. - Page 15 Login Enter your mailbox and password, and then tap Login. The Device interface is displayed. See Figure 3-3. Tap Sign up if you have not signed up yet. Device Error! Use the Home tab to apply 标题 1 to the text that you want to app ear here.
- Page 16 On the Device interface, tap in the upper right corner. The Device adding interface is displayed. See Figure 3-4. Remove the bracket, and then scan QR code at the bottom of the hub. Device adding (QR code) (Optional) Or tap Serial number adding if you fail to scan QR code. The serial number scanning interface is displayed.
- Page 17 Device adding (serial number) Enter serial number of the device, select the device in the category of alarm station, and then tap Next. On the APP interface, tap Next. Enter the device password on the pop-up interface. See Figure 3-6. Enter the device password Error! Use the Home tab to apply 标题...
- Page 18 On the APP interface, tap Next. The hub is connecting with cloud. See Figure 3-7. Connect cloud Then, the hub prompts that it is connected with router successfully. The device is added successfully. On this interface, you can name your device, configure time zone and DST.
-
Page 19: Adding Alarm Hub Through Wi-Fi
Add successfully 3.2.2 Adding Alarm Hub through Wi-Fi Tap App icon on your mobile phone, and start the App. The Login interface is displayed. See Figure 3-9. Error! Use the Home tab to apply 标题 1 to the text that you want to app ear here. - Page 20 Login Enter your mailbox and password, and then tap Login. The Device interface is displayed. See Figure 3-10. Tap Sign up if you have not signed up yet. Device Error! Use the Home tab to apply 标题 1 to the text that you want to app ear here.
- Page 21 On the Device interface, tap in the upper right corner. The Device adding interface is displayed. See Figure 3-11. Remove the bracket, and then scan QR code at the bottom of the hub. Device adding (QR code) (Optional) Or tap Serial number adding if you fail to scan QR code. The serial number scanning interface is displayed.
- Page 22 Device adding (serial number) Enter serial number of the device, select the device in the category of alarm station, and then tap Next. Press and hold the function key on the top of the hub for more than 5 seconds, until the indicator light flashes blue, then the device will enter AP configuration mode.
- Page 23 Enable WLAN on your mobile phone, tap hub hotspot (Hotspot Wi-Fi name is AlarmHub-hub serial number), and then tap Connect on the pop-up interface. See Figure 3-14. Connect The hotspot is connected successfully. See Figure 3-15. Connect successfully Error! Use the Home tab to apply 标题 1 to the text that you want to app ear here.
- Page 24 Go through Step 1 to Step 6 in 3.2.1 Adding Alarm Hub through Wired Network. On the APP interface, tap Next. Enter the device password on the pop-up interface. See Figure 3-16. Enter the device password On the APP interface, tap Next. Select Wi-Fi network, and enter Wi-Fi password according to interface prompts.
- Page 25 Select Wi-Fi Enter Wi-Fi password On the APP interface, tap Next. The hub is connecting with cloud. See Figure 3-19. Error! Use the Home tab to apply 标题 1 to the text that you want to app ear here. 25...
- Page 26 Connect cloud Then, the hub prompts that it is connected with router successfully. The device is added successfully. On this interface, you can name your device, configure time zone and DST. See Figure 3-20. Add successfully Tap Complete, and the hub is added to the device list. Error! Use the Home tab to apply 标题...
-
Page 27: Pairing With Accessories
Table 3-1 Icon description Icon Description Tap to enable or disable DND mode. Alarm notification will no longer be received after DND mode is enabled. Tap to add more devices. Wi-Fi intensity. Battery status. : The battery is fully charged. : The battery has a lot of electricity. - Page 28 Select hub Tap Next. According to the interface prompts, insert one battery into battery compartment of door contact, and ensure its electrodes are correct. See Figure 3-22. Insert battery Follow the operation instruction. See Figure 3-23. Error! Use the Home tab to apply 标题 1 to the text that you want to app ear here.
- Page 29 Operation Tick the confirmation that “Related operations have been completed”, and then tap Next. The pairing process is going on. See Figure 3-24. Pairing process After several seconds, the door contact is added successfully. See Figure 3-25. You can name your device on the interface. Error! Use the Home tab to apply 标题...
-
Page 30: Arming The Door Contact
Add successfully Tap Complete. Arming the Door Contact After the door contact is added to arming mode, an alarm will be triggered only in armed status. Tap App icon on your mobile phone, and start the App. The Device interface is displayed. See Figure 3-26. Error! Use the Home tab to apply 标题... - Page 31 Added Device Accessory list is displayed. See Figure 3-27. Accessory Table 3-2 Opening status description Icon Description Error! Use the Home tab to apply 标题 1 to the text that you want to app ear here. 31...
- Page 32 Icon Description The door is open. The door is closed. Offline and unknown status. Query error. Tap Mode Switch on the interface. Switch the mode according to your needs. See Figure 3-28, Figure 3-29 and Figure 3-30. Home mode Error! Use the Home tab to apply 标题 1 to the text that you want to app ear here.
- Page 33 Away mode Disarm mode (Optional) Tap Settings in Figure 3-28 home mode. Home mode setting interface is displayed. See Figure 3-31. Error! Use the Home tab to apply 标题 1 to the text that you want to app ear here. 33...
- Page 34 Home mode setting The accessory is disarmed by default in home mode. Tap to arm the accessory. (Optional) Tap Settings in Figure 3-29 away mode. Away mode setting interface is displayed. See Figure 3-32. Away mode setting Error! Use the Home tab to apply 标题 1 to the text that you want to app ear here.
-
Page 35: Configuration Details
The accessory is armed by default in away mode. Tap to disarm the accessory. (Optional) Tap to disarm all accessories, except 24H alarm devices, such as flood detector and so on. Configuration Details 3.5.1 Device Details Tap App icon on your mobile phone, and start the App. The Device interface is displayed. - Page 36 Accessory In case of alarm, you can tap Ignore Sound to stop the alarm sound. in the upper right corner. Device Details interface is displayed. See Figure 3-35. Device details Error! Use the Home tab to apply 标题 1 to the text that you want to app ear here.
-
Page 37: Accessory Details
Table 3-4 Description Parameter Description Device Program Version Show the device program version. Gateway Mode Setting Tap to switch mode. Refer to “3.4 Arming the Door Contact”. Power Supply Mode It includes external power and battery. Battery Level Show remaining electricity of the battery. Volume You can configure volume to be Loud, Low and Mute. -
Page 38: Configuring Network
Device details Table 3-5 Description Parameter Description Device Program Version Show the device program version. Signal Intensity Show the signal intensity. If tamper-proof cover is enabled, the hub gives an alarm when Tamper-proof Cover the tamper-proof cover is moved. If door detector is enabled, the hub gives an alarm when the Door Detector door detector is opened. - Page 39 If there is wired network, and the router distributes IP automatically, the hub gets IP ⚫ automatically and uses wired network. If there is no wired network and there is Wi-Fi, the hub uses Wi-Fi. ⚫ If there is no wired network and Wi-Fi, and 2G/4G card is inserted into the hub, the hub ⚫...
- Page 40 Device details Tap Network Config. The Wi-Fi config interface is displayed. See Figure 3-39. Wi-Fi config On the APP interface, tap Next. Enter the device password on the pop-up interface. See Figure 3-40. Error! Use the Home tab to apply 标题 1 to the text that you want to app ear here.
-
Page 41: Deleting The Door Contact
Wi-Fi config—Enter device password After entering password, tap Next. Select Wi-Fi network, and enter Wi-Fi password according to interface prompts. Deleting the Door Contact Method 1: In APP, check accessory details and delete according to prompts. ⚫ Method 2: Press RESET key for 6s when the power is on, restart the hub and restore ⚫... -
Page 42: Faq
1. Wireless alarm hub cannot be booted normally. Solution: Check input power of the hub (including adapter and USB cable). 2. Accessory pairing fails. Solution: Check if electric amount of accessory battery is sufficient. ⚫ Check if the accessory has connected with other hubs. If so, clear configuration and try ⚫... -
Page 43: Technical Parameters
Dimension 125 × 125 × 37.9 mm Net Weight of Whole Device 0.25 Kg Installation Wall-mounted ZHEJIANG DAHUA VISION TECHNOLOGY CO., LTD. Address: No.1199, Bin'an Road, Binjiang District, Hangzhou, P.R. China Postcode: 310053 Tel: +86-571-87688883 Fax: +86-571-87688815 Email: overseas@dahuatech.com Website: www.dahuasecurity.com...
Need help?
Do you have a question about the H1 and is the answer not in the manual?
Questions and answers