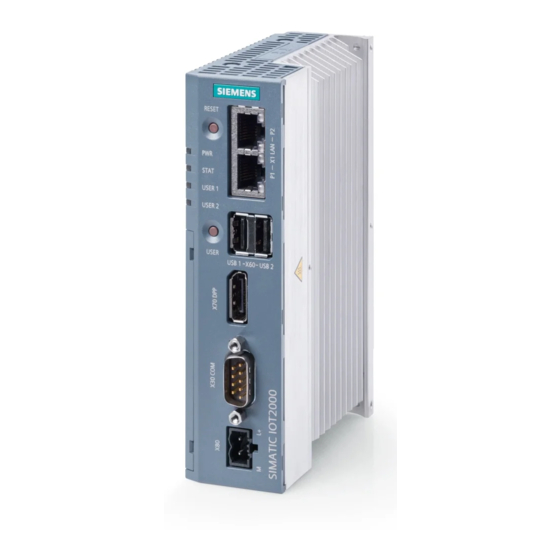
Siemens SIMATIC IOT2050 Starterkit Product Information
Hide thumbs
Also See for SIMATIC IOT2050 Starterkit:
- Operating instructions manual (71 pages) ,
- Quick install manual (2 pages) ,
- Operating instructions manual (133 pages)
Table of Contents
Advertisement
Advertisement
Table of Contents

Related Manuals for Siemens SIMATIC IOT2050 Starterkit


Summary of Contents for Siemens SIMATIC IOT2050 Starterkit
- Page 1 SIMATIC IOT2050 Starterkit Package list Preparing for installation Mounting the device Connecting the device SIMATIC IOT2050 Starterkit Installing the IOT2000 Input/Output Module Insert Micro SD card Product Information 06/2021 A5E50831253-AA...
- Page 2 Note the following: WARNING Siemens products may only be used for the applications described in the catalog and in the relevant technical documentation. If products and components from other manufacturers are used, these must be recommended or approved by Siemens. Proper transport, storage, installation, assembly, commissioning, operation and maintenance are required to ensure that the products operate safely and without any problems.
-
Page 3: Table Of Contents
Notes on connecting ......................16 Connecting the function earth ................... 17 Connecting the power supply ..................... 19 Installing the IOT2000 Input/Output Module ..................20 Insert Micro SD card ..........................23 Index ..............................24 SIMATIC IOT2050 Starterkit Product Information, 06/2021, A5E50831253-AA... -
Page 4: Package List
Package list SIMATIC IOT2050 Starterkit Product Information, 06/2021, A5E50831253-AA... - Page 5 Printed paper OSS Readme Printed paper Important notes on your Printed paper device Note: Additional information on the software topics, commissioning and Micro SD image is available in the SIMATIC IOT2000 Forum (http://www.siemens.com/automation/forum). SIMATIC IOT2050 Starterkit Product Information, 06/2021, A5E50831253-AA...
-
Page 6: Preparing For Installation
4. Check the contents of the packaging and any accessories you may have ordered for completeness and damage. – Device – DC connecting terminal, already plugged into the device. – One mounting accessory kit including: 1 x Rail clamp, 2 x mounting brackets and screws. SIMATIC IOT2050 Starterkit Product Information, 06/2021, A5E50831253-AA... - Page 7 6. Keep the enclosed documentation in a safe place. You need the documentation when you commission the device for the first time. 7. Write down the identification data of the device. SIMATIC IOT2050 Starterkit Product Information, 06/2021, A5E50831253-AA...
-
Page 8: Identification Data Of The Device
All existing Ethernet ad- dresses (MAC) Permitted mounting positions and mounting types The device can be mounted horizontally or vertically on a DIN rail or to a wall. Vertical mounting position, preferred Horizontal mounting position SIMATIC IOT2050 Starterkit Product Information, 06/2021, A5E50831253-AA... - Page 9 Ensure that the following clearances measurements to another component or to a wall of a housing are complied with: • Below the device: ≥ 50 mm • Above the device: ≥ 50 mm SIMATIC IOT2050 Starterkit Product Information, 06/2021, A5E50831253-AA...
-
Page 10: Mounting The Device
• When the device is used in the area of Industrial Control Equipment in accordance with UL61010-2-201, note that the device is classified as "Open equipment". • Siemens recommends you use 0.6 Nm tightening torque to install the mounting clamps and brackets. -
Page 11: Mounting On Din Rails
• Two screws • T8 screwdriver Secure the mounting clips for vertical mounting 1. Lay the rail clamp on the rear of the device. 2. Fasten the rail clamp with the supplied screws. SIMATIC IOT2050 Starterkit Product Information, 06/2021, A5E50831253-AA... - Page 12 2. Fasten the rail clamp with the two supplied screws. 3. Lay the brackets on the rear of the device. Align the bracket edge with the device edge. 4. Fasten the brackets with the supplied screws. SIMATIC IOT2050 Starterkit Product Information, 06/2021, A5E50831253-AA...
-
Page 13: Mounting On Din Rails
Vertical Horizontal Removing 1. Push down the device until it is released by the rail clamp. 2. Swing the device out of the standard profile rail. 3. Lift the device up and off. SIMATIC IOT2050 Starterkit Product Information, 06/2021, A5E50831253-AA... -
Page 14: Wall Mounting
1. Lay the mounting brackets on the rear of the device. 2. Fasten the brackets with supplied screws. 3. Mark the bore holes, drill the required holes in the wall and fasten the device to the wall using two screws. SIMATIC IOT2050 Starterkit Product Information, 06/2021, A5E50831253-AA... -
Page 15: Horizontal Wall Mounting
1. Lay the mounting brackets on the rear of the device. 2. Fasten the brackets with supplied screws. 3. Mark the bore holes, drill the required holes in the wall and fasten the device to the wall using two screws. SIMATIC IOT2050 Starterkit Product Information, 06/2021, A5E50831253-AA... -
Page 16: Connecting The Device
• Only connect I/O devices which are approved for industrial applications in accordance with EN 61000-6-2 and IEC 61000-6-2. • I/O devices that are not hotplug-capable may only be connected after the device has been disconnected from the power supply. SIMATIC IOT2050 Starterkit Product Information, 06/2021, A5E50831253-AA... -
Page 17: Connecting The Function Earth
• Never operate the device without function earth. • If a device is defective, remove it from operation without delay and label it accordingly. SIMATIC IOT2050 Starterkit Product Information, 06/2021, A5E50831253-AA... - Page 18 M4 thread with the torque of 1 Nm (see part labeled). Connect the function earth to the protective conductor con- nection of the cabinet or the plant in which the device is in- stalled. SIMATIC IOT2050 Starterkit Product Information, 06/2021, A5E50831253-AA...
-
Page 19: Connecting The Power Supply
• A slotted screwdriver with a 3 mm blade. Procedure 1. Switch off the power supply. 2. Connect the power cable and the adapter. 3. Connect the connecting terminal to the connection for the power supply. SIMATIC IOT2050 Starterkit Product Information, 06/2021, A5E50831253-AA... -
Page 20: Installing The Iot2000 Input/Output Module
• Always pull out the power plug when you are not using the device or if the device is defective. The power plug must be freely accessible. • Use a central power isolating switch for cabinet installation. SIMATIC IOT2050 Starterkit Product Information, 06/2021, A5E50831253-AA... - Page 21 2. Remove the shield cover. 3. Insert the mounting clamp into the marked boreholes on the motherboard shown below. Note: Insert the marked side of the mounting clamp into the motherboard. SIMATIC IOT2050 Starterkit Product Information, 06/2021, A5E50831253-AA...
- Page 22 Installing the IOT2000 Input/Output Module 4. Install the Input/Output module on the motherboard. 5. Install the Input/Output module cover to the IOT2050. SIMATIC IOT2050 Starterkit Product Information, 06/2021, A5E50831253-AA...
-
Page 23: Insert Micro Sd Card
2. Push the Micro SD card correctly into the supporting frame. The contacts of the Micro SD card must point in the direction of the motherboard. 3. Push the card cover back. SIMATIC IOT2050 Starterkit Product Information, 06/2021, A5E50831253-AA... -
Page 24: Index
Installation on a DIN rail, 8 Micro SD card, 23 Mounting Wall, 1415 Mounting position, 8 Mounting type, 8 Package contents, 6 Checking, 6 Packaging, 6 Checking, 6 Removing, 6 Power supply Connecting, 19 Rating plate, 8 SIMATIC IOT2050 Starterkit Product Information, 06/2021, A5E50831253-AA... - Page 25 Index SIMATIC IOT2050 Starterkit Product Information, 06/2021, A5E50831253-AA...
Need help?
Do you have a question about the SIMATIC IOT2050 Starterkit and is the answer not in the manual?
Questions and answers