AEG BSK782320M User Manual
Hide thumbs
Also See for BSK782320M:
- User manual (56 pages) ,
- User manual (56 pages) ,
- User manual (56 pages)
Table of Contents
Advertisement
Quick Links
Advertisement
Table of Contents

Related Manuals for AEG BSK782320M


Summary of Contents for AEG BSK782320M
- Page 1 BSK782320M User Manual Steam oven USER MANUAL...
-
Page 2: Table Of Contents
FOR PERFECT RESULTS Thank you for choosing this AEG product. We have created it to give you impeccable performance for many years, with innovative technologies that help make life simpler – features you might not find on ordinary appliances. Please spend a few minutes reading to get the very best from it. -
Page 3: Safety Information
SAFETY INFORMATION Before the installation and use of the appliance, carefully read the supplied instructions. The manufacturer is not responsible for any injuries or damage that are the result of incorrect installation or usage. Always keep the instructions in a safe and accessible location for future reference. -
Page 4: Safety Instructions
Disconnect the appliance from the power supply before • carrying out any maintenance. If the mains power supply cable is damaged, it must be • replaced by the manufacturer, its Authorised Service Centre or similarly qualified persons to avoid an electrical hazard. The means for disconnection must be incorporated in the •... - Page 5 • Connect the mains plug to the mains socket only at the end of the installation. Cabinet width 560 mm Make sure that there is access to the Cabinet depth 550 (550) mm mains plug after the installation. • If the mains socket is loose, do not Height of the front of the 594 mm connect the mains plug.
- Page 6 • Clean regularly the appliance to prevent WARNING! the deterioration of the surface material. Risk of damage to the appliance. • Clean the appliance with a moist soft cloth. Use only neutral detergents. Do not • To prevent damage or discoloration to the use abrasive products, abrasive cleaning enamel: pads, solvents or metal objects.
-
Page 7: Product Description
• Contact your municipal authority for • Remove the door catch to prevent information on how to dispose of the children or pets from becoming trapped in appliance. the appliance. • Disconnect the appliance from the mains supply. • Cut off the mains electrical cable close to the appliance and dispose of it. -
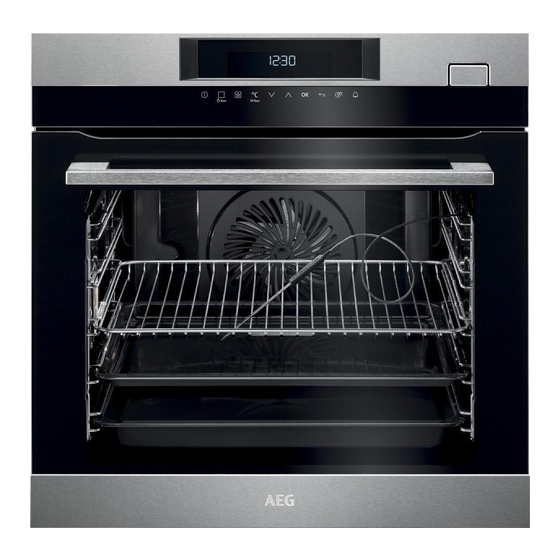
Page 8: Control Panel
To insert and remove trays and wireshelf Trivet more easily. Steam set For roasting and grilling. Use the trivet only with the Grill- / Roasting pan. One unperforated and one perforated food container. Food Sensor The steam set drains the condensing water away from the food during steam cooking. - Page 9 Use the sensor fields to operate the appliance. Sensor Function Comment field Display Shows the current settings of the oven. ON / OFF To turn the oven on and off. Heating Functions or Press the sensor field once to choose a heating function or the VarioGuide menu: VarioGuide.
-
Page 10: Before First Use
Other indicators of the display: Symbol Function Minute Minder The function works. Time of day The display shows the current time. Duration The display shows the necessary time for cook‐ ing. End Time The display shows when the cooking time is complete. - Page 11 5.3 Initial preheating Preheat the empty oven before the first use. Step 1 Remove all accessories and removable shelf supports from the oven. Step 2 Set the maximum temperature for the function: Let the oven operate for 1 h. Step 3 Set the maximum temperature for the function: Let the oven operate for 15 min.
-
Page 12: Daily Use
6. DAILY USE WARNING! Symbol / Menu Description Refer to Safety chapters. item 6.1 Navigating the menus When ON, the function de‐ creases the heat-up time. Fast Heat Up 1. Turn on the oven. 2. Press to select the menu To set a function and acti‐... - Page 13 6.3 Submenu for: Cleaning Symbol Menu item Description Tank Emptying Procedure for removing the residual water from the water drawer after use of the steam functions. Steam Cleaning Plus Procedure for cleaning stubborn dirt with the support of an oven cleaner. Steam Cleaning Procedure for cleaning the appliance when it is slightly soiled and not burned several times.
- Page 14 6.5 Specials 6.6 VarioGuide Food Category: Fish / Seafood Heating function Application Dish To keep food warm. Fish Fish, baked Fish fingers Keep Warm Fish fillet, thin To preheat plates for serv‐ ing. Fish fillet, thick Plate Warming Fish fillet, frozen To preserve vegetables Whole small fish (e.g., pickles).
- Page 15 Dish Dish Veal knuckle Whole turkey Loin of veal Veal Food Category: Meat Roast veal Dish Leg of lamb Prime boiled beef Roast lamb Beef Braised meat Lamb Saddle of lamb Meatloaf Lamb joint, medium Rare Lamb joint, medium Rare Hare Medium •...
- Page 16 Food Category: Pizza / Quiche Dish Dish Sponge dough Pizza, thin Cake on tray Yeast dough Pizza, extra topping Cheese cake, tray Pizza, frozen Pizza Brownies Pizza American, frozen Swiss roll Pizza, chilled Yeast cake Pizza snacks, frozen Crumble cake Baguettes au gratin Sugar cake Tarte flambée...
- Page 17 Food Category: Side dishes Dish Dish Broccoli, whole French fries, thin Cauliflower, florets French fries, thick Cauliflower, whole French fries, frozen Carrots Croquettes Courgette slices Wedges Asparagus, green Hash browns Asparagus, white Boiled potatoes, quar‐ tered Pepper strips Boiled potatoes Spinach, fresh Potatoes in their jacket Leek rings...
-
Page 18: Clock Functions
Refer to the cleaning function: Tank WARNING! Emptying. Use only cold tap water. Do not use filtered (demineralised) or CAUTION! distilled water. Do not use other The oven is hot. There is a liquids. Do not put flammable or risk of burns. alcoholic liquids into the water 9. -
Page 19: Automatic Programmes
• The set temperature is more than 80 °C. • The function: Duration is set. Clock function Application The function: Heat + Hold keeps prepared To set the switch-off time for a food warm at 80 °C for 30 minutes. It turns heating function (max. -
Page 20: Using The Accessories
9. USING THE ACCESSORIES WARNING! Refer to Safety chapters. 9.1 Food Sensor Food sensor measures temperature inside the food. When the food is at the set temperature, the oven turns off. There are two temperatures to be set: • the oven temperature (minimum 120 °C), •... - Page 21 The display shows the food sensor symbol. Food category: casserole 6. Press in less than 5 seconds 1. Activate the appliance. to set the food core temperature. 2. Place half of the ingredients in a baking 7. Set a heating function and, if necessary, dish.
- Page 22 Wireshelf: Push the shelf between the guide bars of the shelf support. Baking tray / Deep pan: Push the tray between the guide bars of the shelf support. Wireshelf, Baking tray / Deep pan: Push the tray between the guide bars of the shelf support and the wire shelf on the guide bars above.
-
Page 23: Additional Functions
Deep pan: Put the deep pan on the telescopic runners. Wire shelf and deep pan together: Place the wire shelf and the deep pan together on the telescopic runner. 9.4 Trivet and Grill- / Roasting pan Step 1 Put the trivet into a deep pan. Step 2 Put the deep pan on the recommended shelf position. - Page 24 4. Press to confirm. To turn off the function, press . The display The display shows the first free memory shows a message. Press again and then position. to confirm. 5. Press to confirm. 6. Enter the name of the programme. When you turn off the oven, the The first letter flashes.
-
Page 25: Hints And Tips
10.6 Brightness of the display 10.7 Cooling fan There are two modes of display brightness: When the oven operates, the cooling fan turns on automatically to keep the surfaces of the oven cool. If you turn off the oven, the Day brightness Night brightness cooling fan can continue to operate until the... - Page 26 Use the second shelf position. Defrost Remove the food packaging and put the food VEGETABLES on a plate. Do not cover the food, as it can extend the defrosting time. Use the first shelf position. Set the temperature to 99 °C. 11.4 Full Steam Be careful when you open the oven door when the function is on.
- Page 27 VEGETABLES SIDE DISHES / ACCOMPANIMENTS Set the temperature to 99 °C. Set the temperature to 99 °C. (min) (min) 25 - 35 White haricot beans 35 - 45 Bread dumpling 30 - 40 Sweet corn on the cob 35 - 45 Potato dumplings 35 - 45 Black salsify...
- Page 28 FISH MEAT (min) (°C) (min) (°C) 20 - 30 Mussels 110 - Tafelspitz 20 - 30 Salmon fillets 20 - 30 Trout, 0.25 kg 30 - 40 Prawns, frozen 75 - 85 EGGS 40 - 45 Salmon trout, 1 kg Set the temperature to 99 °C.
- Page 29 Turbo Grilling Full Steam First step: cook meat Second step: add vegetables (°C) (min) (°C) (min) Roast beef, 1 kg / 60 - 70 40 - 50 Brussels sprouts, po‐ lenta Roast pork, 1 kg / 60 - 70 30 - 40 Potatoes / Vegeta‐...
- Page 30 You can extend the baking time by 10 – 15 minutes if you bake cakes on more than one shelf position. Cakes and pastries at different heights do not (°C) (min) always brown equally. There is no need to One-plate dishes 10 - 15 change the temperature setting if an unequal browning occurs.
- Page 31 BAKING IN TINS (°C) (min) Madeira cake / Fruit True Fan Cooking 140 - 160 70 - 90 cakes Flan base - short pastry, True Fan Cooking 150 - 160 20 - 30 preheat the empty oven Flan base - sponge cake True Fan Cooking 150 - 170 20 - 25...
- Page 32 BISCUITS Use the third shelf position. (°C) (min) Short pastry / Sponge cake True Fan Cooking 150 - 160 15 - 25 mixture Meringues True Fan Cooking 80 - 100 120 - 150 Macaroons True Fan Cooking 100 - 120 30 - 50 Yeast dough biscuits True Fan Cooking...
- Page 33 CAKES / PASTRIES / BREADS ON BISCUITS BAKING TRAYS (°C) (min) (°C) (min) Rolls 20 - 30 Cream puffs / Eclairs, preheat 160 - 25 - 45 the empty oven 11.14 Tips on Roasting Dry streusel cake 150 - 30 - 45 Use heat-resistant ovenware.
- Page 34 PORK Use the function: Turbo Grilling. (kg) (°C) (min) Shoulder / Neck / Ham joint 1 - 1.5 150 - 170 90 - 120 Chops / Spare rib 1 - 1.5 170 - 190 30 - 60 Meatloaf 0.75 - 1 160 - 170 50 - 60 Pork knuckle, precooked...
- Page 35 GAME (kg) (°C) (min) Saddle / Hare leg, Turbo Grilling 180 - 200 35 - 55 preheat the empty oven Venison saddle 1.5 - 2 Conventional Cook‐ 180 - 200 60 - 90 Haunch of venison 1.5 - 2 Conventional Cook‐ 180 - 200 60 - 90 POULTRY...
- Page 36 BREAD (°C) (min) White bread 170 - 190 40 - 60 Baguette 200 - 220 35 - 45 Brioche 180 - 200 40 - 60 Ciabatta 200 - 220 35 - 45 Rye bread 170 - 190 50 - 70 Wholemeal bread 170 - 190 50 - 70...
- Page 37 PIZZA Preheat the empty oven before cooking. Use the second shelf position. (°C) (min) Pizza, thin crust, use the deep pan 210 - 230 15 - 25 Pizza, thick crust 180 - 200 20 - 30 Unleavened bread 210 - 230 10 - 20 Puff pastry flan 160 - 180...
- Page 38 default is 90 °C. Set the temperature for 5. After 10 minutes, the oven automatically Food Sensor. lowers the temperature to 80 °C. Set the temperature to 120 °C. (kg) (min) Steaks 0.2 - 0.3 20 - 40 Fillet of beef 1 - 1.5 90 - 150 Roast beef...
- Page 39 11.22 Dehydrating - True Fan When the liquid in the jars starts to simmer (after approximately 35 - 60 minutes with Cooking one-litre jars), stop the oven or decrease the Cover trays with grease proof paper or temperature to 100 °C (see the table). baking parchment.
- Page 40 BEEF Food core temperature (°C) Less Medium More Meatloaf PORK Food core temperature (°C) Less Medium More Ham / Roast Saddle chop / Pork loin, smoked / Pork loin, poached VEAL Food core temperature (°C) Less Medium More Roast veal Veal knuckle MUTTON / LAMB Food core temperature (°C)
- Page 41 POULTRY Food core temperature (°C) Less Medium More Duck, breast FISH (SALMON, TROUT, Food core temperature (°C) ZANDER) Less Medium More Fish, whole / large / steamed / Fish, whole / large / roasted CASSEROLES - PRE‐ Food core temperature (°C) COOKED VEGETABLES Less Medium...
- Page 42 Ceramic Dark, non-reflective Dark, non-reflective Dark, non-reflective 8 cm diameter, 5 28 cm diameter 26 cm diameter 28 cm diameter cm height 11.25 Moist Fan Baking For the best results follow suggestions listed in the table below. Use the third shelf position. (°C) (min) Pasta gratin...
- Page 43 BAKING ON ONE LEVEL. Biscuits Use the third shelf position. (°C) (min) Short bread / Pastry strips True Fan Cooking 25 - 40 Short bread / Pastry strips, pre‐ Conventional Cooking 20 - 30 heat the empty oven Small cakes, 20 per tray, preheat True Fan Cooking 20 - 35 the empty oven...
-
Page 44: Care And Cleaning
11.27 Information for test institutes Tests according to IEC 60350. Tests for the function: Full Steam. Set the temperature to 99 °C. Container (kg) (min) (Gastronorm) Broccoli, preheat 1 x 2/3 perforated 0.3 13 - 15 Put the baking tray the empty oven on the first shelf position. - Page 45 Clean all accessories after each use and let them dry. Use a soft cloth with warm water and a mild detergent. Do not clean the accessories in a dishwasher. Do not clean the non-stick accessories using abrasive cleaner or sharp-edged objects. Accessories 12.2 How to remove: Shelf supports Remove the shelf supports to clean the oven.
- Page 46 When the cleaning ends: Turn off the oven. When the oven is cold, dry the cavity with Leave the oven door open and wait a soft cloth. until the cavity is dry. 12.4 Cleaning Reminder When the reminder appears, cleaning is recommended. Use the function: Steam Cleaning Plus.
- Page 47 Type Description Soft reminder Recommends you to descale the oven. Hard reminder Obligates you to descale the oven. If you do not descale the oven when the hard reminder is on, the steam functions are disabled. These reminders activate each time you turn off the oven. 12.7 How to use: Rinsing Before you start: Turn off the oven and wait until it is cold.
- Page 48 12.9 How to remove and install: CAUTION! Door Carefully handle the glass, especially around the edges of You can remove the door and the internal the front panel. The glass can glass panels to clean it. The number of glass break.
-
Page 49: Troubleshooting
Before you replace the lamp: Step 1 Step 2 Step 3 Turn off the oven. Wait until the Disconnect the oven from the Put a cloth on the bottom of the cav‐ oven is cold. mains. ity. Top lamp Step 1 Turn the glass cover to remove it. - Page 50 Problem Possible cause Remedy The oven does not heat up. The necessary settings are not set. Make sure that the settings are cor‐ rect. The oven does not heat up. The automatic switch-off is on. Refer to "Automatic switch-off". The oven does not heat up. The Child Lock is on.
-
Page 51: Energy Efficiency
......... 14. ENERGY EFFICIENCY 14.1 Product Information Sheet according to UK Ecodesign and Energy Labelling Regulations Supplier's name Model identification BSK782320M Energy Efficiency Index 81.0 Energy efficiency class Energy consumption with a standard load, conventional mode 1.09 kWh/cycle Energy consumption with a standard load, fan-forced mode 0.68 kWh/cycle... -
Page 52: Environmental Concerns
14.2 Energy saving The fan and lamp continue to operate. When you turn off the oven, the display shows the residual heat. You can use that heat to keep The oven has features which the food warm. help you save energy during everyday cooking. - Page 56 www.aeg.com/shop...
Need help?
Do you have a question about the BSK782320M and is the answer not in the manual?
Questions and answers