DeFelsko PosiTector SPG Instruction Manual
Surface profile gage
Hide thumbs
Also See for PosiTector SPG:
- Instruction manual (52 pages) ,
- Quick manual (38 pages) ,
- Manual (34 pages)

Subscribe to Our Youtube Channel
Related Manuals for DeFelsko PosiTector SPG


Summary of Contents for DeFelsko PosiTector SPG
- Page 1 Surface Profile Gage Instruction Manual GlobalTestSupply www. .com Find Quality Products Online at: sales@GlobalTestSupply.com...
-
Page 2: Quick Start
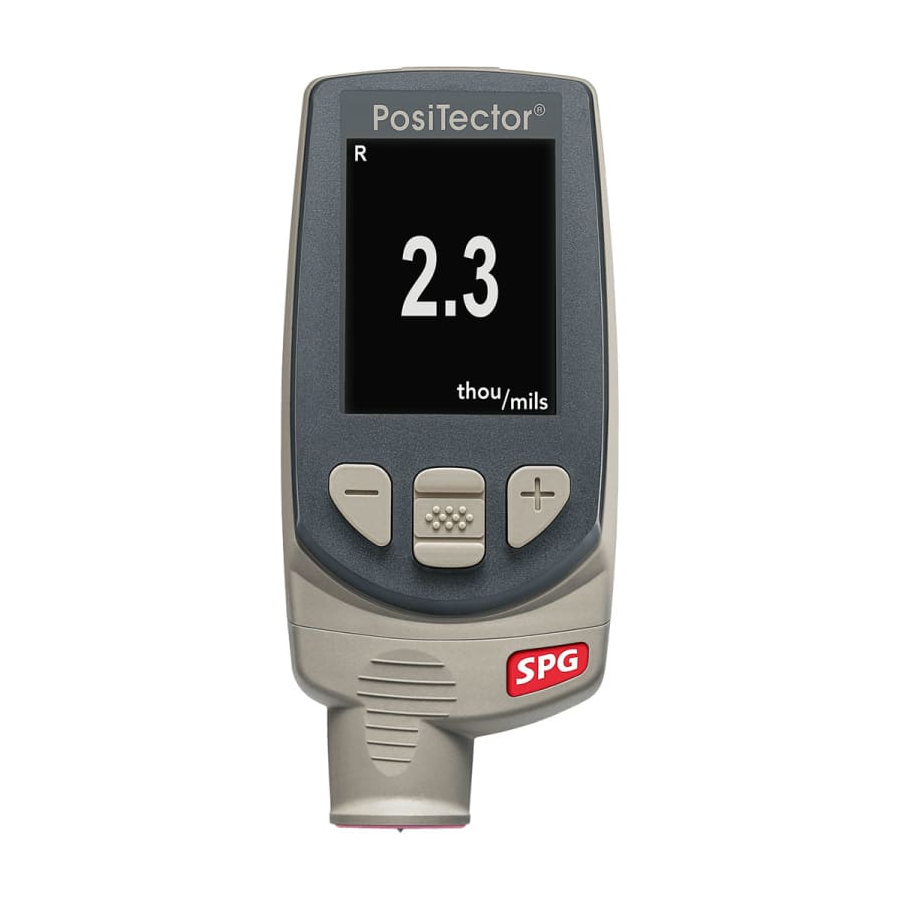
Introduction The PosiTector Surface Profile Gage (SPG) is a hand-held electronic instrument that measures the surface profile (peak-to- valley height) of blasted steel, textured coatings and concrete profile. It consists of a PosiTector body (Standard or Advanced) and probe. Quick Start Press the button to power up the Gage. - Page 3 It is not necessary to power- down the Gage when switching probes. PosiTector SPG and SPG S probes include a 60˚ (ASTM D 4417 B) or 30˚ (Australian Standard AS 3894.5) angle tip (50 µm/2 mil radius) with a measurement range of 0 to 500 µm (20 mils).
-
Page 4: Calibration & Verification Of Accuracy
Additionally, the PosiTector body accepts a wide variety of probe types including magnetic, eddy current, and ultrasonic coating thickness, surface profile, hardness, salt contamination, and ultrasonic wall thickness probes. Calibration & Verification of Accuracy Calibration Instrument calibration is typically performed by the manufacturer. All probes include a Certificate of Calibration. -
Page 5: Setup Menu
Zero Menu Zero The PosiTector SPG has only one adjustment point at zero. The zero point can be set using one of two methods. Both methods are found under the Zero menu option: Glass Plate Zero Zeroing on the included glass plate is the preferred method for best accuracy: 1. - Page 6 - The Zero adjustment is returned to the factory setting. - Menu settings are returned to the following: Memory = OFF Bluetooth & Stream = OFF Statistics = OFF WiFi & Access Point = OFF Hi Lo Alarm = OFF USB Keyboard & Stream = OFF Auto Dim = ON BLE Keyboard = OFF Display = None...
-
Page 7: Statistics Mode
Allows Gage to visibly and audibly alert the user when readings exceed user-specified limits. Memory Management The PosiTector SPG has internal memory storage for recording measurement data. Stored measurements can be reviewed on-screen or accessed via computers, tablets and smart phones. -
Page 8: Accessing Stored Measurement Data
(see PosiSoft USB Drive below). SmartBatch™ Allows the PosiTector SPG to comply with various standards and test methods published by organizations including ASTM, SSPC, ISO, IMO, US Navy, SANS and AS. -
Page 9: Connect Menu
share professional PDF reports. Add images and notes using the smart device’s camera and keyboard. Connect Menu WiFi (Advanced models only) Allows connection to your local wireless network or mobile hot spot. Ideal for using your network’s internet connection for synchronizing stored measurements with PosiSoft.net. When USB Drive is enabled , the PosiTector uses a USB mass storage device class which provides users with a simple... - Page 10 Sync .net Now The WiFi and USB menus contain a Sync .net Now option. When selected, the Gage immediately synchronizes stored measurement data via its respective communication method (internet connection required). Alternatively, select Auto Sync .net from within the USB connect menu to automatically synchronize upon connection to a PC.
- Page 11 Send Batches Transfers selected batches to the PosiTector App. Send Batches is useful when switching between devices, as only readings and batches that have yet to be synchronized with any smart device are synchronized automatically. The Send Batches option is visible in the menu when the Gage is connected to a smart device running the PosiTector App.
-
Page 12: Returning For Service
Returning for Service Before returning the Gage for service… 1. Install new or newly recharged batteries in the proper alignment as shown within battery compartment. 2. Examine the probe tip for dirt or damage. The probe tip should move up and down freely. The plate surrounding the probe tip should be smooth and free from burrs and foreign material.
Need help?
Do you have a question about the PosiTector SPG and is the answer not in the manual?
Questions and answers