Table of Contents
Advertisement
Advertisement
Table of Contents

Related Manuals for Husqvarna VIKING Amber Air S 600


Summary of Contents for Husqvarna VIKING Amber Air S 600
- Page 1 User’s Guide K E E P I N G T H E WO R L D S E W I N G ™...
- Page 2 IMPORTANT SAFETY INSTRUCTIONS Read all instructions before using this household sewing machine. When using an electrical appliance, basic safety precautions should always be followed, including the following: Keep the instructions at a suitable place close to the machine. Make sure to hand them over if the machine is given to a third party.
- Page 3 • Do not unplug by pulling on cord. To unplug, grasp the plug, not the cord. • The foot control is used to operate the machine. Never place other objects on the foot control. • Do not use the machine if it is wet. •...
-
Page 4: Table Of Contents
TABLE OF CONTENTS Introduction ..........6 Threading............. 23 Machine Overview ..........6 General Threading Information......23 Front and Side of Machine........ 6 What Needle and Thread to Use ....23 Inside of Machine ........... 7 Placing the Thread Spools on the Spool Needle Area ........... 8 Pins..............24 Accessories............8 Changing Thread ...........24... - Page 5 Stitch Length Adjustments ......53 Differential Feed Adjustment ......54 Thread Tension..........55 Correct Tension ..........55 Upper Looper Tension........55 Lower Looper Tension........55 Left Needle Tension ........55 Right Needle Tension ........55 Maintenance ..........56 Cleaning............56 Cleaning the Looper Area ....... 56 Cleaning the Looper Threading Pipes ....
-
Page 6: Introduction
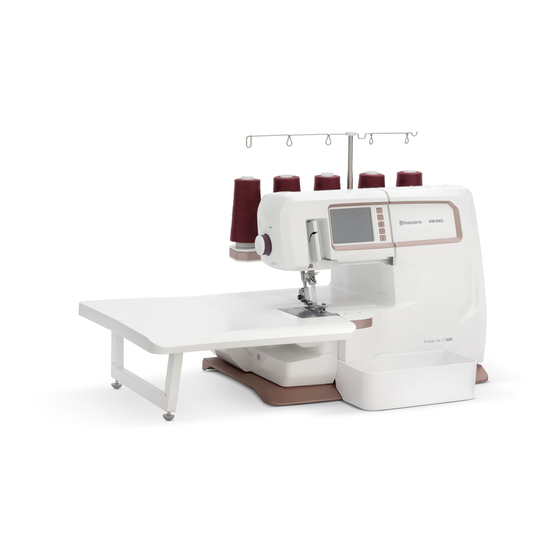
1 Introduction Machine Overview Front and Side of Machine 1. Telescopic thread stand 10. Presser foot 19. Settings button 2. Thread guides 11. Stitch plate 20. Delete button 3. Spool pin 12. Flat bed extension 21. Save stitch button 4. Spool stand 13. -
Page 7: Inside Of Machine
Inside of Machine 12 13 1. 2–thread converter 10. Threading/Sewing lever 18. On/Off switch 2. Upper looper 11. Upper looper position lever 19. Foot control socket 3. Lower looper 12. Storage for tweezers 20. Power cord socket 4. Chainstitch/Coverstitch looper 13. -
Page 8: Needle Area
Needle Area A. Left Overlock Needle B. Right Overlock Needle C. Left Coverstitch Needle D. Middle Coverstitch Needle/Chainstitch Needle E. Right Coverstitch Note: When using two needles, the left needle is positioned a little higher up than the right needle (they are not supposed to be level). When using three needles, such as when sewing a triple coverstitch, the center needle is a little higher up than the right needle, and the left needle is a little higher up that the center needle (they are not supposed to be... -
Page 9: Preparations
2 Preparations Connect Foot Control and Power Supply Among the accessories you will find the power cord and the foot control. Foot control to use with this machine: C-9000, manufactured by: CHIEN HUNG Connect the foot control cord to the front socket on the bottom right side of the machine (A). -
Page 10: Mount The Spool Stand
Mount the Spool Stand Insert the two pins of the spool stand (A) into the slots (B) at the back of the machine. Push the spool stand to the right to lock in place (C). Machine from above Mount the Telescopic Thread Stand Insert the telescopic thread guide into the socket on the thread stand (A). -
Page 11: Knee Lifter
Knee Lifter Your machine comes with a knee-lifter that allows you to lift the presser foot with your knee. This is very helpful when sewing, since it allows you to handle the fabric with your hands while your knee lifts the presser foot. Match the ribs on your knee-lifter with the notches in the knee-lifter socket (A). -
Page 12: Attach The Extension Table
Attach the Extension Table To use the extension table, remove the flat bed extension cover (see Flat Bed Extension / Free Arm). 1. Fold out the legs of the extension table. 2. Place the extension table around the free arm. Fit the pin (A) of the extension table into the corresponding hole on the machine. -
Page 13: Change The Presser Foot
Change the Presser Foot Turn off the main power switch and unplug the machine. Raise the presser foot. Turn the handwheel toward you until the needles are at the highest position. Push the red button (A) on the back of the presser foot ankle to release the presser foot. -
Page 14: Needle Information
Do not attempt to use a standard household sewing machine needle of any size or type in this overlock. Use HUSQVARNA® VIKING® needles EL x 705 sizes 14/90 and 12/80, supplied with this machine. You can sew using one, two or three needles depending on what stitch to use. -
Page 15: Upper Cutter Position
Upper Cutter Position Turn off the main power switch and unplug the machine. Deactivate the Upper Cutter, Position B Deactivate the upper cutter for flatlock, coverstitch and chainstitch or other sewing where the fabric shall not be cut. Open the front cover. Turn the handwheel toward you until the upper cutter (A) is raised to the highest position. -
Page 16: Upper Looper Position
Upper Looper Position Deactivate the upper looper for coverstitch and chainstitch sewing. Deactivate the Upper Looper, Position B Open the front cover. Turn the handwheel until the upper looper is in its lowest position. Slide the Upper Looper Positioning lever to the left to deactivate the upper looper, Position B (1). -
Page 17: Precise Thread Control
Precise Thread Control Depending on the stitch, fabric and thread that is being used, thread loops may either extend beyond the fabric edge, or form too tightly around the fabric edge. If thread tension (page 20, page 55) and the cutting width adjustment (page 52) are not quite enough, the Precise Thread Control (PTC) gives you the possibility to do further adjustment. -
Page 18: Touch Screen
3 Touch Screen Touch Screen Overview Sewing mode is the first view on the Touch Screen after you turn on the machine. Your selected stitch will be shown in the stitch field. Here you will find all the basic information and recommendations you need to start sewing. This is also the menu where you adjust the settings of your stitch. -
Page 19: Stitch Recommendations
Stitch Recommendations Recommendations for needle position, cutting width and presser foot pressure are always visible in the Sewing mode view. When a stitch is selected, a pop-up with extended recommendations is displayed. Touch Cancel (A) to close the pop-up. 1. Upper cutter position A/B 2. -
Page 20: Thread Tension
Thread Tension Touch the thread tension icon (A) to open a thread tension adjustment window where the tension for each of the five threads is displayed. Touch the value number (B) for a thread to select it. The value number becomes surrounded by a colored background, indicating that it is selected. -
Page 21: Save A Stitch
Save a Stitch To save the adjusted stitch, touch the Save Stitch button (A). You can save up to 30 different stitches. You can scroll through the list to find a free position, using the arrows. Any position without a stitch is free and can be used to save your new stitch. -
Page 22: Settings Menu
Settings Menu Touch the Settings button (A) to open the settings menu. Here you can adjust the machine settings. Touch the Settings button again to close the settings menu and save the changes in the machine memory. The changes in settings are saved after turning off the machine. -
Page 23: Threading
Heavy Fabric Knits (voile, crepe, georgette, (cotton, linen, chino, wool, (denim, tweed, etc.) Knitted fabrics etc.) satin, etc.) Needles HUSQVARNA® HUSQVARNA® HUSQVARNA® HUSQVARNA® VIKING® EL x 705 VIKING® EL x 705 VIKING® EL x 705 VIKING® EL x 705 size #12/80... -
Page 24: Placing The Thread Spools On The Spool Pins
Placing the Thread Spools on the Spool Pins Place the thread spools over the cone holders on the spool pin. Firmly insert the spool holder into the spool. Note: If the spools are very large, place the cone holders up-side-down on the spool pin. -
Page 25: Threading The Needles
Threading the Needles Threading the Left Overlock Needle (A) Yellow threading path Blue threading path for Safety Stitches no 1 and 4 Needle A C D E Note: Raise the presser foot to release the tension discs. Note: Make sure to raise the telescopic thread stand to its highest position (illustration shows a “cropped”... -
Page 26: Threading The Right Overlock Needle (B)
Threading the Right Overlock Needle (B) Blue threading path Needle B C D E Note: Raise the presser foot to release the tension discs. Note: Make sure to raise the telescopic thread stand to its highest position (illustration shows a “cropped” thread stand). 1. -
Page 27: Threading The Chainstitch Needle (D)
Threading the Chainstitch Needle (D) Blue threading path Yellow threading path for Safety Stitches no 1, 2, 4 and Needle D Note: Raise the presser foot to release the tension discs. Note: Make sure to raise the telescopic thread stand to its highest position (illustration shows a “cropped”... -
Page 28: Threading The Coverstitch Needles
Threading the Coverstitch Needles Note: Thread the needles in the following order: left (C), middle (D), right (E) Threading the Left Coverstitch Needle (C) Yellow threading path Needle C Note: Raise the presser foot to release the tension discs. Note: Make sure to raise the telescopic thread stand to its highest position (illustration shows a “cropped”... - Page 29 Threading the Middle Coverstitch Needle (D) Blue threading path Needle D Note: Raise the presser foot to release the tension discs. Note: Make sure to raise the telescopic thread stand to its highest position (illustration shows a “cropped” thread stand). 1.
- Page 30 Threading the Right Coverstitch Needle (E) Red threading path Needle E Note: Raise the presser foot to release the tension discs. Note: Make sure to raise the telescopic thread stand to its highest position (illustration shows a “cropped” thread stand). 1.
-
Page 31: Needle Threader
Needle Threader To make threading the needles easier, use the needle threader included with the accessories. Turn the handwheel so the needles are in their highest position and lower the presser foot. Make sure one of the rectangular markings of the needle threader is pointing upwards (A). -
Page 32: Threading The Loopers
Threading the Loopers Threading the Upper Looper Red threading path Note: Raise the presser foot to release the tension discs. Note: Make sure to raise the telescopic thread stand to its highest position (illustration shows a “cropped” thread stand). Note: Make sure the upper looper is in up-position, by sliding the upper looper positioning lever to the right (page 16). -
Page 33: Threading The Lower Looper
Threading the Lower Looper Green threading path Note: Make sure to raise the telescopic thread stand to its highest position (illustration shows a “cropped” thread stand). Note: Raise the presser foot to release the tension discs. Note: If threading special threads, such as wooly nylon, etc., refer to page 1. -
Page 34: Threading The Chainstitch Looper
Threading the Chainstitch Looper Purple threading path Note: Make sure to raise the telescopic thread stand to its highest position (illustration shows a “cropped” thread stand). Note: Raise the presser foot to release the tension discs. Note: If threading special threads, such as wooly nylon, etc., refer to page 1. -
Page 35: Threading Specialty Threads
Threading Specialty Threads When sewing with specialty threads (such as wooly nylon), it can be easier to thread the loopers using the looper threading wire or a standard overlock thread. Before threading: Note: Raise the presser foot to release the tension discs. Set the Threading/Sewing lever in "Threading"... -
Page 36: Stitches And Sewing Techniques
Exclusive SEWING ADVISOR™ Feature Your machine has the HUSQVARNA® VIKING® Exclusive SEWING ADVISOR™ feature. When beginning a sewing project, first choose the stitch you want to sew. Then, on the color touch screen, touch the icon for the fabric type and weight you are sewing. - Page 37 5-Thread Safety Stitch, Wide For joining with a reinforced stitch and overcasting in one step. A durable chainstitch seam with overlock edge for garment sewing, and other projects. Suitable for all fabrics. C D E D, A — 5-Thread Safety Stitch, Narrow For joining with a reinforced stitch and overcasting in one step.
- Page 38 4-Thread Safety Stitch, Narrow For joining with reinforced stitch and overcasting in one step. Suitable for all fabrics. C D E D, B 6.0–6.5 3-Thread Overlock, Wide For sewing two layers of stretchy fabric or overcasting a single layer of light to medium fabric. Use heavier threads in the loopers to create decorative braids.
- Page 39 3-Thread Flatlock, Wide For sewing stretchy fabrics together with a decorative effect either with the flatlock side or the ladder stitch side. Create varying effects by threading the upper looper with decorative thread. Read more on page 47. Suitable for all fabrics. C D E —...
- Page 40 3-Thread Stretch Overlock For sewing extra stretchy fabrics. Add additional stretch by using a stretchy type thread in the lower looper. Change the thread tension accordingly. Note: Not recommended for woven fabrics. C D E A, B 3-Thread Rolled Edge For edging lightweight fabrics.
- Page 41 2-Thread Overlock, Narrow For overcasting a single layer of light to medium weight fabrics. Note: Not recommended for heavyweight fabrics. C D E 2-Thread Narrow Edge Use for edging lightweight fabrics. Read more on page 46. Note: Not recommended for medium to heavyweight fabrics. C D E 6.0–6.5 2-Thread Flatlock, Wide...
- Page 42 2-Thread Wrapped Overlock, Narrow For sewing two layers of stretchy fabrics together. Add additional stretch by using a stretchy type thread in the lower looper. Change the thread tension accordingly. Suitable for medium and heavy stretch fabrics. Note: Not recommended for light, medium, heavy woven fabrics or light stretch fabrics. C D E 2-Thread Rolled Edge For edging lightweight fabrics.
- Page 43 Coverstitch, Narrow For hems on stretch fabrics and for decorative effects on all kind of fabrics. Use decorative thread in looper for embellishment. Read more on page 48. Suitable for all fabrics. C D E C, D — — Chainstitch For construction and hemming.
-
Page 44: Start Sewing
Start Sewing Tip: Some fabrics have a lot of excess dye which can cause discoloration on other fabric but also on your machine. This discoloring may be very difficult or impossible to remove. Fleece and denim fabric, especially red and blue, often contain a lot of excess dye. If you suspect that your fabric/ready-to-wear garment contains a lot of excess dye, always pre-wash it before sewing to avoid the discoloring of your machine. -
Page 45: Cutting The Seams Open
Use the Machine at the Start of a Seam 1. Before placing the fabric in the machine, sew a thread chain approximately 2″-3″ (5-8cm) long. Place your fabric in front of the presser foot. Sew a few stitches and stop. 2. -
Page 46: Rolled Edge Sewing
Rolled Edge Sewing The rolled edge stitch is appropriate for light weight fabrics such as lawn, voile, organdy, crepe, etc. The rolled edge is achieved by adjusting the thread tension to make the fabric edge roll under the fabric while overlocking. Adjust the thread tension to change the degree of rolling. -
Page 47: Flatlock Sewing
Flatlock Sewing A flatlock is made by adjusting the tension of the 3-thread overlock stitch, sewing the seam and pulling the fabrics apart to flatten the seam. The tensions must be adjusted correctly for the fabric to pull flat properly. A flatlock can be used both as a decorative construction stitch, sewing two pieces together (Standard Flatlock), or for decoration only on one piece of fabric (Decorative Flatlock). -
Page 48: Coverstitch Sewing
Coverstitch Sewing The coverstitch can be used for covering, binding or top-stitching necklines and for hemming the bottom of T-shirts and sweatsuits, etc., in addition to flat joining seams (plain seaming). The coverstitch is most suitable for stretchy fabrics. It can also be used for woven fabrics. -
Page 49: Chainstitch Sewing
When Sewing is Stopped Halfway Raise the presser foot and turn the handwheel one full rotation away from you. Pull the fabric under and behind the presser foot while securing the thread ends with your thumb and your forefinger to prevent the seam from unraveling. Pull out the needle threads (2 or 3 threads) on the underside of the fabric and knot the threads in the same manner as described above. -
Page 50: Sewing Tips & Hints
Sewing Tips & Hints Sewing with Decorative Thread in the Loopers Heavy decorative threads can be a beautiful highlight to your sewing project. Thread the loopers as described in the threading section (see page 35). When using decorative threads, remove the spool holder and place the spool caps as shown, to prevent the thread from getting caught on the edge of the spool. -
Page 51: Circular Sewing
Inner Corners Cut the inner corner as illustrated (A). Sew and stop approximately 1¼" (3 cm) before the inner corner. Turn the fabric so that the cutting lines are straight (B). Continue sewing. 1¼” (3cm) Circular Sewing Note: Circular sewing is only suitable for medium and heavy weight fabrics. -
Page 52: Stitch Adjustments
6 Stitch Adjustments Presser Foot Pressure The presser foot pressure for sewing based on normal conditions should be set to ”N”(A). Adjustments may be necessary due to fabric type and weight. Increase or decrease the pressure until you are satisfied with the result. Always test sew on a sample of your fabric before sewing on your garment. -
Page 53: Adjustment Using The Precise Thread Control
Adjustment Using the Precise Thread Control If the loops do not form neatly around the fabric edge and you have tried to adjust the tension and/or cutting width, the Precise Thread Control will allow very small movements of the stitch finger to compensate (see page 17). A. -
Page 54: Differential Feed Adjustment
Differential Feed Adjustment The differential feed system consists of two sets of feed teeth arranged one behind the other. Both feed teeth work independently of each other to give perfect results when sewing on speciality fabrics. When the amount of feed by the front feed teeth is changed in relation to the feed by the rear feed teeth it will "stretch"... -
Page 55: Thread Tension
Thread Tension Thread tension is automatically set when selecting a stitch but it may have to be fine tuned depending on: • Type and thickness of the fabric • Needle size • Size, type and fiber content of the thread 1. -
Page 56: Maintenance
7 Maintenance Cleaning After use, wipe the exterior surface of your machine and the touch screen with a soft and damp cloth to remove any dust or lint built up. Cleaning the Looper Area Turn off the main power switch and unplug the machine. Open the front cover. -
Page 57: Oiling
Oiling Turn off the main power switch and unplug the machine. To keep the machine running smoothly and quietly the moving parts (on the upper looper), pointed out in the picture, must be lubricated often. We recommend lubricating once a week for normal use or once every 10 hours of continuous use. -
Page 58: Trouble Shooting
Trouble Shooting Machine Does Not Run Possible Cause: Machine not properly connected to power source. Solution: Check that machine has been properly connected to power source (page 9). Possible Cause: The safety device is activated. Solution: Close open covers and lower the presser foot. Fabric Does Not Feed Well Possible Cause: Stitch length is set too short for the fabric being sewn. - Page 59 Stitches Skipping Possible Cause: Needle(s) may have a bent, dull or broken point. Solution: Replace needle(s) (page 14). Possible Cause: Needle may not be properly seated in the needle clamp. Solution: Insert needle so that it is all the way up in the needle clamp, then tighten the screw securely. Possible Cause: Needle may not be the correct size for the fabric being sewn.
- Page 60 Fabric Jams Possible Cause: Upper— and stationary cutters are not in proper position. Solution: Check alignment of cutters (page 57). Possible Cause: Thread is not unreeling smoothly off the thread spool. Solution: Check the thread spool to ensure thread is not getting caught. Place the thread spool and spool cap as shown on page 24.
-
Page 61: Technical Specifications
Technical Specifications Sewing Speed Stitch Length Presser Foot Rise Maximum 1100 ± 150rpm 1–5mm Needles Stitch Width Weight HUSQVARNA VIKING® ELx705 3.5–7.5mm 11.2kg #90/14, #12/80 Number of Needles Differential Feed Ratio Machine Dimensions 1–3 0.6–2.0 Width: ≈440mm Depth: ≈300mm Height: ≈310mm... - Page 63 AMBER, VIKING, and KEEPING THE WORLD SEWING & Design are trademarks of KSIN Luxembourg II, S.a.r.l. HUSQVARNA and the "crowned H-mark" are trademarks of Husqvarna AB. All trademarks are used under license by VSM Group AB. Please note that on disposal, this product must be safely recycled in accordance with relevant National legislation relating to electrical/electronic products.
- Page 64 www.husqvarnaviking.com...
Need help?
Do you have a question about the VIKING Amber Air S 600 and is the answer not in the manual?
Questions and answers