Table of Contents
Advertisement
Advertisement
Table of Contents

Related Manuals for Husqvarna Viking Amber Air S 400


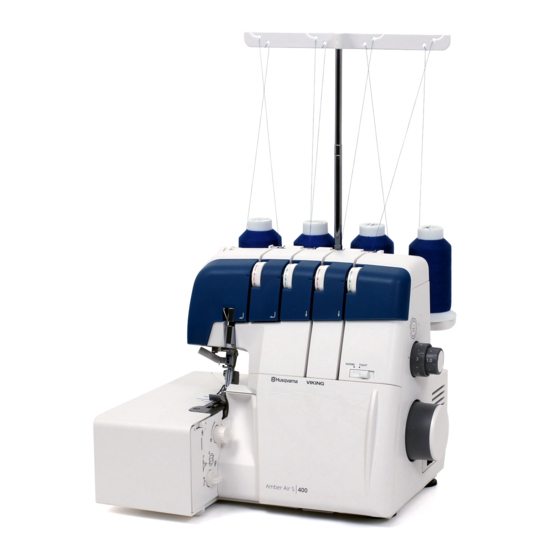
Summary of Contents for Husqvarna Viking Amber Air S 400
- Page 2 This household sewing machine is designed to comply with IEC/EN 60335-2-28 and UL1594. IMPORTANT SAFETY INSTRUCTIONS When using an electrical appliance, basic safety precautions should always be followed, including the following: Read all instructions before using this household sewing machine. Keep the instructions at a suitable place close to the machine.
- Page 3 Intellectual Property VIKING and Amber are trademarks of KSIN Luxembourg II, S.a.r.l. HUSQVARNA and the “H” Crown Device are trademarks of Husqvarna AB and are used under license.
-
Page 4: Table Of Contents
Table of Content ABOUT YOUR MACHINE Machine Overview SEWING Machine Overview - Inside Parts Stitch Overview Accessories Explanation of Icons/Colors Connecting the Foot Control 4-Thread Overlock and the Power Supply 3-Thread Overlock, Wide (and Narrow) Before Using Your Machine 3-Thread Narrow Edge for the First Time 3-Thread Rolled Edge 3-Thread Picot Edge... -
Page 5: About Your Machine
ABOUT YOUR MACHINE Machine Overview 1. Thread guides 2. Thread guide bar 3. Top cover thread guide 4. Presser foot pressure dial 5. Left needle thread tension dial 6. Right needle thread tension dial 7. Upper looper thread tension dial 8. -
Page 6: Machine Overview - Inside Parts
Machine Overview - Inside Parts 1. Stationary cutter 2. Upper cutter 3. Stitch finger 4. Upper looper 5. 2-thread overlock converter 6. Lower looper 7. Upper looper threading hole 8. Looper selection lever 9. Lower looper threading hole 10. Looper threader lever 11. -
Page 7: Connecting The Foot Control And The Power Supply
Connecting the Foot Control and the Power Supply Foot control to use with this machine: Type C-1028 for USA/Canada, C-2085-1 for U.K., C-2065 for Australia, C-2060 for Continental Europe. Before plugging your machine in, make sure the voltage is the same as indicated on the lower rear side of the machine. -
Page 8: Front And Flat Bed Extension Covers
Front and Flat Bed Extension Covers Front Cover Open by pushing the cover to the right as far as it will go and then pull it toward you. Close it again by pulling the cover upward and then sliding it to the left until it locks. -
Page 9: Presser Foot Lifter
Presser Foot Lifter Raise the presser foot by raising the presser foot lifter at the back of the machine. Pressing the lifter up puts the presser foot in extra lift position. Always raise the presser foot lifter when threading. When raised, the tension disks open and the threading becomes easier. -
Page 10: Needle Information
Needle Information • Use HA-1 SP #14 or #11 needles or system Stretch 130/705 H-S, size #11/75 or #14/90. • HA-1 SP #11 needles are set on the machine. You can sew using one or two needles depending on what stitch to use. The left needle and needle clamp screw are marked “L”, the right needle and needle clamp screw are marked “R”. -
Page 11: Upper Cutter
Upper Cutter Turn off the main power switch and unplug the machine. Deactivate the Upper Cutter Deactivate the upper cutter for flatlock, pintucking, etc. • Turn the handwheel toward you until the upper cutter (A) is raised to the highest position. •... -
Page 12: Getting Ready To Sew
GETTING READY TO SEW General Threading Information The loopers and needles are color coded, to indicate the prop- er threading paths. Always start threading the loopers and then Yellow Blue the needles from right to left (follow the order listed below). 1. -
Page 13: Placing The Thread Spools On The Spool Pins
Placing the Thread Spools on the Spool Pins Place the thread spools over the cone holders on the spool pin. Firmly insert the spool holder into the spool. A. If sewing with small thread spools, remove the cone hold- ers. Place the spool with its slit side up, and put the spool holder cap on top of it. -
Page 14: Threading The Lower Looper
Threading the Lower Looper Turn off the main power switch and unplug the machine. Note: Raise the presser foot lifter for easier threading. Place a thread spool on the very right spool pin. Pull the thread through the right thread guide from back to front (A). - Page 15 Set the Threading/Sewing switch to “Threading” position (G) by turning it to the right. Turn the handwheel slowly toward you until the mark on the wheel matches the mark on the cover (H). The hand wheel will click and is locked in threading position. Turn the looper selection lever to the right (I) to activate the lower looper threading.
-
Page 16: Threading The Upper Looper
Threading the Upper Looper Turn off the main power switch and unplug the machine. Note: Raise the presser foot lifter for easier threading. Place a thread spool on the second right spool pin. Pull the thread through the second right thread guide from back to front (A). - Page 17 Set the Threading/Sewing switch to “Threading” position (G) by turning it to the right. Turn the handwheel slowly toward you until the mark on the wheel matches the mark on the cover (H). The hand wheel will click and is locked in threading position. Turn the looper selection lever to the left (I) to activate the upper looper threading.
-
Page 18: Threading Loopers With The Looper Threading Wire Or Standard Thread
Threading Loopers with the Looper Threading Wire or Standard Thread Turn off the main power switch and unplug the machine. Note: Raise the presser foot lifter for easier threading. Note: Do not raise or lower the looper thread lever while threading. When sewing with specialty threads (such as wooly nylon), it can be easier to thread the loopers using any of the below ways:... -
Page 19: Using A Standard Thread
Using a Standard Thread Set the Threading/Sewing switch to “Threading” position (A) by turning it to the right. 1. Turn the handwheel slowly toward you until the mark on the wheel matches the mark on the cover (B). The hand wheel will click and is locked in threading position. -
Page 20: Threading The Right Needle
Threading the Right Needle Turn off the main power switch and unplug the machine. Note: Raise the presser foot lifter for easier threading. Raise the needles by turning the handwheel slowly toward you until the mark on the wheel matches the mark on the cover. Place a thread spool on the second left spool pin. - Page 21 Pull the thread down along the slit and pass it to the left through the thread path (E). Pass the thread from right to left around the take-up lever (F). Pass the thread through the right slit of the needle thread guide (G).
-
Page 22: Threading The Left Needle
Threading the Left Needle Turn off the main power switch and unplug the machine. Note: Raise the presser foot lifter for easier threading. Raise the needles by turning the handwheel slowly toward you until the mark on the wheel matches the mark on the cover. Place a thread spool on the left spool pin. - Page 23 Pull the thread down along the slit and pass it to the left through the thread path (E). Pass the thread from right to left around the take-up lever (F). Pass the thread through the left slit of the needle thread guide (G).
-
Page 24: Using The Needle Threader
Using the Needle Threader Turn off the main power switch and unplug the machine. Raise the needles by turning the handwheel slowly toward you until the mark on the wheel matches the mark on the cover (A). Lower the presser foot lifter (B). Set the needle threader switch to “R”... -
Page 25: Differential Feed Adjustment
Differential Feed Adjustment The differential feed system consists of two sets of feed teeth arranged one behind the other. Both feed teeth work inde- pendently of each other to give perfect results when sewing on speciality fabrics. When the amount of feed by the front feed teeth is changed in relation to the feed by the rear feed teeth it will “stretch”... -
Page 26: Cutting Width Adjustment
Cutting Width Adjustment Turn off the main power switch and unplug the machine. When the cutting width is too narrow or too wide for the set seam, adjust it by moving the staionary cutter. Turn the cutting width adjustment dial to move the stationary cutter to the right or left. -
Page 27: Thread Tension Settings
Thread Tension Settings Set the thread tension to suit the type of fabric and thread used. As the number on the thread tension discs increases, the thread tension becomes tighter. See the stitch table on pages 28-31 for thread tension recommendations for each stitch. Correct Thread Tension Lower looper thread and upper looper thread should be well bal- anced with the same tension (both looper threads should cross at... -
Page 28: Sewing
SEWING On your overlock machine, different stitches are obtained by combining different needle positions, threading methods, tension set- tings, and the use of the 2-thread overlock converter. See Chapter 2, Getting Ready to Sew, for references on how to set your machine. Stitch Overview The settings shown in the table below are our recommendations based on normal conditions. -
Page 29: 3-Thread Overlock, Wide (And Narrow)
3–Thread Overlock, Wide (and Narrow) For sewing two layers of stretchy fabric or overcasting a single layer of light to medium fabric. Use heavier threads in the loopers to create decorative edges. Note: Use the right needle instead for a narrow stitch. Recommended thread tension settings within brackets in the chart. THREAD TENSION NORM/ TIGHT... -
Page 30: 3-Thread Flatlock, Wide (And Narrow)
3–Thread Flatlock, Wide (and Narrow) For sewing fabrics together with a decorative effect either with the flatlock side or the ladder stitch side. Create varying effects by threading the loopers with decorative thread, such as 40 weight rayon. Note: Use the right needle instead for a narrow stitch. Recommended thread tension settings within brackets in the chart. THREAD TENSION NORM/ TIGHT... -
Page 31: 2-Thread Rolled Edge
2–Thread Rolled Edge For edging lightweight fabrics. It gives a nice finish on silky scarves, pillow ruffles and napkins. Thread the looper with a decorative lightweight thread, such as 40 weight rayon for a beautiful satin edge (2-thread overlock converter required). Note: Not recommended for heavy weight fabrics. -
Page 32: Start Sewing
Start Sewing When the machine is completely threaded, close the front cov- er and bring all of the threads over the stitch plate and slightly to the left under the presser foot. Ensure that the upper cutter moves against the stationary cut- ter correctly by turning the hand wheel slowly toward you. -
Page 33: Securing The Thread Chain
Securing the Thread Chain Tie a Knot (A) To avoid the thread chain from ravelling, separate and tie the thread ends together. Use a Sewing Needle (B) 1. Thread the chain into a large eyed, hand sewing needle. 2. Insert the needle into the end of the seam and pull the chain into the seam to secure the threads. -
Page 34: Gathering Using The Differential Feed
Gathering Using the Differential Feed The differental feed can be used to gather lightweight fabrics. Use it for sleeves, making ruffles, and more. Set the differential feed between 1.5 and 2 to obtain the best gathering effect for your project. Always test sew on a scrap piece of your fabric first. -
Page 35: Flatlock Sewing
Flatlock Sewing A Flatlock (A) is made by adjusting the tension of the 3-thread overlock stitch, sewing the seam and pulling the fabrics apart to flatten the seam. The tensions must be adjusted correctly for the fabric to pull flat properly. A Flatlock can be used both as a decorative construction stitch, sewing two pieces together (Standard Flatlock), or for decoration only on one piece of fabric (Decorative Flatlock). -
Page 36: Sewing Corners
Sewing Corners 1¼ (3cm) Outer Corners Trim three of the corners approximately 1¼” (3cm) as illustrat- ed (A). Start sewing at the corner that is not trimmed. When you reach a corner, stop the machine. Raise the needle and the presser foot. Remove the threads from the stitch finger. Turn the fabric and align the cutting line with the upper knife (B). -
Page 37: Machine Maintenance
MACHINE MAINTENANCE An overlock requires more frequent maintenance than a conventional sewing machine for two reasons: • A lot of lint is produced when the cutters are cutting the fabric. • An overlock runs at a very high speed and needs to be oiled frequently to lubricate the internal working parts. Storage When the machine is not in use, be sure to keep it unplugged. -
Page 38: Cleaning The Looper Threader Pipe
Cleaning the Looper Threader Pipe Turn off the main power switch and unplug the machine. Use the looper threading wire to clean the pipe of the looper threader device. Set the Threading/Sewing switch to “Threading” position (A) by turning it to the right. Turn the handwheel slowly toward you until the mark on the wheel matches the mark on the cover (B). -
Page 39: Oiling The Machine
Oiling the Machine Turn off the main power switch and unplug the machine. To keep the machine running smoothly and quietly the moving parts, pointed out in the picture, must be lubricated often. We recommend lubricating once a week for normal use or once every 10 hours of continuous use. -
Page 40: Replacing The Upper Cutter
Replacing the Upper Cutter Turn off the main power switch and unplug the machine. The upper cutter should be changed when it becomes blunt. Change it by following the below instructions. If you are hav- ing any difficulties, have a service technician make the neces- sary adjustments. - Page 41 Fabric Puckers Possible Cause: Thread tensions are set too tightly. Solution: Loosen thread tensions (page 27). Possible Cause: Thread is not unreeling smoothly off the thread spool. Solution: Check the thread spool to ensure thread is not getting caught. Possible Cause: Using thread that is poor quality or has uneven filament.
-
Page 42: Specifications
Irregular Stitches Possible Cause: Stitches are not balanced. Solution: Adjust thread tensions and possibly cutting width (page 26, 27) Possible Cause: Thread is not unreeling smoothly off the thread spool. Solution: Check the thread spool to ensure thread is not getting caught. Possible Cause: Machine may not be threaded correctly or threads threaded in the incorrect sequence.
Need help?
Do you have a question about the Viking Amber Air S 400 and is the answer not in the manual?
Questions and answers
upper looper is not looping in the chain
The upper looper may not be looping in the chain on the Husqvarna Amber Air S 400 due to incorrect thread tension. If the upper looper thread is too loose, it gets pulled to the wrong side of the fabric. If it's too tight, it pulls on the right side. In both cases, the thread may not form proper loops. Adjust the upper and lower looper thread tensions to balance the stitch.
This answer is automatically generated