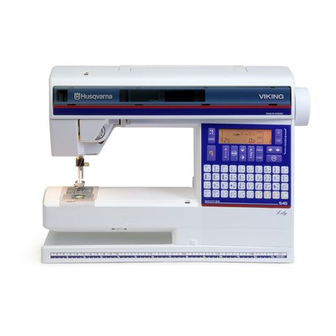
Husqvarna Lily 555 User Manual
Hide thumbs
Also See for Lily 555:
- Operator's manual (92 pages) ,
- Workshop manual (68 pages) ,
- User manual (60 pages)
Table of Contents
Advertisement
Advertisement
Table of Contents

Related Manuals for Husqvarna Lily 555


Summary of Contents for Husqvarna Lily 555
- Page 1 User’s Guide 545, 555 K E E P I N G T H E W O R L D S E W I N G...
-
Page 2: Safety Instructions
• Do not operate where aerosol (spray) products are being used or where oxygen is being administrated. • To disconnect, turn the switch off (''0'', then remove plug from outlet. • Do not unplug by pulling on cord. To unplug, grasp the plug, not the cord. SAVE THESE INSTRUCTIONS Instruction book Lily 555/545... -
Page 3: Table Of Contents
Stitch table, Model 555 48-49 Memory Stitch table, Model 545 50-51 Programming 23-26 Mirror image Maintenance CLR - Deleting programs Care of the machine Satin taper and darning Changing light bulbs stitches Fault-fi nding 53-54 Accessories, Needles Index 56-57 Instruction book Lily 555/545... - Page 4 13. Needle plate 27. Function selectors 14. Presser bar and Presser foot 28. Stitch panel ankle 29. Main power switch, Connec- 15. Needle clamp screw tion to power supply 16. Presser foot lifter 17. Thread tension Instruction book Lily 555/545...
- Page 5 13. Needle plate 27. Function selectors 14. Presser bar and Presser foot 28. Stitch panel ankle 29. Main power switch, Connec- 15. Needle clamp screw tion to power supply 16. Presser foot lifter 17. Thread tension Instruction book Lily 555/545...
-
Page 6: Procedures
Fold down the handle tray at the back of the machine, and replace the cover. where also the extension table is placed. Instruction book Lily 555/545... -
Page 7: Connecting The Foot Control
If the plug does not fi t fully in the outlet, reverse the plug. If it still does not fi t, contact a qualifi ed electrician to install the proper outlet. Do not modify the plug in any way. Instruction book Lily 555/545... -
Page 8: Accessory Box, Sewing Surface
Tray and the front, right hook onto the recess on the free arm. 6. To remove it, push slightly in the direction of the arrow at the front right corner, then lift the hook out of the free arm. Instruction book Lily 555/545... -
Page 9: Spool Pin
The large spool holder (c) is placed under the thread. This spool pin is used when winding a bobbin from a second spool of thread or for a second spool when sewing with a twin needle. Instruction book Lily 555/545... -
Page 10: Threading The Upper Thread
The white on the press- ser foot ankle makes it easy to see the eye of the needle. 7. Place thread under the presser foot and into the thread knife where it is cut. Instruction book Lily 555/545... -
Page 11: Threading For Twin Needles
5. Place the bobbin with the second thread on the spool pin. 6. Thread the machine as before but this thread should lie between the outer thread tension discs, outside the lowest thread guide. Thread right needle. Instruction book Lily 555/545... -
Page 12: Bobbin Winding With The Machine Threaded
3. Bring the thread under the th- bobbin will stop automatically. read guide (a) and over thread guide Remove the bobbin, cut off the (b), then around thread guide (c) as thread and bring the bobbin illustrated. spindle up. Instruction book Lily 555/545... -
Page 13: Threading Lower Thread
Continue threading around (b) and to the right of the thread knife (c). Replace the cover and slide it into position. Then pull the thread to the left to cut it. Instruction book Lily 555/545... -
Page 14: Incorrect Thread Tension
Make a few tests on a scrap piece on the underside. of the material you are going to sew 2. If you set the tension at the hig- and check the tension. hest number, the opposite will occur, and the seam may pucker. Instruction book Lily 555/545... -
Page 15: Presser Foot Pressure
Pull the presser foot down and towards you. 2. Line up the cross pin on the foot between the spring and the press- ser foot ankle. Press back until the foot snaps into place. Instruction book Lily 555/545... -
Page 16: Changing The Needle, Lowering
The feed teeth are lowered when sewing buttons and for free-hand work. By lowering the feed teeth it is ea- sier to get thick garments under the presser foot. Do not forget to raise the feed teeth before starting to sew. Instruction book Lily 555/545... -
Page 17: Functions
High speed on the Infodisplay. You can change the stitch length by pressing either Reduced speed the (+) or (-) button. Certain stitches Slow speed have a limited stitch length. Not active in REP position. Instruction book Lily 555/545... - Page 18 (+) or (-) These buttons are used to button. The width can be adjusted advance or return within between 0 and 6 mm. Not active in a memory, when entering REP position. or checking stitches. See page 22. Instruction book Lily 555/545...
- Page 19 PROG or REP. The number is white mark. If the whole symbol is shown on the display to the upper fl ashing, select a buttonhole. See right. Read more on page 22. page 28-29. Instruction book Lily 555/545...
-
Page 20: Stitch Selection, Model
Menu 6: Hemstitches and sew. To the right on the Info- Decorative stitches display the number of the selected menu (b), the selected stitch (a) or the selected letter is displayed. Menu 3 Menu 4 Instruction book Lily 555/545... -
Page 21: Stitch Selection, Model 545
With the MENU button you select which menu you wish to sew. To the right on the Info- display the number of the selected menu (b), the selected stitch (a) or the selected letter is displayed. Menu 2 Instruction book Lily 555/545... -
Page 22: Memory
Your machine will remember the program. what you have programmed even when it is switched off. Instruction book Lily 555/545... -
Page 23: Programming
To sew your program, touch FUNC to the REP position. The machine will be positioned at the fi rst pro- grammed stitch. Also see "Quick info" on the mach- ine. Instruction book Lily 555/545... - Page 24 2. Use the buttons marked with ar- letter to another one in your pro- rows until the stitch gram: number or the letter is displayed. 1. Touch FUNC to PROG. 3. Select the new stitch or letter. Instruction book Lily 555/545...
-
Page 25: Mirror Image
If you have programmed STOP at tion. the end of your program and then mirror the entire program in length, the STOP will be placed at the beginning. Use the button advance to the next stitch to avoid STOP. Instruction book Lily 555/545... -
Page 26: Clr - Deleting Programs
FUNC button the stitch length and width is shown to return to PROG. The machine as 0.0/0.0 on the display. will be positioned at the fi rst pro- Letters are deleted in the same way. grammed stitch. Instruction book Lily 555/545... -
Page 27: Stitches
The repeated stitch is retained even if you switch off the machine. If you attempt to program these stitches in the PROG position, the stitch number is fl ashing to indi- cate that this is not possible. Instruction book Lily 555/545... -
Page 28: Sewing
You will sew until the fi rst buttonhole column reaches this mark. There is a small fi nger at the back of the presser foot. For a corded but- tonhole, loop your cord around the fi nger as illustrated. Instruction book Lily 555/545... - Page 29 Place the button as shown on the buttonhole will be sewn in one circles on the picture and you can step, and when the buttonhole is easily see the size needed for your completed the machine will stop buttonhole. automati-cally. Instruction book Lily 555/545...
- Page 30 You will sew until the fi rst buttonhole column reaches this mark. There is a small fi nger at the back of the presser foot. For a corded but- tonhole, loop your cord around the fi nger as illustrated. Instruction book Lily 555/545...
-
Page 31: Knife
NOTE: Always stitch a sample but- tonhole on scraps of the garment fabric to check size before sewing buttonholes on the garment. Buttonhole knife The knife is used to cut buttonholes. It is also useful for removing stitches sewn in error. Instruction book Lily 555/545... -
Page 32: Sewing Buttons
Push in the plate between the but- ton and the fabric. Lower the presser bar and sew on the button. Pull the threads between the button and the fabric. Wind the threads a few times around the shank and tie the ends. Instruction book Lily 555/545... -
Page 33: Straight Stitch
D or the fi rst mark presser foot A and set the needle to of the left edge of the presser foot A. the right position. Instruction book Lily 555/545... -
Page 34: Gathering With Straight Stitch
Sew between the straight gathe- ring rows. Hold the gathering with your fi ngers on both sides of the needle to avoid folds. Re- move any gathering thread that is visible. Instruction book Lily 555/545... -
Page 35: Zipper
Before If you want to sew a ”gentleman’s you begin to sew, mark the seam zipper”, follow the instructions but line. Sew the other side of the insert in the other direction. zipper. Instruction book Lily 555/545... -
Page 36: Reinforced Straight Stitch
2 and width 3. You can change this setting by pres- sing either the (+) or (-) button on the width and/or length. Experiment until you reach the best setting for your actual work. Instruction book Lily 555/545... -
Page 37: Lace Edging
1.5. 2. Press seam allowance towards fabric. Sew with satin stitch stitch width 2.0, on the right side over the zigzag seam. 3. Cut off the seam allowance up to the stitching on the wrong side. Instruction book Lily 555/545... -
Page 38: Three-Step Zigzag
Use the reverse feed button Guide the fabric slight-ly to the side. If the fabric is very worn, a piece of fabric or lining may be attached to the reverse as reinforcement. Instruction book Lily 555/545... -
Page 39: Flatlock
Trim from the wrong side or sew another seam from the right side. Narrow belts and bands Fold the fabric in thirds and sew in the center. Trim excess material from underneath. Instruction book Lily 555/545... -
Page 40: Hemming
(+). 2. If the stitch catches too much of the fold, de- crease the stitch width (-). 3. For an invisible hem the needle catches a single thread of the folded edge. Instruction book Lily 555/545... -
Page 41: Bridging Stitch
Place the shirring elastic (elastic thread) around the fi nger of the presser foot C. Sew from the wrong side over both lengths of the elastic following marked lines. Gather the shirring by pulling the elastic threads. Instruction book Lily 555/545... -
Page 42: Seam And Overcast
fi rm fabrics. The pin on the press- ser foot should follow the edge of the fabric and will prevent the fabric from puckering. Stitch width 5-6 mm. When using stitch width 4.5 or lower, use presser foot A. Instruction book Lily 555/545... -
Page 43: Darning Stitch
2. Touch FUNC to NORM position and select 3. Sew until the desired length is reached. 4. Touch the reverse button to ta- per the end. See "Satin taper and darning stitches" page27. Instruction book Lily 555/545... -
Page 44: Decorative Stitches
An effective edging can be produced with these stitches. Sew a bit from the edge and trim close to the stitching. Upper: Model 555: Menu 5, Stitch 20. Model 545: Menu 1, Stitch 16 Lower: Model 555: Menu 5, Stitch 21. Model 545: Menu 1, Stitch 17 Instruction book Lily 555/545... -
Page 45: Quilting, Applique
, set to stitch width 2 mm sews beautiful app- liques. Fuse or pin appli-que in place and satin stitch around the outside edges. 3. Use stitch to quilt. Sew the stit- ches with a few cm in between. Instruction book Lily 555/545... -
Page 46: Pictogram
13. Change to straight stitch, stitch length 1,5. 14. Sew back close to the petal. 15. Sew the rest of the petals in the same way. Also: Consult Quick info for Picto- gram steps. Instruction book Lily 555/545... -
Page 47: Sewing Hints
Set a wide zigzag stitch. Sew a bartack from the outer edge to the center of the loop, move the material and sew a new bartack. Continue to sew along the entire length of the loop's short side. Instruction book Lily 555/545... -
Page 48: Stitch Table, Model
Decorative hems and overlapped seams, see page 39 belts and bands. 16 Elastic stitch Sew over two rows of elastic thread for shirring 17 Elastic/Casing stitch For overlapped seams in tricot. To sew casing over narrow elastic Instruction book Lily 555/545... - Page 49 Suitable in light fabrica 35-36 Reinforced buttonhole For heavy fabrics 37 Heirloom buttonhole Looks like a handmade buttonhole 38-39 Keyhole buttonhole For tailoring, sutiable in compact woollen cloth, e.g. fl annell 40 Straight stitch buttonhole Suitable in leather Instruction book Lily 555/545...
- Page 50 Invisible hems in stretch medium and see page 40 heavy fabrics. 10 Bridging stitch For joining two pieces of fabric with fi nished see page 41 edges and for elastic shirring 11, 14 Cross stitch For decorating clothes, tablecloths and curtains Instruction book Lily 555/545...
- Page 51 Darn and mend work clothes, jeans, table- see page 27, 43 cloths and linen towels. 39 Bartack Buttonhole Suitable in medium and heavy fabrics. see page 28-31 40 Keyhole buttonhole For tailored garments suitable in compact wool- see page 28-31 len cloth Instruction book Lily 555/545...
-
Page 52: Maintenance
fi nd with the accessories. Replacing the stitch plate Replace the stitch plate about 5 mm in front of the rear edge and push it backward. Replace the bobbin cover. Instruction book Lily 555/545... -
Page 53: Fault-Fi Nding
The needle eye may have sharp edges which cut the thread. If so, change the needle. See page 16. The upper thread is incorrectly th- readed. See page 10. The upper thread may have too much tension. Refer to page 14. Instruction book Lily 555/545... -
Page 54: Fault-Fi Nding
When you wish to increase the density of the right column, press stitch length button (-). When you wish to decrease the density, press stitch length button (+). Instruction book Lily 555/545... -
Page 55: Accessories, Needles
Hems Setting up the machine Sewing hints Infodisplay 17-19 Sewing speed Shirring Lace edging Snap off & on presser foot Lapped zipper Speed Length Spool Holders Letters 20-21 Spool pin Light bulb, changing Lowering feed teeth Instruction book Lily 555/545... - Page 56 Stitch table, Model 545 50-51 Stitch Width Vertical spool pin Stop 18, 25 Width Straight Stitch Stretch stitch Zigzag Zippers Tapered satin stitch 27, 43 Tension 14, 19 Terry cloth Topstitching Thread, tension 14, 19 Threading, bobbin 12-13 Instruction book Lily 555/545...
- Page 57 Research & Development Department VP-TX SE-561 84 Huskvarna Sweden Husqvarna Viking reserves the right to change the machine equipment and the assortment of accesso- ries without prior notice, or make modifi cations to the performance or design. Such modifi cations, however, will always be to the benefi...
- Page 58 Instruction book Lily 555/545...
- Page 59 Instruction book Lily 555/545...
- Page 60 First Selective Thread Cutters First Color Touch Screen First Built-in Disk Drive Purchase your top-of-the-line from your local authorized Husqvarna Viking Dealership: VSM Group AB • SE-561 84 Huskvarna, Sweden ww w. hus qv ar nav ik i ng.c om...
Need help?
Do you have a question about the Lily 555 and is the answer not in the manual?
Questions and answers