Table of Contents
Advertisement
Quick Links
Operator's Manual
VIKING
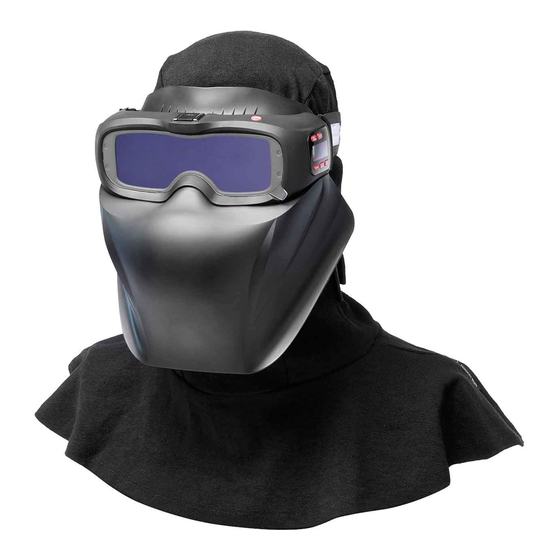
Auto-Darkening Welding Goggles
with 4C
Technology
™
Register your machine:
www.lincolnelectric.com/register
Authorized Service and Distributor Locator:
www.lincolnelectric.com/locator
Save for future reference
Date Purchased
Code: (ex: 10859)
Serial: (ex: U1060512345)
IM10544
| Issue D ate Aug-19
© Lincoln Global, Inc. All Rights Reserved.
ArcSpecs
™
™
GRAPHICS MAY VARY
Advertisement
Table of Contents

Related Manuals for Lincoln Electric VIKING ArcSpecs


Summary of Contents for Lincoln Electric VIKING ArcSpecs
- Page 1 Operator’s Manual VIKING ArcSpecs ™ ™ Auto-Darkening Welding Goggles with 4C Technology ™ GRAPHICS MAY VARY Register your machine: www.lincolnelectric.com/register Authorized Service and Distributor Locator: www.lincolnelectric.com/locator Save for future reference Date Purchased Code: (ex: 10859) Serial: (ex: U1060512345) IM10544 | Issue D ate Aug-19 ©...
-
Page 2: Table Of Contents
TABLE OF CONTENT Page SAFETY WARNINGS – READ BEFORE USING WELDING GOGGLE INFORMATION SPECIFICATIONS OPERATING INSTRUCTIONS GOGGLE OPERATIONS/FEATURES GRIND BUTTON OPERATION GOGGLE CARE AND MAINTENANCE SHADE GUIDE SETTINGS TROUBLESHOOTING WARRANTY INFORMATION REPLACEMENT PARTS, OPTIONAL ACCESSORIES... -
Page 3: Safety Warnings - Read Before Using
SAFETY WARNINGS – READ BEFORE USING WARNING ARC Rays can injure eyes and burn skin • Before welding, always inspect goggle and filter lens to be sure they are fitted properly, in good condition and not damaged. • Check to see that the clear lens is clean and securely attached to the goggles. •... -
Page 4: Welding Goggle Information
WELDING GOGGLE INFORMATION This Auto-Darkening Welding Goggle will automatically change from a light state (shade 3.5) to a dark state (Shade 5-13) when arc welding starts. The filter automatically returns to a light state when the arc stops. Match your welding application to the shade indicated on the shade chart. (See Page 6) •... -
Page 5: Specifications
SPECIFICATIONS Optical Class 1/1/1/1 LCD Viewing Area 47.0 sq. cm. (7.29 sq. in.) Goggle Size 187 x 75 x 82mm (7.4 x 2.9 x 3.2in.) UV/IR Protection Up to Shade DIN 16 at all times Arc Sensors Light State Shade DIN 3.5 Variable Welding Shades DIN 5 to 13... -
Page 6: Operating Instructions
OPERATING INSTRUCTIONS HEADBAND ADJUSTMENT: Headband Tightness is adjusted by loosening or tightening the elastic band about the two adjustment clips. HEADBAND REMOVAL: Locate the hinges on the Auto-Darkening Goggle and pull the hard plastic connection of the headband toward the opening in the hinge. -
Page 7: Goggle Operations/Features
GOGGLE OPERATION/FEATURES ON/MODE Button • ON-OFF (Lens will automatically darken when arc is present) The Auto-Darkening goggle will automatically turn on, the digital display control will activate, and the goggles will be ready for use. It is recommended that the user review the goggle settings prior to use. The welding goggles will automatically turn off after a half hour of no use. - Page 8 Variable Shade Control After turning on the lens, press the "FUNC" button to choose "SHADE", adjust the lens shade number. Use the shade control UP and DOWN but- tons to select the lens darkened state. The shade range for each mode is as follows: •...
- Page 9 Delay Control Press "FUNC" button to choose "DELAY", begin lens delay adjust- ments. Use the Lens Delay Con- trol "UP" and "DOWN" buttons to adjust the time for the lens to switch to the clear state after welding or cutting. •...
-
Page 10: Grind Button Operation
GRIND BUTTON OPERATION In order to switch the Auto Darkening Goggle from a Cutting or Welding Shade into Grind Mode first locate the plastic button on the top and left side of the Auto-Darkening Goggle. After the button has been located press and hold it for 3 seconds. -
Page 11: Goggle Care And Maintenance
GOGGLE CARE AND MAINTENANCE Cleaning: Cleaning: Clean googles by wiping with a soft cloth. Clean goggle surfaces regularly. Do not use strong cleaning solutions. Clean sensors with soapy water solution and a clean cloth and wipe dry with a lint-free cloth. Do NOT submerge goggles in water or other solution. - Page 12 Replacing Inside Cover Lens: Replace the inside cover lens if it is damaged. Place your fingernail in the re- cess above the lens view as shown below and flex the lens upwards until it releases from the edges of the lens view window.
- Page 13 Battery Replacement: To remove the battery, locate the battery cover on the left hand side of the goggle. Press the battery cover down in the indented area with your thumb and pull the cover toward the back of the goggle as shown in the image below.
- Page 14 Face Cover Replacement: To install a new face cover, first snap the piece into the two hinges on either side of the goggle shown in Step 1. For Step 2, rotate the face cover so that it is flush with the goggle. Lastly, fasten the two screws attached to the face cover into the goggle by turning them clockwise as shown in Step 3.
- Page 15 Change the Silicone Frame: Replace the silicone frame if it is damaged or worn. Push the frame down toward the center of the goggle lens as shown in the first image below and pull to remove. Install new silicone frame by pressing it into all five locking positions shown in the two images at the bottom of the page.
-
Page 16: Shade Guide Settings
SHADE GUIDE SETTINGS GUIDE FOR SHADE NUMBERS SUGGESTED ( 1 ) OPERATION ELECTRODE SIZE MINIMUM 1/32 in. (mm) CURRENT (A) PROTECTIVE SHADE NO. NT 1 SHADE (COMFORT) Shielded metal arc Less than 3 (2.5) Less than 60 – welding 3-5 (2.5–4) 60-160 5-8 (4–6.4) 160-250... -
Page 17: Troubleshooting
TROUBLESHOOTING GUIDE Test your auto-darkening goggles prior to welding by directing the front of the goggles toward a bright source of light. The, using your finger, rapidly cover and uncover the sensors. The goggles should darken momentarily as the sensors are exposed. A torch striker can also be used. PROBLEM POSSIBLE CAUSE SOLUTION... -
Page 18: Warranty Information
WARRANTY INFORMATION - Reference IMWS1 included in Literature. SPATTER DAMAGE IS NOT COVERED BY WARRANTY: Do not use this product without the correct protective clear lenses installed properly on both sides of the Auto-Darkening Goggles. The clear lenses sup- plied with the welding goggles are properly sized to work with this product and substitutions from other supplier should be avoided. - Page 19 Lincoln Electric for advice or information about their use of our products. We respond to our customers based on the best information in our possession at that time. Lincoln Electric is not in a position to warrant or guarantee such advice, and assumes no liability, with respect to such information or advice.
Need help?
Do you have a question about the VIKING ArcSpecs and is the answer not in the manual?
Questions and answers