
Related Manuals for GDC Standalone IMB SX-4000


Summary of Contents for GDC Standalone IMB SX-4000
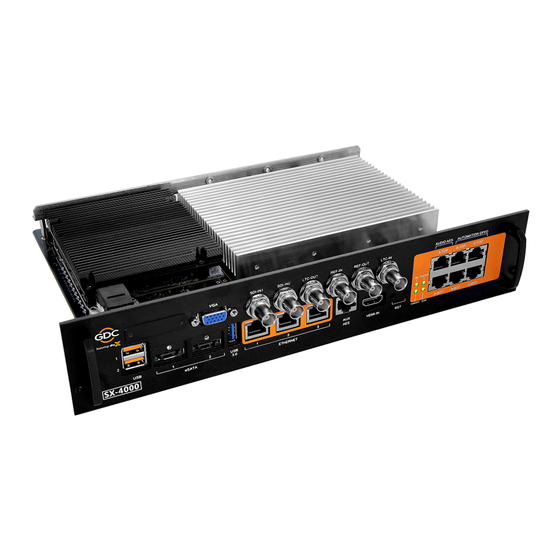
- Page 1 USER MANUAL FOR SX-4000 STANDALONE INTEGRATED MEDIA BLOCK™ SMS version 10.0 September 26, 2016...
-
Page 2: Table Of Contents
TABLE OF CONTENTS TABLE OF CONTENTS 1. INTRODUCTION ..................... 10 1.1. About This Manual ................... 10 1.2. Safety Instructions ................... 11 1.2.1. General Safety Instructions ........................11 1.2.2. Electrical Safety ............................11 2. SMS......................... 12 2.1. About the SMS Interface ................12 2.2. - Page 3 TABLE OF CONTENTS 2.3.5.3.6. Ethernet .............................. 42 2.3.5.3.7. Restart/Save/Cancel ........................... 43 2.3.6. Automation ............................... 44 2.4. Show Playlist .................... 52 2.4.1. Create a Show Playlist ..........................52 2.4.1.1. Access to Playlist Management ......................52 2.4.1.2. Creating a Playlist ..........................53 2.4.1.3.
- Page 4 TABLE OF CONTENTS 4. CONTENT MANAGER ................... 89 4.1. About the Content Manager ..............89 4.1.1. Introduction .............................. 89 4.1.2. Accessing the Content Manager ....................... 89 4.2. Content Management ................90 4.2.1. Ingesting Content ............................. 90 4.2.2. Ingesting Content from USB Disk ......................92 4.2.3.
- Page 5 TABLE OF CONTENTS 5.3. Configuration & Maintenance ..............118 5.3.1. Storage System Management ........................ 118 5.3.1.1. Create new RAID array ........................118 5.3.1.2. Monitor RAID Status ..........................121 5.3.1.3. Hard Disk Information ......................... 122 5.3.1.4. Hard Disk Usage ........................... 124 5.3.1.5.
- Page 6 TABLE OF CONTENTS 5.4.2. Add/Edit user ............................151 5.4.3 Delete User ............................. 153 5.4.4. Change Current User Password ......................155 5.5. DCI Compliance ..................156 5.5.1. Access to DCI Compliance ........................156 5.5.2. Offset RTC Time ............................157 5.5.3. Get SM Log.............................. 158 5.6.
- Page 7 The contents, features and specifications stated in this manual are subject to change without notice due to continuous product development and improvements. In no other event shall GDC Technology Limited be liable for any loss of profit or any other commercial damages, including but not limited to special, consequential, or other damages.
- Page 8 CONTACTS AND OFFICES CONTACTS AND OFFICES Website: www.gdc-tech.com Email: info@gdc-tech.com 24/7 Engineering Support Hotline: North America +1 877 743 2872 (Toll Free) Latin America +52 55 8851 1198 Europe +34 928 912 295 China +86 400 886 0966 (Toll Free)
- Page 9 CONTACTS AND OFFICES Indonesia (Jakarta) Japan (Tokyo) India (Mumbai) Mexico (Mexico City) Total Building Lantai 4 Suite 0401, 3F, Kyobashi-Chuo Bldg, Office No. B-207/208, Ave. Santa Fe 94, Jl. Letjen S. Parman Kav. 106A, 1-14-7 Kyobashi Chuo-ku, Everest Chamber, Torre A Piso 8, Kel Tomang, Kec.
-
Page 10: Introduction
1. INTRODUCTION 1.1. About This Manual This user manual provides instructions on how to use and manage the GDC SX-4000 Standalone Integrated Media Block™ (SX-4000 Standalone IMB®). The user interface of the IMB consists of a few key components described in the diagram below [Figure 1]. -
Page 11: Safety Instructions
• You are cautioned that any change or modification not expressly approved in this manual or approved in writing by an authorized representative of GDC Technology could void your warranty and/or authority to operate SX-4000. SX-4000 Standalone Integrated Media Block™... -
Page 12: Sms
2. SMS 2. SMS 2.1. About the SMS Interface The SMS interface is used for playback control, creating and editing playlists, scheduling. It also provides access to advanced configuration options. 2.2. Accessing the SMS Interface Figure 2 SMS interface. interface as seen in Figure 2. Enter the user password to access the SX-4000 Standalone Integrated Media Block™... -
Page 13: Understanding The Sms Interface
2. SMS 2.3. Understanding the SMS Interface 2.3.1. SMS Interface Figure 3 SMS Interface. [►] [►] Play button. The button starts playback when pressed, and is disabled when the system is in paused mode. Pause button. The button is enabled when the system is in playing or pause mode. - Page 14 2. SMS [►] [Slider Bar] It will start advancing when is pressed to start a playback. One clip will take one complete cycle from the left to the right. The Slider Bar always [■] returns to the starting point (extreme left) after a clip is finished. When is pressed, the Slider Bar will stop and return to its starting point.
-
Page 15: Playlist Management
2. SMS 2.3.2. Playlist Management Figure 4 Playlist Management. [IMB Content] The IMB content is listed here. Content is shown in alphabetical order grouped by [Trailer, Feature, etc]. Available automation cues are listed under cues. HDMI content can also be added to the playlist. [Playlist Content] The contents of the playlist being currently edited are shown here. - Page 16 2. SMS [Loop] When [Loop] is selected, the contents in the Playlist will run continuously [►] in a loop when is pressed. [3D Sync] Synchronizes clips for 3D showing. [Clear] Removes all clips on the playlist. [Edit Cue] Click the Edit Cue button to bring up the cue editing interface, used to add, remove or edit existing automation cues for the selected clip in the playlist...
- Page 17 2. SMS Cancel Enter Type in the desired name and press [Enter] to complete the action. To cancel the action and return to the previous screen, press [Cancel]. [Close] Exits the Playlist Management and returns to the Interface. SX-4000 Standalone Integrated Media Block™ September 26, 2016 - 17 - User Manual...
-
Page 18: Scheduler
2. SMS 2.3.3. Scheduler Figure 5 Scheduler [Select Date] Specifies the date and time of the schedule. [Timeline] Displays shows scheduled on a 24-hour timeline for the date selected in (1). [Selected Schedule Displays information such as name, time and duration of the selected Information] show schedule. -
Page 19: Configuration
2. SMS 2.3.4. Configuration 2.3.4.1. General Figure 6 Configuration [General]. SX-4000 Standalone Integrated Media Block™ September 26, 2016 - 19 - User Manual... - Page 20 2. SMS [Use startup / shutdown There are 3 levels of users on the system User, Technician, password] Maintenance. If this option is checked, the system will start up with a password dialog and the user will have to authenticate themselves as one of the above 3 users to start using or shut down the system.
- Page 21 2. SMS [Change Technician Password] button. For changing the Technician Password. When [Change Technician Password] is pressed, 3 prompts [Change Technician Password] will appear. The first prompt is for the user to enter the old password, the second prompt is for the user to enter the new password and the third prompt is for the system to verify the new password.
-
Page 22: Cinecanvas
2. SMS 2.3.4.2. CineCanvas Figure 7 Configuration [CineCanvas]. SX-4000 Standalone Integrated Media Block™ - 22 - September 26, 2016 User Manual... - Page 23 2. SMS [Use RPL for SMPTE Subtitle] Send a SMPTE-compatible Resource Presentation List (RPL) instead of an Interop-compatible Subtitle Presentation List to the projector for Cinecanvas subtitles. This is only enabled when SMPTE subtitles are available for the CPL. [Network Timeout] Timeout in seconds for communication with the projector.
-
Page 24: Assistance
2. SMS 2.3.4.3. Assistance Figure 8 Assistance. [USB Disk] Press to perform software upgrades from USB Disk. Displays serial number, OS version, software version, video [Server Information] capabilities of the IMB and warranty expiry date. [Warn before warranty To set the number of days to show a warning before warranty/lock /lock expired] expired. -
Page 25: Audio Option
2. SMS 2.3.4.4. Audio Option Figure 9 Audio option. Specify the audio delay to make the video and audio in sync. ‘+x’ will move the audio x frames forward [Audio Offset] such that the audio comes earlier than before. ‘-x’ will delay the audio by x frames such that the audio comes later than before. -
Page 26: Audio Channel Mapping
2. SMS 2.3.4.4.1 Audio Channel Mapping Figure 10 Using DCP channel order Audio output based on the number of audio channels in the audio track of the DCP can be configured in this tab. The preset for the number of audio channels in the audio track can be changed here. Use the 'Preset' button to configure audio presets. - Page 27 2. SMS Figure 11 Use DCP channel labels Audio output based on SMPTE audio channel configuration labels can be configured in this tab, Check the 'Use SMPTE audio labels' checkbox to route audio output based on SMPTE audio channel configuration labels. Audio output for individual SMPTE audio channel labels can be changed here.
- Page 28 2. SMS Figure 12 Alternative Inputs Audio output for alternative (HDMI, SDI) inputs can be configured in this tab. The audio output preset for each alternative input can be changed here. Use the 'Preset' button to configure audio presets. SX-4000 Standalone Integrated Media Block™ - 28 - September 26, 2016 User Manual...
- Page 29 2. SMS Figure 13 Upmix Audio channel upmix can be enabled or disabled in this tab. Check the 'Enable Upmix' checkbox to enable audio upmix. Please refer to Section 9 for more details on audio upmix. SX-4000 Standalone Integrated Media Block™ September 26, 2016 - 29 - User Manual...
- Page 30 2. SMS Figure 14 Audio Preset Audio channel output presets can be configured in this tab. Select a preset to view or change preset settings Add a new preset, or delete the current preset. Audio configuration for an audio preset can be changed here. Click 'Save' to save current audio configuration to the selected preset.
-
Page 31: Closed Captions
2. SMS 2.3.4.5. Closed Captions Figure 15 Closed Captions [Rear Window Caption Enable and configures a Rear Window display for closed captions. Device] Note: A USB-to-Serial converter is required for Rear Window display. [Enable Device] Enable communication with a closed caption device that supports SMPTE 430-10 (USL CCE-100, etc). -
Page 32: Imb Network
2. SMS 2.3.4.6 IMB Network Figure 16 IMB Network. Specify the subnet for all IP addresses. Specify the IP address of the IMB. This is the IP address of the Security Manager. This is the main IP address of the SX-4000. The SMS interface can be reached at this IP address using VNC. - Page 33 2. SMS Click to check all IP addresses entered above for correctness. A dialog will be displayed showing the source and target IP addresses, and any errors found in the new network configuration as shown below. SX-4000 Standalone Integrated Media Block™ September 26, 2016 - 33 - User Manual...
-
Page 34: Imb Storage
2. SMS 2.3.4.7 IMB Storage Figure 17 IMB Storage Specify a Network-Attached Storage System (NAS) which has an NFS share available to this SX-4000 system for the use as data storage Configure the SX-4000 to use an attached single external eSATA hard disk as data storage. The external eSATA hard disk must be attached to the eSATA Port 1 on the SX-4000. -
Page 35: Snmp Configuration
2. SMS 2.3.5. SNMP Configuration 2.3.5.1. Introduction The SNMP feature is an option on the SX-4000 that enables the use of SNMP to monitor the IMB. The SNMP interface contains many useful SNMP traps and is easy to configure. 2.3.5.2. Accessing the SNMP Configuration Interface Press Configuration... - Page 36 2. SMS Figure 19 SNMP Configuration [General]. On the SNMP Configuration, there are several tabs along the bottom of the screen. The General option (shown in the above figure), System Info option, System Setting option, Encrypt option, Storage option, Video Card option, option and Sensors...
-
Page 37: Understanding The Snmp Configuration Interface
2. SMS 2.3.5.3. Understanding the SNMP Configuration Interface 2.3.5.3.1. General Figure 20 SNMP Configuration [General Settings]. SNMP Manager IP Address, indicate the IP address of the SNMP Manager where traps are to be sent by typing in the IP Address , press the button to insert multiple SNMP addresses. -
Page 38: Storage
2. SMS 2.3.5.3.2. Storage Figure 21 SNMP Configuration [Storage Settings]. On the SNMP Configuration, select Storage. A new window opens as seen in Figure 21. Activate the Trap by checking the checkbox opposite the corresponding storage device. NOTE: When the Trap is On, a trap will be sent to the SNMP Manager if the system cannot detect the specified device. -
Page 39: Video Card
2. SMS 2.3.5.3.3. Video Card Figure 22 SNMP Configuration [Video Card Settings]. On the SNMP Configuration, select Video Card. A new window opens as seen in Figure 22 above. Activate the Trap by checking the checkbox opposite Video Card Driver JPEG2000. -
Page 40: Pci
2. SMS 2.3.5.3.4. PCI Figure 23 SNMP Configuration [PCI]. On the SNMP Configuration, select PCI. A new window opens as seen in Figure 23 above. Activate the Trap by checking the checkbox opposite the corresponding Device. NOTE: When the Trap is On, a trap is sent when the corresponding PCI device is missing. SX-4000 Standalone Integrated Media Block™... -
Page 41: Sensors
2. SMS 2.3.5.3.5. Sensors Figure 24 SNMP Configuration [Sensors]. On the SNMP Configuration, select Sensors. A new window opens as seen in Figure 24 above. Set the threshold temperature required for the system sensors by typing in the field or using an on-screen keyboard . -
Page 42: Ethernet
2. SMS 2.3.5.3.6. Ethernet Figure 25 Ethernet settings. Enables sending an SNMP trap if the system detects that the selected network interface is down. SX-4000 Standalone Integrated Media Block™ - 42 - September 26, 2016 User Manual... -
Page 43: Restart/Save/Cancel
2. SMS 2.3.5.3.7. Restart/Save/Cancel Figure 26 Pop-up window for restarting SNMP service. After the settings are complete, press to confirm. A small window pops out asking if you want to save the current SNMP configuration. (a) Select to save the configuration. (b) Select Cancel to cancel the configuration. -
Page 44: Automation
2. SMS 2.3.6. Automation Please refer to Figure 6 to transit from Configuration to Automation. DEVICES ACTIONS INPUTS EXTERNAL DEVICE INPUTS ACTIONS INTERNAL DEVICE (SYSTEM) AUTOMATION CONTROLLER ACTIONS INPUT EVENTS Figure 27 Automation flowchart. SX-4000 Standalone Integrated Media Block™ - 44 - September 26, 2016 User Manual... - Page 45 2. SMS DEVICES Automation Device Setup It should be noted that automation will only be executed within a playlist as long as that playlist is playing. If playback stops or the Stop button is pushed automation will not run. For Series 2 projectors please refer to Section 2.8.
- Page 46 2. SMS Figure 29 The device configuration window. To add a new device, press Add. A new window appears as seen in Figure 29. Type in the name you want to assign to a particular device. After adding the device name, assign the type of device you want to use. Select from a dropdown list as seen below.
- Page 47 2. SMS Under Projector Settings, (a) When the selected device type is PROJECTOR, select the model of the projector you want to use from a dropdown list. When the selected device type is JNIOR_IO, only one model of the Ethernet I/O controller is available from the dropdown list.
- Page 48 2. SMS INPUTS Figure 30 Inputs. Press the Inputs button. A new window opens as seen in Figure 30. On the Inputs, press to enter the selected device. NOTE: Only devices capable of sending a signal to the IMB can be added under Inputs. (a) Select a Trigger number from 0-7.
- Page 49 2. SMS ACTIONS Figure 31 Actions Select Actions on the Automation. On the Actions, press Add, located at the top portion of the screen. An on-screen keyboard opens. Type in your desired label name and press Enter. Press Add, located at the lower portion the screen, to append an action to the selected Event Label.
- Page 50 2. SMS (a) If the selected device is System, the Output Type prompt is Primitive. The Pins To option is disabled. Then select the desired operation under the Value option. (b) If the selected device type is a Projector, select primitive macro from a...
- Page 51 2. SMS Register is selected, multiple pins can be selected under the Pins To Use option. The number of pins selected will be the number of pins that can be used for output under the Value option. You can select more than one pin in the Value column based on the selected pins in the...
-
Page 52: Show Playlist
2. SMS 2.4. Show Playlist 2.4.1. Create a Show Playlist 2.4.1.1. Access to Playlist Management Figure 32 Creating a show playlist. On the interface, press to open a Playlist Management for creating playlists as seen in Figure 33 below in Section 2.4.1.2. Creating a Playlist. SX-4000 Standalone Integrated Media Block™... -
Page 53: Creating A Playlist
2. SMS 2.4.1.2. Creating a Playlist Figure 33 Playlist Management On the Playlist Management, all compositions stored are listed in the Content column on the left. The content is shown in alphabetical order grouped by type [Trailer, Feature, etc.]. Available automation cues are listed under ‘cues’. Select the composition to add to the playlist and press ]. -
Page 54: Editing Cues
2. SMS 2.4.1.3. Editing Cues Figure 34 Playlist Management To edit a cue of a composition on the playlist, select the desired composition from the Playlist Management and press Edit Cue. A new window displaying the Edit Cue opens as seen in Figure 35. - Page 55 2. SMS Figure 35 Edit Cue To specify a time code for the activation of the cue, press and a time code entry window [▲] [▼] wi ll open. Use the buttons enter the desired time code. Press to confirm your selection.
- Page 56 2. SMS Press and a frame number entry window will open. Key in the desired frame number and press Enter. Press Marker to view any markers present in the composition. If the composition does not contain any markers, a small window pops up to indicate that there are no markers present.
- Page 57 2. SMS To add a start cue, tick the Start Cue option and select the desired automation cue label from the dropdown list as seen below. To specify the blank time, press and a blank time entry window will open. Key in the desired blank time and press Enter.
- Page 58 2. SMS Press Add Cue to add the cue to the composition. The cue’s details will then be displayed in the cue window as seen below NOTE: You can select a cue from the cue window at any time to edit its properties. To delete a cue from the composition, select the cue from the cue window and press Delete Cue.
-
Page 59: Saving The Playlist
2. SMS 2.4.1.4. Saving the Playlist Figure 36 Saving the playlist. Press Save Show to save the playlist. This ensures any changes to playlist will not be lost. Press Load Show to Play and return to the SMS Interface. SX-4000 Standalone Integrated Media Block™ September 26, 2016 - 59 - User Manual... -
Page 60: Show Schedule
2. SMS 2.5. Show Schedule 2.5.1. Schedule a Show Figure 37 SMS Interface [Scheduler] . On the Interface, press Scheduler. A new window opens as seen in Figure 38. SX-4000 Standalone Integrated Media Block™ - 60 - September 26, 2016 User Manual... - Page 61 2. SMS Figure 38 Scheduler Go to the bottom section named Add to Schedule. At Date / Time, indicate the date and time to schedule the show. (a) The date format is DD/MM/YYYY and the time format is HH:MM:SS. To select the day, [▲] and [▼].
- Page 62 2. SMS (c) The Selected Playlist column on the right displays the clips in each playlist. (d) If you want the playlist to loop for a period of time, check Loop Until and indicate the date and time to end the loop. (e) Press after the schedule date/time is fixed and playlist is selected.
- Page 63 2. SMS Figure 39 Viewing schedule information. SX-4000 Standalone Integrated Media Block™ September 26, 2016 - 63 - User Manual...
- Page 64 2. SMS Check the Enable Scheduler checkbox to enable scheduled playback (a) At Select Date, indicate the date of the schedule. You should see a line on the time-bar at the slot where the show is scheduled. (b) Click on the line. Information about the show such as name, time and duration will be displayed in the Selected Schedule Information column beneath the time-bar.
- Page 65 2. SMS Figure 40 Replicating show schedule. A new window opens as seen in Figure 40. Select the required recurrence option. Only one option can be selected. Upon selection, all effective recurring dates will be listed in the Schedule recurrence dates column at the bottom.
-
Page 66: Synchronizing Shows
2. SMS 2.6. Synchronizing Shows 2.6.1. Synchronizing Clips for 3D (MPEG2) Figure 41 Synchronizing the clips. On the Playlist Management, select the clip from the Contents you want to associate with another clip for 3D showing and then press Sync. A small window pops out as seen below. SX-4000 Standalone Integrated Media Block™... - Page 67 2. SMS (a) Select the clip you want to associate with the previous clip you selected from Contents and then press OK. (b) Clips with the same number of frames will be immediately synchronized. If the clips don’t have the same number of frames, a small window will pop out as seen below.
-
Page 68: Imb Configuration
2. SMS 2.7. IMB Configuration 2.7.1. CineCanvas™ Configuration Connect a network cable from the Ethernet 2 port of the IMB to the LAN port of the projector that will accept CineCanvas™ communication. Make sure the IMB and projector are set on the same subnet network. For example, if the projector is set to 10.10.10.10 and the IMB is set to 192.168.0.200, either the IMB has to change its IP to 10.10.10.xxx or the projector has to change its IP to 192.168.0.xxx for them to be on the same network. - Page 69 2. SMS On the Interface, press Configuration. A prompt for Maintenance/Technician password opens. Select Maintenance from the dropdown list. Type in the correct password and press [Enter]. NOTE: Only Maintenance access has permission to view or change settings on the CineCanvas™...
- Page 70 2. SMS Figure 43 Setting up Cinecanvas subtitling option. SX-4000 Standalone Integrated Media Block™ - 70 - September 26, 2016 User Manual...
- Page 71 2. SMS A new window for the Configuration opens as seen in Figure 38. Press CineCanvas to open the CineCanvas. [▲] [▼] Use the buttons to adjust the Network Time out Projector blank time. (a) At Network Timeout, indicate how long the IMB will wait for the projector to respond to accept the subtitles before popping up an error message.
-
Page 72: Dolby 3D Setup
2.7.2. Dolby 3D Setup Once you have obtained a license from GDC, you will be given an update that enables Dolby 3D configuration. Dolby 3D setup requires that you have a PC that can be connected to the IMB network, so that you can access a web interface on the IMB. - Page 73 Connect your laptop, open a browser and point to http://server-ip/cgi-bin/dolby3dConfig. From here you will follow the wizard to setup color correction for the GDC IMB. T he DFC Controller will automatically turn on and off whenever a 3D playlist is being played.
-
Page 74: Series 2 Dlp Cinema Projector Setup
® 2.8. Series 2 DLP CINEMA Projector Setup There are several points to be noted when setting up the GDC IMB with a Series 2 DLP Cinema ® projector. SMS version 10.0 supports Series 2 projectors, the section below details additional steps required for full Series 2 compatibility. - Page 75 2. SMS To setup a Barco Series 2 Projector go to SMS-> Configuration -> General- Automation -> Devices ->Add-> Device Type-> Projector-> Model-> BARCO. The Device Type should be setup PROJECTOR Model set to BARCO. To set up the Christie Series 2 projector the Device Type should be setup as PROJECTOR...
-
Page 76: Subtitle Overlay
2. SMS 2.8.2. Subtitle Overlay 2.8.2.1. Subtitle Overlay Setup Subtitle Overlay is supported for Series 2 projectors for 2D JPEG2000 content. To setup Subtitle Overlay go to SMS -> Configuration -> Maintenance Access -> General. Under Settings there is a box titled Subtitle Overlay. You can also enter a Subtitle Delay number of frames, entering a negative number will advance the subtitles by that number of... - Page 77 2. SMS Figure 47 Control Panel From the Control Panel select Manage Content. SX-4000 Standalone Integrated Media Block™ September 26, 2016 - 77 - User Manual...
- Page 78 2. SMS Figure 48 Editing the subtitle language. Select the Subtitle tab to change the subtitle language. When subtitle overlay is selected, the language for clips with subtitles can be configured in the as seen in Figure 48. Setting the correct language for subtitles will ensure Content Manager that subtitles will be rendered properly for each clip.
- Page 79 2. SMS Figure 49 Subtitle language options. As shown in Figure 51, the following languages can be set for each clip: • Simplified Chinese • Traditional Chinese • Korean • Japanese • English • Spanish • Italian • Russian • French The language setting can also be left as Default to automatically use the original language...
-
Page 80: Cinecanvas Tm Support For Series 2 Projectors
2. SMS Figure 50 Returning to Control Panel. Click the Control Panel button to return to the Control Panel. 2.8.3. CineCanvas Support for Series 2 Projectors CineCanvas support for Series 2 projectors will be enabled automatically when the Subtitle Overlay checkbox is unchecked. -
Page 81: Shutdown/Restart Application
2. SMS 2.9. Shutdown/Restart Application 2.9.1. Shutdown or Restart Figure 51 Shutting down the system On the interface, when the Shutdown button is pressed, the system will prompt the user to select shutdown or restart application. Restarting the application will not reboot the IMB. -
Page 82: Control Panel
3. CONTROL PANEL 3. CONTROL PANEL 3.1. About Control Panel Control Panel UI provides access to all the other interfaces used to configure and operate the SX-4000. To get to the Control Panel, press Control Panel on the interface as shown in Figure 52. Figure 52 Control Panel. -
Page 83: Control Panel
3. CONTROL PANEL 3.2. Control Panel Figure 53 Control Panel Switch ON the IMB and allow it to boot up to prompt directly to the interface. When the SMS interface is shown, press the Control Panel button and a new window for opens as shown in Figure 53. -
Page 84: Manual Automation Execution
3. CONTROL PANEL 3.3. Manual Automation Execution Figure 54 Accessing Automation. Automation labels and projector commands can now be executed from an interface on the Control Panel. Press Automation on the Control Panel to start the manual automation interface as shown in Figure 54. SX-4000 Standalone Integrated Media Block™... - Page 85 3. CONTROL PANEL Figure 55 Executing Automation. A new window opens as seen in Figure 55. Select an automation label to view the actions associated with the label. Press Execute to execute the automation label. When a projector is configured for automation, projector primitives and macros can be triggered from this interface as well.
-
Page 86: Restarting The Control Panel
3. CONTROL PANEL 3.4. Restarting the Control Panel Figure 56 Selecting Restart on the Control Panel Press Restart to restart the Control Panel. The Control Panel will restart and display interface as seen in Figure 57. SX-4000 Standalone Integrated Media Block™ - 86 - September 26, 2016 User Manual... - Page 87 3. CONTROL PANEL Figure 57 SMS interface. SX-4000 Standalone Integrated Media Block™ September 26, 2016 - 87 - User Manual...
-
Page 88: Shutting Down The System
3. CONTROL PANEL 3.5. Shutting Down the System Figure 58 Shutting down the system. Select Shutdown on the Control Panel. A small window appears as seen in Figure 58. Select Shutdown to continue shutdown of IMB, or Cancel to cancel shutdown of IMB. All current playback will be stopped upon shutdown of the system. -
Page 89: September 26, 2016 Sx-4000 Standalone Integrated Media Block
4. CONTENT MANAGER 4. CONTENT MANAGER 4.1. About the Content Manager 4.1.1. Introduction The SX-4000 Content Manager allows the user to manage the contents of the IMB to: Download content from a disk or source on the network. Download keys [KDM’s] required for playing back content from disk or source on the network. Delete content that exists in the IMB data storage. -
Page 90: Content Management
4. CONTENT MANAGER Press Control Panel on the Interface. Press Manage Content to go to the Content Manager. NOTE: The Content Manager can run in the background and does NOT need to be exited. 4.2. Content Management 4.2.1. Ingesting Content Figure 60 Ingesting a package or CPL from a source located in a specific directory in the network. - Page 91 4. CONTENT MANAGER Select the source of data you want to ingest content from and click Open. Please refer to Section 4.5 Source Management to configure the source of data. Browse the source and select the directory where the package is located. The list of packages in the directory will be displayed in the top right section of the screen.
-
Page 92: Ingesting Content From Usb Disk
4. CONTENT MANAGER 4.2.2. Ingesting Content from USB Disk Figure 61 Opening a USB disk connected to the IMB. Select USB drive from dropdown list and click Open. (Continued on next page) SX-4000 Standalone Integrated Media Block™ - 92 - September 26, 2016 User Manual... - Page 93 4. CONTENT MANAGER Figure 62 Selecting the USB storage device and its partition Select a storage device and its partition from the dropdown lists. Press to confirm the selection. SX-4000 Standalone Integrated Media Block™ September 26, 2016 - 93 - User Manual...
-
Page 94: Ingesting Kdms
4. CONTENT MANAGER 4.2.3. Ingesting KDMs Figure 63 Ingesting KDM from a directory in the selected source. Select the directory in the selected source where the KDM is located. Shows the KDMs present in the selected directory that are valid for this IMB. ... -
Page 95: Monitor Ingest Progress
4. CONTENT MANAGER 4.2.4. Monitor Ingest Progress Figure 64 Monitoring the progress of download of the packages. Select the Status option. Shows the download status of the packages or CPLs. In this example, downloading of some packages or CPLs is incomplete. SX-4000 Standalone Integrated Media Block™... -
Page 96: Cancelling Ingest
4. CONTENT MANAGER 4.2.5. Cancelling Ingest Figure 65 Content Manager - Status Press Pause to temporarily stop the download of the package(s) or CPL(s). The Pause button will change to Start and will indicate that the download is being paused. Use the Move Up Move Down... -
Page 97: Deleting Content
4. CONTENT MANAGER 4.2.6. Deleting Content Figure 66 Deleting a downloaded package or CPL To delete a package or CPL, go to Content and click under the Select column opposite the package or CPL you want to delete. A green check indicates the selection. -
Page 98: Checking Content Integrity
4. CONTENT MANAGER 4.2.7. Checking Content Integrity Figure 67 Verifying the integrity of the files in the package(s) or CPL(s). Click View CPL to toggle between the package and CPL lists displayed in the content interface. Click under the Select column opposite the package or CPL you want to verify. - Page 99 4. CONTENT MANAGER Press Verify to check if all the required files are present in the selected package(s) or CPL(s). (a) If is selected, the package will be verified immediately as seen below. (b) If Schedule is selected, you need to assign a name and schedule the time and date when to verify the package(s) or CPL(s) in a new window as seen below.
- Page 100 4. CONTENT MANAGER Figure 68 Checking for stray files in package(s) or CPL(s) You can check if there are stray files in the selected package(s) or CPL(s) by pressing Check Stray. A small window pops out to confirm if there are no stray files. SX-4000 Standalone Integrated Media Block™...
- Page 101 4. CONTENT MANAGER Figure 69 Package [Quick Verify] Select Quick Verify to quickly check the integrity of the files in case it is modified or corrupted by calculating hash for each file in the selected package(s) or CPL(s). You will see under the Status column after verifying that no problems are detected.
- Page 102 4. CONTENT MANAGER Figure 70 Content Manager [Schedule]. You can view the list of package(s)/CPL(s) that you have scheduled for verification by selecting Schedule option. Select the desired package or CPL and press View to see its schedule details. Select the desired package or CPL and press Remove to delete it from the schedule list.
-
Page 103: Kdm Management
4. CONTENT MANAGER 4.3. KDM Management 4.3.1. Manage KDM Figure 71 KDM Manager. Select the KDM tab in the Content Manager Show the KDMs present in the selected directory that are valid for this IMB. Show the details of the selected KDM, including target, CPL, UUID and date of validity. Display date of issue for KDM. -
Page 104: License Management
4. CONTENT MANAGER 4.4. License Management 4.4.1. Manage Licenses Figure 72 License Manager. Select the License tab in the Content Manager. Shows the licenses that are valid for this system. Shows the details of the selected license, including licensed feature and validity period. Verify the integrity of the selected license. -
Page 105: Ingesting Licenses
4. CONTENT MANAGER 4.4.2. Ingesting Licenses Figure 73 Ingesting license from a directory in the selected source. Select the directory in the selected source where the license is located. Shows the licenses present in the selected directory that are valid for this IMB. ... -
Page 106: Monitor Ingest Progress
4. CONTENT MANAGER 4.4.3. Monitor Ingest Progress Figure 74 Monitor the progress of download of the packages. Select the Status option. Shows the download status of the packages or CPLs. In this example, downloading of some LDMs is complete. SX-4000 Standalone Integrated Media Block™ - 106 - September 26, 2016 User Manual... -
Page 107: Source Management
4. CONTENT MANAGER 4.5. Source Management 4.5.1. Adding a Data Source Figure 75 Content Manager [Source]. You can add a new source or edit an existing source by selecting the Source option. To add a new source, enable the source name entry and source information entry by pressing Add. - Page 108 4. CONTENT MANAGER Figure 76 Content Manager – Setting the data source parameters. Type in the new data source name on the Source Name entry. NOTE: You can type on each entry using an external keyboard or by using the on-screen keyboard The on-screen keyboard is normally used when an external keyboard is not present.
- Page 109 4. CONTENT MANAGER Set the parameters of the source. Select the type of source from a dropdown list. Type in the server name (source IP), source directory (source path), username and password of the selected source. NOTE: For sources such as and CIFS, the IP address, source path, username and password are enabled.
-
Page 110: Erasing A Data Source
4. CONTENT MANAGER 4.5.2. Erasing a Data Source Figure 77 Deleting a previously saved data source. Select the data source you want to delete from the dropdown list. Press Delete to delete the selected data source. SX-4000 Standalone Integrated Media Block™ - 110 - September 26, 2016 User Manual... -
Page 111: Editing Sources
4. CONTENT MANAGER 4.5.3. Editing Sources Figure 78 Editing a new data source. To edit an existing source, select the data source you want to edit from the dropdown list. Press Edit to edit the selected data source. Edit buttons will change to Save Cancel. - Page 112 4. CONTENT MANAGER Figure 79 Editing the parameters of the selected data source. You can edit/change the source name, parameter settings, username, or password by typing on each entry using an external keyboard or an on-screen keyboard NOTE: For more information regarding types of sources, please refer to Figure 79. Press Save after making all the changes.
-
Page 113: Admin Panel
All actions can be performed by touching the drawn control on the screen of the IMB. Access to Admin panel of the GDC IMB is available via the maintenance option and by entering a required password available from authorized GDC personnel only. -
Page 114: User Interface (Ui)
5. ADMIN PANEL 5.2. User Interface (UI) 5.2.1. Introduction Admin Panel UI provides access to the menu buttons and on-screen keyboard that are used for setting up and configuring the IMB. Diagnostic maintenance and/or monitoring of the status and performance of the IMB can also be done via the Admin Panel UI. -
Page 115: Login To Admin Panel
Click on the password entry on the screen and type in the required password using the on-screen keyboard and then press Login to access the Admin Panel SMS interface. NOTE: The password is available from GDC authorized personnel only. SX-4000 Standalone Integrated Media Block™ September 26, 2016 - 115 - User Manual... -
Page 116: Sms Interface
5. ADMIN PANEL Select Quit if you wish to go back to Control Panel. A small window pops out to confirm the selection. Press to confirm. Select Shut Down if you wish to shut down the IMB. A small window pops up to confirm the selection. - Page 117 5. ADMIN PANEL Storage System Management For creating a new RAID array and monitoring the RAID array status. Also shows hard disk information, hard disk usage, storage performance and increase rebuild speed. Diagnostics/Maintenance For changing timezone, and extracting logs and configuration backups from the IMB.
-
Page 118: Configuration & Maintenance
5. ADMIN PANEL 5.3. Configuration & Maintenance 5.3.1. Storage System Management Figure 83 Storage System Management Storage System Management. A small window for Storage System Management Select pops up. 5.3.1.1. Create new RAID array Figure 84 Storage System Management [Create new RAID array]. Select Create new RAID array. - Page 119 5. ADMIN PANEL Figure 85 Confirming to destroy data on the drive to confirm or cancel the selection by clicking the right [ ] or left [ ] arrow Select keys on the on-screen keyboard and then click Return. If less than three (3) hard disks are inserted to the PSD, a small dialog box will pop up: Click Return...
- Page 120 5. ADMIN PANEL Figure 86 RAID creation progress. The RAID creation progress is shown on the screen. After the RAID is created, the following dialog box is shown. Use SMS Configuration IMB Storage (please refer to Section 2.3.4.7.) to mount the RAID. SX-4000 Standalone Integrated Media Block™...
-
Page 121: Monitor Raid Status
5. ADMIN PANEL 5.3.1.2. Monitor RAID Status Figure 87 Storage System Management [Monitor RAID status]. Select Monitor RAID Status. When the RAID is rebuilding, it displays the rebuilding progress as normal function to the previous RAID setup. A new window appears as seen in Figure 88. -
Page 122: Hard Disk Information
5. ADMIN PANEL 5.3.1.3. Hard Disk Information Figure 89 Storage System Management [Hard Disk Information]. Select Hard Disk Information. A new window appears as seen in Figure 90. Figure 90 Selecting the hard disk to be viewed. Select the disk you want to view the information from and press Select. A new window will show the information for the selected disk as seen in Figure 91. - Page 123 5. ADMIN PANEL Figure 91 List of information for selected hard disk. SX-4000 Standalone Integrated Media Block™ September 26, 2016 - 123 - User Manual...
-
Page 124: Hard Disk Usage
5. ADMIN PANEL 5.3.1.4. Hard Disk Usage Figure 92 Storage System Management [Hard Disk Usage]. Select Hard Disk Usage from Storage System Management. A new window showing hard disk usage appears as seen in Figure 93. Click Back to return to Storage System Management. -
Page 125: Storage Performance
5. ADMIN PANEL 5.3.1.5. Storage Performance Figure 94 Storage System Management [Storage performance]. Select Storage performance. A new window showing a list of hard disks appears as shown in Figure 95. Select the hard disk you want to view and press Select to execute the process. -
Page 126: Increase Rebuild Speed
5. ADMIN PANEL Figure 96 Shows information on storage performance of the selected hard disk. A new window showing information on hard disk performance appears as seen in Figure 96. Press Save output to USB to save this information to a USB disk. Press Back to return to... -
Page 127: Diagnostics/Maintenance
5. ADMIN PANEL 5.3.2. Diagnostics/Maintenance 5.3.2.1. Access to Diagnostics/Maintenance Figure 98 Diagnostics/Maintenance On the Main menu, select Diagnostics/Maintenance. A small window for Diagnostics/ Maintenance appears. SX-4000 Standalone Integrated Media Block™ September 26, 2016 - 127 - User Manual... -
Page 128: Extract Logs & Configuration
5. ADMIN PANEL 5.3.2.2. Extract Logs & Configuration Figure 99 Diagnostics/Maintenance [Extract logs]. Select Extract logs. Select the set of logs required on this dialog box. A pop up window will be shown indicating that the log extraction is in progress. Once extract log files finished, a new window showing backup done is appeared. -
Page 129: Backup Configuration
5. ADMIN PANEL 5.3.2.3. Backup Configuration Figure 100 Diagnostics/Maintenance [Backup configuration]. Backup Configuration saves the IMB configuration to a backup file on a USB disk or thumb drive. Attach a USB thumb drive to the IMB and select Backup Configuration to save the current IMB configuration. -
Page 130: Restore Configuration
5. ADMIN PANEL The backup file is saved in an encrypted format as seen in Figure 101. The following configuration files are included in the backup file: • Automation configuration • SNMP configuration • SMS configuration • Content manager source configuration •... - Page 131 5. ADMIN PANEL Restore Configuration will restore the IMB configuration from a backup file on a USB disk or Restore Configuration is pressed, a list of backup files present on the USB disk thumb drive. When is displayed. Select the backup file to restore and then press Select. Figure 104 Confirm restore.
-
Page 132: Configure Timezone
5. ADMIN PANEL 5.3.2.5. Configure Timezone Figure 105 Diagnostics/Maintenance [Configure Timezone]. Select Configure Timezone. A new window will appear as seen in Figure 106. Move the highlight bar to your geographical area by clicking the up [ ] or down [ ] arrow keys on the on-screen keyboard and then click the space key. - Page 133 5. ADMIN PANEL Figure 107 Selecting the timezone of specific country. Move the highlight bar to your timezone by clicking the up [ ] or down [ ] arrow keys on the on- screen keyboard and then click the space key. Then click the right [ ] arrow key to select the button and click Return.
-
Page 134: Check Network Access
5. ADMIN PANEL 5.3.2.6. Check Network Access Figure 108 Network [Check network access]. Select Check network access on the Network. A new window appears to enter Network or IP address. Enter the Network or IP address, and then select Test connectivity. - Page 135 5. ADMIN PANEL Figure 110 A list of information after testing the connectivity of the IMB to the network. Press Save output to USB to save a screen capture of the information to a USB disk. Press Back. SX-4000 Standalone Integrated Media Block™ September 26, 2016 - 135 - User Manual...
-
Page 136: Network Time
5. ADMIN PANEL 5.3.2.7. Network Time Figure 111 Network [Network Time]. Select Network Time on the Network. A new window appears for NTP service configuration as shown in Figure 112. Select Enable NTP service. Type in the specified time server’s IP address and press to start using the NTP server. -
Page 137: Software Upgrade
From the Software Upgrade button in the Admin Panel you can run any GDC issued upgrade files, once you press the button you will be prompted for the upgrade password as seen in Figure 114. Figure 114 Diagnostics/Maintenance [Software Upgrade] Enter the password of the upgrade file and press Enter. - Page 138 5. ADMIN PANEL Figure 115 Diagnostics/Maintenance [Software Upgrade] Select the upgrade file from the dropdown list and press SX-4000 Standalone Integrated Media Block™ - 138 - September 26, 2016 User Manual...
-
Page 139: Check Ip Conflict
5. ADMIN PANEL 5.3.2.9. Check IP Conflict Figure 116 Diagnostics/Maintenance [Check IP Conflict] A new window will appear as shown in Figure 117. Select Check IP Conflict on the Network. Figure 117 Network interface Selection Select a network interface for checking IP conflict. SX-4000 Standalone Integrated Media Block™... - Page 140 5. ADMIN PANEL Figure 118 IP conflict Result Select Save output to USB to save a screenshot of the information to a USB disk. Click Back to exit. SX-4000 Standalone Integrated Media Block™ - 140 - September 26, 2016 User Manual...
-
Page 141: System Information
5. ADMIN PANEL 5.3.3. System Information 5.3.3.1. Access to System Info Figure 119 System Info On the Main menu, select System Info. A small window for System info appears. SX-4000 Standalone Integrated Media Block™ September 26, 2016 - 141 - User Manual... -
Page 142: Software/Os Version
5. ADMIN PANEL 5.3.3.2. Software/OS Version Figure 120 System Info [Software/OS version]. Select Software/OS version on System Info. The OS and Software versions of the IMB are shown in a new window as seen in Figure 121. Press Back to return to System Info. -
Page 143: Hardware Information
5. ADMIN PANEL 5.3.3.3. Hardware Information Figure 122 System Info [Hardware information]. Select Hardware information on the System Info. A new window showing the list of hardware information including the Motherboard, Video card and JPEG2000 card used in the IMB as seen in Figure 123. Press Back to exit and return to System Info. -
Page 144: Licensing Information
5. ADMIN PANEL 5.3.3.4. Licensing Information Figure 124 System Info [Licensing information]. Select Licensing information System Info. A new window shows the serial number and license capabilities of available options in the server as seen in Figure 125. Press Back to return to System Info. -
Page 145: Hotfix Information
5. ADMIN PANEL 5.3.3.5 Hotfix Information Figure 126 System Info [Hotfix information]. Select Hotfix information. It allows the user to check on the patches and upgrades installed on the IMB. A new window showing hotfix information appears as seen in Figure 127. Press Back to return to the... -
Page 146: Module Information
5. ADMIN PANEL 5.3.3.6 Module Information Figure 128 System info [Module information] The Module information button provides the user with detailed version information used in troubleshooting. Back A new window showing module version information appears as seen in Figure 129. Press to return to the System Info Figure 129 Module Version Information... -
Page 147: Touchscreen
5. ADMIN PANEL 5.3.4. Touchscreen 5.3.4.1. Access to Touchscreen Figure 130 Touchscreen On the Main menu, select Touchscreen. Touchscreen appears showing two types of touchscreens. SX-4000 Standalone Integrated Media Block™ September 26, 2016 - 147 - User Manual... -
Page 148: Select Touchscreen Type
5. ADMIN PANEL 5.3.4.2. Select Touchscreen Type Figure 131 Touchscreen [Switch Touchscreen Type]. Select Switch Touchscreen Type. A small dialog box pops up warning that the cursor may stop working if a change is made to the touchscreen type. Select to confirm the change in touchscreen type. - Page 149 5. ADMIN PANEL A small window indicating no change in touchscreen type will appear if The selected screen type is already activated. SX-4000 Standalone Integrated Media Block™ September 26, 2016 - 149 - User Manual...
-
Page 150: Calibrate Touchscreen
5. ADMIN PANEL 5.3.4.3. Calibrate Touchscreen Figure 132 Touchscreen [Calibrate Touchscreen]. Select Calibrate Touchscreen. Calibrate Touchscreen is selected when in TK USB screen, the screen will appear as seen in Figure 133. Figure 133 Calibrating the touchscreen by 4-pt calibration method. Touch the blinking symbol until it stops. -
Page 151: User Manager
5. ADMIN PANEL 5.4. User Manager 5.4.1. Access to User Manager Figure 134 User Manager On the Main menu, select User Manager. A small window for User Manager appears. 5.4.2. Add/Edit user Figure 135 User manager [Add/Edit user]. On the Main menu, select Add/Edit user. - Page 152 5. ADMIN PANEL Figure 136 Username and Password entries. Type in your desired Username Password using the on-screen keyboard to create a new username and password, and press OK. A small window will appear after creating your username and password. Press to confirm and exit.
-
Page 153: Delete User
5. ADMIN PANEL To edit the password, enter your current username and type in your new password . A small window pops up asking if you want to change the password. Press to confirm. A new window appears to confirm the password has changed. Press to exit and return to User... - Page 154 5. ADMIN PANEL Figure 138 Selecting the username to be deleted. Select the username you want to delete and press Select. A small window pops up to confirm if you want to continue to delete the user. Select to confirm. A small window appears confirming the user has been deleted. Press to exit and return to User Manager.
-
Page 155: Change Current User Password
5. ADMIN PANEL 5.4.4. Change Current User Password Figure 139 User manager [Change current user password]. Select Change current user password. A new window for password entry appears as seen in Figure 140. Figure 140 Password entry to change password. Type in your new password and press OK. -
Page 156: Dci Compliance
5. ADMIN PANEL 5.5. DCI Compliance 5.5.1. Access to DCI Compliance Figure 141 DCI compliance Press the DCI compliance button to access the RTC time offset or extract the SM (Security Manager) logs. SX-4000 Standalone Integrated Media Block™ - 156 - September 26, 2016 User Manual... -
Page 157: Offset Rtc Time
5. ADMIN PANEL 5.5.2. Offset RTC Time Figure 142 RTC Offset. The allowed offset range is set to plus or minus 360 seconds The Offset can be set + or – within the allowed offset range seen in field 1. The time is set in MM:SS (Minutes: Seconds) SX-4000 Standalone Integrated Media Block™... -
Page 158: Get Sm Log
5. ADMIN PANEL 5.5.3. Get SM Log Figure 143 Set time for SM log. Choose the date and time range for SM log extraction. It is possible to alter the name of the output file with the Key Pad button. Once a USB drive has been inserted press the Get Log button. -
Page 159: Quit/Shutdown
5. ADMIN PANEL 5.6. Quit/Shutdown Figure 144 Quit/Shutdown On Main menu, select Quit/ Shutdown. A small window shows the Quit/Shutdown. (a) Select Quit to switch to the Control Panel. (b) Select Shut Down to turn off the IMB. (c) Select Logout to logout the current user and return to the Admin Panel... - Page 160 7. APPENDIX (d) Select Restart all services to restart all automation, communications, playback, and content management services on the IMB. Playback will be stopped while services are restarted. Select to restart services or to cancel. A confirmation message will be displayed after all services are restarted. Press to exit.
-
Page 161: Operation Notes
6. OPERATION NOTES 6. OPERATION NOTES 6.1. Power Up Sequence Always power up any external storage before powering up the projector. The external storage must be powered up first to be correctly identified by the SX-4000. 6.2. Power Down Sequence Always power down the SX-4000 and projector with the following steps: 1. -
Page 162: Appendix
7. APPENDIX 7. Appendix This section describes optional features on the SX-4000 that require licenses from GDC. 7.1. Network Streaming The SX-4000 is capable of playing live network streams. This section provides information on configuring the SX-4000 for live network streaming. -
Page 163: Network Streaming Configuration
7. APPENDIX This configuration option allows video and audio to be buffered for a fixed amount of time before playback. (Recommended value: 5 seconds). Increasing this value is only needed on unstable connections. This configuration option allows audio to be delayed, for cases where source audio and video are out of sync. - Page 164 7. APPENDIX [UDP Multicast] This section will configure the network stream parameters [Multicast Group address] IP Address of streaming source [Multicast port] Port of the streaming source related to the IP address Video, Audio and Subtitle PID are usually provided by the broadcaster. If the video or audio PID is set to ‘0’, the SX-4000 will automatically search and play back the last video or audio stream [Video PID] found in the network system.
-
Page 165: Imb Synchronized Playback Operation
Please check with your regional GDC office for the correct software version to be used. NOTE 2: IMB synchronized playback is only enabled with a license from GDC. Please check with your regional GDC office for a license to enable IMB synchronized playback. - Page 166 7. APPENDIX [Enable Synchronization] Setting this option will enable synchronized playback with another system. [Mode] Select the IMB synchronized playback mode. The “Master Server” is used to control playback for IMB synchronized playback mode. The “Slave Server” will play in sync with the “Master Server”. Playback control must be done from the “Master Server”.
- Page 167 7. APPENDIX IMB sync playback with 'Play IMB sync playback Left Eye'/'Play Right Eye' with 'Play 3D' selected selected 2D SPL Will play as 2D on each projector Will play as 2D on each projector Will play as 2D left or right eye on 3D SPL Will play as 3D on each projector each projector...
-
Page 168: Synchronizer Set Up
7.APPENDIX 7.2.1 Synchronizer Set Up 7.2.1.1 GEN10 Sync playback supports three groups of frame rate: 24/ 48fps, 25/ 50fps and 30/ 60fps. GEN10 shall be configured to be with corresponding frame rate group. (please refer to Figure 139) GEN10 setup for 24/ 48fps ... -
Page 169: Setting Up Mda Internal Decoding Configuration
7. APPENDIX 7.3 MDA Decoding This section provides information on configuring the SX-4000 for MDA internal decoding. 7.3.1 Requirement The following items are required for MDA internal decoding on SX-4000 Immersive Sound Media Server. SX-4000 Immersive Sound Media Server ... -
Page 170: Setting Up The Mda Configuration File
7. APPENDIX 7.3.2.2 Setting up the MDA configuration file Note: A valid MDA configuration file must be set before playback with MDA internal decoding. Take note of the server IP address, and load the MDA configuration webpage http://<server_IP>/cgi-bin/mdaConfig on a PC connected to the server. For example, if the server IP address is '192.168.0.139', load the webpage http://192.168.0.139/cgi-bin/mdaConfig. - Page 171 7. APPENDIX Figure 150 MDA Configuration Manager August 24, 2016 SX-4000 Standalone Integrated Media Block™ - 171 - User Manual...
-
Page 172: Audio Channel Routing Requirements
7. APPENDIX 7.3.3 Audio channel routing requirements In order to allow for audio playback of content with 5.1 channel audio, 7.1 channel audio and MDA audio without speaker re-configuration, audio channel routing configuration needs to be done. After selecting Internal for MDA decoding, it is possible to select either Route HI/VI-N, Route D-Box or No Routing. -
Page 173: Audio Upmix On Sx-4000
7. APPENDIX 7.4 Audio Upmix This section provides information on configuring the SX-4000 for audio upmix. 7.4.1 Requirement License for MDA playback (internal rendering) 7.4.2 Setup 7.4.2.1 Enable audio upmix Audio upmix is enabled in SMS -> Configuration -> Audio tab -> Audio Channel Mapping - >... -
Page 174: Set Cpl Audio Track Properties
7. APPENDIX 7.4.2.2 Set CPL audio track properties This feature allows the user to define audio track properties for each CPL in an SPL. This can be done from SMS Playlist Management -> CPL Properties -> Audio tab. Figure 153 CPL audio track properties setting Audio track properties can be changed for each CPL if they are not detected correctly. - Page 175 7. APPENDIX Figure 154 CPL audio track properties setting The audio channel configurations available for each CPL are as follows: Audio channel configuration Audio upmix applied Unspecified No audio upmix applied 2.0 stereo No audio upmix applied 5.1 surround Upmixed from 5.1 surround to 13.1 7.1 surround Upmixed from 7.1 surround to 13.1 SX-4000 Standalone Integrated Media Block™...
- Page 176 Cert. No. CN09/32221 GDC Technology manufacturing facility is ISO 9001:2008 certified. Copyright © 2016 GDC Technology Limited. All rights reserved. All trademarks listed in this manual are properties of their respective owners. Specifications are subject to change without notice due to ongoing product development and improvement.
Need help?
Do you have a question about the Standalone IMB SX-4000 and is the answer not in the manual?
Questions and answers