
Related Manuals for GDC SX-2000ATO


Summary of Contents for GDC SX-2000ATO
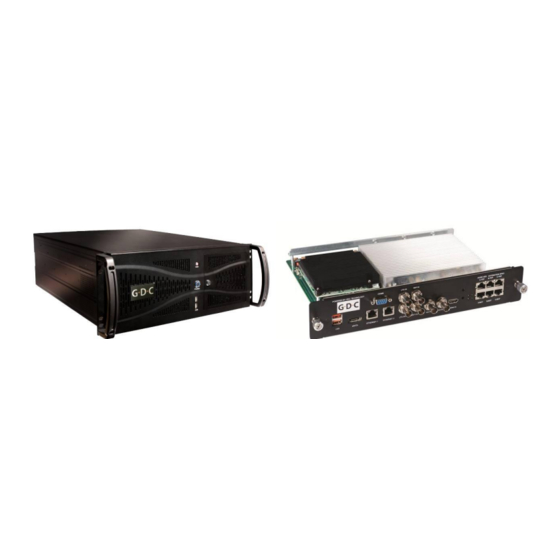
- Page 1 HFR UPGRADE MANUAL FOR SX-2000(A/T) TO SX-2000(A/T)R DIGITAL CINEMA SERVER WITH NEW INTEGRATED MEDIA BLOCK SMS version 9.0 December 19, 2012...
- Page 2 SX-2000(A/T)R Digital Cinema Server with New Integrated Media Block...
-
Page 3: Table Of Contents
TABLE OF CONTENTS STANDARD UPGRADE PACKING LIST AND RETURN LIST .......... 6 Standard Upgrade Packing List ................6 Standard Upgrade Return List ................6 UPGRADE INFORMATION ....................6 BEFORE THE UPGRADE ....................7 Backup ........................7 Swapping IMB ....................... 7 Connections ...................... -
Page 4: Copyright Notice
The contents, features and specifications stated in this manual are subject to change without notice due to continuous product development and improvements. In no other event shall GDC Technology Limited be liable for any loss of profit or any other commercial damages, including but not limited to special, consequential, or other damages. - Page 5 Notwithstanding the foregoing, LICENSOR IS NOT LIABLE TO LICENSEE FOR ANY DAMAGES, INCLUDING COMPENSATORY, SPECIAL, INCIDENTAL, EXEMPLARY, PUNITIVE, OR CONSEQUENTIAL DAMAGES, CONNECTED WITH OR RESULTING FROM THIS LICENSE AGREEMENT OR LICENSEE'S USE OF THIS SOFTWARE. Licensee agrees to defend and indemnify Licensor and hold Licensor harmless from all claims, losses, damages, complaints, or expenses connected with or resulting from Licensee's business operations.
-
Page 6: Standard Upgrade Packing List And Return List
1. STANDARD UPGRADE PACKING LIST AND RETURN LIST Standard Upgrade Packing List Standard Upgrade HFR hardware package kit includes: 1. Upgrade package hardware checklist and software upgrade manual 2. NEW IMB 3. Cover plate for projector type 4. RJ45 Audio cable x 2 5. -
Page 7: Before The Upgrade
3. BEFORE THE UPGRADE Backup Create a snapshot of the OS partition with Rescue mode before you try to apply the upgrade. Note that the Rescue mode function is only available for SATA OS hard disk. If you are unfamiliar with this procedure, please refer to the document GDC_system_backup_and_recovery. Swapping IMB 1. -
Page 8: Installing The Additional Gigabit Network Card
Figure 1 Error message after replacement of the IMB. 4. INSTALLING THE ADDITIONAL GIGABIT NETWORK CARD For TMS/LMS data connection 1. Remove old IMB from the projector. 2. Remove PCI-e adaptor card from the server. - Page 9 192.168.1.x IP. After the upgrade and reboot on the server, eth2 appears on the server Control Panel and AdminPanel Network as 192.168.1.13. Please do not change this IP. ================================================================= Link URL: http://visitor:wiije67@ftp.gdc-tech.com/~service/9x/upgrade-SX2000AR-9x-networkcard-20121109.tgz.enc User: visitor Password: wiije67 md5sum: 2fc13509c8c172be25f24c73dd717e0e upgrade-SX2000AR-9x-networkcard-20121109.tgz.enc Upgrade password: 20121109 ================================================================= 6.
-
Page 10: Upgrade Procedure
9. Server eth2 (from the installed gigabit card) can be used for transferring content from the TMS/LMS as in normal operation. 5. UPGRADE PROCEDURE Run the ServerID Upgrade “ServerID upgrade” prepares your server for the DCI software upgrade and MUST run before running the main upgrade. - Page 11 Figure 3 Select upgrade package. Enter password and select the correct upgrade package. Figure 4 Upgrade completed. The upgrade will take under one minute, then a window “Upgrade completed. Click OK to reboot” will pop up. User should unplug the USB drive and click OK to reboot the system.
-
Page 12: Apply Upgrade Package 2
If the IMB is not able to access the server storage during the incremental upgrade, i.e. without checking that the system is able to playback a DCP from the server, the upgrade may fail and the IMB LED will display a RED color after reboot. When this happens, only a GDC authorized personnel can recover the system. -
Page 13: After The Upgrade
Figure 6 Press password to log in SMS. The below screen will show up after rebooting, and requires inputing the password to enter SMS interface. 7. AFTER THE UPGRADE Figure 7 Server eth1. After the upgrade is completed, powercycle both the server and projector with IMB. -
Page 14: Preparing The Som Os
SOM (Option, required for MPEG2 playback) If the SOM option is included with the IMB, please follow the steps in this section to integrate. 7.1 Preparing the SOM OS Please request from your service provider to produce the SOM OS for the IMB with the corresponding serial number. -
Page 15: Preparing For Playback
8. PREPARING FOR PLAYBACK Figure 8 Turn off the server. Click server SMS->Shutdown->Shutdown to turn off the server. After the server is turned off, the IMB/SOM on projector will be down as well, so the projector must be off. Power off the projector. Power on the projector. - Page 16 Figure 9 Configure Projector 1 TI IP. Configure Projector 1 TI IP on server SMSConfigurationCinecanvas. Figure 10 SMS Interface. Once 'SM connected' shows up on the server SMS, the system is ready to playback both JPEG2000 and MPEG2 contents.
-
Page 17: Projector Setting For Mpeg2 Playback On Som
9. PROJECTOR SETTING FOR MPEG2 PLAYBACK ON SOM Figure 11 Projector setting [Input format]. Input format is '422 12 bit'. Figure 12 Activate PCF file. PCF should be 'MXFI_185' or 'MXFI_239'. 10. CAUTION 1. Please use Server SMSShutdownShutdown to turn off the server and IMB. 2. -
Page 18: Appendix
11. APPENDIX 11.1 IMB Audio and GPIO Port Pin Layout AES Audio GPIO Figure 13. IMB audio and GPIO port pin layout. - Page 19 Cert. No. CN09/32221 GDC manufacturing facility is ISO 9001: 2008 certified. Copyright © 2012 GDC Technology Limited. All rights reserved. All trademarks listed in this manual are properties of their respective owners. Specifications are subject to change without notice due to ongoing product development and improvement.
Need help?
Do you have a question about the SX-2000ATO and is the answer not in the manual?
Questions and answers