Table of Contents
Advertisement
Quick Links
Advertisement
Table of Contents

Related Manuals for Waves DiGiGrid IOC


Summary of Contents for Waves DiGiGrid IOC
- Page 1 DiGiGrid IOC User Guide...
-
Page 2: Table Of Contents
System Info Page and About Page ..........................20 Presets ..................................21 USING AN I/O DEVICE WITH A DAW ..........................22 SPECIFICATIONS ................................23 RESETTING THE UNIT ..............................26 Waves Inc 2800 Merchants Drive, Knoxville, TN 37912 USA 1-865-909-9200 www.waves.com DiGiGrid IOC / User Guide... -
Page 3: Introduction
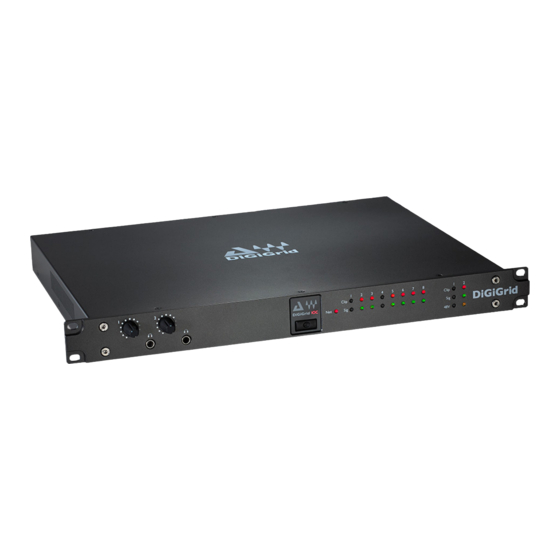
Introduction Perfect for the control room, the DiGiGrid IOC interface offers a wide range of connectivity options, including two mic/line inputs with broadcast-grade preamps, eight line inputs/outputs, sixteen AES/EBU inputs/outputs, one ADAT 8-channel I/O, and two independently adjustable headphone outputs. DiGiGrid IOC can be used as your primary audio interface, or as an additional I/O expansion to an existing SoundGrid system. -
Page 4: Hardware And Connections
Hardware and Connections DiGiGrid IOC is a 1U rack-mounted device. Aside from headphone jacks, all connections are on the rear panel. IOC F RONT ANEL Input clipping Red = clipping (level can be set through the control panel) Input signal present... - Page 5 1 ADAT I/O (8 channels @ 48 kHz) Clock in and out (BNC connectors for external Word Clock) * See the Connections diagram in the Technical Specifications section at the end of this user guide. DiGiGrid IOC / User Guide...
-
Page 6: Getting Started
ARDWARE One I/O In this example, one DiGiGrid IOC is connected directly to the SoundGrid host computer using a Cat 5e Ethernet cable or better. This provides plugin processing and/or DAW playback/recording via the SoundGrid ASIO/Core Audio driver. Host computer with SoundGrid application SoundGrid I/O device The host computer’s LAN port that’s connected to the SoundGrid network should be used for SoundGrid only. -
Page 7: Add I/Os
Adding I/O devices not only increases the number of I/O channels, but lets you have separate devices for stage and FOH, or live room and control room. Use a "star" network configuration with a 1GB Ethernet switch to connect SoundGrid devices. Only use switches tested and approved by Waves. Host computer... -
Page 8: Download And Install Software
YSTEM If you are already using a Waves SoundGrid host application and your device does not appear in the Network Devices list, use Waves Central to update the host application, which also updates the device drivers—or install just the missing device driver from Waves Central. -
Page 9: Configure The System
Please consult the user guide of your host application for specific instructions. SoundGrid QRec SoundGrid Studio Setup Window All SoundGrid devices are configured in a similar manner. Throughout this section, we show DiGiGrid IOS as an example. DiGiGrid IOC / User Guide... -
Page 10: Manual Device Configuration
If later you add, remove, or swap a device, Auto-Config will reconfigure your inventory and re-patch. Note that SoundGrid Studio assigns the SoundGrid driver automatically. SuperRack SoundGrid and eMotion LV1 require that the SoundGrid ASIO/Core Audio driver is assigned manually. DiGiGrid IOC / User Guide... -
Page 11: Device Firmware
Click on the ID button to activate a hard-to-miss LED on the front panel of the corresponding hardware device. You can also activate the front panel from the top bar of the device’s control panel. SoundGrid Studio SoundGrid QRec DiGiGrid IOC / User Guide... -
Page 12: Ioc Control Panel
RIVER ONTROL ANEL Open the driver control panel and then click the Hardware Control Panel button. The driver control panel is located here in the host computer: PC: C:\Program Files (x86)\Waves\SoundGrid\Driver Control Panel Mac: System HD/Applications/Waves/SoundGrid ONTROL ANEL AGES The About and System Info pages provide information about the unit, such as MAC address, SOE master MAC Address, firmware version, and more. -
Page 13: Controls Page
Analog section 2 mic/line combo 8 line in + 8 line out (DB25) ADAT I/O section AES/EBU I/O section Focus section: analog input and output levels and 48V phantom power are controlled from here. DiGiGrid IOC / User Guide... - Page 14 Peak hold persists until you reset it by clicking on the indicator or switching to a different input. An orange light on a channel button indicates that phantom power for that channel is active. This status is also shown in the Focus section. DiGiGrid IOC / User Guide...
- Page 15 In addition to meters and clip and peak indicators—which are identical to those in the input controls— there is a Headroom switch that provides a -10 dB pad. A green LED indicates the presence of a -10 dB. pad on the analog output. DiGiGrid IOC / User Guide...
- Page 16 A yellow light on the channel button indicates that sample rate conversion is active for that channel. Outputs: To gain access to the SRC button, select any of the AES/EBU outputs. Once you select SRC, you can also choose any of the following sample rates: 44.1, 48, 88.2 or 96. DiGiGrid IOC / User Guide...
- Page 17 0 dB, -1 dB, -2 dB, or -3 dB. This setting is global: it affects level indication for all channels, inputs and outputs. Each channel button—analog or digital, input or output—has a small level meter that indicates when signal is present and provides a rough idea of level. A red light on the channel button indicates clipping. DiGiGrid IOC / User Guide...
-
Page 18: Clock Page
External WC Clock is provided by an external device via the Word Clock Input connector. Sync over Ethernet The device receives clock from the SoundGrid network. AES/EBU CH1 IOC clocks to an incoming AES/EBU stream DiGiGrid IOC / User Guide... - Page 19 If the I/O is clocked to external source and that clock source fails, the device will seek an alternate source of clock, in this priority: word clock, Digital 1, Digital 2, and then SOE. If this fails, the device will fall back to Internal. DiGiGrid IOC / User Guide...
-
Page 20: System Info Page And About Page
The About page contains a description of the device. The System Info page contains technical details about the device, including MAC address, Firmware version, and Module version. This information is useful for troubleshooting. Please have this information handy if you contact Waves technical support concerning the device. DiGiGrid IOC / User Guide... -
Page 21: Presets
Click the Identify button to indicate which IOC hardware device belongs to this Control Panel. Clicking the button causes the Network LED on the front panel of the IOC to flash in a rather psychedelic manner. DiGiGrid IOC / User Guide... -
Page 22: Using An I/O Device With A Daw
ONFIGURE THE OUND 1. Set the DAW playback engine to “Waves SoundGrid.” The SoundGrid driver channels will now appear in the DAW I/O preferences and in the Input/Output selector in each DAW channel. 2. Route the DAW inputs and outputs to SoundGrid. -
Page 23: Specifications
• Harmonic Distortion: Typically < 0.01% @ unity gain, -10 dB input @ 1 kHz • Frequency Response: +/-0.5 dB (20 Hz to 20 kHz) • Channel Separation: Better than 90 dB (40 Hz to 15 kHz) DiGiGrid IOC / User Guide... - Page 24 XLR C ONNECTORS Phase Termination Point Positive (+) Pin 2 Negative (-) Pin 3 Signal Ground Pin 1 Chassis Ground Case ¼” TRS C ONNECTORS Phase Termination Point Positive (+) Negative (-) Ring Signal Ground Sleeve DiGiGrid IOC / User Guide...
- Page 25 OUT 1-2 OUT 3-4 OUT 5-6 OUT 7-8 G C H G C H G C H G C H G C H G C H G C H G C H G=Ground C=Cold H=Hot DiGiGrid IOC / User Guide...
-
Page 26: Resetting The Unit
3. Restart the unit while holding the button. 4. Release the Reset button once the device has fully booted. The unit is now in “force update” mode and a new firmware update can be performed. DiGiGrid IOC / User Guide...
Need help?
Do you have a question about the DiGiGrid IOC and is the answer not in the manual?
Questions and answers