Table of Contents
Advertisement
Quick Links
Advertisement
Table of Contents

Related Manuals for Waves MIDIPLUS FIT


Summary of Contents for Waves MIDIPLUS FIT
- Page 1 Mixing Control Surface for Waves eMotion LV1 User Guide...
-
Page 2: Table Of Contents
MIDIPLUS FIT User Guide Introduction ......................3 Safety Instructions and Warnings ..............................3 Getting Started ......................5 Connect the Hardware ..................................5 Assign MIDIPLUS to eMotion LV1 ..............................6 Configure the Device ..................................7 Controls .........................9 Front Panel......................................9 Rear Panel ....................................... 10 Rack Mounting the Unit .................. -
Page 3: Introduction
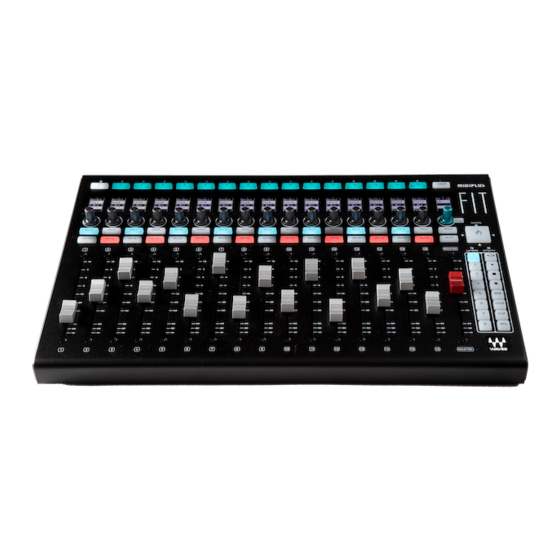
Introduction Thank you for choosing the MIDIPLUS FIT controller, an intuitive control surface designed to function as a fully-integrated fader bank for the Waves eMotion LV1 digital mixing console. MIDIPLUS FIT features 16+1 touch-sensitive motorized faders, 16+1 clickable rotary encoders, and assignable function buttons. - Page 4 CAUTION RISK OF ELECTRIC SHOCK. DO NOT OPEN. ATTE NTIO RISQUE DE CHOC ELEC TRIQ NE PAS OUVRIR CAU TIO N: TO REDUCE THE RISK OF ELE CTRIC, SHOCK DO NOT REMOVE COVER BACK OF THIS DEVICE. NO USER-SERVICEABLE PARTS INSIDE. REFER SERVICING TO LIFIED PERSONNEL...
-
Page 5: Getting Started
LV1 and Waves plugins. 1. Use a USB cable to connect the MIDIPLUS FIT controller to a USB port on the Motion LV1 host computer. 2. Turn on the FIT controller device and your computer will automatically install the necessary drivers. -
Page 6: Assign Midiplus To Emotion Lv1
If you are not familiar with the eMotion LV1 Settings window and the System Inventory page, please refer to the eMotion LV1 user guide, which can be downloaded from the waves.com Download page. After connecting FIT to the computer, launch eMotion LV1. Go to the Settings window and click the System Inventory tab. -
Page 7: Configure The Device
Faders: Select which LV1 mixer window will be controlled by the MIDIPLUS FIT device. This can be LV1 Mixer 1 or 2, or the controller can operate standalone. If you are using a second FIT controller, you can select “Follow Device 1.” The second device will then serve as an extension of the first device. - Page 8 The three Custom Function drop-down menus map actions to the controller’s Record, Stop, and Play buttons. By default, these three buttons are assigned to Next Scene, Save Session, and Alt. Use the drop-down menus to assign other functions to the buttons. LUGIN APPING The Knob Mode menu sets the mapping of the FIT rotary encoder knobs to either pan, gain,...
-
Page 9: Controls
Controls Front Panel The functions of the knobs and buttons on the MIDIPLUS FIT controller are specifically designed to control the Waves eMotion LV1. Touch-sensitive motorized faders Mute: Turns off the corresponding channel's output signal. Solo: Activates Cue or Solo, depending on the LVl mode. -
Page 10: Rear Panel
Cable Tie: Holds the power cable in place. Rack Mounting the Unit The MIDIPLUS FIT controller can be mounted in a standard 19-inch (482.6 mm) rack. Before mounting, replace the two side panels with the included rack mounting side panels. -
Page 11: Specifications
If the FIT controller cannot control the eMotion LV1, try this: Make sure the USB cable is connected and the power is turned on. Make sure you have configured your LV1 as described above. www.waves.com www.midiplus.com FIT Controller for eMotion LV1 / User Guide...
Need help?
Do you have a question about the MIDIPLUS FIT and is the answer not in the manual?
Questions and answers