Table of Contents
Advertisement
Available languages
Available languages
Quick Links
Advertisement
Table of Contents

Related Manuals for universalblue UVT1316-21


Summary of Contents for universalblue UVT1316-21
-
Page 2: Table Of Contents
Ventilador de techo Ceiling fan ÍNDICE ESPAÑOL INSTRUCCIONES DE SEGURIDAD ..............3 CARACTERÍSTICAS DEL PRODUCTO ...............7 MONTAJE E INSTALACIÓN................9 FUNCIONAMIENTO ..................20 LIMPIEZA Y MANTENIMIENTO ..............23 GUÍA DE SOLUCIÓN DE PROBLEMAS............24 SERVICIO POSTVENTA ..................24 INFORMACION INHERENTE AL MEDIOAMBIENTE ........26 ENGLISH SAFETY INSTRUCTIONS .................. -
Page 3: Español
ESPAÑOL Felicidades por haber adquirido este producto. Le recomendamos que dedique algún tiempo a leer cuidadosamente este Manual de Instrucciones / Instalación con el fin de hacer un buen uso del mismo. Lea cuidadosamente todas las instrucciones de seguridad antes de utilizar el aparato y conserve este Manual de Instrucciones / Instalación para poder consultarlo en el futuro. - Page 4 El ventilador debe ser instalado por un electricista o persona cualificada para ello. El ventilador debe estar conectado a un suministro eléctrico de 220-240V~50/60Hz. Todo trabajo eléctrico debe llevarse a cabo tras desconectar la corriente eléctrica, apagando el interruptor.
- Page 5 Este aparato no está diseñado para ser utilizado por personas (incluidos niños) con capacidades físicas, sensoriales o mentales reducidas o con falta de conocimiento, a menos que estén recibiendo supervisión o instrucción relativa al uso del aparato por una persona responsable. Debe revisar que los niños no utilicen el ventilador como juguete.
- Page 6 Para protegerse contra las descargas eléctricas: no sumerja la unidad o el cable en agua ni rocie con líquidos. Apague el ventilador cuando no se use y antes de desmontarlo limpiarlo. Ensamble completamente el ventilador antes de encenderlo de nuevo.
-
Page 7: Características Del Producto
son factores necesarios en la instalación y el funcionamiento de este ventilador. 2. CARACTERÍSTICAS DEL PRODUCTO El contenido del paquete contendrá los siguientes elementos, además de el mando a distancia, tornillos y kit de equilibrio de las aspas, este manual y la garantía del producto. - Page 8 Con función invierno incluida Clase energética E Eficiencia lumínica 85LM/W Flujo de aire 7300 CFM Emisiones acústicas 30dB Protección IP20 5 velocidades Velocidad del ventilador 204 RPM 3 colores LED Color: negro CARACTERÍSTICAS UVT1327-21 Ventilador de techo Dimensión 64”/163 cm Potencia máxima: 50 W 3 aspas Material aspas: Plástico ABS...
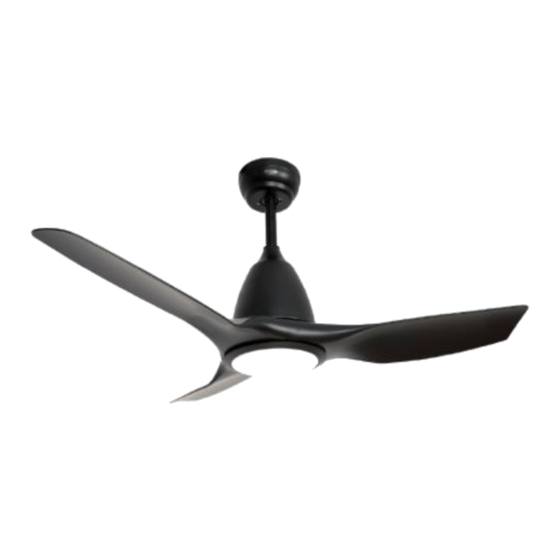
- Page 9 UVT1316-21 CARACTERÍSTICAS UVT1316-21 Ventilador de techo Dimensión 56”/142 cm Potencia máxima: 26 W Motor 3 aspas Material aspas: madera Con mando a distancia Con porta lámparas (luces LED 15W) Con temporizador Con accesorios para facilitar el montaje Con función invierno incluida Con WiFi Clase energética E...
-
Page 10: Montaje E Instalación
5 velocidades Velocidad del ventilador 205 RPM 3 colores LED Color: negro 3. MONTAJE E INSTALACIÓN Antes de instalar el aparato asegúrese que el aparato está desenchufado de la corriente eléctrica. Además desconecte la corriente eléctrica de la instalación de su casa. DÓNDE INSTALAR ... - Page 11 tornillos de fijación largos incluidos. Asegúrese de que al menos 30 mm del tornillo se enroscan en el soporte. Nuestros ventiladores no están diseñados para instalar en pladur o falso techo, pues estos materiales podrían no soportar los 45Kg. Nota: Los tornillos de fijación (incluidos) están diseñados para su uso con el ventilador y ser fijados en vigas de madera o techo de hormigón.
- Page 12 3. Una los componentes de la varilla de soporte en el orden que indica la imagen. (fig. 3). 4. Pase el cable el cable de electricidad por el interior de la varilla y sáquelo por el otro lado.(fig. 4) 5. Asemble la varilla de soporte con la cabeza del ventilador (fig. 5) 6.
- Page 15 PASO A PASO MODELO UVT1316-21 Nota: Las imágenes son orientativas y sólo deben ser utilizadas como apoyo a la instalación. 1. Instale las aspas en la cabeza del ventilador utilizando los tornillos suministrados (fig. 1). 2. Ensamble el alojamiento de la placa LED en el cabezal del ventilador (fig.
- Page 16 12. Con un taladro, haga lo agujeros en el techo en función a las medidas del ventilador. (fig. 13) 13. Note la diferencia de instalación entre un techo de madera y uno de hormigón (fig. 14) 14. Desconecte la electricidad general de la zona en donde se vaya a hacer la instalación.
- Page 19 CONEXIÓN DEL MANDO A DISTANCIA L : AC IN 220-240V N : AC IN 220-240V : Amarillo/Verde Nota: la imagen y los colores de los cables es orientativo. Puede variar según el modelo. KIT DE EQUILIBRIO DE ASPAS Junto con el producto adquirido encontrará un kit suministrado para evitar que las aspas se muevan desequilibradas.
-
Page 20: Funcionamiento
doblando muy suavemente el soporte del aspa para devolverlo de nuevo a su posición. Usando una regla se puede comprobar el seguimiento de la hoja. Ponga la regla contra el techo, verticalmente, y anote la distancia del borde del aspa al techo. Cuidadosamente gire las hojas lentamente con la mano para comprobar el resto de aspas. - Page 21 MANDO A DISTANCIA MODELOS UVT1317-21 Y UVT1327-21 aparato incorpora mando distancia, para un uso más cómodo y eficiente. Para funcione mando distancia se debe siempre apuntar al ventilador. Antes comenzar utilizarlo, rogamos dediquen unos minutos a familiarizare con las funciones: ...
- Page 22 Para utilizar el control remoto, debe añadir 2 baterías en la parte inferior del mando. MANDO A DISTANCIA MODELO UVT1316-21 Todos controles de este modelo...
-
Page 23: Limpieza Y Mantenimiento
desincronizarlo. Lea el manual de instrucciones de Wi-Fi para realizar la conexión de manera satisfactoria. Nota: Cada control remoto va asociado al receptor incluido junto con el ventilador. Nota: Cuando apaga el ventilador con el mando a distancia se quedará guardada la última configuración de la luz establecida. -
Page 24: Guía De Solución De Problemas
Para la reparación: El producto debe ser reparado por un electricista con licencia y utilizando el repuesto original, de lo contrario esto puede resultar en un peligro considerable para el usuario. Este producto eléctrico cumple con los requisitos de seguridad pertinentes. - Page 25 Para hacer uso de la garantía acuda al centro donde compró este producto o bien contacte con nosotros de cualquiera de las siguientes formas: A través del email sat@universalblue.es, adjuntando la factura de compra e indicando sus datos de contacto y brevemente qué problema presenta su producto.
-
Page 26: Informacion Inherente Al Medioambiente
Puedes descargar este manual en nuestra página web: www.universalblue.es *Universal for Engineering Industries Spain, S.L. se reserva el derecho de hacer cualquier cambio en las especificaciones y características de los productos sin previo aviso, debido a la mejora continua de los productos. -
Page 27: English
ENGLISH Congratulations on the purchase of your product. We recommend you to spend some time to read this Instruction Manual in order to fully understand how to use it correctly.. Read all the safety instructions carefully before use and keep this Instruction / Installation Manual for future reference. - Page 28 The fan must be installed by an electrician or a qualified person. The fan must be connected to a 220-240V power supply. All electrical work must be carried out after disconnecting the electrical current by turning off the switch.
- Page 29 person. You should check that children do not use the fan as a toy. The fan cannot be started in a room with a gas appliance running at the same time. The fan must be turned off and stopped completely before reversing the direction of the fan.
-
Page 30: Product Features
If the fan is not working properly, contact a qualified technician for examination and repair. Never attempt to dismantle the fan yourself. To avoid personal injury or damage to the fan and other items, be cautious when working around or cleaning the fan. - Page 31 UVT1317-21 AND UVT1327-21 FEATURES UVT1317-21 Ceiling fan Dimension 52"/132 cm Maximum power: 26 W 3 blades Blades’ Material: ABS plastic With remote control With lamp holder (LED light 20W) With timer With accessories for easy assembly Winter function included Energy class E Light efficiency 85lm/W Air flow 7300 CFM Noise level 30 dB...
- Page 32 With lamp holder (LED light 20W) With timer With accessories for easy assembly Winter function included Energy class E Light efficiency 85lm/W Air flow 10600 CFM Noise level 30 dB IP20 protection 5 speeds Fan speed 207 rpm 3 LED colours Colour: black UVT1316-21...
- Page 33 FEATURES UVT1316-21 Ceiling fan Dimension 56"/142 cm Maximum power: 26 W Motor 3 blades Blades’ Material: wood With remote control With lamp holder (LED light 15W) With timer With accessories for easy assembly Winter function included With WiFi Energy class E...
-
Page 34: Assembly And Installation
3. ASSEMBLY AND INSTALLATION Before installing the appliance, make sure that the appliance is unplugged from the mains. Also disconnect the electrical current from the installation of your home. WHERE TO INSTALL Make sure that the place where the fan is going to be installed is quite wide, as this will allow a better air flow and that the fan blades do not come into contact with any object, minimum space of 0.6m on each side. - Page 35 Note: Fastening screws (included) are designed for use with the fan and are fastened to wooden beams or concrete ceiling. If the installation is carried out on a different material, it is advisable to use the appropriate fixing screws for that material (these screws are not supplied with this equipment).
- Page 36 8. Place the fixing stick at the top end of the rod (fig. 8). 9. Set the rod position by screwing it in (fig, 9 ). 10. Slide the rod down as shown in the picture (fig. 10) 11. Disassemble the cable holder to split them. (fig.11 and 12). 12.
- Page 39 STEP BY STEP UVT1316-21 MODEL Note: The images are for guidance only and should be used to support the installation. 1. Install the blades on the fan head using the screws provided (fig. 1). 2. Ensamble el alojamiento de la placa LED en el cabezal del ventilador (fig.
- Page 40 12. Using a drill, make the holes in the ceiling according to the dimensions of the fan screw holes (fig. 13). 13. Note the diffrents installation between a wooden and a concrete ceiling (fig. 14). 14. Disconnect general electricity current (fig. 15). 15.
- Page 43 REMOTE CONTROL CONNECTION L : AC IN 220-240V N : AC IN 220-240V : Yellow/Green Note: picture and colours of the cables are indicative. It may vary depending on the model. BLADE BALANCE KIT Included in the purchased product you will find a kit supplied to prevent the blades from moving unbalanced.
-
Page 44: Using The Appliance
the blades. If the blades are not aligned, the holder can be slightly bent up or down to align it with the rest of the blades. If after following all these steps the problem is not solved, a small adjustment must be made using the balance kid provided. Turn the fan on and change the speed until the most noticeable swing occurs (usually the highest speed). - Page 45 ON/OFF button : Press it to turn the device on or off. Light ON button : Press it to turn on the lights of the device. Press it as many times as necessary select among the different colours of light, with a choice of three options.
- Page 46 8H: Setting for the fan to turn off automatically after three hours of operation. In order to be able to use the ceiling fan through the remote control, the receptor included with this device must be installed before, as explained in the installation section of this manual.
-
Page 47: Cleaning And Maintenance
To use this function simply press the remote control button. 5. CLEANING AND MAINTENANCE This product does not require a great deal of maintenance. To clean, please follow the instructions below: Unplug the fan first and wait until it comes to a complete stop. ... -
Page 48: After-Sales Service
To make use of the guarantee go to the store where you purchased this product or contact us by: By email, sat@universalblue.es. Please, attach the invoice, add your contact details and explain briefly what the issue is. By phone, calling us to (0034) 968 893691. -
Page 49: Environmental Information
In the following address: UNIVERSAL FOR ENGINEERING INDUSTRIES SPAIN, SL C/ Decenio N1, Polígono Industrial Media Legua. 30565. Las Torres de Cotillas (Murcia) This product’s motor have a 5 year warranty. 8. ENVIRONMENTAL INFORMATION This appliance is labelled in compliance with European directive 2012/19/EU for Waste Electrical and Electronic Equipment (WEEE). - Page 50 Download this manual in our web site: www.universalblue.es *Universal for Engineering Industries Spain, S.L. reserves the right to make any change in the specifications and features of the products without prior notice, due to the continuous improvement of the products. The images shown here are illustrative, so there may be slight differences between the images and the product you have purchased.
- Page 51 www.universalblue.es...
Need help?
Do you have a question about the UVT1316-21 and is the answer not in the manual?
Questions and answers