Disc Makers EliteMicro Installation And Setup Manual
Usb 2.0 cdr / dvdr publisher
Hide thumbs
Also See for EliteMicro:
- Troubleshooting manual (51 pages) ,
- Installation and setup manual (40 pages)
Table of Contents
Advertisement
Quick Links
Advertisement
Table of Contents

Related Manuals for Disc Makers EliteMicro


Summary of Contents for Disc Makers EliteMicro
- Page 1 EliteMicro CDR / DVDR Publisher Hardware Installation and Setup Guide USB 2.0...
-
Page 2: Service And Contact Information
Whenever you contact Discmakers please have the serial number listed in the front of this manual or on the rear of the EliteMicro, so a customer service representative can log onto your account. Discmakers utilizes one of the most advanced trouble-ticket monitoring solutions. We track any and every exception or trouble ticket to verify that you are completely satisfied with your purchase. - Page 3 It is illegal to duplicate copyrighted discs for any reason other than personal use, unless you happen to be the copyright owner. The EliteMicro recording unit is intended for use only to those identities that are the owners of the copyright or are properly licensed to use the copyright.
-
Page 4: Table Of Contents
Welcome and Introduction Hardware Configuration Minimum PC Hardware Requirements Unpacking the Hardware Carton Contents Installation of Printer Adapter Kit Connection of the EliteMicro Startup CDROM Installation of Recording Software Installation of Autoloader Command Console Installation of Labeling Software Disabling CD ROM “Auto-Run”... -
Page 5: Welcome And Introduction
50 Piece Input A CDR or DVDR Drive The EliteMicro is a single writer desktop CDR or DVD/CDR copying and printing solution in a single footprint. As the smallest and most versatile duplication system on the market today, the EliteMicro offers you endless possibilities to automate your CDR or DVD/CDR duplication and printing needs. -
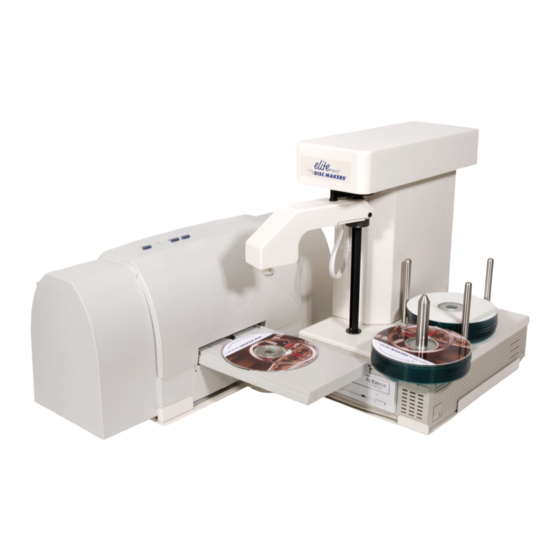
Page 6: Hardware Configuration
EliteMicro Setup Guide Hardware Configuration Before starting the installation, please review the following figures showing the EliteMicro Hardware and Functions... - Page 7 EliteMicro Setup Guide...
-
Page 8: Minimum Pc Hardware Requirements
Desktop systems change rapidly and the EliteMicro was designed for use with PC systems that are relatively new models. It is recommended that you operate your new EliteMicro with the best possible hardware. This will ensure you a recording and printing system that will operate smoothly and efficiently. -
Page 9: Unpacking The Hardware
Installation CD for EliteMicro Software Set the components on a table that will hold the EliteMicro unit and your PC. Next, by lifting straight up, carefully remove the foam container and foam protection over the EliteMicro unit. You will see the EliteMicro in a plastic bag. - Page 10 Foam section removed. other hand under the unit to remove Carefully lift out as shown Remove from bag NOTE: Do not attempt to raise the CD Pick Arm by hand; the software will position the Pick Arm when the EliteMicro is initialized.
-
Page 11: Carton Contents
EliteMicro Setup Guide Main Carton w/ EliteMicro USB 2.0 Cable DB9 Serial Loader to PC Cable AC Power Cord Installation CD for EliteMicro Software Hardware Setup Manual Printer Adapter Kit Contents Printer Guide Plates (2 pcs) Printer Control Cable Printer Parallel Cable... -
Page 12: Installation Of Printer Adapter Kit
Review your configuration and confirm it matches Figures 9.5 and 9.6. Plug the CD Printer Control Cable (mini din cable similar to a keyboard cable and has connectors on both ends) into matching connectors in the rear of the EliteMicro and the rear of the Printer. (Figures 9.7 & 9.8) Plug the parallel printer cable provided with the Printer Adapter Kit into the rear of the printer and into the parallel port of your PC. - Page 13 Figure 9.3 Next arrange the guide as shown, USING THE INSERTATION ANGLE place the EliteMicro Recording unit into the guide. Figure 9.5 Review your configuration and confirm it matches as shown Figure 9.7 Plug in CD Printer Control Cable into...
-
Page 14: Connection Of The Elitemicro
Arrange your PC hardware on the same table as the EliteMicro unit. Connect the other ends of the USB 2.0 and Serial Cables to their respective connections on your PC. Plug the power cord into the power supply of the EliteMicro, also located on the rear side. Plug into a standard 115VAC outlet. -
Page 15: Startup Cdrom
EliteMicro Setup Guide Installation of Startup CDR Locate the EliteMicro Installation and Support CDROM, insert into your PC’s CDROM drive and it will automatically open to the setup screen shown below. Note: If your CDROM drive is not set to autoplay, open the CDROM and click on click_here.htm. - Page 16 Register Your EliteMicro If your PC is currently connected to the Internet, click on this option to register your EliteMicro online. You are encouraged to register your EliteMicro to allow you to be notified of software updates. Check for Software Updates/Upgrades If your PC is currently connected to the Internet, click on this option and you will be directed to the software support download site.
-
Page 17: Installation Of Recording Software
EliteMicro Setup Guide Step 4 Installation of Recording Software Install EliteMicro CDR/DVDR The first option is installation of the recording software. Select Software onto your PC and the software will begin to automatically install. Note: Keep the Registration Key [DJ4A-0000-0000-0000-00] on the back of the Sleeve handy;... - Page 18 Registration Key [DJ4A-0000-0000- 0000-00] on the back of the CD Sleeve and on the front page of this manual. Play close attention to the Key and be sure to enter exactly as it is written on the label. EliteMicro Setup Guide...
- Page 19 EliteMicro Setup Guide Click complete and Next The installation is complete. Click Finish and the DiscJuggler Icon will be placed on your desktop.
-
Page 20: Installation Of Autoloader Command Console
EliteMicro Setup Guide Step 5 Installation of EliteMicro Autoloader Command Console Next you can install the ACC (Autoloader Command Console) program. This is a utility program used to align and support the Elite Autoloading unit. Double click on the Install... - Page 21 EliteMicro Setup Guide The ACC allows you to troubleshoot and update your EliteMicro unit. If any electrical or mechanical issues occur, run the Diagnostics. The ACC Diagnostic routine will test all functions of the autoloader and provider graphical feedback. Comm Port...
- Page 22 EliteMicro Setup Guide This screen provides an easy way to update the AutoLoader’s firmware if changes are made in the future. This screen offers an easy way to recalibrate your unit if the need should ever arise.
-
Page 23: Installation Of Labeling Software
Step 6 Installation of Labeling Software If your EliteMicro was purchased with the Inkjet Printer Adapter Kit, you will need to install the label making software included with the kit. Locate the Discus CD Labeling Software CDR and insert into your CDROM drive on the PC that is connected to the EliteMicro. -
Page 24: Disabling Cd Rom "Auto-Run
CD is inserted into your CD ROM drive, then you will need to turn off your computer’s “Auto- Run” feature. You MUST disable Auto-Run for the EliteMicro’s recorder. Otherwise, when you insert a master CD to be copied, your computer will try to automatically play or run whatever is on that CD. -
Page 25: Arranging Icons & Turning Unit On
CDR/DVDR product. Turn on your EliteMicro Unit Ensure that all the cables are properly connected. Turn on the EliteMicro by flipping the power switch located on the rear of the unit. You are now ready to start creating and duplicating CD/DVDs. -
Page 26: Set Up A Job
Load Blank CD’s and Start Duplication You are now ready to begin a job or task on the EliteMicro. Turn on your unit if you have not already done so. Refer to the previous page if necessary. The next steps will take you through a typical setup and usage of the EliteMicro. - Page 27 EliteMicro Setup Guide After you have selected Copy CDs and DVDs from the same burner, the panel below will open. Choose ACTION from the upper right section. On the PULL DOWN select Write and Print if you have a CD/DVD printer. Otherwise, select Write.
- Page 28 DiscJuggler menu. Next, click on the Defaults Here, you can change the default write speed for CDs and DVDs to the speeds that work best with your media. EliteMicro Setup Guide tab if it is not already...
-
Page 29: Set Up Print Image
To do this you will have to use the Discus label software provide with the EliteMicro. Minimize the DiscJuggler Software and on the Desktop, Click on the Discus CD Labeling ICON. The Discus Software will open. - Page 30 EliteMicro Setup Guide Choose the Print folder at the top. Click on Select Template and choose the Primera Signature. Then click on the Text folder.
- Page 31 EliteMicro Setup Guide Discus will display the Text folder. Click on an ABC button and the Centered button. Then click on the image of the CD. Now type in a simple test label as shown in the figure below. Once you have completed your test label, save it by clicking on File and Save. Choose a path that will be easy to access from DiscJuggler, such as My Documents or the Desktop.
- Page 32 EliteMicro Setup Guide Next you will have to choose a file name for the PRINT (PRN) file. This can be the same as your label file; however, it is necessary to include the “.prn” at the end of the name. In the example below we have created printtest.prn...
-
Page 33: Set Print Image For Discjuggler
EliteMicro Setup Guide Step 10 SET PRINT IMAGE FOR DiscJuggler Now you have to provide the label print file location to the DiscJuggler. From the DiscJuggler Software choose the AUTOLOADER tab on the upper left section. Then click on the folder ICON to the right of the GOOD LABEL file panel. -
Page 34: Cycle Only Option
EliteMicro Setup Guide Step Cycle Only Option As an option you can elect to “cycle only” and the software will not “RECORD” onto the media. Instead it will run through all functions BUT RECORD. Check the Cycle Only box to... -
Page 35: Start The Job
CD Printer to open. The recorded CD will be placed into the printer tray and the CD will be printed. After printing the EliteMicro will pick up the CD from the printer and place into the output spindle. It will repeat this and the cycle will continue until the 25 copies are completed. -
Page 36: Using Drive Assigner
EliteMicro Setup Guide Using Drive Assigner If Your Unit is trying to use CD/DVD Recorders on your PC, try the following: Due to the fact that DiscJuggler is an open platform that looks at the entire PC system for writers, it can sometimes try to assign your PC’s internal writer to the autoloader. -
Page 37: Troubleshooting
EliteMicro Setup Guide Troubleshooting the EliteMicro The EliteMicro systems is comprised of 4 basic systems that all work together similar to a PC, Scanner and Printer configuration. Generally any items that come up can be isolated to one of the following components: 1) PC System / Windows®...
Need help?
Do you have a question about the EliteMicro and is the answer not in the manual?
Questions and answers