Tecnosicurezza Pulse Pro Installation Instructions Manual
Hide thumbs
Also See for Pulse Pro:
- User instructions (4 pages) ,
- User instructions (26 pages) ,
- User instructions (24 pages)
Table of Contents
Advertisement
Quick Links
Advertisement
Table of Contents

Subscribe to Our Youtube Channel
Related Manuals for Tecnosicurezza Pulse Pro


Summary of Contents for Tecnosicurezza Pulse Pro
- Page 1 Pulse Pro Installation instructions...
-
Page 2: Company
Founded in 1983 with the aim of providing a complete range of professional products, Tecnosicurezza is now a consolidated reality in the field of locks and security systems for safes. The experience gained in over 35 years of activity in the security sector has allowed the designing and manufacturing of high technology and reliability systems, which continue to receive the approval of an increasingly demanding clientele. -
Page 3: Table Of Contents
Installation instructions Pulse PRO Table of contents COMPANY TABLE OF CONTENTS MODELS AND CHARACTERISTICS ACCESSORIES AUDIT AND PROGRAMMING ACCESSORIES CERTIFICATIONS IMPORTANT NOTES! KEYPAD DIMENSIONS ROTOBOLT LOCK DIMENSIONS STRAIGHTBOLT LOCK DIMENSIONS SPRINGBOLT LOCK DIMENSIONS MOTORLOCK LOCK DIMENSIONS MOTOR LATCHBOLT LOCK DIMENSIONS KEYPAD ROTATING KIT INSTALLATION INSTRUCTIONS (ACCESSORY, P.N. -
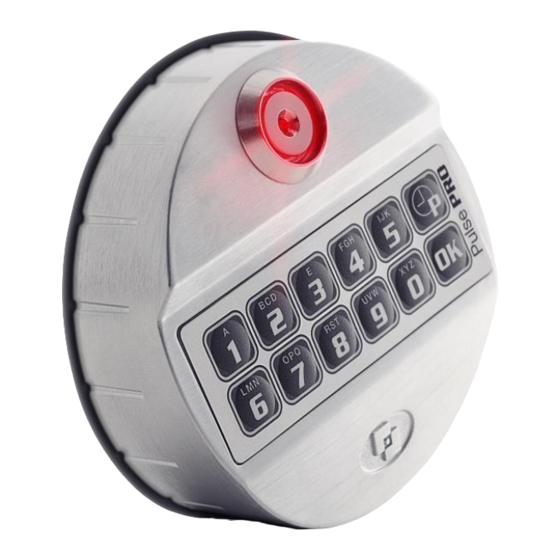
Page 4: Models And Characteristics
Installation instructions Pulse PRO Models and characteristics Models Variants T6630/GRP Keypad in metal. Satin chrome /DL – with Dallas key reader. colour with rubber membrane foil keypad in grey colour. Accessories Code Description T3330 Rotating back plate kit. NL1000 Mounting adapter. -
Page 5: Certifications
Installation instructions Pulse PRO Certifications II_PulsePro_03_eng 5 of 24... - Page 6 HIGH-SECURITY ELECTRONIC LOCKS, TYPE 1 representative samples of High Security Electronic Lock, Type 1 – High Security Electronic Lock System; Pulse Pro: Comprised of Rotobolt Lock with),T6630(Pulse Pro Metal satin chrome). Units maybe suffixed with /B Black unit,/G Grey unit,/GR unit with rubber grey keypad,/BR unit with rubber keypad in black,/DL unit with Dallas Reader.
-
Page 7: Important Notes
The mounting dimensions are standard (magic module). For the installation of the keypad and lock, use only the screws provided by Tecnosicurezza. Any other screw must be approved in advance. Locks are supplied with metric (M6) mounting screws. Upon request, Imperial 1/4-20 UNC format mounting screws are available. - Page 8 Any component to be fixed to the lock bolt must be previously approved by Tecnosicurezza before installation. In any case, the maximum load must not exceed 2,5 N for T4800/M model, 4 N for T4801/M and 30 N for the reinforced model T4801/MP.
-
Page 9: Keypad Dimensions
Installation instructions Pulse PRO Keypad dimensions RotoBolt lock dimensions T4800 StraightBolt lock dimensions T4800/D II_PulsePro_03_eng 9 of 24... -
Page 10: Springbolt Lock Dimensions
Installation instructions Pulse PRO SpringBolt lock dimensions T4800/S MotorLock lock dimensions T4800/M T4801/M & T4801/MP 10 of 24 II_PulsePro_03_eng... -
Page 11: Motor Latchbolt Lock Dimensions
Installation instructions Pulse PRO Motor LatchBolt lock dimensions T4800/M/S T4801/M/S II_PulsePro_03_eng 11 of 24... -
Page 12: Keypad Rotating Kit Installation Instructions (Accessory, P.n. T3300)
Installation instructions Pulse PRO Keypad rotating kit installation instructions (accessory, p.n. T3300) The rotation kit consists of 2 bushings, 2 M4 countersunk screws, 1 plastic pin, 1 spring and 1 rotating backplate. (Imperial screws 8-32 UNC are available on request.) Cut the grooved shaft to the appropriate length: measure door thickness (from mounting surface of the entry unit to the mounting surface of the lock) and add 26 mm (1”). -
Page 13: Fixed Keypad Installation Instructions
Installation instructions Pulse PRO Remove the release liner placed under the membrane and apply the latter on the keypad case. Connect a battery to the battery connector inside the keypad battery compartment or, if provided, connect the battery pack to the lock connector "BAT" (connector 2 in the case of a MotorLock or Motor LatchBolt lock). -
Page 14: Straightbolt And Springbolt Installation Instructions
The bolt must be able to move freely without force being applied to it. The maximum load applicable to the bolt must not exceed 1 KN. Contact Tecnosicurezza in case of heavier loads. Connect the keypad cable to the lock connector "ENT", making sure it is fully inserted and locked. - Page 15 The maximum load applicable to the bolt must not exceed 1 KN. Contact Tecnosicurezza in case of heavier loads. Connect the keypad cable to the lock connector "ENT", making sure it is fully inserted and locked.
-
Page 16: Motorlock And Motor Latchbolt Locks Installation Instructions
Installation instructions Pulse PRO Secure the cable inside the specific groove on the lock cover and fix the lock using the appropriate mounting screws. Avoid stretching the cable. Connect the keypad cable to the lock connector "ENT", making sure it is fully inserted and locked. - Page 17 To remove the cable, bring the connector upwards and carefully pull it out. The maximum load applicable to the bolt must not exceed the limit values specified in the table below. Contact Tecnosicurezza in case of heavier loads. Lock reference Lock version...
-
Page 18: Functional Tests
For all types of locks, at the end of the operation the bolt must fully extend and ensure locking. Repeat the functional test several times before locking the safe door. Failure to follow these installation instructions or opening the lock by personnel not authorized by Tecnosicurezza will void the warranty. 18 of 24 II_PulsePro_03_eng... -
Page 19: Ce Declarations
Il sottoscritto Franco Miller, in veste di Presidente CdA e Legale Rappresentante della società Tecnosicurezza S.p.A., con sede in San Giovanni Lupatoto (Verona) Via Cesare Battisti 276, dichiara sotto la propria responsabilità, che il suddetto prodotto soddisfa per progettazione e costruzione i requisiti delle direttive di: compatibilità... - Page 20 Il sottoscritto Franco Miller, in veste di Presidente CdA e Legale Rappresentante della società Tecnosicurezza S.p.A., con sede in San Giovanni Lupatoto (Verona) Via Cesare Battisti 276, dichiara sotto la propria responsabilità, che il suddetto prodotto soddisfa per progettazione e costruzione i requisiti delle direttive di: compatibilità...
- Page 21 Installation instructions Pulse PRO NOTES II_PulsePro_03_eng 21 of 24...
- Page 22 Installation instructions Pulse PRO NOTES 22 of 24 II_PulsePro_03_eng...
- Page 23 Installation instructions Pulse PRO NOTES II_PulsePro_03_eng 23 of 24...
-
Page 24: Correct Disposal Of This Product
Contacts GLOBAL HEADQUARTERS USA HEADQUARTERS SPAIN HEADQUARTERS Tecnosicurezza SpA Tecnosicurezza Inc. Tecnosicurezza Sa Via Cesare Battisti. 276 50, Thomas Lane C/Menor, 4 - Nave 10 37057 San Giovanni Lupatoto Pol.
Need help?
Do you have a question about the Pulse Pro and is the answer not in the manual?
Questions and answers