Advertisement
Quick Links
Advertisement

Related Manuals for Kogan KAMN15CDA


Summary of Contents for Kogan KAMN15CDA
- Page 1 USER GUIDE 15.8” FULL HD IPS LED PORTABLE USB-C MONITOR (1920 x 1080) (KAMN15CDA)
-
Page 2: Table Of Contents
CONTENTS Safety instructions ........3 Product overview ........4 Using cover case ........5 Connection options .........6 Operation ..........10 Specification..........12 Troubleshooting ........13 Cleaning & maintenance ..... 15... -
Page 3: Safety Instructions
SAFETY INSTRUCTIONS • Read these instructions. All safety and operating instructions must be read before this product is operated. • Keep these instructions – Retain this manual for future reference. • All warnings on the device and in the operating instructions must be adhered to. •... -
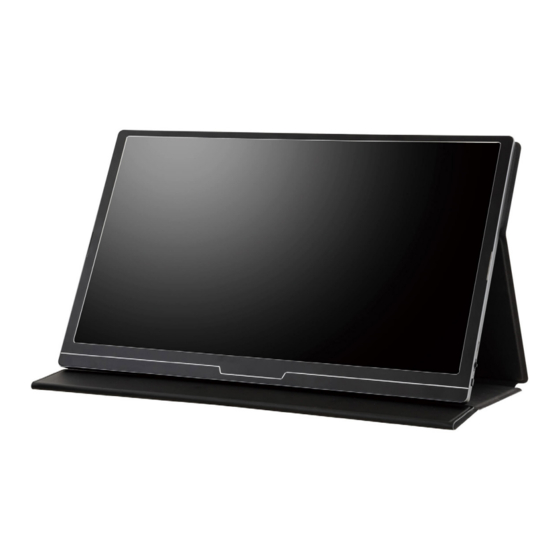
Page 4: Product Overview
PRODUCT OVERVIEW 1920 1080 15.8 Inch 368mm A 15.8” LED Portable Monitor F 3.5mm headphone jack B Case cover G Right speaker C Left speaker H Secondary USB-C port (power only) D Mini HDMI port I Rocker switch E Primary USB-C port J Power / Return button (power and video) -
Page 5: Using Cover Case
USING COVER CASE The cover case has a built-in magnet that can be attached to the monitor. Attach the case by following the below steps: Back side (with one line) Place the device LED side on the back side, (with two lines) with the LED display facing up. -
Page 6: Connection Options
CONNECTION OPTIONS Plugging in If the device you’re connecting to has a USB-C port, connect one end of the USB-C to USB-C cable to the device and the other end to the portable monitor. Some devices may not provide enough power to the monitor. Check the USB-C port on your device for the symbols shown in the table below. - Page 7 Computer (via USB-C) The portable monitor can be connected to a compatible computer using the supplied USB-C cable. This must be connected to the primary USB-C port on the monitor’s left side. The computer will provide power and signal to the monitor and can be used for extended display or duplicated display use.
- Page 8 Computer (via HDMI & power adapter) The second option for HDMI connection is to connect the supplied HDMI-to-Mini HDMI cable between the computer and the portable monitor, while also connecting the monitor directly to an external power adapter (supplied) via USB. For this, you can use either the primary USB-C port on the monitor’s left side, or the secondary USB-C port on the monitor’s right side.
- Page 9 Other devices (via HDMI & USB or power adapter) If connecting to a device without a USB-C port, you can utilise HDMI as long as you also provide a power supply. There are two options for this. The first is to connect the supplied HDMI-to-Mini HDMI cable between the device and the portable monitor, while also connecting to the device via USB to provide power.
-
Page 10: Operation
OPERATION Powering on/off Press and hold the power button for 3 seconds to turn the monitor ON and OFF. The monitor will enter power saving mode when turned on unless there is a suitable device connected. Adjusting display brightness and speaker volume The rocker switch on the monitor’s right side is used to increase or decrease the volume and adjust the brightness. - Page 11 OSD (On Screen Display) setting Language: Change the language of the menus. OSD Timer: Adjust the amount of time the menu is shown before the display returns to normal operation. Transparency: Adjust how transparent the menus are. Reset Reset: Return the portable display to factory settings.
-
Page 12: Specification
SPECIFICATIONS Audio Speaker 1Wx2 Dimensions Net Weight 790g With adapter 448 x 265 x 48mm Display Brightness 200 ± 20cd/m2 Colours 16.7M Contrast Ratio 800:1 Native Aspect Ratio 16:9 Panel Manufacturer Panel Type Refresh Rate 60Hz Resolution 1920 x 1080 Size 15.8”... -
Page 13: Troubleshooting
TROUBLESHOOTING Problem Solution • Make sure the video cable between the monitor and computer is connected properly and securely. • Use other electrical equipment to confirm that the No video / picture power outlet is working properly. (LED not lit) •... - Page 14 • Computer equipment can be set to 16: 9 resolution, screen. the display can be full screen display • Play a video source with a 16: 9 video sources, and the monitor can display full screen. Still need help? Head online to help.kogan.com...
-
Page 15: Cleaning & Maintenance
CLEANING & MAINTENANCE Before cleaning the monitor, unplug the monitor power cord from the electrical outlet. • When cleaning the antistatic screen, slightly dampen a clean, soft cloth with water. If possible, use a dedicated screen-cleaning tissue or solvent for electrostatic coating. Do not use benzene, thinner, ammonia, abrasives, or compressed air. - Page 16 Need more information? We hope that this user guide has given you the assistance needed for a simple set-up. For the most up-to-date guide for your product, as well as any additional assistance you may require, head online at help.kogan.com...
Need help?
Do you have a question about the KAMN15CDA and is the answer not in the manual?
Questions and answers