Advertisement
Quick Links
VL01-EN-A04
Quick Start Guide
WARNING
This guide is only applicable to Voxelab Polaris 3D printer
1.
Please put on gloves while using photopolymer resin to avoid
direct contact with hands.
2.
To ensure the printing quality, please don't open the light shield
unless it's necessary.
3.
Unused photopolymer resin needs to be stored in a dark, dry ,
and cool place.
4.
Please clean the finished model with anhydrous alcohol.
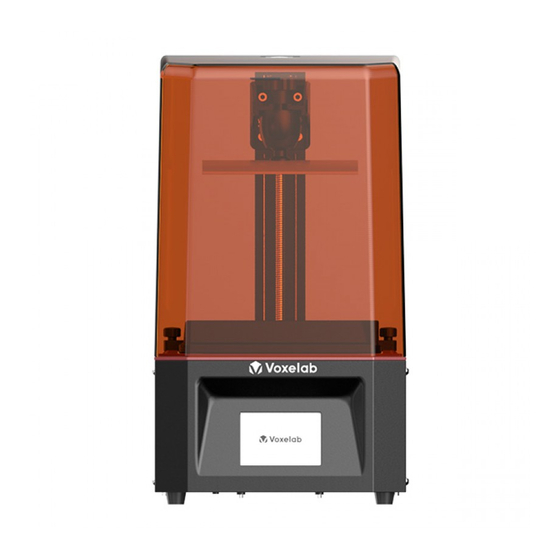
Polaris
Advertisement

Related Manuals for Voxelab Polaris


Summary of Contents for Voxelab Polaris
- Page 1 To ensure the printing quality, please don’t open the light shield unless it’s necessary. Unused photopolymer resin needs to be stored in a dark, dry , and cool place. Please clean the finished model with anhydrous alcohol. This guide is only applicable to Voxelab Polaris 3D printer...
- Page 3 Guide carefully before use and follow the instructions strictly. The Voxelab team is always ready to provide you with the perfect service. In case of any problems during the use, please contact us by phone or email listed in this Guide.
- Page 4 Electricity Safety Always use the Polaris with a properly grounded outlet. Do not refit Polaris plug. Do not use Polaris in damp or wet locations. Do not expose Polaris to burning sun. Do not abuse the cable. Avoid using the device during an thunderstorm.
- Page 5 The resin stored at low temperature should be shaken well and used at room temperature (above 20℃). Photopolymer Resin Requirements Do not abuse the photopolymer resin. Please make sure you use the Voxelab photopolymer resin or the photopolymer resin from the brands accepted by Voxelab.
- Page 6 Getting to Know Your Polaris 1. Platform Tighten Knob 2. Z-axis 3. Build Plate 4. Resin Box 5. Box Tighten Knob 6. Touched Screen 7. USB Stick Port 8. Light Shield 9. Power Switch 10. Power Slot...
- Page 7 Parameter Print Technology Liquid Crystal Display 405nm UV integrated light array Light Resource 0.047mm(2560*1440) XY Resolution 0.05-0.1mm Suggested Layer Thickness Net Weight 110-220V, 50-60Hz 12V, 5A, 60W AC Input CHITUBOX/VoxelPrint Software 3.5’’ color IPS Touch Screen Screen Connectivity USB Stick Production Dimensions 230*200*410mm Build Volume...
-
Page 8: Accessory Box
Unused photopolymer resin needs to be stored in a dark, dry , and cool place. Please clean the finished model with anhydrous alcohol. aftersales@voxelab3dp.com This guide is only applicable to Voxelab Polaris 3D printer Polaris Power cable Quick start guide... - Page 9 Leveling Open the paper box and take out the Polaris on the desk. Remove all protective foam and plug in the power cable. 1. Install the build plate on the plate 2. Tighten the platform tighten knob. holder. If the build plate cannot fix well, please to do step 3 first, then do the...
- Page 10 5. Connect the power adapter and power cable. Plug the output end of the power adapter into the power input port on the back of the printer and turn on the switch. Print Tool Systerm Manual Exposure Set Z=0 Stop Back 6.
- Page 11 Press Tighten the screws 8. If twitch a piece of A4 paper and feel the large resistance.Press the top of the build plate with one hand to let four corners of build plate to touch the LCD screen evenly. And just tighten the screws in the front and right side of cradle head first. Then tighten again.
-
Page 12: First Print
First Print 1.Make sure LCD screen, build plate and 2. Tighten the two box tighten knobs. resin box is clear. Install the resin box on the LCD screen. 3. Verify the installation of resin box and build plate first. Then pour the resin into the resin box. - Page 13 Print Tool Systerm Model-01 Model-02 Model-03 Model-04 4. Close the light shield after all above 5. Click [Print] and choose the printed file preparatory work. in the list. Click the printed file and star to print. Note: Do not open the top cover in the process of printing to avoid eyes hurt.
- Page 14 Postprocessing Print completed! Time: 04h57m Model-01 00h01m 04h57m 899/899 1.Touched screen will show the tips after 2. Just loose the platform tighten knob the printing is finished. Click [OK] and to remove the build plate easily. then open the top cover. 3.
- Page 15 Residual resin Filter paper Clean and sealable bottle 5. If you do not print within a period of time, it suggest that pour the residual resin into the resin bottle. The residual resin must be filtered by using filter paper first. At last, Close the power and clean the printer, especially build plate and resin box, by using non-dust cloth and anhydrous alcohol.
-
Page 16: Software Operation
Software Operation CHITUBOX CHITUBOX V1.0 Open Project 1. Install and open the ChiTuBox 64.exe Save ProJect program. Open... Save As... 2. Click the upper left menu button, and click【Open...】to choose the printed files. CHITUBOX V1.0 untitled* File List Select All Solid X-Ray 0.00... - Page 17 Settings Polaris Default Machine Resin Print Infill Gcode Advanced Layer Height: Bottom Lift Distance: 0.05 Bottom Layer Count: Lifting Distance: Exposure Time: Bottom Lift Speed: mm/min Bottom Exposure Time: Lifting Speed: mm/min Light-off Delay: Retract Speed: mm/min Bottom Light-off Delay:...
- Page 18 Model-03 Model-04 2. Pull USB stick into the USB stick port in the Polaris. Click [Print] in the touched screen and open files list. Only showed in the list, the files are recognized. Note: USB stick permit to remove in the process of printing.
- Page 20 Sales Service: sales@voxelab3dp.com After-Salse Service: aftersales@voxelab3dp.com Manufacture: Zhejiang Flashforge 3D Technology Co.Ltd Add: 2/F, No, 518, Xianyuan Road, Jinhua, Zhejiang, China...
Need help?
Do you have a question about the Polaris and is the answer not in the manual?
Questions and answers