Voxelab Aquila X2- 3D Printer with Filament Detection Manual
- User manual (33 pages)
Advertisement
- 1 Notes
- 2 Product Introduction
- 3 Equipment Parameters
- 4 Mechanism Parts
- 5 Spare Parts
- 6 Installation of Z-axis limit switch kit and Z-axis profiles
- 7 Install Z-axis motor kit and T-shaped screw rod
- 8 Install pneumatic joint, XE-axis kit
- 9 Install synchronous belt, extruder kit and Z-axis passive block
- 10 Install X-axis Tensioner
- 11 Install the X-axis moving kit and adjust the tightness of X-axis and Y-axis tensioners
- 12 Install the gantry profile, screen kit
- 13 Install spool holder and gantry cover
- 14 Wire connection
- 15 Bed Leveling
- 16 Preheat
- 17 Load the filament
- 18 Start printing
- 19 Wiring connection
- 20 Printing notice
- 21 Trouble shooting
- 22 Videos
- 23 Documents / Resources
Notes
- Do not make any modifications to the device. To avoid personal injury or property damage please ensure your operation as followed as the Guide.
- Dress properly. Do not wear loose clothing or jewelry. Keeping your hair, clothing and gloves away from moving parts.
![]()
Do not directly touch the nozzle and build plate to avoid high-temperature burn.![burn hazard]() Do not operate the printer in flammable liquid, gas or dust environment (The high temperature generated by printer operation may react with dust, liquid, and flammable gas in the air to cause a fire.)
Do not operate the printer in flammable liquid, gas or dust environment (The high temperature generated by printer operation may react with dust, liquid, and flammable gas in the air to cause a fire.) - Do not display the printer in unstable environment. The printer quality may be affected.
- Children and untrained personnel are not allowed to operate the printer alone.
- Operate the device in a well-ventilated environment. Some materials may produce odors during the printing process.
- Do not manually move the nozzle and printing platform mechanism while booting up, otherwise the device will be damaged.
- Never use the device for illegal activities.
- Never use the device to make any food storage vessels.
- Never put the model into your mouth.
- Lower the build plate before loading/unloading filament. The distance between the nozzle and build plate should be kept for at least 50mm.
- Keep the printer with regular maintenance, to wipe with a dry cloth to remove dust and adhered printing items.

 Do not operate the printer in flammable liquid, gas or dust environment (The high temperature generated by printer operation may react with dust, liquid, and flammable gas in the air to cause a fire.)
  Please pay attention to the sharp edges and corners of the profile.
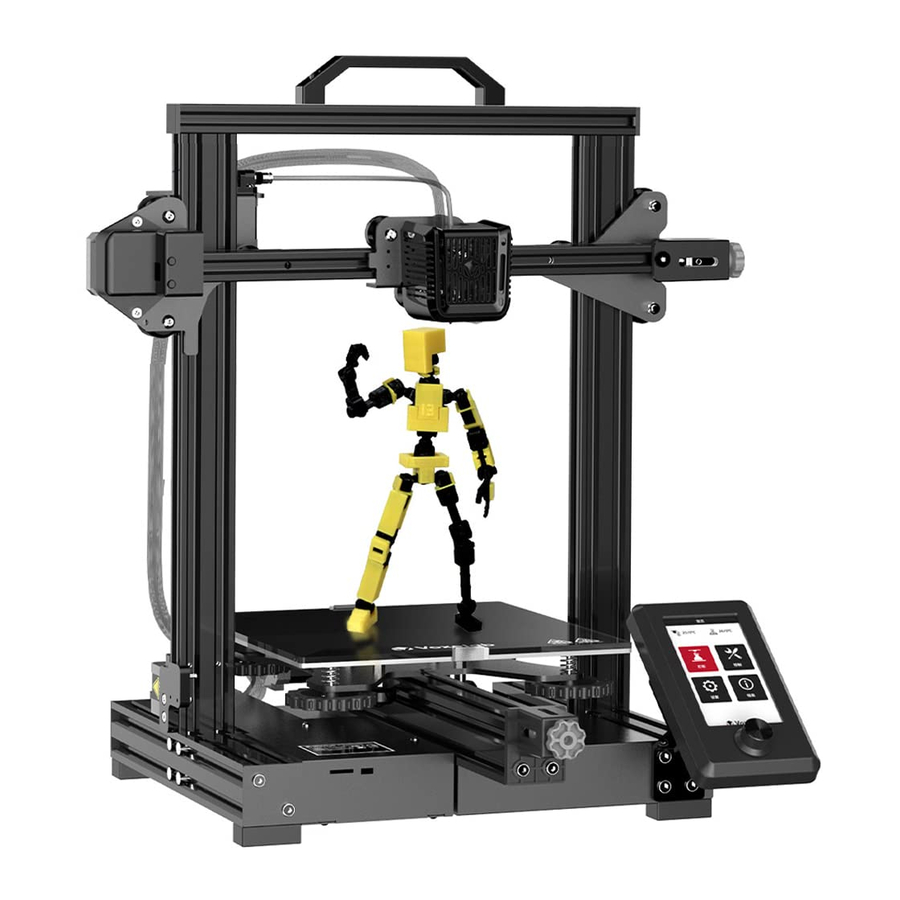
Product Introduction

- XE-axis kit
- X-axis limit switch
- Build plate
- Y-axis tensioner
- Extruded kit
- Material rack and spool holder
- Handle
- Z-axis passive block
- X-axis tensioner
- Screen
- Knob switch
- Machine base
- Y-axis limit switch
- Voltage regulator
- Y-axis motor
- Filament detector
- E-axis motor
- X-axis motor
- Coupling
- Z-axis limit switch
- Z-axis motor
- Power switch and socket
Equipment Parameters
| Model | Voxelab Aquila X2 |
| Print size | 220*220*250mm |
| Forming technology | FDM |
| Number of nozzle | 1 |
| Layer thickness | 0.1mm - 0.4mm |
| Nozzle diameter | Standard 0.4mm |
| XY axis precision | ±0.2mm |
| Filament | φ1.75mm PLA |
| File format | STL / OBJ / AMF |
| Working mode | Memory card offline printing / USB connection printing |
| Compatible slicing software | Cura / Simplify 3D / VoxelMaker |
| Power specification | Input: AC 115/230V 50/60Hz Output: DC 24V |
| Total power | 350W |
| Hotbed temperature | ≤100℃ |
| Nozzle temperature | ≤250℃ |
| Resume printing function | Yes |
| Filament sensor | Yes |
| Dual z-axis screws | No |
| Language switch | English / Chinese |
| Computer operating system | Windows 7/10 / Mac OS |
| Print speed | ≤180mm/s, 30-60mm/s normally |
Mechanism Parts

Spare Parts

Installation of Z-axis limit switch kit and Z-axis profiles
Installation video can be found on Voxelab Youtube channel


Step: Use the four pieces screws M5x45 to fix Z-axis with the base.
Install Z-axis motor kit and T-shaped screw rod


Step: Unlock the nuts on Z-axis motor kit firstly, then insert the T-shaped screw road into the Z-axis motor kit, finally lock the nut. (as showed above).
Install pneumatic joint, XE-axis kit

- Insert the M6 pneumatic joint to the connector of the XE axis kit, then use open-end wrench to screw them together.

- Lock the XE axis kit onto the X axis profile with M5x14 screws.


Install synchronous belt, extruder kit and Z-axis passive block

Put the synchronous belt into the profile along the v-wheel of the extruder kit.
Mount the extruder kit onto the X axis kit. The belt is on the top of the profile and under the v wheel when pushing it into the middle.


The highlighted red stripe refers to synchronous belt.

Install Z axis passive block with M5x14.
Install X-axis Tensioner

- Disassemble the X-axis tensioner.
![]()
- Insert the synchronous belt into the tensioner block, reassemble the X axis tensioner, make sure that the belt connects with the tensioner.

- Tighten it with a plastic hand screw nut, lock Z-axis passive block with
![]() M5x14 screw first, and then lock the
M5x14 screw first, and then lock the ![]() M5x14 screw.
M5x14 screw.
![]()


 M5x14 screw first, and then lock the
  M5x14 screw.
Attention: During the current operation, please do not tighten the X-axis tensioner screws with too much force.
- Insert the synchronous belt buckle into the sheet metal slot at the back of the extruder and tighten X-axis tensioner completely.


- Lock the X-axis limit assembly on the XE axis with two M4x8 screws.
![]()


Install the X-axis moving kit and adjust the tightness of X-axis and Y-axis tensioners

Take the first step: assembled components

Take the second step: assembled components
Step:
- Implant the X axis kit along the V-wheel into the two ends of Z axis profile (as showed in the below figure).
![]()
- After installation, move the extruder left and right to check belt's tension. It is recommended that the extruder can touch X-axis sensor and the belt has elasticity.

 Tips: Manually rotate X axis and Y axis tensioners to achieve an appropriate tightness. Refer to A and B: the perfect distance between the nut and the screw (protrusion) is 0-2mm, you may feel a little tension when press the synchronous belt. Belt too loose will affect print effect, and too tight will break.

Install the gantry profile, screen kit

- Fix the gantry profile on the upper end of the Z axis with four pieces screws M5x25.
![]()
- Lock screen bracket and screen kit with two pieces screws ST2.9*9.
![]()
- Lock the assembled screen kit onto printer base side using two pieces screws M5*8.
![]()
- Connect the display screen kit with screen cable.
![]()
![]()


Install spool holder and gantry cover


Step: Put M4x6 and T nuts into the material rack (as showed), place spool holder on the rack and fix on profile with screws (as showed); Then insert 2020 profile cover on both side.
Wire connection


- Insert the teflon tube into the pneumatic connector.
- Connect the yellow-labeled cable on 6 pin (4 wires) port to E-axis stepper motor.
- Connect the yellow-labeled cable on 6 pin (4 wires) port to X-axis stepper motor.
- Connect the yellow-labeled cable on 3 pin (2wires) port to X-axis limit switch.
- Connect the cable on 3 pin port to filament detector.
- Connect the yellow-labeled cable on 3 pin port to Z-axis limit switch.
- Connect the yellow-labeled cable on 6 pin port to Z-axis motor.
- Plug in the power cord (as showed) and toggle the switch to turn on the power.
Attention
- Damage might occur if voltage setting is incorrect. Make sure the current input voltage matches to your local power supply (115/230V).
- Plug in power cord and turn power switch to 1 to turn it on.
- Do not disconnect the cables when the printer is powered on.
Bed Leveling
Leveling operation video can be found on Voxelab Youtube channel

Check the steadiness of the build plate before leveing. If the build plate is unsteady, please use open-end wrench to adjust the v-wheel to steady it.

Choose [Auto home] first to ensure the extuder in the home position; then choose [Disable steppers] to close the motors.
Make sure extruder homing has finished before closing the motors. Do not touch Teflon tube and nozzle cable during bed leveling.
Note: The UI information is only for reference, the actual UI may be different.
- Move the extruder on the top of the leveling nut. Screw the nut and adjust the distance between the nozzle and the build plate. The distance is around 0.1mm. (Thickness of a piece of A4 paper)
![]()

- Use a piece of A4 paper to assist in leveling, so that the nozzle can just scratch the A4 paper lightly. Adjust the leveling nuts on the four sides in turn until you can feel the slight resistance from the nozzle when pulling the A4 paper.
- Test the distance between the nozzle and the print platform is enough or not. Repeat the above steps 1-2 times if necessary.


Note: If adjusting rotating nuts cannot make the nozzle touch the build plate, the position of the z-axis limit switch may be too high. Adjust accordingly.

After adjusting the upper position of the 4 nuts, check the center position again.

 Nozzle is too far away from build plate that model cannot adhere to the build plate.

 Nozzle is too close to build plate that cause filament failed to sufficiently extruding. Nozzle may easily be damaged and clogged, build plate may be scratched.

 Perfect distance between nozzle and build plate ensures even filament adheres right on the build plate.
Preheat

Method 1

Method 2
Note: The UI information is only for reference, the actual UI may be different.
Note: The printing preheat temperature for PLA and ABS filaments has been preset. PLA: nozzle temperature 200℃, hot bed temperature 60℃. ABS: nozzle temperature 240℃, hot bed temperature 70℃. For other materials or special printing environment print, you may adjust parameters under Control - Temperature.
Load the filament
- When waiting for the temperature to rise, please hang the filament on the material rack.
![]()
- Press the spring to pull filament pass through (loose the spring and pull filament back and forth to see if extrusion pressure is too high or too low; adjust the screw on the force arm if the pressure is improper).
![]()
- Pull filament into the wire tube; click <automatic input> button beneath the setting to send filament to the nozzle. Loading is completed when filament are extruded at the nozzle. Filament can be extruded to the nozzle manually when the printer is preheated.


For better printing, the end of filament recommended as showed in the figure.
Replace the filament during printing
- If filament in the nozzle, heat up the nozzle to 185°C+, draw out the filament to replace it.
- To replace filament during the printing process, please adjust the printing speed to 10%, then replace it as introduced in Step 1.
Start printing
Please level build plate before printing, otherwise it will easily cause nozzle damage or clog, and build plate scratched.

Install slicing software on your computer.

Insert the TF card, press the knob and set up the menu to print the file.
File names must be Latin letters or numbers, Chinese characters and other special symbols are unaccepted.
Print

Note: When you notice the improper distance between the nozzle and the build plate during printing the first layer, please click Setting - Z axis offset to adjust the distance.
When the offset value is positive, the nozzle and the build plate gets farther; When the offset value is negative, the nozzle and the build plate get closer.
Wiring connection

Printing notice
- The adhesion of glass build plate may decrease after long time using. Please apply proper amount of glue to keep and improve the adhesion.
- Warping issues may occur when print ABS filament in cold environment, you may use glue to enhance the adhesion. It's not recommended to print ABS filament at extremely low temperature environment, as print will easily fail with model break away from the build plate.
- There is a certain quivering on the build plate during the printing which may cause the flatness to change. Thus please pay attention to the adhesion of the first layer when printing the second model; if the distance of build plate and nozzle is not right, please re-level it.
- If prints' accuracy is not right, check the status of synchronous belt, adjust it if too loose or too tight. If synchronous belt is working correctly, check the transmission ratio under Setting. Turn up the transmission ratio if the size gets smaller, turns down the ratio if the size gets larger.
- If the accuracy of Z-axis height dimension is not good enough, check out the compensation setting of Z-axis for precision compensation.
- If the build plate shakes, adjust tightness of the pulley using a wrench and slowly slide the build plate to see whether all four wheels under it rotate. Stop moving the pulley only when the build plate is steady.
- If XZ components shakes, adjust the distance between the pulley and the structural section properly using an open-end wrench; the wheel can be rotated by hand.
- Optimal temperature for printing is 18~30℃. Print quality will be affected if ambient temperature is too high or too low.
Trouble shooting
Q: How to upgrade the firmwares?
A:
- Insert the TF card into the card reader
- Insert the card reader into the USB interface of the computer
- Create a new folder named firmware in TF card
- Copy the xx.bin file into the "firmware" folder
- Insert the TF card into the TF card socket of the machine
- Restart the machine
Q: How to get the firmwares?
A: Enter the official website <www.voxelab3dp.com> and download them at the <Download Center>.
Q: What if the model warps or is unable to stick to the build plate?
A:
- Build plate temperature is too low, increase its temperature accordingly;
- Filament failed to adhere or bond on the build plate, use glues to enhance the adhesion;
- Distance between the build plate and the nozzle is too far or the build plate is not leveling enough, re-leveling the build plate accordingly.
Q: What if the accuracy of model is not good?
A:
- Please ensure the normal status of the synchronous belt, neither loose nor tight;
- Adjust the transmission ratio in the settings: turn up the transmission ratio if the size turns smaller and turn down the transmission ratio if the size turns larger.
Q: What if the screen turns dark?
A:
- Please check the wire of the screen and re-plug it;
- Refresh the firmware to see if the screen can back to normal. Contact the after-sales personnel if not.
Q: What if the build plate cannot be heated?
A: Please check the digital display of the temperature. If the temperature inproper, please replace the plate wires. Otherwise, please replace the heating wires.
Q: What if the nozzle cannot be heated?
A:
- Please check the digital display of the temperature; if the temperature displayed in error, replace the temperature sensor cable;
- If the temperature displayed normally, replace the heating cable.
Q: What if the axis cannot be moved?
A:
- Check the wire of the electric motor;
- Contact us by email listed.
Email: support@voxelab3dp.com
Q: What if the files on the TF card cannot be identified?
A:
- Clean and wipe the storage card
- Format the storage card
- Replace the storage card
Q: What if the files are garbled and cannot be read?
A:
- Change file name to English or numeric formats;
- Format of your sliced files is not compatible;
- Repair the model before slicing.
Q: What if the noise occurs for the return to zero device?
A:
- Check the return to zero sensor to see whether it has been knocked;
- Check the lines and see whether the noises could stop if the sensor is pressed by hand;
- Take the replacement method to check.
Q: Unable to resume printing from power failure?
A: It might be caused by different TF card. Make sure you are using the same TF card before and after the power cut off.
Q: What if the offset occurs on the finished model?
A:
- Check the tightness of the synchronous belt and ensure it is correctly installed.
- Slice the model again
- Reduce print speed or adjust the acceleration value;
- Make sure operating temperature doesn't exceed its assigned set-point temperature 30℃.
Q: Damage occurs when turn on the 3D printer.
A: It might be caused by dialing error from switch power supply, please check whether the voltage is set to the correct value. If the voltage is 110V and the power supply is 220V, damage will occur. Please select 110V/230V by switch before power on.
Q: Too much filament oozing?
A:
- Reduce print temperature by 5~10℃;
- Increase traveling speed, or increase the retraction length and speed.
Q: No filament coming out during printing?
A:
- The arm force of the feeding structure might be too tight to allow the filament out. Please adjust the arm force, neither too loose nor too tight.
- Lower the retraction length to avoid any abrasion.
- Check whether the extruder is clogged, clean it with the needle if necessary.

VideosGuidance of Aquila assembly and leveling Video by Voxelab 3D Printing
Documents / Resources
References

Download manual
Here you can download full pdf version of manual, it may contain additional safety instructions, warranty information, FCC rules, etc.
Download Voxelab Aquila X2- 3D Printer with Filament Detection Manual
Advertisement


Need help?
Do you have a question about the Aquila X2 and is the answer not in the manual?
Questions and answers